Types of DIY Sensory Tables for Children
A DIY sensory table is an engaging, hands-on learning tool that promotes cognitive, motor, and sensory development in children. These interactive play stations encourage exploration through touch, sight, and sound, making them ideal for early childhood education and home-based play. From sand to water to mud, each type offers unique tactile experiences that stimulate curiosity and creativity. Below is a comprehensive guide to the most popular types of DIY sensory tables, their benefits, ideal materials, and usage tips.
DIY Sand Table
Perfect for tactile play, a sand table allows children to dig, pour, mold, and build—enhancing fine motor skills and imaginative thinking.
Benefits
- Encourages creative construction (e.g., sandcastles)
- Improves hand-eye coordination
- Promotes calm, focused play
- Can be used indoors or outdoors
Considerations
- Requires containment to prevent mess
- Needs regular cleaning and sand replacement
- Not suitable for very young infants without supervision
Best for: Toddlers and preschoolers, outdoor play areas, early learning centers
DIY Water Table
A dynamic and refreshing sensory station, water tables offer endless fun with pouring, splashing, and floating activities—ideal for hot days.
Benefits
- Teaches basic science concepts (e.g., sinking vs. floating)
- Supports hydration awareness and motor development
- Highly engaging and cooling during summer
- Easy to set up with household items
Considerations
- Requires supervision to prevent accidents
- Can create water runoff or slip hazards
- Needs drying after use to prevent mold
Best for: Summer play, sensory integration therapy, group childcare settings
DIY Mud Table
Combining earth and water, mud tables deliver rich sensory input and connect children with nature through messy, exploratory play.
Benefits
- Offers intense tactile stimulation (squishy, cool, textured)
- Fosters environmental awareness and outdoor learning
- Encourages imaginative role-play (e.g., cooking in mud kitchens)
- Uses natural, low-cost materials
Considerations
- Can be extremely messy—best for outdoor use only
- Requires access to soil and water sources
- May attract insects or require cleanup of organic debris
Best for: Nature-based learning, forest schools, backyard play zones
DIY Sensory Bins
Compact and versatile, sensory bins are smaller-scale alternatives ideal for limited spaces or themed play throughout the year.
Benefits
- Easy to store and transport
- Customizable with seasonal themes (e.g., autumn leaves, holiday items)
- Suitable for individual or small-group play
- Can use dry materials like rice, beans, or pasta
Considerations
- Small items pose choking hazards for young toddlers
- Dry fillers may spill easily indoors
- Limited space for large motor activities
Best for: Indoor play, classrooms, travel-friendly sensory activities
| Type | Best Age Group | Indoor/Outdoor | Clean-Up Level | Learning Focus |
|---|---|---|---|---|
| DIY Sand Table | 2–6 years | Both | Moderate | Creativity, motor skills, sensory processing |
| DIY Water Table | 1.5–5 years | Outdoor (or supervised indoor) | Moderate to High | Science concepts, cause-effect, coordination |
| DIY Mud Table | 3–7 years | Outdoor only | High | Nature exploration, imaginative play, texture recognition |
| DIY Sensory Bins | 1–6 years | Indoor (with precautions) | Low to Moderate | Themed learning, fine motor development, focus |
Expert Tip: For sensory bins using dry materials like rice or beans, consider coloring them with food coloring and vinegar for visual appeal. Let them dry completely before use to avoid staining clothes or surfaces. Always supervise young children to prevent ingestion of non-food items.
Safety Note: When building DIY sensory tables, ensure all edges are sanded smooth and materials used are non-toxic. For outdoor setups, place tables on level ground and provide shaded areas to protect children from prolonged sun exposure during extended play.
Function, Features, and Design of DIY Sensory Tables for Child Development
DIY sensory tables are powerful educational tools that combine play with cognitive and physical development in young children. Designed to stimulate the senses through hands-on exploration, these tables offer a dynamic environment where children can learn by doing. Ideal for home, preschool, or daycare settings, sensory tables foster experiential learning, encourage curiosity, and support early childhood development across multiple domains—motor, cognitive, social, and emotional.
Core Functions of a Sensory Table
The primary function of a DIY sensory table is to facilitate experiential learning through tactile exploration and imaginative play. These interactive stations allow children to engage directly with various materials, promoting discovery-based education in a safe and stimulating environment.
Motor Skill Development
Manipulating materials such as sand, water, rice, or beans helps children refine fine motor skills and hand-eye coordination. Scooping, pouring, sifting, and transferring activities strengthen finger dexterity and wrist control—foundational abilities for writing, drawing, and self-care tasks like buttoning clothes.
Cognitive and Creative Growth
Sensory play stimulates brain development by encouraging problem-solving, pattern recognition, and cause-and-effect reasoning. Open-ended materials spark creativity and imagination, allowing children to invent stories, build worlds, and explore scientific concepts like volume, density, and texture.
Social and Emotional Learning
When used in group settings, sensory tables become hubs for cooperative play. Children learn to share tools, take turns, communicate ideas, and resolve conflicts—key components of social-emotional development. The calming nature of sensory activities also supports emotional regulation, especially for children with sensory processing needs.
Environmental Exploration
Exposure to diverse textures, temperatures, and materials broadens a child’s sensory vocabulary. This real-world interaction enhances neural connections, builds confidence in unfamiliar situations, and lays the groundwork for scientific inquiry and lifelong learning.
Essential Features of an Effective Sensory Table
The educational value of a sensory table is significantly enhanced by thoughtful feature integration. These elements transform simple play into rich, multi-sensory experiences that engage children on multiple levels.
Design Considerations for DIY Sensory Tables
Designing a functional and durable sensory table requires careful attention to materials, structure, and usability. The right design ensures safety, ease of maintenance, and adaptability to different environments and age groups.
| Design Factor | Importance | Best Practices |
|---|---|---|
| Material Type | High | Use non-toxic, easy-to-clean materials: food-grade plastic for indoor use, weather-resistant wood (e.g., cedar) or metal for outdoor setups. Avoid splinter-prone woods or rust-prone metals. |
| Depth & Size | High | Shallow basins (6–10 inches deep) prevent overfilling and allow easy access. Table height should match child ergonomics: 18–24 inches for toddlers, 24–30 inches for older preschoolers. |
| Drainage & Cleanability | High | Include a drain plug or removable basin for quick cleanup. Waterproof surfaces with sealed edges prevent mold and water damage. Portable designs with wheels simplify storage and relocation. |
| Indoor vs. Outdoor Use | Medium | Indoor tables benefit from spill trays and lightweight construction; outdoor versions need UV-resistant finishes, anchoring options, and covers to protect from weather. |
| Age Appropriateness | High | Tailor design complexity to developmental stage: simple bins for ages 2–3; multi-compartment or themed stations (e.g., farm, ocean) for ages 4–6. |
Important: Always supervise children during sensory play, especially when using small items (e.g., beads, beans) that pose choking hazards. Regularly sanitize the table and tools using child-safe cleaners. Rotate materials frequently to maintain engagement and introduce new learning opportunities. A well-designed, thoughtfully maintained sensory table can become a cornerstone of early childhood development, blending fun with foundational learning in an unforgettable way.
Scenarios of DIY Sensory Tables: Practical Applications for Learning and Play
DIY sensory tables are versatile, hands-on learning tools that support cognitive, emotional, and physical development in children. By engaging the senses—touch, sight, sound, and even smell—these interactive stations encourage exploration, creativity, and problem-solving. Below are key scenarios where DIY sensory tables provide meaningful benefits across various environments.
Preschool and Daycare Centers
Children learn most effectively through experiential, play-based activities. In early childhood education settings, DIY sensory tables serve as dynamic learning hubs that promote both individual discovery and cooperative group play.
- Teachers integrate sensory tables into curriculum themes—such as ocean life (using sand, shells, and toy fish) or weather (with cotton "clouds" and water droplets)—to reinforce classroom lessons.
- Activities with varied textures (sand, rice, water beads) help develop fine motor skills and hand-eye coordination.
- Group interaction at sensory tables fosters social skills like sharing, turn-taking, and verbal communication.
- Open-ended materials encourage imaginative play, boosting creativity and language development.
Educator tip: Rotate sensory materials weekly to align with learning themes and maintain student engagement.
Backyard Birthday Parties or Family Gatherings
Sensory tables make excellent activity stations during children's parties and family events, offering a fun, contained play experience that keeps kids entertained while freeing adults to socialize.
- In warm weather, a water-based sensory table with floating toys, cups, and funnels provides cooling, splash-friendly fun.
- For indoor or cooler-weather gatherings, use dry fillers like colored rice, dried beans, or kinetic sand in a large bin with scoops and containers.
- Place the table away from food areas to avoid contamination and reduce mess.
- Add themed elements—such as pirate treasure for a pirate party or plastic dinosaurs for a prehistoric theme—to enhance imaginative play.
Party pro tip: Use a plastic storage bin with a lid for easy setup, cleanup, and storage—ideal for temporary installations.
Therapy and Special Needs Education
Sensory tables are widely used in occupational therapy and special education to support children with autism spectrum disorder (ASD), sensory processing disorder (SPD), ADHD, and other developmental challenges.
- Controlled sensory input helps regulate the nervous system, reducing anxiety and improving focus.
- Textures like smooth stones, fluffy cotton, or squishy gel beads provide calming tactile feedback.
- Therapists can tailor the sensory experience—adjusting sound (e.g., crinkly paper), movement (pouring, stirring), and temperature (warm water, cool gel)—to meet individual sensory profiles.
- Structured tasks at the table, such as sorting objects by color or size, support cognitive and motor skill development.
Therapeutic insight: A predictable, safe sensory environment builds confidence and emotional regulation in neurodivergent children.
Home Use
Creating a DIY sensory table at home is a cost-effective, engaging way to support child development and provide screen-free entertainment.
- Ideal for rainy days, school breaks, or after-school activities, sensory bins keep children constructively occupied.
- Parents can use household items—like oatmeal, pasta, or shaving cream—to create diverse sensory experiences without high costs.
- Simple designs using plastic tubs, baby pools, or repurposed furniture make setup easy and customizable.
- Rotating materials weekly prevents boredom and introduces new learning concepts (e.g., letter recognition with magnetic letters in rice).
Parent-friendly benefit: Sensory play encourages independent play, giving caregivers time to complete household tasks.
Community Events or Pop-Up Play Areas
Mobile sensory tables are increasingly popular at public events such as fairs, farmers markets, library programs, and community festivals.
- They serve as engaging, inclusive attractions that welcome children of all ages and abilities.
- Pop-up sensory stations can be themed—such as a “science lab” with colored liquids and pipettes or a “nature exploration” bin with pinecones and leaves.
- Portable designs on carts or foldable tables allow for easy transport and quick setup.
- These stations provide a safe, supervised activity while parents browse, shop, or attend workshops.
Event planner note: Include clear signage with activity instructions and safety guidelines to ensure smooth operation.
Expert Recommendation: Whether in education, therapy, or recreation, the success of a DIY sensory table lies in its adaptability. Use open-ended, safe, and washable materials, and always consider the age, developmental level, and sensory preferences of the children involved. With thoughtful design, a simple sensory bin can become a powerful tool for learning, calming, and joyful exploration.
| Setting | Primary Benefit | Suggested Materials | Ideal Age Group |
|---|---|---|---|
| Preschool/Daycare | Social & cognitive development | Sand, water, play dough, natural items | 2–5 years |
| Family Gatherings | Entertainment & engagement | Colored rice, water beads, themed toys | 3–8 years |
| Therapy Settings | Sensory regulation & skill building | Gel beads, textured fabrics, calming liquids | 2–12 years (individualized) |
| Home Use | Creative play & independent learning | Oatmeal, pasta, shaving cream, magnets | 1–10 years |
| Community Events | Inclusive public engagement | Themed bins, safe liquids, interactive tools | All ages (supervised) |
Additional Considerations for Success
- Safety First: Avoid small items for children under 3; ensure all materials are non-toxic and allergen-free.
- Cleanability: Choose waterproof containers and easy-to-wash materials to simplify sanitation.
- Accessibility: Adjust table height for wheelchairs or standing play to include all children.
- Eco-Friendly Options: Use natural, biodegradable materials like corn kernels, salt dough, or recycled paper.
- Storage: Label and store sensory fillers in sealed containers for reuse and organization.
DIY Sensory Table Customization Options
Creating a custom sensory table is a rewarding project that combines creativity, functionality, and developmental support for children of all ages. Whether you're building one for a classroom, therapy environment, or home use, personalizing your sensory table enhances engagement, encourages exploration, and supports sensory integration. This guide explores the most popular and effective customization options to help you design a unique, durable, and stimulating sensory experience tailored to your specific needs.
Safety Note: Always supervise children during sensory play. Ensure all materials used are non-toxic, age-appropriate, and free from small parts that could pose choking hazards. Regularly inspect your sensory table for wear, splinters, or sharp edges to maintain a safe play environment.
1. Custom Add-Ins for Enhanced Sensory Engagement
One of the greatest advantages of DIY sensory tables is the ability to customize them with engaging add-ins that stimulate touch, sight, and cognitive development. These elements transform a simple table into a dynamic learning station.
- Natural Elements: Incorporate shells, smooth river rocks, pinecones, or wooden beads to introduce varied textures and organic shapes.
- Mini Figurines: Use animal models, people, or fantasy creatures to encourage imaginative play and storytelling.
- Textured Objects: Include items like rubber balls, fabric scraps, or foam shapes to diversify tactile experiences.
- Sorting & Matching Tools: Add colored cups, scoops, or trays to promote fine motor skills and early math concepts.
These add-ins can be rotated regularly to keep the sensory experience fresh and engaging, supporting long-term developmental benefits.
2. Choosing the Right Base Material
The foundation of your sensory table significantly impacts its durability, appearance, and usability. Consider the following materials based on your intended environment and usage frequency.
| Material | Pros | Cons | Best For |
|---|---|---|---|
| Plastic | Lightweight, waterproof, easy to clean, affordable | Less durable over time, may appear less attractive, can warp in extreme temperatures | Indoor classrooms, temporary setups, budget-friendly projects |
| Wood | Natural aesthetic, sturdy, customizable, can be sealed for water resistance | More expensive, requires maintenance (sealing, sanding), heavier | Home use, Montessori environments, permanent installations |
| Metal | Extremely durable, weather-resistant, modern design potential | Highest cost, can be heavy, may conduct heat or cold | Outdoor installations, high-traffic areas, professional therapy settings |
For wooden tables, use waterproof sealants like polyurethane or marine varnish to protect against moisture damage, especially if used with water or food-based materials.
3. Custom Table Designs for Different Needs
Custom sizing and height adjustments ensure accessibility and usability for various age groups and settings.
- Size Variations:
- Large Tables (4+ feet): Ideal for group activities in preschools or therapy centers.
- Compact Tables (2–3 feet): Perfect for individual play, small spaces, or travel-friendly setups.
- Height Adjustments:
- Toddler Height (18–22 inches): Supports seated play for ages 1–3.
- Preschool Height (24–28 inches): Suitable for standing play for ages 3–5.
- Adaptive Heights: Consider adjustable legs or modular designs for inclusive environments.
- Shape Options: Round, square, or L-shaped tables can fit specific room layouts or encourage different social interactions.
4. Adding Functional and Fun Features
Enhance play value and developmental benefits by integrating interactive components.
- Water Play Additions:
- Install small water pumps for fountains or circulation systems.
- Add spouts, tubes, funnels, or water wheels for cause-and-effect learning.
- Incorporate squirt bottles or cups for motor skill development.
- Modular Compartments: Use dividers to create separate zones for different materials (e.g., sand, water, rice).
- Elevated Sections: Include raised platforms or ramps for building, pouring, or vehicle play.
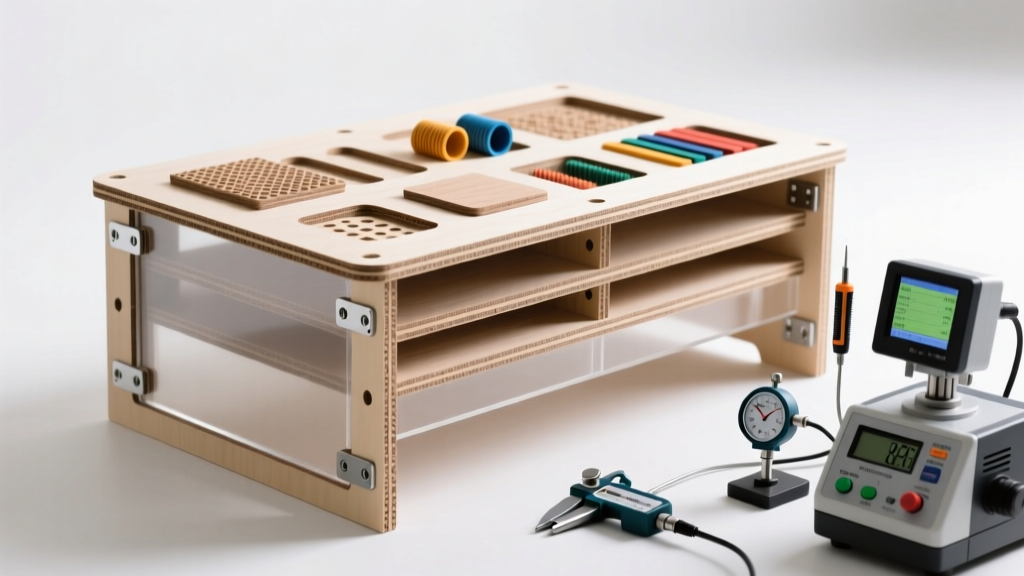
- Built-In Storage: Add shelves or drawers underneath for easy access to tools and cleanup.
5. Sound and Fragrance Components for Multi-Sensory Stimulation
Incorporating auditory and olfactory elements enriches the sensory experience and supports emotional regulation.
- Sound Features:
- Attach jingle bells, rain sticks, or chimes to the table edges.
- Include metal pots and wooden spoons for impromptu music-making.
- Use sound tubes or homemade shakers for cause-and-effect exploration.
- Fragrance Elements:
- Add scented materials like lavender-infused rice, citrus peels, or vanilla-scented beans.
- Use essential oil diffusers nearby (not directly in the table) for calming aromas.
- Avoid strong allergens and always check for sensitivities in group settings.
These components are especially beneficial for children with sensory processing needs, autism, or anxiety, offering calming and focusing stimuli.
Expert Tip: Rotate sensory materials and features weekly to maintain interest and support diverse developmental domains—texture one week, sound the next, and scent the following. This keeps the table fresh and encourages continued exploration.
Final Recommendations
- Label compartments and tools to encourage independence and organization.
- Use removable liners (e.g., silicone mats or plastic trays) for quick cleanup.
- Involve children in the design process to increase engagement and ownership.
- Document your build process and customization ideas for future reference or sharing.
- Consider weather-resistant finishes and covers if using outdoors.
By thoughtfully customizing your sensory table, you create more than just a play surface—you build a dynamic, multi-sensory learning environment that supports cognitive, emotional, and physical development. Whether you're crafting a simple sandbox or a complex water-and-sound station, the possibilities are limited only by your imagination and the needs of the children who will use it.
Frequently Asked Questions About Sensory Tables for Children
Q1: What are the benefits of sensory tables for children?Sensory tables are more than just fun—they're powerful tools for early childhood development. Designed to engage the senses, these learning stations support cognitive, physical, and emotional growth in young children. Here’s how they make a difference:
- Motor Skill Development: Activities like pouring, scooping, sifting, and transferring materials strengthen fine motor skills and hand-eye coordination—essential for writing, dressing, and other daily tasks.
- Sensory Integration: Exposure to different textures (wet, dry, rough, smooth) helps children process sensory input, which is especially beneficial for those with sensory processing differences.
- Cognitive Growth: Children learn concepts like volume, measurement, cause and effect, and classification through hands-on experimentation.
- Social & Emotional Learning: Group play at sensory tables encourages sharing, turn-taking, communication, and collaborative problem-solving.
- Calming & Regulating Effect: The repetitive motions and tactile stimulation can have a soothing effect, helping children self-regulate emotions and transition between activities more smoothly.
Because sensory tables can be adapted for various age groups and developmental stages, they are widely used in homes, preschools, and therapeutic settings.
Q2: How does one build a sensory table?Building a DIY sensory table is a flexible and budget-friendly project that can be customized to your space and needs. You don’t need a fancy or expensive setup—creativity and safety are key. Here are some practical approaches:
- Choose the Base: Use a sturdy plastic bin, storage tote, or even a shallow kiddie pool. For a raised option, place the container on a low table, sawhorses, or custom-built wooden frame to suit the child’s height.
- Adjustable Height Designs: Some parents build dual-height tables—one side higher for older kids, one lower for toddlers—maximizing usability across age groups.
- Drainage & Access: Consider adding a small spigot near the bottom for easy water drainage, or use removable trays for quick cleanup.
- Stability & Safety: Ensure the structure is stable and won’t tip. Sand sharp edges and use non-toxic sealants if working with wood.
- Portability: Add wheels for easy movement between indoor and outdoor play areas.
Many DIY designs are inspired by popular models like the "invite table" or "Montessori-style" sensory bins, emphasizing accessibility and child-led exploration.
Q3: What goes inside sensory tables?The contents of a sensory table should be safe, engaging, and appropriate for the child’s age and developmental stage. Rotating materials keeps the experience fresh and encourages continued exploration. Consider these categories:
| Age Group | Suitable Materials | Learning Focus |
|---|---|---|
| Infants & Toddlers (6–24 months) | Soft fabric scraps, water with floating toys, large silicone spoons, crinkly paper | Sensory discovery, cause and effect, texture recognition |
| Preschoolers (2–5 years) | Colored rice, kinetic sand, playdough, water beads (supervised), scoops, funnels | Imaginative play, fine motor skills, scientific thinking |
| Early Elementary (5–8 years) | Rocks, sticks, magnets, ice experiments, baking soda & vinegar reactions | STEM exploration, classification, hypothesis testing |
Always avoid small parts for children under 3 to prevent choking hazards. Natural materials like pinecones, shells, or smooth stones add an earthy, open-ended element to play.
Q4: Are DIY sensory tables easy to clean?Yes, one of the biggest advantages of a well-designed DIY sensory table is its ease of cleaning—especially when planned with maintenance in mind. Here’s how to keep cleanup simple:
- Removable Bins: Use containers that can be lifted out and rinsed or wiped down quickly.
- Water-Resistant Materials: Choose plastic, sealed wood, or metal surfaces that resist moisture and stains.
- Drainage Features: A small valve or spout allows water to be emptied without lifting heavy containers.
- Non-Porous Surfaces: Prevents absorption of liquids and odors—ideal for repeated use with wet materials.
- Indoor/Outdoor Flexibility: Many DIY tables are designed for outdoor use, where spills are less of a concern and cleanup is as easy as hosing down the table.
With proper design, most sensory tables can be cleaned in under 10 minutes, making them practical for daily use in classrooms or homes.
Q5: Do sensory tables require constant supervision?While sensory play encourages independence, **active supervision is essential**—especially for younger children. The level of oversight depends on the materials used and the child’s age:
- High-Risk Materials: Water, small objects (like beads), or edible-like substances (e.g., oats or cereal) require close monitoring to prevent choking, drowning risks, or ingestion.
- Age-Appropriate Freedom: Older preschoolers can be given more autonomy, but an adult should remain nearby to guide play and intervene if needed.
- Safety Rules: Teach children not to throw materials, taste contents, or splash water. Consistent routines build responsible play habits.
- Special Needs Considerations: Children with sensory sensitivities or developmental delays may need more individualized support during sensory activities.
In short: constant hovering isn’t necessary, but attentive, nearby supervision is crucial for safety and meaningful learning. With clear boundaries, children can explore freely while staying safe.