Every dog deserves a feeding station that’s both functional and reflective of their personality—and yours. While store-bought dog bowls are convenient, crafting your own DIY version offers a chance to personalize, save money, and repurpose household items in eco-friendly ways. Whether you're on a tight budget or want a statement piece for your kitchen corner, there's a homemade dog bowl idea that fits your lifestyle. From upcycled mason jars to painted ceramic designs, these projects blend practicality with creativity, ensuring your pet dines in comfort and style.
Budget-Friendly Upcycling: Turn Everyday Items into Dog Bowls
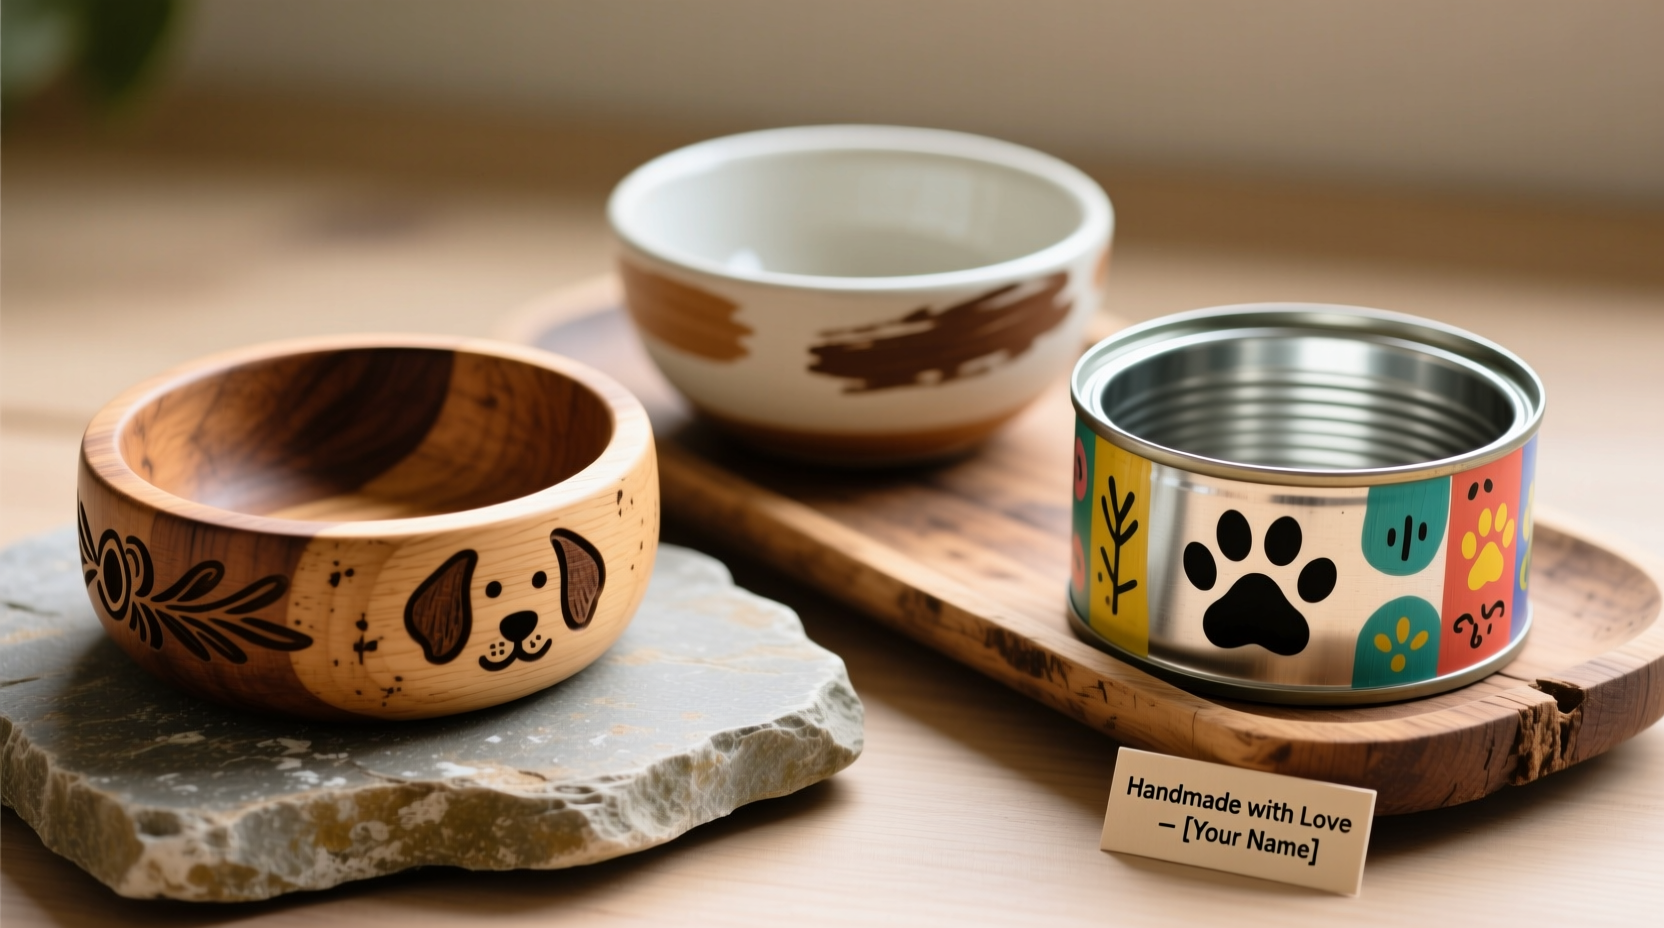
One of the easiest ways to create a homemade dog bowl is by repurposing items already in your home. Many common kitchen containers are durable, washable, and safe when used properly. Glass jars, stainless steel cans, and even old ceramic mugs can be transformed into temporary or long-term feeding solutions.
For example, large mason jars with wide mouths work well for water. Remove labels, clean thoroughly, and place them in a stable base like a rubber jar gripper or a small plant saucer to prevent slipping. Similarly, empty coffee tins or metal food cans (with sharp edges filed down) can hold dry kibble. Just ensure all surfaces are smooth and non-toxic.
Tip: Always inspect repurposed containers for rust, cracks, or residue before giving them to your pet.These low-cost options are ideal for renters, foster pet parents, or anyone testing different bowl heights and placements before investing in permanent fixtures.
Mid-Range Projects: Customized Ceramic and Wood Bowls
When you’re ready to invest a little more time and resources, handmade ceramic or wooden bowls offer durability and aesthetic appeal. Pre-made ceramic dishes from craft stores can be personalized with non-toxic glazes or paint pens. Look for stoneware or porcelain labeled “food-safe” and “dishwasher-safe” to ensure longevity and hygiene.
Wooden bowls require more care but add warmth to any space. Use hardwoods like maple or walnut, which are naturally resistant to bacteria. Sand the interior until smooth, then seal with multiple coats of pet-safe mineral oil or beeswax. Avoid polyurethane or varnishes containing solvents, as these can leach into food or water.
“Handcrafted feeding dishes not only enhance home decor but also allow owners to tailor size, depth, and stability to their dog’s breed and eating habits.” — Dr. Lena Patel, Veterinary Behavior Consultant
Step-by-Step: Painting a Personalized Ceramic Bowl
- Choose a plain ceramic bowl labeled oven-safe and food-grade.
- Clean thoroughly with rubbing alcohol to remove oils.
- Sketch your design lightly with a pencil (e.g., your dog’s name, paw prints).
- Use non-toxic, kiln-set acrylic paints or ceramic paint pens.
- Let dry completely (24 hours), then bake according to paint instructions (usually 30 minutes at 300°F).
- Seal with a food-safe glaze if desired for added protection.
Luxury & Style: Elevated Feeders and Multi-Tier Stations
Dogs with long bodies or senior pets often benefit from elevated feeders, which reduce neck strain during meals. These can be built affordably using wood, PVC pipes, or even repurposed furniture legs. A simple design involves mounting two sturdy ceramic or stainless steel bowls onto a wooden platform raised 4–12 inches off the ground, depending on your dog’s shoulder height.
For a high-end look, consider a multi-tier stand made from reclaimed barn wood or stained oak. Incorporate a slide-out tray underneath to hold treat jars or cleanup wipes. Some pet owners integrate the feeder into cabinetry or banquette seating for seamless integration into modern kitchens.
| Bowl Type | Best For | Maintenance Level | Average Cost |
|---|---|---|---|
| Repurposed Mason Jar | Water, temporary use | Low | $0–$5 |
| Painted Ceramic Dish | Daily feeding, indoor use | Medium | $10–$20 |
| Wooden Elevated Feeder | Large breeds, joint support | Medium-High | $30–$75 |
| Concrete Geometric Bowl | Modern homes, outdoor use | Low | $40–$100 |
Safety First: Materials to Use and Avoid
No matter how stylish a bowl looks, safety must come first. Dogs chew, lick, and sometimes paw at their dishes, so any toxic material can pose serious health risks. Below is a guide to help you choose wisely.
Tip: Test ceramic glazes by placing a drop of vinegar in the bowl overnight. If the surface etches or changes color, it’s not acid-resistant and unsafe for food.- Safe Materials: Stainless steel, food-grade silicone, lead-free ceramics, hardwood sealed with mineral oil, glass.
- Avoid: Plastics (can harbor bacteria and degrade), zinc-coated metals, painted surfaces with unknown pigments, particleboard (swells when wet).
Stainless steel inserts are an excellent compromise—place them inside a hand-built outer shell for style while keeping food contact surfaces hygienic and easy to clean.
Real-Life Inspiration: How Sarah Built a Matching Feeding Station for Her Puppies
Sarah, a graphic designer from Portland, adopted two littermate golden retrievers and wanted a cohesive, Instagram-worthy feeding nook. With a $50 budget, she bought two identical stainless steel bowls, a pine board, and hairpin legs from a local hardware store. She sanded and stained the wood herself, then mounted the bowls using rubber grommets to prevent sliding.
To personalize it, she stenciled each dog’s name beside their bowl and added a small chalkboard label for meal notes. The entire project took one weekend and became a centerpiece in her mudroom. “It’s functional, adorable, and way cheaper than buying a branded elevated feeder,” she said. “Plus, I know exactly what went into making it.”
DIY Checklist: Building Your Own Safe, Stylish Dog Bowl
Before starting your project, run through this checklist to ensure success:
- ✅ Measure your dog’s height from floor to shoulder to determine ideal bowl elevation.
- ✅ Choose non-toxic, food-safe materials for all surfaces touching food or water.
- ✅ Ensure the base is stable and slip-resistant (add rubber feet if needed).
- ✅ Design for easy cleaning—removable bowls or smooth surfaces without crevices.
- ✅ Test the setup with a small amount of water first to check for leaks or instability.
- ✅ Label bowls clearly if you have multiple pets.
Frequently Asked Questions
Can I use air-dry clay for a dog bowl?
No. Air-dry clay is not waterproof long-term and can harbor mold or bacteria. Even when sealed, it may crack or degrade with repeated washing. For clay projects, use kiln-fired ceramics with food-safe glaze instead.
How do I stop my dog from pushing the bowl around?
Use a weighted base, attach rubber non-slip pads, or place the bowl inside a slightly larger tray or sink mat. For DIY stands, widen the footprint of the base for greater stability.
Are concrete dog bowls safe?
Yes, if properly sealed. Raw concrete is porous and can absorb moisture and bacteria. Use a food-safe epoxy or cement sealer on both interior and exterior surfaces. Reapply the sealant every 6–12 months depending on use.
Final Thoughts: Make Mealtime Meaningful
Creating a homemade dog bowl isn’t just about saving money—it’s about thoughtfulness. Each scratch, brushstroke, or carefully chosen material reflects the care you put into your pet’s daily life. Whether you craft a $5 mason jar holder or a custom walnut feeder, the result is more than a dish; it’s a gesture of love.
Start small, prioritize safety, and let your dog’s needs guide your design. When you see them eagerly approach their personalized bowl, you’ll know the effort was worth it.
🚀 Ready to get started? Pick one idea from this article, gather your supplies this weekend, and create a feeding space your dog will love. Share your finished project online to inspire other pet parents!