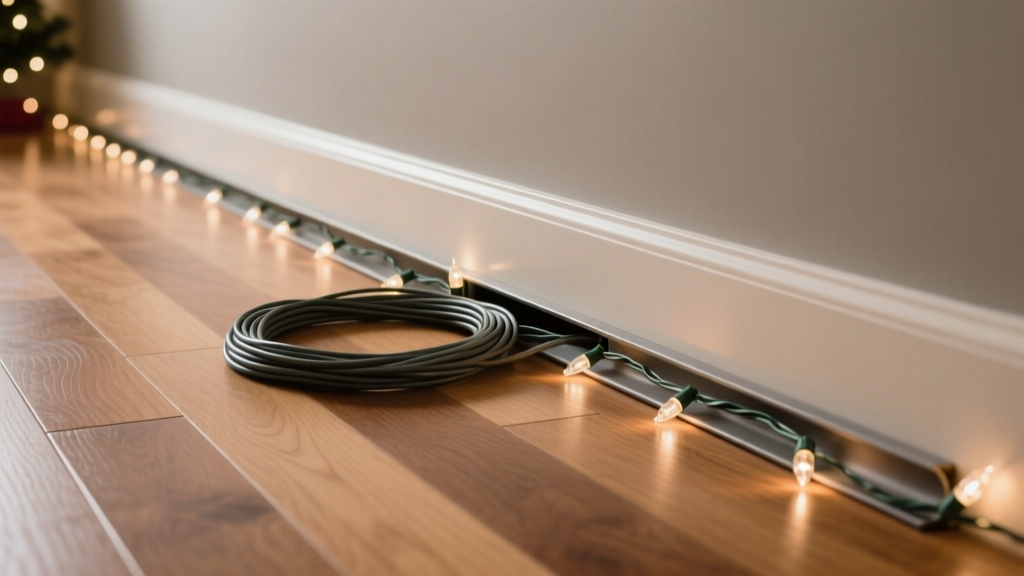
Decorating your home with outdoor Christmas lights brings warmth, cheer, and holiday spirit to your neighborhood. But when winter storms roll in—bringing gale-force winds, ice accumulation, and heavy snowfall—those festive strands can quickly become tangled, torn down, or even pose safety hazards. Many homeowners invest time and money into their displays only to see them damaged within days of installation. The good news is that with the right materials, techniques, and foresight, you can keep your lights securely in place all season long, regardless of weather conditions.
The key lies not just in hanging lights but in anchoring them properly. This means understanding wind load, weight distribution, material strength, and seasonal wear. Whether you're draping lights across eaves, wrapping trees, or outlining windows and railings, a well-secured setup will survive December blizzards and January thaw cycles alike.
Understand the Risks: Wind, Snow, and Ice Load
Outdoor lighting systems face two primary environmental threats during winter: wind uplift and snow/ice accumulation. High winds create dynamic pressure that can lift, twist, or snap poorly secured wires. Gusts exceeding 30 mph are common in many regions and can easily dislodge clips, fray connections, or pull entire light strings from gutters and fascia boards.
Snow and ice present a different challenge. As snow accumulates on light strands—especially on horizontal runs along roofs or fences—the added weight increases stress on fasteners and wiring. Ice buildup can double or triple the effective load on a single strand. Over time, this leads to sagging, breakage, or complete detachment.
According to the National Weather Service, sustained winds above 25 mph combined with wet snowfall (over 0.5 inches per hour) create high-risk conditions for exterior decorations. In mountainous or northern climates, these conditions may persist for weeks. Proactive securing isn’t optional—it’s essential for both safety and display longevity.
“Many holiday electrical incidents stem not from faulty wiring, but from mechanical failure due to poor mounting. If the lights aren’t anchored against lateral and vertical forces, no UL rating will save them.” — Daniel Reeves, Electrical Safety Inspector, NFPA Contributor
Step-by-Step Guide to Secure Lights Against Extreme Weather
Securing Christmas lights for harsh winter conditions requires more than just clipping them into place. Follow this detailed sequence to ensure maximum resilience:
- Assess Your Structure and Exposure
Walk around your property and identify which areas are most exposed to wind—typically corners, rooftops, and open facades. Note where snow tends to accumulate or slide off roofs. These zones need extra reinforcement. - Choose Durable, Weather-Rated Lights
Use only LED mini lights rated for outdoor use with thick insulation and shatter-resistant bulbs. Look for labels like “UL Listed,” “Rated for -20°F,” or “Heavy-Duty PVC Coating.” Avoid thin, flimsy cords meant for indoor decoration. - Pre-String and Test Before Installation
Lay out each strand on the ground and plug it in. Check for flickering, dark sections, or loose bulbs. Repair or replace defective sets now—fixing mid-installation at height is dangerous and inefficient. - Use Reinforced Fastening Methods, Not Basic Clips
Standard plastic gutter clips often fail under wind pressure. Instead, use stainless steel wire ties, UV-resistant zip ties (rated for -40°F), or screw-in hooks made of galvanized metal. For wood surfaces, small eye screws provide superior holding power. - Minimize Horizontal Runs and Sag Points
Long spans between anchor points act like sails in the wind. Support every 12–16 inches on flat surfaces and every 8–10 inches on vertical drops. Never let lights drape loosely between distant points. - Route Cords Away from Snow Paths
Position wires so they won’t be buried under sliding snow from roofs or shoveled drifts. Elevate low-level connections using short stakes or wall-mounted brackets to prevent crushing and moisture pooling. - Secure End-to-End Connections
Plug connectors should face downward to shed water and be wrapped in waterproof electrical tape or enclosed in insulated outlet covers. Loose plugs can disconnect in strong gusts or short when wet. - Anchor Trees and Shrubs Thoughtfully
When wrapping trees, avoid tying directly around thin branches. Use soft nylon cord looped around the trunk and suspend lights from it. Wrap spirals upward at consistent intervals, securing every few turns with flexible ties. - Install Surge-Protected Timers and GFCI Outlets
Even well-fastened lights need electrical protection. Plug into GFCI outlets to prevent shock hazards during melting cycles. Use timers with surge suppression to avoid voltage spikes during storms. - Inspect Weekly During Storm Season
After any major snowfall or wind event, walk the perimeter and check for loosened ties, pooled water, or strained sections. Re-tension as needed before damage occurs.
Best Fastening Methods Compared: Do’s and Don’ts
Not all attachment methods are created equal. Some offer temporary convenience but fail under real winter stress. This table compares common options based on holding strength, weather resistance, ease of removal, and cost.
| Method | Best For | Do’s | Don’ts | Durability Rating (1–5) |
|---|---|---|---|---|
| Plastic Gutter Clips | Short-term, mild climates | Use in sheltered eaves; pair with zip ties | Don’t rely on them alone in windy zones | 2 |
| Stainless Steel Wire Ties | Metal roofs, railings, fencing | Twist tightly; trim excess to avoid snags | Don’t over-tighten and cut into cord insulation | 5 |
| UV-Resistant Zip Ties | All surfaces, especially vinyl and wood | Use 8” or 12” lengths for flexibility | Don’t use standard indoor ties—they become brittle | 4 |
| Screw-In Hooks (Eye Screws) | Wood fascia, beams, posts | Drive fully; loop cord through gently | Don’t install too close together—risk splitting wood | 5 |
| Suction Cups | Windows only, temporary use | Clean glass thoroughly first | Never use on freezing surfaces or painted siding | 1 |
| Adhesive Hooks | Smooth surfaces, low-wind areas | Press firmly for 30 seconds; wait 24 hrs before loading | Don’t use if temps were below 40°F during application | 2 |
For maximum reliability, combine methods: use screw-in hooks at anchor points and reinforce with zip ties every foot along the run. This hybrid approach distributes stress and provides backup support if one fastener fails.
Real Example: A Midwest Home That Survived a Blizzard
In December 2022, a homeowner in Duluth, Minnesota installed her annual rooftop light display just before a historic lake-effect snowstorm hit. Winds reached 45 mph, and over 28 inches of wet snow accumulated in 36 hours. Neighbors reported fallen lights, tripped breakers, and tangled messes across yards.
Yet her display remained intact.
How? She had replaced all plastic clips with stainless steel zip ties and installed screw-in eye hooks at every rafter tail along the front gable. She pre-strung all lines on a taut nylon guide rope stretched beneath the eave, minimizing direct strain on the lights. Connectors were sealed with silicone tape and tucked into a covered junction box mounted under the soffit.
She also reduced horizontal exposure by avoiding long spans across the garage roof, instead using vertical drops from the peak to the driveway pillars. After the storm, she inspected the setup and found only one zip tie slightly loosened—easily retightened without ladder work.
This case demonstrates that investment in proper hardware and technique pays off when nature tests your preparations.
Essential Checklist for Winter-Proof Lighting
Before powering on your display, go through this final checklist to ensure everything is secured for winter conditions:
- ✅ All light strands are UL-listed for outdoor use
- ✅ No frayed wires, cracked bulbs, or loose sockets
- ✅ Fasteners are spaced no more than 16 inches apart (closer on vertical drops)
- ✅ Zip ties or wire anchors are used instead of basic clips
- ✅ Cords are routed away from roof runoff and snow slides
- ✅ All plugs face downward and are protected from moisture
- ✅ Connected to GFCI-protected outlets with surge suppression
- ✅ Timer set to turn lights off during peak wind hours (optional but recommended)
- ✅ Ladder access points are clear for future inspections
- ✅ Spare zip ties, lights, and tools stored nearby for repairs
Frequently Asked Questions
Can I leave my outdoor lights up all winter?
Yes, if they are designed for outdoor use and properly secured. Most commercial-grade LED strings can withstand temperatures down to -20°F and resist UV degradation. However, periodic inspection is crucial—especially after major storms. Remove lights promptly after the holiday season to extend their lifespan and reduce wear.
What’s the best way to secure lights on vinyl siding?
Vinyl siding lacks structural depth, so avoid drilling unless hitting a stud. Instead, use specialized siding hooks that clip into the seams between panels. These distribute pressure safely and resist wind uplift. Reinforce with short zip ties looped around the hook base and light cord. Never nail or screw directly into vinyl without backing—it can crack or warp.
Are net lights safe in heavy snow?
Net lights are convenient for shrubs and bushes but vulnerable in snow-prone areas. The mesh structure collects snow rapidly, increasing weight and strain. If using net lights, choose smaller grids (6-inch spacing) and install only on dense, supportive shrubs. Consider removing them temporarily during forecasted snow events or switch to individually strung lights with independent support.
Final Tips for Long-Term Success
Beyond immediate installation, consider adopting a seasonal maintenance plan. At the end of each holiday season, remove lights carefully, coil them neatly on reels or cardboard spools, and store in climate-controlled space. Label each string by location (e.g., “Front Eave – 50ft Warm White”) to simplify next year’s setup.
Keep a log of what worked and failed each season. Did a particular fastener hold up better? Was there a weak point that always comes loose? Use this data to refine your strategy annually. Over time, you’ll develop a system tailored to your home’s architecture and local weather patterns.
Also, involve family members in the process. Teach older children how to inspect for loose wires or damaged plugs. Turn post-storm checks into a quick weekend ritual—like checking smoke detectors or winterizing pipes.
“The most durable displays aren’t the flashiest—they’re the ones built with patience, planning, and respect for the elements.” — Lena Peterson, Landscape Lighting Designer, 15+ years in Northern Climate Installations
Stay Bright, Stay Safe
Your Christmas lights are more than decoration—they’re a symbol of joy, tradition, and community spirit. Protecting them from winter’s worst doesn’t diminish the magic; it ensures it lasts. By using rugged materials, smart engineering, and regular care, you can enjoy a stunning, safe display all season long—no matter how hard the wind blows or how deep the snow piles.
Take action now: review your current setup, upgrade weak fasteners, and apply the strategies outlined here. When the next storm hits, you’ll watch from your window with confidence, knowing your lights are built to endure.
💬 Have a winter lighting success story or tip? Share your experience in the comments and help others keep their holiday glow shining bright!