Christmas lighting transforms homes into festive sanctuaries, but not all displays are created equal. While many homeowners drape strings of lights around windows in a single line, the most striking holiday exteriors use layered lighting to create depth, warmth, and dimension. A professionally lit window doesn’t just outline—it glows from within, suggesting candlelight, warmth, and celebration. Achieving this look requires more than quantity; it demands strategy, planning, and attention to detail. This guide breaks down exactly how to layer Christmas lighting on windows to produce a luminous, high-end effect that stands out in your neighborhood.
Why Layering Matters: The Science of Light Depth
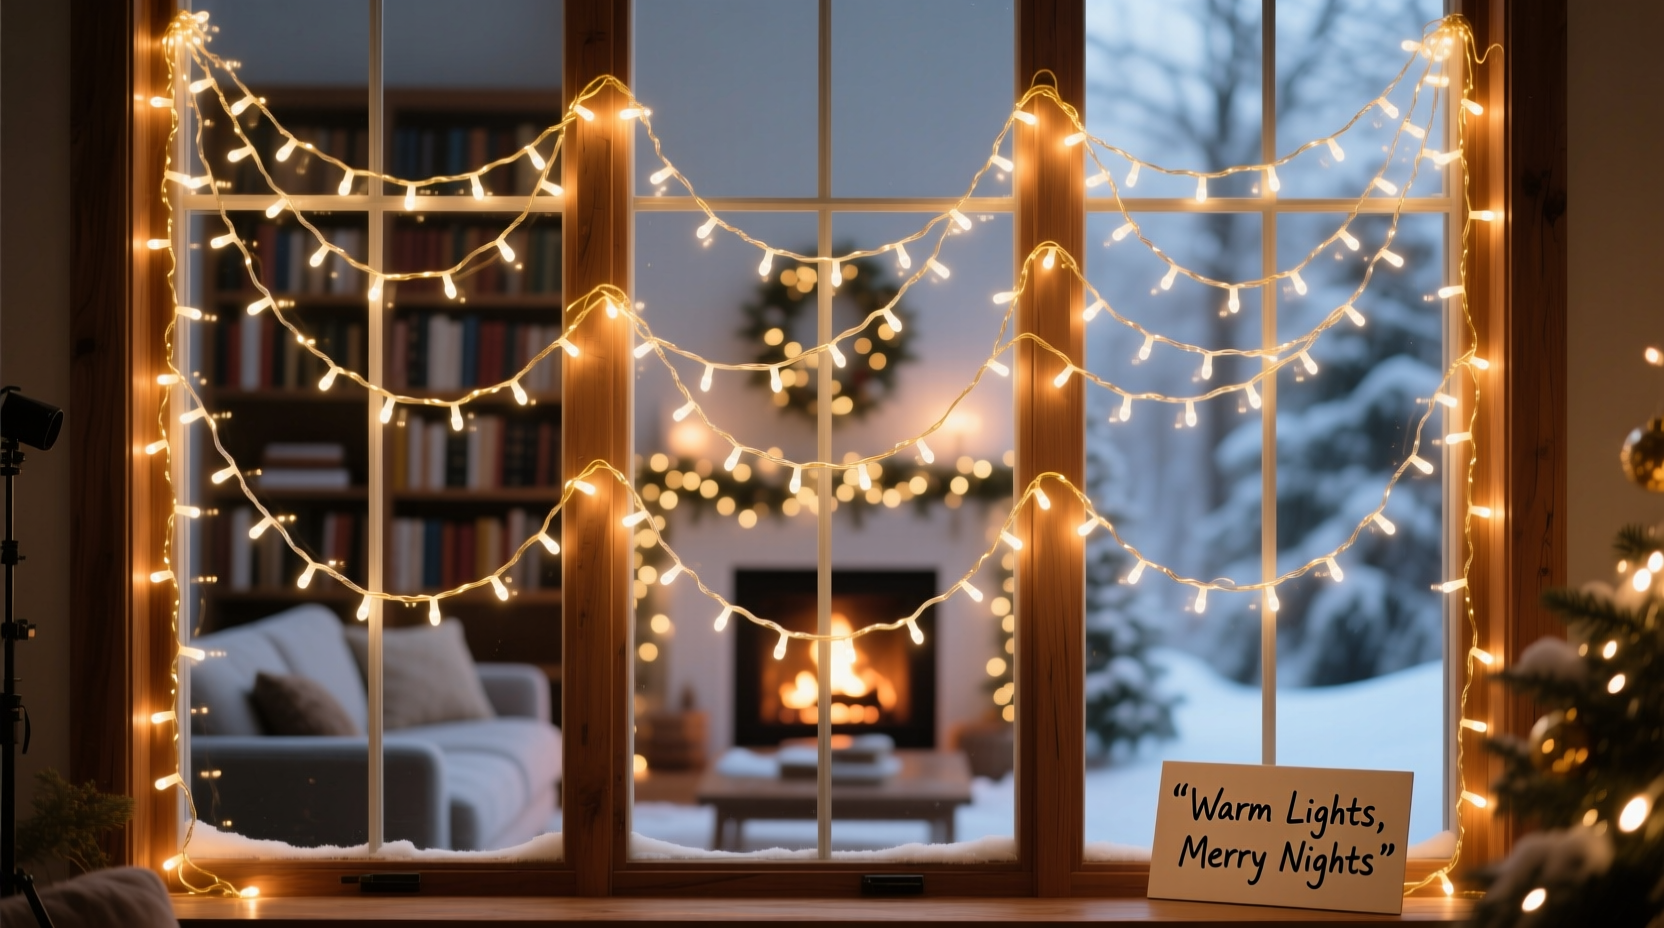
A single strand of Christmas lights around a window frame often looks flat and underwhelming. The human eye perceives depth through contrast, shadow, and variation in brightness. Layering introduces multiple light sources at different distances and intensities, mimicking natural illumination patterns found in well-lit interiors—like the soft spill from a table lamp or the flicker of a fireplace.
Professional decorators don’t rely on one type of light or placement. Instead, they build visual interest by combining ambient, accent, and outline lighting. When applied to windows, this approach creates a “halo” effect—where light appears to emanate from behind the glass and wrap gently around the frame.
“Layering is what separates amateur setups from magazine-worthy displays. It’s not about more lights—it’s about smarter placement.” — Daniel Reyes, Lead Designer at Evergreen Holiday Lighting
Step-by-Step Guide to Layering Window Lights
Follow this six-phase process to achieve a professional glow on any window, regardless of size or architectural style.
- Assess Your Windows: Measure each window’s height, width, and depth (including trim). Note obstructions like shutters, railings, or nearby trees.
- Choose Your Light Types: Select at least three kinds of lights—warm white LED mini lights, icicle lights, and net or curtain lights—for varied textures.
- Install the Base Layer (Interior Glow): Simulate indoor candlelight by placing string lights along the inside edge of the window frame or attaching battery-operated fairy lights to sheer curtains.
- Add the Mid-Layer (Frame Accent): Wrap warm white mini lights tightly around the exterior window trim. Use clips to avoid nails and maintain clean lines.
- Apply the Outer Layer (Dimensional Effect): Hang icicle lights below the sill or install net lights over shrubs beside the window to bounce light upward.
- Test and Adjust: View your work at dusk and after dark. Shift strands that appear too sparse or overly bright. Consider adding dimmers for control.
Essential Tools and Materials Checklist
Gathering the right supplies before installation saves time and prevents mid-project frustration. Here’s what you’ll need:
- Warm white LED mini lights (at least 50 bulbs per strand)
- Icicle lights (6–9 feet long, with downward-pointing tips)
- Battery-powered fairy lights (for interior layering)
- Plastic mounting clips (gutter, shingle, and window types)
- Extension cords rated for outdoor use (UL-listed)
- Power strips with surge protection
- Ladder (sturdy, non-conductive)
- Tape measure and notepad
- Zip ties (for securing excess cord)
- Dimmer controllers (optional but recommended)
Material Comparison: Choosing the Right Lights
Not all Christmas lights are suitable for layering. The table below compares common options based on suitability for window applications.
| Light Type | Best For | Pros | Cons |
|---|---|---|---|
| Mini LED String Lights | Trim wrapping, base outlines | Energy-efficient, long lifespan, flexible | Can look thin if used alone |
| Icicle Lights | Sills, vertical drops | Creates snow-melt effect, adds movement | Limited flexibility in placement |
| Net/Curtain Lights | Shrubs, window flanking | Covers large areas quickly, diffused glow | Not ideal for precise framing |
| Rope Lights | Thick outlines, modern styles | Durable, bright, weather-resistant | Less elegant, harder to bend tightly |
| Fairy/Battery Lights | Interior accents, sheer layers | No cords, safe near glass, subtle | Shorter runtime, manual replacement |
Real Example: Transforming a Colonial-Style Home
Consider a two-story colonial house with six double-hung windows on the front facade. The homeowner initially installed one strand of cool white lights around each window, resulting in a stark, institutional appearance. After consulting a local decorator, they re-lit using layering principles:
- Battery-powered fairy lights were clipped to white sheers inside each window, creating a soft inner glow.
- Warm white mini lights were wrapped twice around each exterior frame using shingle clips for even spacing.
- Icicle lights were hung 2 inches below each sill, staggered to mimic melting ice.
- Two net lights were placed in foundation plantings on either side of the entry, angled toward the central bay window.
The result? Neighbors reported the home looked “like it was lit from within,” and passersby slowed to admire the display. The total cost was under $300, and the setup took one weekend. The key wasn’t spending more—it was layering intentionally.
Advanced Techniques for Maximum Impact
Once the basics are mastered, consider these pro upgrades:
Use Dimmers and Timers Strategically
Connect multiple circuits to independent dimmers. Lower the interior-layer brightness to 60% to simulate real candlelight, while keeping outline lights at full intensity. Program timers to turn lights on at sunset and off at midnight for energy savings and longevity.
Incorporate Color Accents Sparingly
While warm white remains the foundation, add subtle color through small clusters. For example, place a single red-and-green-tipped strand behind sheer curtains to suggest a wreath reflection. Avoid full-color changes unless part of a themed display.
Balance Symmetry and Variation
Identical windows should have consistent lighting structure, but slight variations prevent monotony. Alternate icicle drop lengths or vary the density of mini lights by 10% between floors to create rhythm without chaos.
Tip: Test one window first. Perfect the layering technique on a single unit before replicating across the house.Common Mistakes to Avoid
Even experienced decorators make errors when layering lights. Steer clear of these pitfalls:
- Mixing color temperatures: Combining warm and cool whites creates an unbalanced, jarring effect.
- Overloading circuits: Plugging too many strands into one outlet can trip breakers or damage wiring.
- Ignoring maintenance access: Ensure power sources and connections remain accessible for repairs.
- Skipping the layout plan: Installing lights haphazardly leads to gaps and uneven coverage.
- Using indoor-rated lights outdoors: These lack weather resistance and pose safety hazards.
Frequently Asked Questions
How many layers of lighting should I use per window?
At minimum, use two: an interior or base layer and an exterior outline. For maximum impact, add a third—such as icicle drops or landscape uplighting—to create depth. More than four layers typically overwhelms residential architecture.
Can I layer lights on vinyl or aluminum windows without damage?
Yes, if you use proper clips. Avoid nails or staples. Instead, use adhesive-backed plastic clips designed for vinyl siding and gutters. They hold securely and remove cleanly in spring without residue or scratches.
Are smart lights worth it for window layering?
Smart lights offer convenience and dynamic control, but for static glow effects, they’re often unnecessary. However, if you want to adjust brightness remotely or sync with music, Wi-Fi-enabled dimmers paired with standard LEDs provide excellent value without replacing every strand.
Final Thoughts: Lighting as Storytelling
Layered Christmas lighting isn’t just decoration—it’s storytelling. Each level of light communicates warmth, welcome, and celebration. When done well, it draws the eye, evokes nostalgia, and turns a house into a home. The difference between ordinary and extraordinary isn’t found in price tags or bulb count, but in thoughtful arrangement and emotional resonance.
Start small. Pick one window. Experiment with combinations. Observe how light interacts with glass, trim, and shadow. Refine your approach, then scale across the facade. With patience and precision, you can achieve a glow that doesn’t just illuminate your windows—it defines your holiday spirit.
💬 Ready to elevate your holiday display? Try the layering method this season and share your results. Inspire others with your journey from simple strands to stunning glow.