Decorating your home for the holidays should bring joy—not damage to your gutters or exterior walls. Yet every year, homeowners face a dilemma: how to hang festive Christmas lights securely without resorting to nails that puncture gutters or adhesives that peel paint and leave residue. The good news is there are multiple proven, non-invasive methods that protect your home while delivering professional-looking results. Whether you're working with aluminum, vinyl, or copper gutters, this guide walks you through reliable techniques that preserve both aesthetics and structural integrity.
Why Avoid Nails and Adhesives?
Nails may seem like the quickest way to secure lights, but they come with long-term consequences. Driving nails into gutters compromises their ability to channel water efficiently. Over time, these punctures can lead to rust in metal gutters or cracks in vinyl ones, especially when exposed to freeze-thaw cycles. Additionally, nails can loosen due to thermal expansion, causing lights to sag or fall.
Adhesives—especially heavy-duty tapes or glues—are no better. While some promise “no residue,” most degrade under UV exposure and temperature fluctuations. What starts as a clean installation often ends in sticky messes, peeling paint, or damaged gutter finishes during removal. In colder climates, adhesive failure is even more common, leaving behind brittle remnants that require scraping or solvents to remove.
“Homeowners often don’t realize the cost of temporary fixes until spring cleanup reveals dents, leaks, or staining. Using non-damaging hangers preserves both curb appeal and gutter function.” — Mark Delaney, Residential Roofing & Gutter Specialist
Best Tools and Materials for Nail-Free Installation
The key to successful, damage-free light hanging lies in selecting the right hardware. Below is a comparison of popular nail- and glue-free options, ranked by ease of use, durability, and compatibility with different gutter types.
| Product Type | Works With | Pros | Cons |
|---|---|---|---|
| Plastic Gutter Clips (S-shaped) | All gutter types | Inexpensive, reusable, easy to install | May slip on wide or rounded gutters |
| Spring-Loaded Clips | Vinyl, aluminum | Strong grip, adjustable tension | Higher cost; not ideal for irregular shapes |
| Wire Hangers (Bendable) | All types, especially deep gutters | Custom fit, durable, weather-resistant | Requires wire cutters; takes more time |
| Magnetic Hangers (for steel gutters only) | Steel/metal roofs or gutters | Zero contact, ultra-fast setup | Useless on aluminum, vinyl, or copper |
| Over-Gutter Hooks (Rubber-Coated) | Most residential gutters | Gentle on finish, widely available | Can stretch or degrade over seasons |
Step-by-Step: Installing Lights Using Gutter Clips
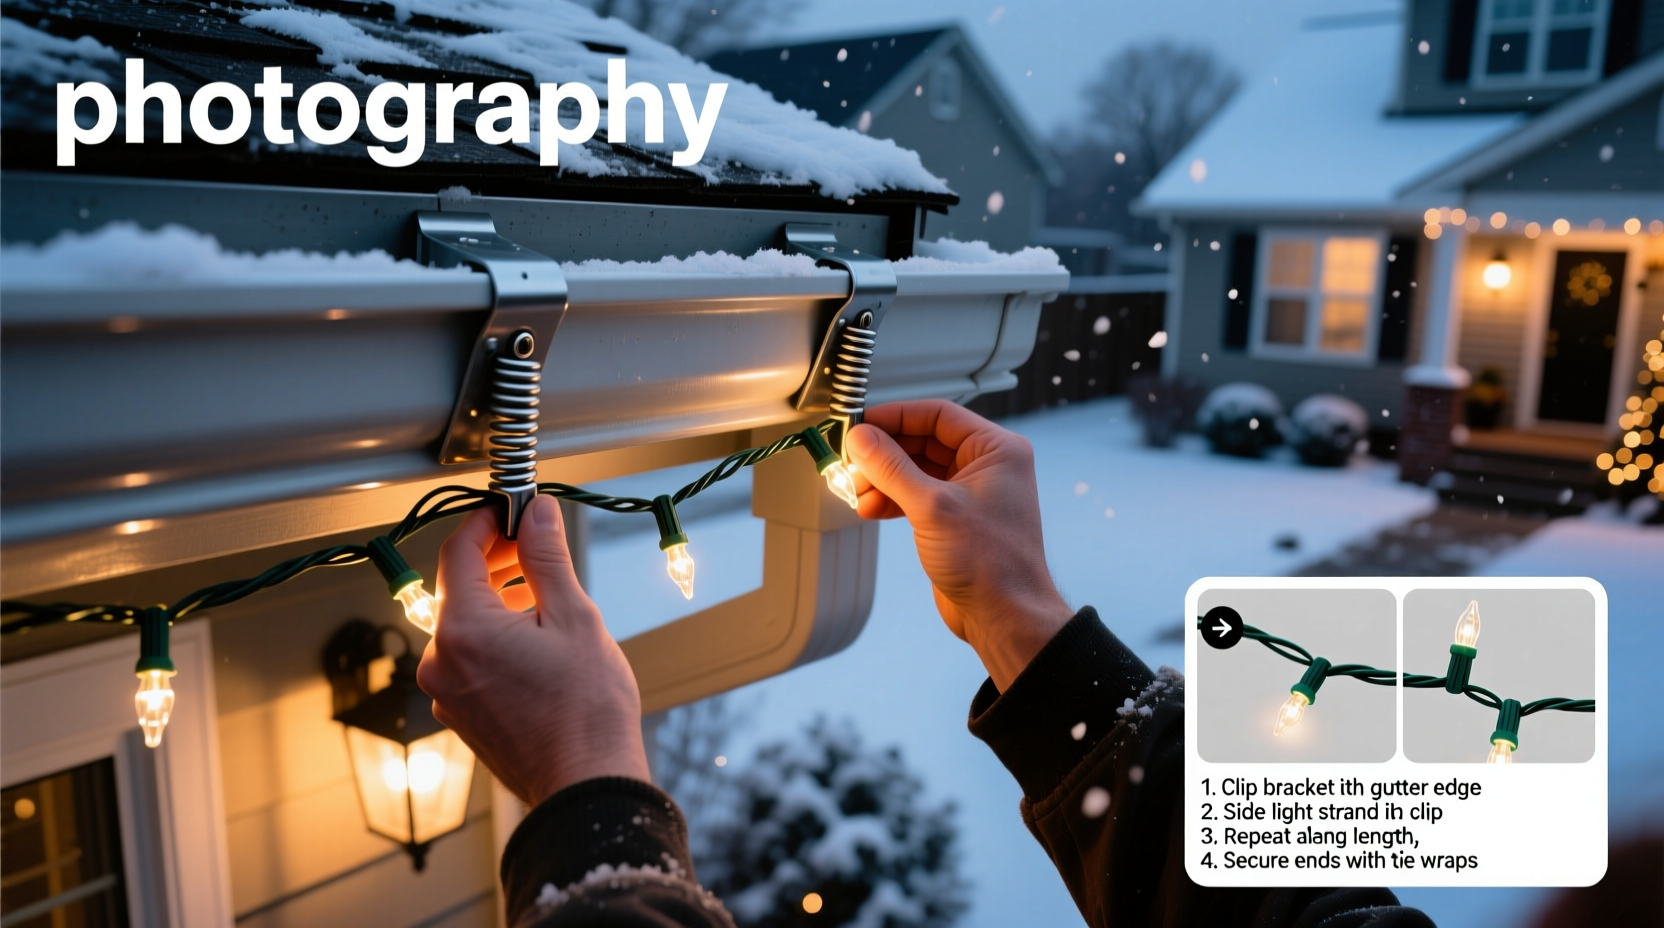
One of the most accessible and effective methods involves using S-shaped plastic clips designed specifically for gutters. These clips hook over the edge and cradle the string of lights, distributing weight evenly without pressure points.
- Inspect Your Gutters: Clear debris and ensure no sections are loose or sagging. Repair any issues before hanging lights.
- Measure and Plan Layout: Determine how many strands you’ll need based on the perimeter. Most LED strings are 25 feet long—plan overlaps accordingly.
- Choose Clip Spacing: Place clips every 12 to 18 inches. Closer spacing prevents sagging, especially in windy areas.
- Attach the Clips: Slide each clip over the front lip of the gutter. Press down gently until it snaps into place. Ensure it’s seated fully.
- Thread the Lights: Starting from the power source, tuck the bulb base into each clip’s cradle. Work steadily along the line.
- Connect Strands Safely: Use only UL-listed connectors rated for outdoor use. Do not exceed the transformer’s maximum load.
- Test Before Finalizing: Plug in the lights temporarily to confirm all bulbs work and alignment looks balanced.
- Secure Excess Cord: Use zip ties or cord wraps to bundle extra wire near outlets or downspouts—never let cords dangle.
This method works best with mini LED lights, which are lightweight and generate minimal heat. For heavier C7 or C9 bulbs, consider sturdier alternatives like bendable wire hangers.
Alternative Method: DIY Wire Hangers for Maximum Hold
For homes with deeper or oddly shaped gutters, custom wire hangers offer unmatched stability. Made from galvanized steel wire (12–14 gauge), they’re bent to match the gutter profile and hold lights securely through snow and wind.
To make them:
- Cut 8-inch lengths of wire using sturdy cutters.
- Bend each piece into a U-shape with 3-inch arms and a 2-inch base.
- Wrap the top of each arm with electrical tape or dip in rubber coating to prevent scratching.
- Insert the arms over the gutter edges, letting the base rest underneath to support the light strand.
These hangers last for years if stored properly. At season’s end, unbend slightly to remove, then reshape for next year.
“We switched to wire hangers after two seasons of replacing damaged clips. Now our display stays put—even during ice storms.” — Linda Ruiz, homeowner in upstate New York
Checklist: Damage-Free Light Installation
Follow this pre-installation checklist to ensure a smooth, safe, and protective setup:
Preparation Checklist- ☑ Confirm total linear footage of gutters to be lit
- ☑ Purchase enough clips or hangers (one per 12–18 inches)
- ☑ Test all light strands for functionality
- ☑ Identify nearest outdoor GFCI outlet
- ☑ Use a voltage calculator to avoid circuit overload
- ☑ Gather tools: ladder, gloves, wire cutters (if making hangers), zip ties
- ☑ Check weather forecast—avoid rainy or icy days
- ☑ Inform household members about installation timing for safety
Avoiding Common Mistakes
Even experienced decorators make errors that compromise safety or damage property. Be mindful of these pitfalls:
- Daisy-Chaining Too Many Strings: Most manufacturers limit connections to three or four strands. Exceeding this risks overheating and fire hazards.
- Using Indoor Lights Outdoors: Indoor-rated lights aren’t sealed against moisture and can short-circuit.
- Ignoring Ladder Safety: Always maintain three points of contact. Have someone spot you when possible.
- Leaving Lights Up Year-Round: Prolonged sun exposure degrades wires and housings. Remove within six weeks post-holiday.
- Skipping a Timer: Manual on/off leads to wasted energy and shortened bulb life. Use a programmable timer set to 5–10 hours nightly.
Real Example: A Suburban Home’s Transformation
The Thompson family in Columbus, Ohio, wanted a bright, full-gutter display for their first Christmas in a new home. Their previous house had wood fascia where nails were acceptable, but this one featured seamless aluminum gutters. Concerned about voiding the warranty, they researched non-damaging methods.
They purchased 60 S-shaped gutter clips and 120 feet of warm-white LED mini lights. After clearing leaves and testing each strand, they installed clips every 15 inches along the front and side eaves. The entire process took just over an hour with two people. By using a basic timer, their display turned on at dusk and off at midnight, reducing energy use by 40% compared to previous years.
In February, removal was quick—just unhook each light and slide out the clips. All components were stored in labeled bins for reuse. No scratches, dents, or leaks appeared in the gutters the following spring.
Frequently Asked Questions
Can I use suction cups on gutters?
Suction cups are unreliable for outdoor lighting. Temperature changes cause rubber seals to expand and contract, leading to rapid detachment. They also leave marks and fail completely in freezing conditions. Avoid them for permanent installations.
How do I prevent lights from swaying in the wind?
Ensure proper clip density—one every 12 inches in high-wind areas. For added stability, run a thin nylon fishing line along the back of the strand and tie it to downspouts or soffit vents. This creates a secondary support line without touching the gutter surface.
Are there rental options for light installation tools?
Some hardware stores and tool libraries offer pole-based clip applicators for rent. These extendable poles let you attach clips from the ground, reducing ladder use. Ideal for multi-story homes or those with mobility concerns.
Final Tips for Long-Term Success
Planning ahead pays off. Invest in quality clips or reusable hangers rather than disposable solutions. Store all components in clearly labeled containers—lights coiled around cardboard, clips in small bags, timers and remotes together.
Consider upgrading to smart lights with app control. Many models allow color changes, dimming, and scheduling—all without climbing a ladder after initial setup. Pair them with solar-powered micro-inverters to eliminate cords entirely.
Finally, inspect your gutters annually before decorating. Look for signs of wear, misalignment, or blockages. A well-maintained gutter system supports both water management and holiday cheer.
Conclusion
Hanging Christmas lights doesn’t require compromising your home’s integrity. With the right tools and techniques, you can achieve a dazzling display that respects your gutters, saves money on repairs, and simplifies seasonal transitions. From plastic clips to custom wire hangers, the options are practical, accessible, and effective. This holiday season, decorate with confidence—knowing your home will look magical now and remain protected for years to come.
💬 Have a favorite damage-free lighting hack? Share your tip in the comments and help fellow homeowners celebrate safely!