Exposed light wires can disrupt the clean, polished look of any room. Whether you're stringing fairy lights above a bed, installing LED strips along a window frame, or running power to a floor lamp behind heavy drapes, visible cords often become an eyesore. But what if you live in a rental? Or you simply don’t want to damage walls with nails, screws, or permanent adhesives? Fortunately, there are clever, non-invasive methods to conceal wiring while maintaining safety and aesthetics.
The key is working with your existing architecture—using curtains, baseboards, crown molding, and furniture as natural concealers. With the right tools and techniques, you can achieve a seamless setup that looks professionally installed, all without leaving a single mark on your walls.
Why Avoid Nails and Glue?
Many people default to using thumbtacks, nails, or strong adhesives to secure cords. While these solutions work, they come with drawbacks:
- Renters risk penalties: Landlords often charge fees for wall damage, even from small holes.
- Paint and wallpaper damage: Removing glue residue or patching nail holes can be time-consuming and imperfect.
- Limited flexibility: Once glued or nailed, repositioning lights becomes difficult.
- Safety concerns: Overuse of adhesives near heat sources (like lamps) may pose fire risks.
Non-permanent solutions not only protect your space but also allow for seasonal changes, redecorating, or taking your lighting setup with you when you move.
Tip: Always check local electrical codes before routing wires through any architectural feature—even temporarily.Step-by-Step: How to Route Wires Behind Curtains
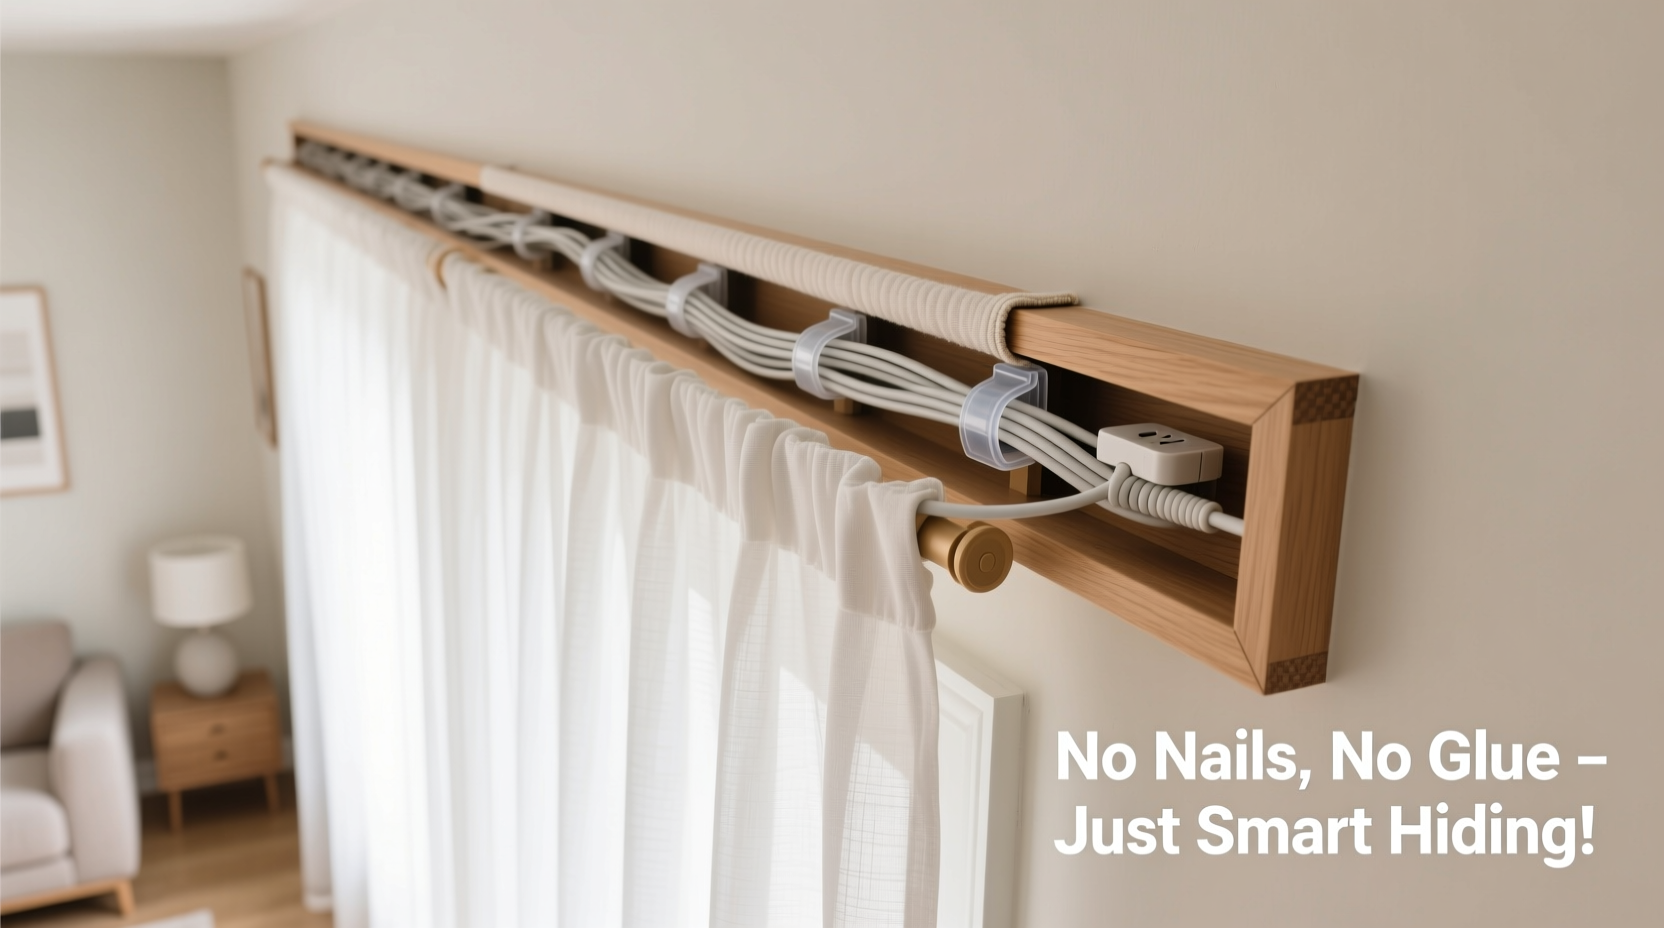
Curtains offer one of the easiest and most effective ways to hide light wires. Floor-length drapes, especially those with back rods or double tracks, create a natural channel between the fabric and the wall.
- Choose the right curtain rod setup: Opt for a double rod system—one for sheer curtains closest to the wall, and another for heavier drapes in front. This creates a hidden gap ideal for cord management.
- Run the wire behind the inner curtain: Start at the outlet and gently guide the cord up behind the sheer layer. Keep it flat against the wall to avoid bulging.
- Use tension-based clips (optional): Instead of gluing, use over-the-door cord clips or adhesive-free silicone grips that hold the wire in place via friction. These press against the wall without residue.
- Route toward the ceiling or valance: If attaching string lights overhead, feed the wire up along the edge of the window frame, then tuck it into the curtain header or cornice box.
- Plug into a discreet outlet: Use a slim power strip tucked behind furniture or under a rug edge to maintain accessibility.
This method works especially well in bedrooms and living rooms where curtains already serve as focal points. The layered fabric ensures wires remain invisible from all viewing angles.
Using Crown and Base Molding as Wire Pathways
Molding isn’t just decorative—it can function as a built-in cable raceway. Both crown molding (at the ceiling) and base molding (near the floor) have slight gaps between the wood and the wall, often enough to slip thin cords through.
Before proceeding, assess the gap size. Most standard moldings leave a 1/8” to 1/4” space, which accommodates low-voltage LED wires, USB cords, or thin extension cables.
Technique: The Gentle Weave Method
Instead of forcing the wire, use a flexible wire guide or a bent coat hanger to gently thread the cord behind the molding.
- Cut a piece of stiff but bendable wire (e.g., floral stem or plastic zip tie) and shape it into an “L.”
- Insert the short end behind the molding and push it forward until it emerges a few inches ahead.
- Attach the light cord to the exposed end using a small piece of tape (avoid direct contact with wall paint).
- Pull the guide wire through, bringing the cord with it.
- Repeat every 12–18 inches to prevent snagging.
This process requires patience but results in a nearly invisible installation. It’s particularly effective along baseboards leading from outlets to entertainment centers or reading nooks.
“Smart cord routing starts with understanding your room’s architecture. Molding gaps are underutilized assets in modern home styling.” — Daniel Reyes, Interior Design Technologist
Alternative Tools and Accessories (No Adhesive Needed)
You don’t need to rely solely on structural features. Several commercial products are designed specifically for managing cords without damaging surfaces.
| Product Type | How It Works | Best For | Limits |
|---|---|---|---|
| Furniture-weighted cord clips | Clips hang over edges of tables or shelves, secured by gravity | Guiding wires from floor lamps to outlets | Requires nearby furniture |
| Magnetic cable ties | Attach to metal surfaces (vents, appliances) via magnets | Kitchens, offices with metal studs or HVAC grills | Only works on ferrous metals |
| Over-door cord organizers | Rest on top of doors or cabinets, holding multiple cords | Bedrooms with closet doors near beds | May slide if door is uneven |
| Self-coiling cord sleeves | Expandable braided tubes that wrap around bundles | Grouping multiple wires neatly | Doesn't anchor—needs support elsewhere |
| Baseboard corner ramps | Small plastic channels that sit at floor-wall junctions | Running wires across rooms under rugs | Visible unless covered by rug edge |
These accessories are renter-friendly, reusable, and easy to remove. Many are available in neutral colors to blend with trim or flooring.
Mini Case Study: Apartment Bedroom Makeover
Alex, a tenant in a Chicago apartment, wanted to install warm-white fairy lights above their bedroom window for ambiance. The outlet was behind the bed, and the landlord prohibited wall modifications.
Rather than drilling or gluing, Alex used a dual-curtain rod setup with sheer white linen curtains closest to the wall. Starting at the outlet, they fed the light cord behind the sheers, using silicone friction clips every 10 inches to keep it flush. At the top, the wire disappeared into a fabric valance box, where the plug connected to a slim power adapter hidden inside.
The result? A hotel-like glow effect with zero visible wiring. When Alex moved out six months later, removal took less than five minutes—no trace left behind.
Tip: Test wire thickness against your curtain lining or molding gap before purchase. Measure with calipers or fold a paper strip to simulate width.Checklist: Nail-Free Wire Hiding Plan
Follow this checklist to ensure a smooth, damage-free installation:
- ✅ Identify the power source location and plan the shortest safe route
- ✅ Measure wire length needed—add 15% extra for slack and adjustments
- ✅ Confirm compatibility with molding gaps or curtain depth
- ✅ Choose non-damaging accessories (friction clips, magnetic ties, etc.)
- ✅ Group multiple cords using self-wrapping sleeves to reduce clutter
- ✅ Ensure no cord runs under heavy furniture or high-traffic areas
- ✅ Verify that all connections are accessible and not overloaded
- ✅ Label cords if hiding multiple lines (e.g., lights vs. fan controls)
This systematic approach minimizes trial and error, saving time and preserving your decor.
Common Mistakes to Avoid
Even with the best intentions, improper wire management can lead to hazards or aesthetic flaws.
- Over-tightening friction clips: Can scuff paint or crack drywall. Apply only enough pressure to hold the cord.
- Ignoring heat buildup: Never trap cords behind thick insulation or enclosed spaces without ventilation.
- Using tape as a long-term solution: Even “safe” tapes like painter’s tape can yellow or lose adhesion over time.
- Routing over sharp edges: Metal window frames or rough plaster can wear through insulation. Use protective grommets or padding.
- Blocking outlet access: Avoid covering the outlet itself—future access may be needed for resets or maintenance.
Always prioritize safety over invisibility. A slightly visible cord is better than a fire hazard.
FAQ
Can I run wires behind blackout curtains?
Yes, but be cautious. Blackout curtains often have thicker linings that may compress against the wall, pinching the wire. Use ultra-thin cables and check regularly for overheating. Avoid placing cords near the mechanical drawstrings to prevent entanglement.
Are there wireless alternatives to consider?
Absolutely. Battery-powered LED strips or solar-rechargeable string lights eliminate cords entirely. However, they require regular charging or battery replacement and may lack brightness for ambient lighting. Best used in low-demand areas like accent shelves or closets.
What if my molding is flush with the wall?
If there’s no gap behind the molding, consider surface-mounted cord covers that mimic molding profiles. Some brands offer peel-and-stick raceways in wood finishes, but for a truly nail- and glue-free option, use a lightweight foam molding replica held in place with removable mounting putty (tested on inconspicuous area first).
Final Tips for Long-Term Success
Successfully hiding light wires without nails or glue isn’t just about technique—it’s about planning and adaptability. Here are a few final insights to ensure lasting results:
- Work during daylight: Natural light helps spot snags, bulges, or visibility issues you might miss under artificial lighting.
- Test before finalizing: Plug in the lights and observe from multiple angles—sitting, standing, and from doorways.
- Keep a maintenance log: Note how and where wires are routed. This helps during cleaning or future adjustments.
- Use modular systems: Choose lights with detachable plugs or connectors so sections can be removed independently.
Remember, the goal isn’t perfection—it’s improvement. Even partial concealment significantly enhances visual harmony. With thoughtful execution, your lighting can feel intentional and integrated, not improvised.
💬 Have a clever wire-hiding trick you’d like to share? Join the conversation—your insight could help someone solve their own lighting puzzle!