Coffee makers are essential appliances in most homes and offices, delivering fresh brews daily. But over time, mineral buildup from hard water and residual oils from coffee grounds can compromise performance and flavor. Vinegar is a popular, affordable, and effective solution for descaling and deep cleaning. However, many users worry that its acidity might damage rubber seals, gaskets, or plastic components inside the machine. When used correctly, vinegar cleans thoroughly without causing harm. This guide explains how to harness its power safely, maintain your machine’s longevity, and avoid common mistakes.
Why Vinegar Works—and Why People Worry
Vinegar, specifically white distilled vinegar, contains about 5% acetic acid. This mild acidity effectively dissolves limescale (calcium carbonate deposits) that accumulate in water tanks, heating elements, and internal tubing. It also helps eliminate stale coffee oils and organic residue that can cause off-flavors.
Despite its benefits, concerns arise because prolonged exposure to acidic solutions can degrade certain materials. Rubber seals, silicone gaskets, and some plastics may become brittle or swell if left in contact with vinegar for too long. However, short-term, properly diluted use—as recommended by most manufacturers—is generally safe.
“Vinegar is one of the safest natural descalers when used according to guidelines. The key is not strength, but duration and rinsing.” — Dr. Alan Tran, Appliance Materials Scientist
The real risk comes from misuse: using undiluted vinegar, letting it sit too long, or skipping post-cleaning rinses. These habits can accelerate wear on sensitive parts. Understanding your coffee maker’s design and following best practices minimizes any risk.
Step-by-Step: Safe Vinegar Cleaning Process
This method applies to most drip-style coffee makers (e.g., Mr. Coffee, Cuisinart, Hamilton Beach). Always check your user manual first, as some high-end models (like certain Keurig or Miele units) recommend proprietary descaling solutions.
- Unplug the machine and remove all removable parts: carafe, filter basket, and water reservoir lid.
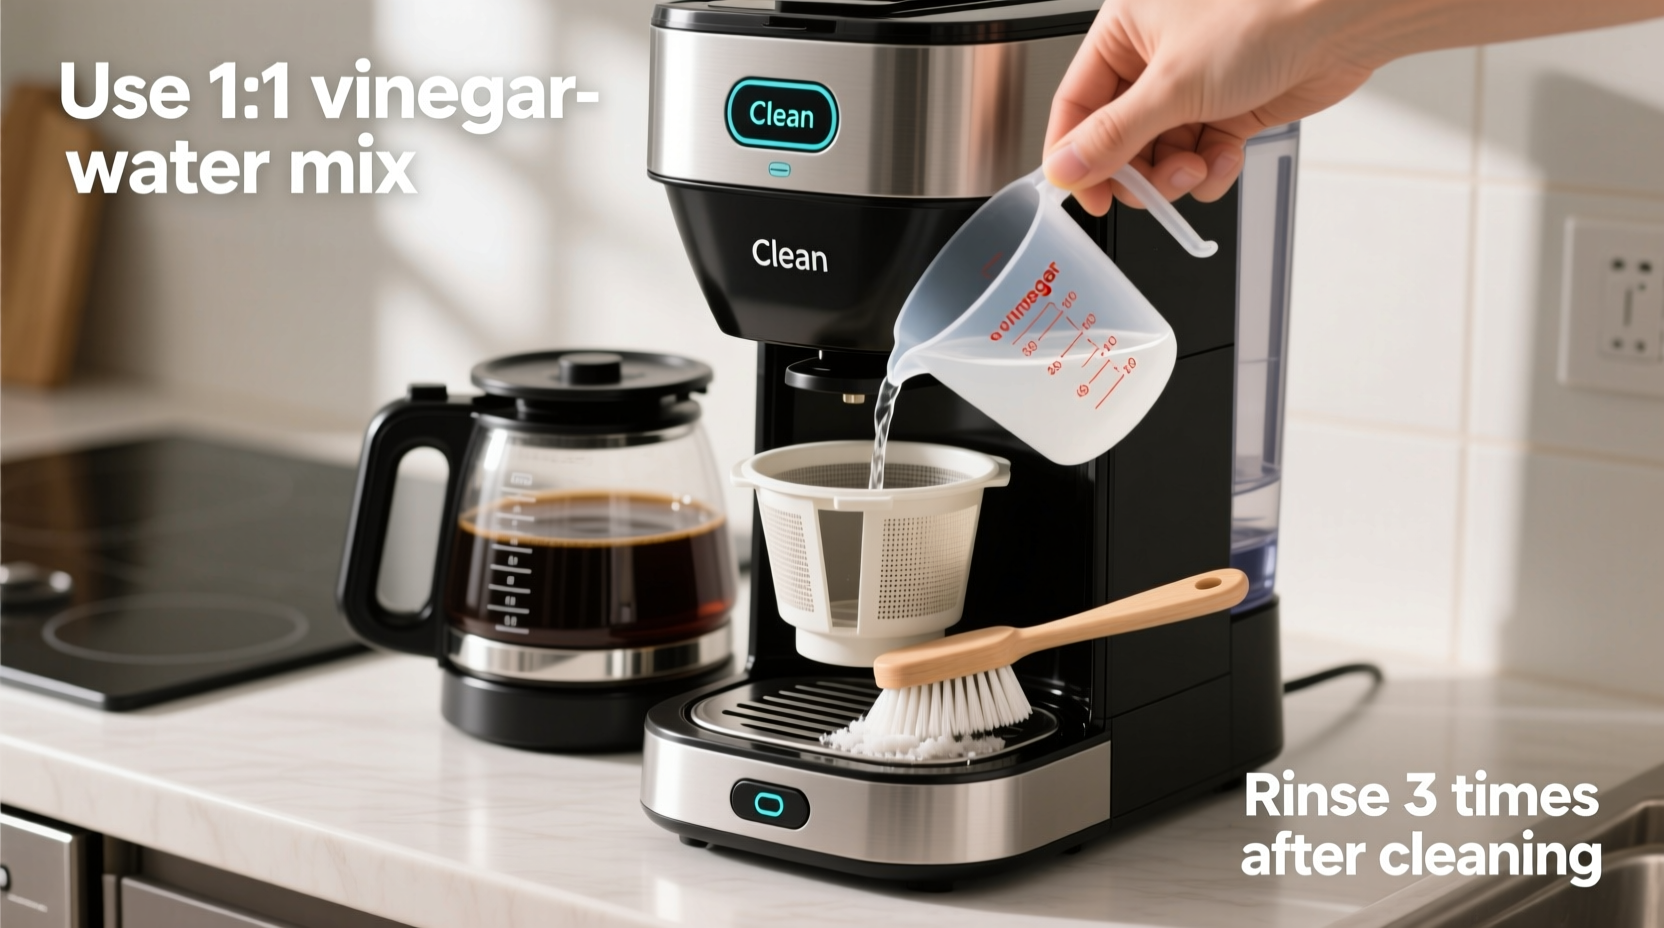
- Prepare the cleaning solution: Mix equal parts white distilled vinegar and cold water. For a standard 12-cup machine, use 30 oz vinegar + 30 oz water. Never use undiluted vinegar.
- Fill the reservoir with the vinegar-water mix. Do not add coffee grounds.
- Start a brew cycle, but stop it halfway (after about 50% of the liquid has passed through). Unplug the machine and let the solution sit for 30 minutes. This allows the vinegar to break down scale without prolonged exposure to heated components.
- Resume the cycle after waiting. Plug back in and complete the brew process.
- Discard the vinegar solution and rinse the carafe thoroughly.
- Run 3–4 full cycles of fresh cold water through the machine to flush out any vinegar residue. Taste the last cycle’s output—if you detect any sourness, run one more rinse.
- Clean removable parts separately: Wash the carafe, filter basket, and lid with warm soapy water. Use a soft brush to scrub away coffee stains. Avoid abrasive pads.
- Wipe the exterior with a damp cloth. Dry all parts before reassembling.
- Reassemble and test with a normal coffee batch to ensure no lingering odor or taste.
Do’s and Don’ts: Protecting Seals and Internal Components
To keep rubber seals, gaskets, and plastic joints intact, follow these guidelines. The integrity of these parts ensures leak-free operation and consistent brewing pressure.
| Do’s | Don’ts |
|---|---|
| Use a 1:1 vinegar-to-water ratio | Never use full-strength vinegar |
| Limited soak time (max 30–60 minutes) | Leave vinegar in the tank overnight |
| Rinse thoroughly with multiple water cycles | Skip post-clean water runs |
| Clean every 1–3 months depending on usage | Descale weekly with vinegar |
| Inspect seals monthly for cracks or warping | Use bleach or citrus-based cleaners |
| Hand-wash removable rubber gaskets gently | Scrub seals with steel wool or harsh brushes |
Seals are typically made from food-grade silicone or EPDM rubber, both of which resist mild acids when exposure is brief. However, repeated aggressive treatment will shorten their lifespan. Regular inspection helps catch degradation early.
Real Example: How Sarah Saved Her 5-Year-Old Brewer
Sarah, a remote worker from Portland, relied on her drip coffee maker for two pots a day. After noticing slower brewing times and a faint metallic aftertaste, she considered replacing the unit. Instead, she decided to try a vinegar clean based on a friend’s suggestion—but cautiously.
She followed the 1:1 vinegar-water ratio, ran a half-brew cycle, and let it sit for 30 minutes. After completing the cycle, she performed five rinse cycles with fresh water. To her surprise, the flow rate improved immediately, and the next pot tasted cleaner and brighter.
When disassembling the machine, she noticed the rubber seal around the shower head was slightly cloudy. She removed it, soaked it in warm soapy water for 10 minutes, and dried it before reinserting. Six months later, the machine still performs like new—all without costly repairs or replacement.
Her takeaway: “Cleaning isn’t just about removing gunk—it’s about preserving the machine’s entire system, including the little rubber parts you never see.”
Alternative Cleaning Methods and When to Use Them
While vinegar is effective for most users, alternatives exist for those concerned about smell, material sensitivity, or manufacturer restrictions.
- Citric Acid Solution: Mix 1–2 tablespoons of food-grade citric acid per 32 oz of water. Less odor than vinegar and equally effective at dissolving scale. Safe for most machines and gentle on seals.
- Commercial Descalers: Products like Dezcal or Urnex are formulated specifically for coffee equipment. They often include corrosion inhibitors that protect metal and rubber components. Ideal for frequent descaling.
- Baking Soda Paste: For external stains or sticky residues, a paste of baking soda and water can be gently applied with a soft cloth. Not suitable for internal descaling.
Note: Never mix vinegar with baking soda or bleach in the same cleaning session. Combining vinegar and bleach produces toxic chlorine gas. Even mixing vinegar and baking soda creates foam that can clog narrow tubing.
Tip: If you dislike the smell of vinegar, add a tablespoon of lemon juice to the final rinse cycle to neutralize odors naturally.Frequently Asked Questions
Can vinegar damage the heating element in my coffee maker?
Not if used properly. The brief exposure during a standard cleaning cycle won’t harm stainless steel or aluminum heating elements. However, prolonged soaking (e.g., leaving vinegar in the reservoir for hours) may contribute to corrosion over time. Always follow the recommended dwell time and rinse thoroughly.
How often should I clean my coffee maker with vinegar?
Every 1 to 3 months, depending on usage and water hardness. If you use hard water or brew multiple times daily, clean monthly. Soft water areas may only require cleaning every 2–3 months. Visible scale, slow brewing, or off-tastes are signs it’s time to descale.
Is there a way to reduce vinegar smell after cleaning?
Yes. Run extra rinse cycles with plain water—typically 3 to 5. For stubborn odor, brew a cycle with water and a tablespoon of baking soda, followed by one final rinse. Alternatively, leave the carafe and reservoir open overnight to air out.
Maintenance Checklist: Keep Your Machine in Top Shape
Follow this checklist monthly to extend your coffee maker’s life and prevent buildup:
- ✅ Wipe exterior with a damp cloth weekly
- ✅ Wash carafe and filter basket after each use
- ✅ Deep clean with vinegar or descaler every 1–3 months
- ✅ Inspect rubber seals for brittleness or deformation
- ✅ Replace water filters (if applicable) as scheduled
- ✅ Use filtered water to minimize mineral deposits
- ✅ Descale immediately if brewing slows or steam smells odd
- ✅ Store with all parts dry to prevent mold or mildew
Consistent care prevents larger issues. A well-maintained coffee maker not only tastes better but lasts years longer. Most failures stem from neglect—not age.
Final Thoughts: Clean Smarter, Not Harder
Cleaning your coffee maker with vinegar doesn’t have to be risky. By diluting the solution, limiting exposure time, and rinsing thoroughly, you protect delicate seals while removing harmful buildup. The goal isn’t to eliminate vinegar—it’s to use it wisely. Think of it as routine maintenance, not emergency repair.
Your coffee maker works hard for you. In return, it deserves regular attention and thoughtful care. With the right approach, you’ll enjoy richer flavor, faster brewing, and a machine that serves you reliably for years. No need for expensive replacements or chemical-laden products. Simple, safe, and effective—that’s the promise of proper vinegar cleaning.
💬 Have a favorite coffee maker cleaning hack? Share your experience below and help others brew better, safer cups every morning.