There’s something timeless and magical about Mickey Mouse ears. Instantly recognizable and universally loved, they’ve become a symbol of joy, imagination, and adventure. While you can buy them at theme parks or online, creating your own personalized pair at home adds a unique touch that reflects your style, occasion, or personality. Whether you're preparing for a birthday party, a Disney-themed event, or just want a fun craft project with kids, this guide walks you through every stage—from selecting materials to adding dazzling embellishments.
With basic supplies and a little creativity, you can design a headband that stands out, lasts longer, and carries sentimental value. More than just an accessory, handmade Mickey ears can become keepsakes, gifts, or even part of a costume rotation for holidays and special events.
Gathering Your Materials: What You’ll Need
The beauty of this DIY project lies in its simplicity. Most materials are affordable, reusable, or already in your craft drawer. Below is a comprehensive list of essentials and optional upgrades based on your desired look.
| Item | Purpose | Alternative Options |
|---|---|---|
| Felt (black) | Main ear structure | Foam sheets, fleece, or EVA craft foam |
| Elastic band or plastic headband | Base for attaching ears | Hair clip, ribbon tie, or wire frame |
| Hot glue gun & glue sticks | Secure components | E6000 craft adhesive (for heat-sensitive materials) |
| Scissors & ruler | Cutting and measuring | Rotary cutter and cutting mat |
| Decorative elements | Personalization | Rhinestones, fabric paint, sequins, patches, bows |
Step-by-Step Construction Process
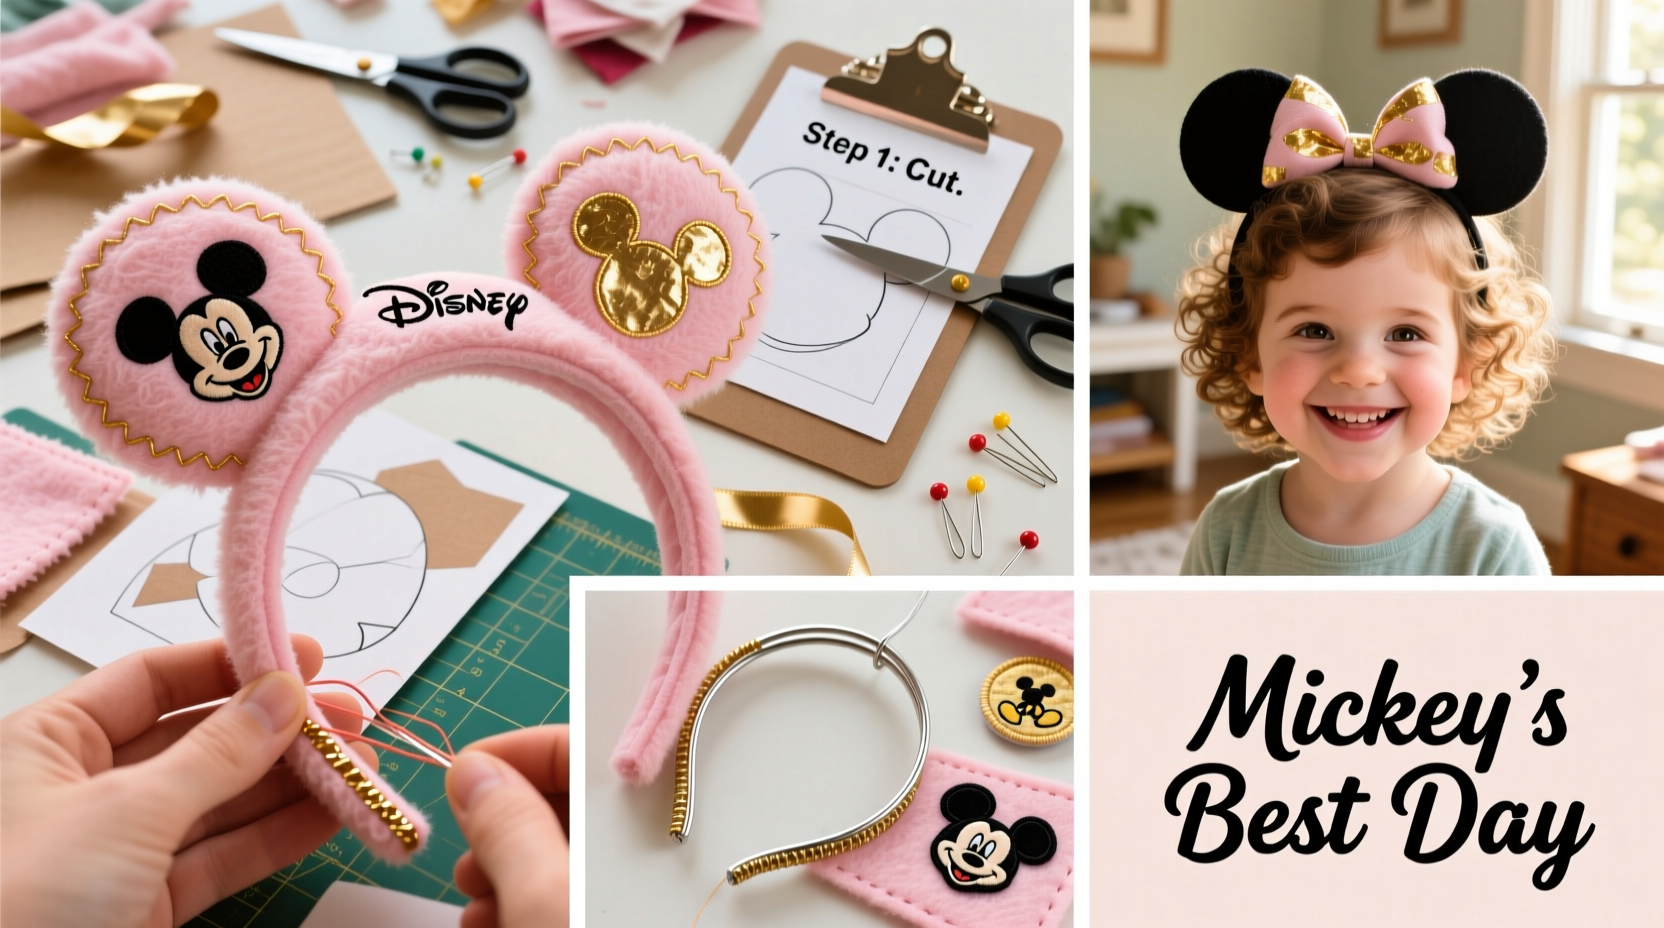
Follow this detailed timeline to assemble your Mickey ears with precision and flair. Allow 30–60 minutes depending on complexity and decoration level.
- Trace and cut the ear shapes: Draw two identical circles, approximately 4 inches in diameter, on black felt. For Mickey’s classic silhouette, add a third smaller circle (about 2.5 inches) slightly overlapping each large one to form the side ears. Cut carefully along the lines.
- Create layered pairs: Stack two sets of three-circle units (six pieces total) to give thickness and durability. Glue the layers together using small dots of hot glue around the edges and center. Let dry completely.
- Prepare the band: If using a plastic headband, wrap it with matching black or colored ribbon to conceal the base and add polish. Secure ends with glue. For elastic, measure it to fit snugly around the head (typically 20–22 inches), then knot or sew the ends.
- Attach the ears: Position the large central circle of each ear set at the top sides of the headband, about 3–4 inches apart. Use generous dabs of hot glue underneath and press firmly. Hold for 30 seconds until set. Reinforce from underneath if needed.
- Reinforce structure: Insert thin cardboard or craft foam between layers before gluing for extra rigidity, especially if using lightweight felt.
Timeline Summary
- Prep (10 min): Gather tools, choose colors, sketch design.
- Cutting (10 min): Trace and cut all ear pieces.
- Assembly (15 min): Layer and glue ears, attach to band.
- Decoration (15–30 min): Add personal touches.
Personalization Ideas That Make It Unique
This is where your creativity shines. The standard black ears are iconic, but customizing them transforms them into wearable art.
- Color themes: Match school colors, wedding palettes, or holiday schemes (e.g., red and green for Christmas, pastels for Easter).
- Bows and ribbons: Attach a satin bow between the ears or on one side. Try polka dots, stripes, or glitter fabric.
- Name or initials: Use iron-on letters, fabric markers, or embroidered patches to add names—ideal for children’s parties.
- Themed motifs: Add miniature character pins, tiny crowns for princess versions, or star-shaped rhinestones for a celestial twist.
- Lights and motion: Advanced crafters can embed micro LED string lights inside translucent ears made from craft foam for nighttime glow effects.
Real Example: Emma’s Birthday Surprise
Emma, a 7-year-old Disney enthusiast, wanted to celebrate her birthday with a “Princess Mickey” theme. Her mom used pink felt for the main ears, added silver glitter trim, and glued a small tiara-style crown across the top center. Between the ears, she attached a white satin bow with “Emma” embroidered in cursive. The headband became the centerpiece of her outfit and was later displayed in her room as a keepsake. Guests were so inspired that they took photos with it, and several parents asked for the tutorial to recreate it for their own kids.
This example shows how a simple craft can carry emotional value and spark joy beyond the moment.
Expert Insight: Why Handmade Matters
“Handcrafted accessories engage both imagination and motor skills, especially in children. A personalized item like Mickey ears fosters pride and connection far more than a store-bought version.” — Dr. Laura Mendez, Child Development & Creative Arts Specialist
Creating something by hand builds confidence, encourages problem-solving, and strengthens family bonds when done together. It also allows for inclusivity—adjust sizes for toddlers, seniors, or sensitive skin by using softer bands or hypoallergenic materials.
Dos and Don’ts for Long-Lasting Mickey Ears
| Do | Don’t |
|---|---|
| Use fabric glue for delicate embellishments | Overload with heavy decorations |
| Let glue dry fully before handling | Wash in machine unless materials specify otherwise |
| Store flat in a box or pouch | Leave near heat sources (can warp foam) |
| Involve kids in safe steps (cutting paper templates, choosing colors) | Use sharp tools without supervision |
FAQ
Can I make Mickey ears without a hot glue gun?
Yes. Use strong fabric adhesive like Aleene’s or E6000. These require longer drying time (up to 24 hours) but provide durable bonds. Avoid school glue or rubber cement—they lack strength.
How do I clean homemade Mickey ears?
Spot clean with a damp cloth and mild soap. Do not submerge in water, especially if using cardboard inserts or electronic elements. Let air dry completely before storing.
Are these suitable for toddlers?
Yes, with modifications. Replace small, loose decorations with stitched-on fabric shapes. Use soft elastic instead of rigid bands, and ensure the fit is secure but not tight. Always supervise young children during wear.
Checklist: Craft Your Perfect Pair
- ☐ Choose base color and theme
- ☐ Gather materials and tools
- ☐ Cut three-circle units from felt or foam
- ☐ Layer and glue ear pieces together
- ☐ Prepare and cover the headband
- ☐ Attach ears securely with hot glue
- ☐ Add personalization (bows, names, sparkles)
- ☐ Test fit and reinforce if needed
- ☐ Store safely or gift in a decorative box
Bring Magic to Life—one Stitch at a Time
Creating personalized Mickey Mouse ears at home isn’t just about replicating an icon—it’s about infusing it with meaning, memory, and individuality. From the first snip of felt to the final sparkle, each step is an opportunity to express yourself and share joy with others. Whether you’re crafting solo, bonding with a child, or designing a themed ensemble, the result is more than an accessory: it’s a token of creativity and love.
💬 Did you make your own Mickey ears? Share your design ideas, challenges, or photos in the comments below—we’d love to see your magic come to life!