Types of Junior Microscopes
A junior microscope is specifically designed for young learners, students, and educational environments, combining ease of use with durable construction. While they offer a wide range of capabilities similar to adult models, junior microscopes are optimized for safety, simplicity, and engagement. Key differences include simplified focus mechanisms, lower magnification settings, and reinforced components to withstand frequent use in classrooms or at home.
These microscopes play a vital role in sparking scientific curiosity, helping children explore the microscopic world through hands-on learning. Below are the most common types of junior microscopes, each suited to different educational needs and applications.
Stereo Microscope
Also known as a dissecting microscope, this model provides a three-dimensional view of specimens using two separate optical paths—one for each eye. It operates at lower magnifications (typically 10x–40x), making it ideal for observing surface details of larger, solid objects.
Advantages
- 3D depth perception for better spatial understanding
- Can view opaque and solid objects (no slide preparation needed)
- User-friendly for beginners and younger students
- Excellent for dissection, insect examination, and small object inspection
Limitations
- Limited magnification compared to compound models
- Larger footprint requires more desk space
- Not suitable for viewing cells or microorganisms
Best for: Elementary science projects, nature exploration, and hands-on dissection activities
Monocular Compound Microscope
This classic design features a single eyepiece and uses multiple objective lenses to achieve high magnification (up to 1000x). Light passes through thin, translucent specimens mounted on slides, allowing detailed observation of cellular structures.
Advantages
- High magnification for studying cells, bacteria, and tissues
- Affordable and widely available for schools
- Durable construction suitable for classroom use
- Teaches fundamental microscopy skills
Limitations
- Requires prepared slides and staining for best results
- Single eyepiece may be less comfortable for extended use
- Not suitable for 3D or opaque objects
Best for: Middle school biology, cell studies, and introductory life science labs
Digital Microscope
Equipped with a built-in digital camera, this microscope displays images directly on a screen or computer. It eliminates the need to look through an eyepiece, making it highly accessible for group learning and digital documentation.
Advantages
- No eyepiece required—ideal for young children or those with vision challenges
- Real-time image and video capture for reports and presentations
- Easy to share findings with classmates or teachers
- Often includes zoom, measurement, and annotation software
Limitations
- Lower optical magnification than high-end compound models
- Dependent on external devices (computer/tablet)
- Battery or power supply needed for operation
Best for: Classroom demonstrations, STEM projects, and digital science portfolios
Biological Compound Microscope (Junior)
A simplified version of the standard biological microscope, tailored for young learners. It focuses on observing living organisms and biological samples like pond water, blood smears, and plant cells using transmitted light and high-magnification lenses.
Advantages
- Perfect for studying microorganisms and biological processes
- Encourages scientific inquiry and lab skills
- Often includes pre-prepared slides and safety features
- Supports curriculum-based learning in life sciences
Limitations
- Requires proper slide preparation and handling
- Needs external lighting or built-in LED care
- More complex than stereo models for very young users
Best for: Junior high biology, science fairs, and home education with a focus on life sciences
USB Microscope
A portable, plug-and-play microscope that connects directly to a computer or tablet via USB. It functions like a high-powered webcam, allowing users to inspect small objects with digital zoom and real-time viewing.
Advantages
- Extremely portable and easy to set up
- Immediate viewing on screen—great for group activities
- Enables video recording, time-lapse, and image analysis
- Ideal for inspecting electronics, fabrics, plants, and insects
Limitations
- Limited magnification range (typically 20x–200x)
- Image quality depends on sensor resolution
- Requires a compatible device and software
Best for: Quick inspections, tech projects, and interactive learning with digital tools
| Type | Magnification Range | Best For | Age Suitability | Educational Use |
|---|---|---|---|---|
| Stereo Microscope | 10x – 40x | 3D objects, dissection, insects | 6–12 years | Elementary science, nature studies |
| Monocular Compound | 40x – 1000x | Cells, bacteria, thin slides | 10–16 years | Middle school biology |
| Digital Microscope | 20x – 200x (digital zoom) | Screen-based learning, documentation | 8–14 years | STEM projects, classroom sharing |
| Biological Compound | 40x – 1000x | Living specimens, lab work | 11–16 years | Life science curriculum |
| USB Microscope | 20x – 200x | Electronics, fabrics, quick checks | 7–15 years | Digital exploration, tech integration |
Expert Tip: For younger children (ages 6–10), start with a stereo or digital microscope to build interest and confidence. Transition to compound models around ages 10–12 when they're ready for more advanced biological studies and slide preparation.
Materials & Design of Microscope Junior
The junior microscope may be a small, simple instrument, but it is engineered with carefully selected materials and intelligent design principles to deliver reliable optical performance. Despite its compact size, this microscope leverages durable construction and precision optics to achieve effective magnification—making it ideal for educational use and early scientific exploration.
Frame and Body Materials
Metal Alloys for Durability
The frame and body of most junior microscopes are constructed from high-tensile-strength metal alloys, such as aluminum or zinc die-cast materials. These metals provide excellent rigidity, minimizing vibrations and misalignment during use, while still allowing slight flexibility to absorb minor impacts. This structural stability is essential for maintaining focus and optical alignment, especially in classroom environments.
Plastic and Composite Enhancements
To cater to younger users and reduce manufacturing costs, many models incorporate impact-resistant plastics in non-critical structural areas. These polymers withstand drops and rough handling—common with student use—without compromising safety. Higher-end junior microscopes may include carbon fiber laminates in key structural zones to further enhance strength-to-weight ratio, improving portability and longevity without adding bulk.
Lenses: Optical Precision and Clarity
At the heart of every microscope are its lenses, which determine image clarity, resolution, and magnification. Junior microscopes typically use optical-grade glass for both objective and eyepiece lenses due to its superior transparency and minimal chromatic aberration. Glass lenses transmit light efficiently and resist scratching, ensuring consistent image quality over time.
However, budget-friendly models—particularly those manufactured in China—may employ molded plastic convex lenses to reduce production costs. While these are less optically precise than glass, they are sufficient for basic educational purposes. To enhance performance, many lenses feature anti-reflective coatings that minimize glare and increase light transmission, especially beneficial at lower magnifications where ambient lighting is limited.
Iris Diaphragm and Condenser System
Metal Iris Diaphragm
The iris diaphragm, resembling the pupil of an eye, is typically made from thin, overlapping metal blades that smoothly open and close to regulate the amount of light reaching the specimen. This metal construction ensures durability and precise control, allowing users to optimize contrast and resolution. Proper adjustment of the diaphragm enhances image detail, particularly at higher magnifications.
Condenser Lens Assembly
The condenser, usually housed in a metal casing, focuses light from the source onto the specimen for even illumination. It often includes a simple lens system to concentrate light effectively. While advanced microscopes feature adjustable condensers, many junior models come with a fixed or basic condenser—or omit it entirely—to keep design and cost simple. Even in simplified forms, the condenser plays a vital role in improving image brightness and clarity.
Stage and Objective Lenses
The stage—the platform where slides are placed—is commonly made of reinforced glass or coated metal to resist scratches, chemical spills, and daily wear. Its smooth, flat surface ensures slide stability during observation. Integrated metal clips securely hold slides in place, preventing movement during focusing.
Objective lenses are mounted on a rotating nosepiece and made from optical glass with varying magnification levels (typically 4x, 10x, and 40x). This allows users to switch between low and high power seamlessly. Junior microscopes usually include fewer objectives than full biological models, focusing on essential magnifications suitable for beginners. The nosepiece is precision-machined to maintain alignment, ensuring parfocality—meaning the specimen remains in approximate focus when changing lenses.
Eyepiece Lenses: Comfort and Clarity
Eyepieces (or oculars) are crafted from the same optical-grade glass as objectives and often include corrective elements to reduce chromatic and spherical aberrations. These corrections result in sharper, clearer images with accurate color representation. Most junior microscopes feature 10x magnification eyepieces, balancing detail with ease of use.
Lower magnification options (e.g., 5x or 7x) are sometimes included to protect young eyes and simplify focusing, making the learning process less intimidating. The eyepiece tube is designed for ergonomic viewing, often with rubber eyecups to reduce glare and improve comfort during extended use.
LED Light Source: Efficiency and Longevity
Modern junior microscopes are equipped with energy-efficient LED illumination systems instead of traditional incandescent or fluorescent bulbs. LEDs produce bright, cool light with minimal heat output, preventing damage to live specimens and reducing the risk of burns during student use.
The LED’s long operational lifespan—often exceeding 50,000 hours—significantly reduces maintenance and replacement costs, making it ideal for schools and home laboratories. Brightness is typically adjustable via a built-in rheostat or multi-level switch, and when combined with the iris diaphragm, allows fine-tuning of illumination for optimal contrast across all magnification levels.
| Component | Common Materials | Function & Benefits |
|---|---|---|
| Frame & Body | Die-cast metal, reinforced plastic, carbon fiber (premium) | Ensures structural rigidity, shock resistance, and long-term durability |
| Lenses (Objective/Eyepiece) | Optical glass (standard), plastic (budget) | Provides clear magnification with minimal distortion; coated for better light transmission |
| Iris Diaphragm | Thin metal blades | Controls light intensity and improves image contrast |
| Condenser | Metal housing with glass lens | Focusses light evenly on the specimen for brighter, clearer images |
| Stage | Tempered glass or coated metal | Resists scratches and securely holds slides in place |
| Light Source | LED (modern), fluorescent (older models) | Energy-efficient, long-lasting, cool operation, adjustable brightness |
Important: When selecting a junior microscope, prioritize optical glass lenses and metal construction for critical components. Avoid models with all-plastic optics, as they degrade image quality and hinder learning. Regular cleaning of lenses and mechanical parts ensures optimal performance and extends the microscope’s lifespan. Always use appropriate lighting settings to avoid eye strain in young users.
How To Choose a Junior Microscope
Selecting the right junior microscope is an important educational investment that can spark a lifelong interest in science. A well-chosen microscope should be both engaging and functional, tailored to the child’s developmental stage, curiosity level, and intended use. Unlike professional models, junior microscopes are designed with safety, simplicity, and durability in mind—making them ideal for young learners exploring the microscopic world for the first time.
When helping parents, educators, or gift-givers choose a microscope for children, it's essential to consider several key factors to ensure the instrument is not only safe and durable but also capable of delivering meaningful learning experiences.
Age Group and Skill Level
The child’s age and prior experience with scientific tools are critical in determining the appropriate type of microscope. Younger children benefit from intuitive, visually engaging instruments, while older students may require more advanced features aligned with school curricula.
- Preschoolers (ages 3–6): Opt for simple, rugged stereoscopic (dissecting) microscopes with low magnification (2x–20x) and large focus knobs. These allow kids to explore everyday objects like leaves, coins, or insects in 3D without needing slide preparation.
- Elementary students (ages 7–10): Choose beginner-friendly compound microscopes with magnifications up to 400x. Look for models with pre-focused slides and color-coded parts to reduce confusion.
- Middle school and up (ages 11+): Students ready for deeper exploration can use advanced compound or digital microscopes with magnifications up to 1000x, ideal for viewing bacteria, cells, and prepared slides.
- Educational alignment: Many junior microscopes are designed to support STEM curricula, including lesson plans, experiment guides, and alignment with science standards.
Key consideration: Match complexity to cognitive development—too advanced can frustrate, too basic may disengage.
Type of Microscope
Different types of microscopes serve distinct educational purposes. Understanding their applications helps match the tool to the child’s interests—whether biology, engineering, or general curiosity.
- Stereo (Dissecting) Microscopes: Provide 3D viewing at low magnification (5x–50x), perfect for observing whole objects like bugs, plants, or circuit boards. Ideal for hands-on activities and dissections.
- Compound Microscopes: Use high magnification (40x–1000x) to examine thin specimens on slides, such as cheek cells, pond water, or bacteria. Best for life science exploration.
- Digital/USB Microscopes: Connect to computers or tablets, allowing image capture, video recording, and screen sharing. Great for school projects, presentations, and collaborative learning.
- Hybrid Models: Some microscopes combine stereo and compound functions or include built-in cameras for versatility.
Pro tip: For multi-age households, consider a digital microscope with zoom and recording features to grow with the child’s skill level.
Build Quality and Durability
Children are naturally curious—and sometimes rough—so the microscope must withstand drops, bumps, and frequent handling. Prioritize sturdiness without sacrificing functionality.
- Material: High-impact plastic bodies are lighter and more resistant to breakage than metal or glass, making them safer for younger users.
- Optics: While glass lenses offer superior clarity, they require adult supervision. Plastic lenses are more durable but may distort at high magnifications.
- Base and Stage: A wide, heavy base prevents tipping. A metal stage with stage clips ensures slides stay in place during viewing.
- Mechanical Components: Smooth, oversized focus knobs and a robust arm allow easy adjustments even for small hands.
Critical factor: Look for models with protective cases or storage compartments to extend lifespan.
Magnification Power
Magnification determines what a child can see, but higher isn’t always better. Excessive magnification without quality optics leads to blurry images and frustration.
- Stereo Microscopes: Typically offer 10x–40x magnification—ideal for surface details and 3D structures.
- Compound Microscopes: Range from 40x (low power) to 1000x (oil immersion), enabling study of microorganisms and cellular structures.
- Multi-Objective Lenses: Models with 3–4 objective lenses (e.g., 4x, 10x, 40x, 100x) provide flexibility across experiments.
- Digital Zoom: Some USB microscopes offer digital zoom up to 500x, though optical magnification is more reliable for clarity.
Technical note: Ensure the microscope includes a mechanical stage or coarse/fine focus controls for precise viewing at high magnifications.
Ease of Use and Features
A junior microscope should be intuitive and engaging. The easier it is to use, the more likely a child will return to it independently.
- Illumination: LED lights are energy-efficient and long-lasting. Top and bottom lighting allow viewing of both opaque and transparent specimens.
- Focus Mechanism: Large, easy-turn knobs with coarse and fine adjustment help kids achieve clear images without frustration.
- Digital Connectivity: USB or Wi-Fi-enabled models let kids save images, create reports, or share discoveries with classmates.
- Accessories: Starter kits with pre-made slides, blank slides, cover slips, stain bottles, tweezers, and a user manual enhance the learning experience.
- Ergonomics: Adjustable eyepieces and a comfortable viewing angle reduce strain during extended use.
Smart choice: Look for microscopes with interactive apps or AR features that turn observation into an immersive experience.
Additional Considerations
Beyond core functionality, several factors influence long-term satisfaction and educational value.
- Warranty & Support: Reputable brands often offer 1–3 year warranties and customer support for troubleshooting.
- Noise & Vibration: Quiet LED lighting and stable construction prevent distractions during observation.
- Battery vs. AC Power: Battery-powered models offer portability; AC adapters ensure consistent brightness for longer sessions.
- Educational Resources: Some brands include experiment books, online video tutorials, or curriculum-aligned activities.
- Storage & Portability: Compact designs with carrying handles make it easy to move or store the microscope safely.
Time-saving tip: Choose a complete kit with everything needed to start exploring right out of the box.
Professional Recommendation: For most families, a mid-range compound microscope with 40x–400x magnification, LED illumination, and a starter kit offers the best balance of educational value, durability, and ease of use. If the child shows a strong interest in technology or presentation-based learning, consider upgrading to a digital model. Always supervise younger children during use, especially when handling glass slides or fine focus controls.
| Child Profile | Recommended Microscope Type | Magnification Range | Key Features |
|---|---|---|---|
| Preschooler (Curious Explorer) | Stereo Dissecting Microscope | 10x–20x | Large focus knob, top lighting, plastic body, no slides needed |
| Elementary Student (Science Fair Ready) | Beginner Compound Microscope | 40x–400x | LED illumination, 3 objectives, prepared slides included |
| Middle Schooler (Biology Enthusiast) | Advanced Compound Microscope | 40x–1000x | Mechanical stage, oil immersion lens, fine focus, glass optics |
| Teen or Tech-Savvy Learner | Digital/USB Microscope | 50x–500x (optical) | Connects to PC/tablet, image capture, zoom, AR-compatible |
Final Tips for Choosing the Best Junior Microscope
- Test Before Buying: If possible, let the child try the microscope to assess comfort and ease of use.
- Avoid "Toy" Models: Extremely cheap microscopes often have poor optics and limited functionality—stick to reputable educational brands.
- Encourage Exploration: Pair the microscope with nature walks, pond water collection, or DIY slide-making kits to keep learning fun.
- Check School Requirements: Some science classes specify microscope types or magnification levels for lab work.
- Consider Future Use: A slightly more advanced model can grow with the child, offering better long-term value.
Frequently Asked Questions About Junior Microscopes
Introducing children to the world of microscopy can spark a lifelong interest in science and discovery. Junior microscopes are specially designed to be safe, user-friendly, and educational for young learners. This comprehensive Q&A guide answers the most common questions parents, educators, and students have about using and maintaining junior microscopes effectively.
Quick Tip: Always supervise young children during microscope use to ensure proper handling and to enhance the learning experience through guided exploration.
Q1: What specimens can be viewed using junior microscopes?
A1: Junior microscopes come in two main types—compound and stereoscopic (also called dissecting)—each suited for different kinds of specimens:
- Compound microscopes are ideal for viewing very small, thin, and translucent specimens. Common examples include:
- Blood cells on a prepared slide
- Bacteria cultures (under supervision)
- Onion skin cells (a classic classroom experiment)
- Pond water microorganisms like paramecia or amoebas
- Plant and animal tissue sections
- Stereoscopic microscopes provide a 3D view and are better for larger, solid objects such as:
- Small insects (e.g., ants or beetles)
- Plant parts like leaves, flowers, or seeds
- Coins, fabrics, or circuit boards for hobby exploration
- Fossils or mineral samples
Most junior compound models offer magnification between 40x and 400x, while stereo models typically range from 10x to 40x, making them perfect for hands-on learning.
Q2: Is it possible to transfer images from a junior microscope to a computer?
A2: Yes, many modern junior microscopes are equipped with digital capabilities that allow seamless image and video transfer to a computer. Here’s how it works:
- Digital microscopes feature a built-in camera and connect via USB or Wi-Fi to a computer, tablet, or monitor.
- The live image is displayed in real-time on the screen, enabling group observation—ideal for classrooms or family learning.
- Images and videos can be captured, saved, and shared for science reports, presentations, or personal portfolios.
- Some models come with software that allows measurement tools, image annotation, and time-lapse photography.
This functionality enhances documentation, encourages scientific recording, and supports STEM education standards by integrating technology with biology and observation skills.
Q3: At what age is it appropriate to start using a microscope for children?
A3: Children can begin exploring with microscopes as early as 5 to 6 years old, depending on the microscope type and level of supervision. However, age appropriateness depends on several factors:
- Ages 5–8: Best suited for rugged, easy-to-use digital or stereo microscopes with large focus knobs and LED lighting. These models minimize frustration and maximize engagement.
- Ages 9–12: Can handle compound microscopes with higher magnification, especially if they include prepared slides and guided experiment kits.
- Safety & Design: Avoid models with fragile glass components or complex focusing mechanisms for younger users. Look for shatterproof lenses, low-voltage lighting, and durable construction.
Starting early fosters curiosity, but choosing the right microscope for the child’s developmental stage is crucial to maintaining a positive and educational experience.
Important Note: A poorly matched microscope can discourage a child from science. Always select a model with intuitive controls, clear visuals, and engaging accessories like sample kits or activity guides.
Q4: What should be done to maintain a junior microscope?
A4: Proper maintenance ensures longevity and consistent performance. Follow these best practices for care:
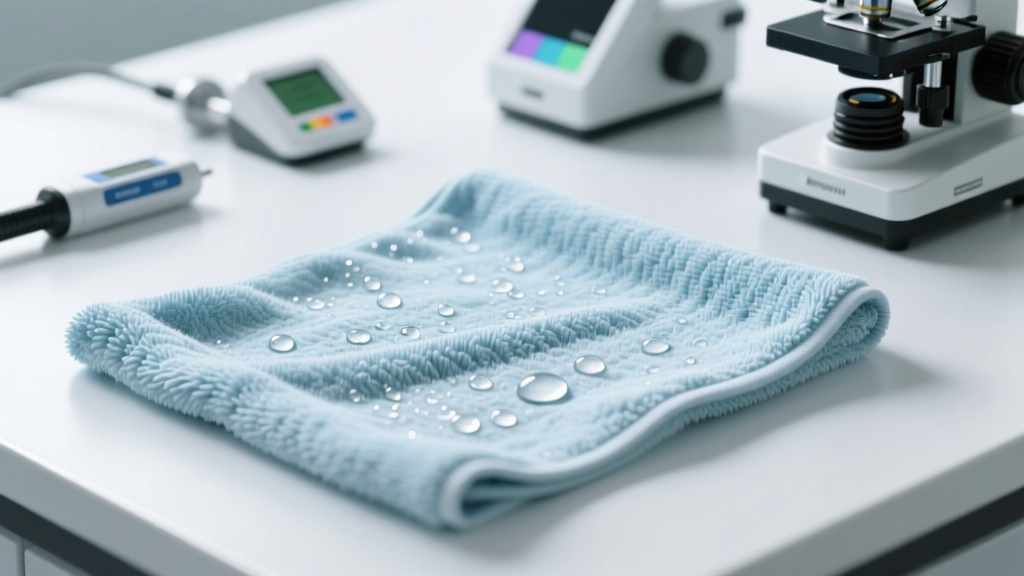
- Cleaning: After each use, gently wipe the exterior with a soft, dry cloth. For lenses, use only lens paper or a microfiber cloth designed for optics—never paper towels or clothing, as they can scratch the surface.
- Storage: Keep the microscope in a cool, dry place. Always cover it with a dust cover or store it in a protective case to prevent dust, moisture, and insect damage.
- Handling: Teach children to carry the microscope with both hands—one on the arm and one supporting the base—to avoid drops or misalignment.
- Lighting: Turn off LED lights when not in use to extend battery life. Replace batteries promptly to avoid corrosion.
- Monthly Check: Inspect for loose parts, clean the stage, and verify that all knobs operate smoothly.
Regular maintenance not only preserves image quality but also instills responsibility and respect for scientific tools.
Q5: How is a digital microscope different from a classical optical microscope?
A5: While both types magnify small objects, digital and optical microscopes differ significantly in design, use, and benefits:
| Feature | Digital Microscope | Classical Optical Microscope |
|---|---|---|
| Viewing Method | Images displayed on a computer screen or monitor; no eyepiece required | Viewed directly through eyepieces (monocular or binocular) |
| Image Sharing | Easy to share live feeds, capture photos, and record videos | Limited to one viewer at a time unless equipped with a camera adapter |
| User Comfort | Reduces eye strain; ideal for group learning and children with glasses | Requires proper eye alignment; may cause discomfort during prolonged use |
| Magnification | Typically 10x–200x on screen (can be digitally enhanced) | 40x–1000x with objective lenses; higher optical resolution |
| Portability & Setup | Often plug-and-play via USB; great for classrooms and home use | Standalone device; does not require a computer |
| Educational Use | Excellent for documentation, reports, and interactive learning | Teaches traditional microscopy skills and optical principles |
Digital microscopes have revolutionized science education by making observation more accessible and collaborative. However, optical microscopes remain essential for teaching fundamental biology and developing fine motor and focusing skills.
Expert Tip: For a well-rounded experience, consider starting with a digital microscope for engagement and later introducing an optical model to deepen understanding of microscopy techniques and optics.
Additional Recommendations for Parents and Educators
- Begin with prepared slides to ensure quick success and clear images.
- Encourage kids to keep a science journal with sketches or printed images from their observations.
- Use themed exploration kits (e.g., “Nature Detective” or “Mini Beasts”) to maintain interest.
- Pair microscope activities with age-appropriate books or videos about cells, insects, or the microscopic world.
- Upgrade to more advanced models as the child’s skills and interest grow.
Microscopy is more than a science tool—it’s a gateway to curiosity, critical thinking, and wonder. With the right guidance and equipment, every child can become a young scientist exploring the invisible world around them.