Metallic eyeshadows can elevate any makeup look with their luminous finish and modern flair. But when overdone or poorly blended, they risk turning your eyes into a shimmering spectacle better suited for a 70s dance floor than a daytime brunch. The key isn’t avoiding metallics altogether—it’s learning how to use them with precision, balance, and intention. With the right techniques, you can create multidimensional, radiant eye looks that catch the light beautifully without crossing into “disco ball” territory.
The secret lies in understanding texture, contrast, and placement. Metallic shadows reflect more light than matte ones, so where and how much you apply dramatically affects the final effect. When layered thoughtfully, metallics add depth and dimension rather than just sparkle. This guide breaks down exactly how to mix metallic eyeshadows with finesse, from choosing compatible shades to mastering blendability and transition tones.
Understanding Metallic Eyeshadow Properties
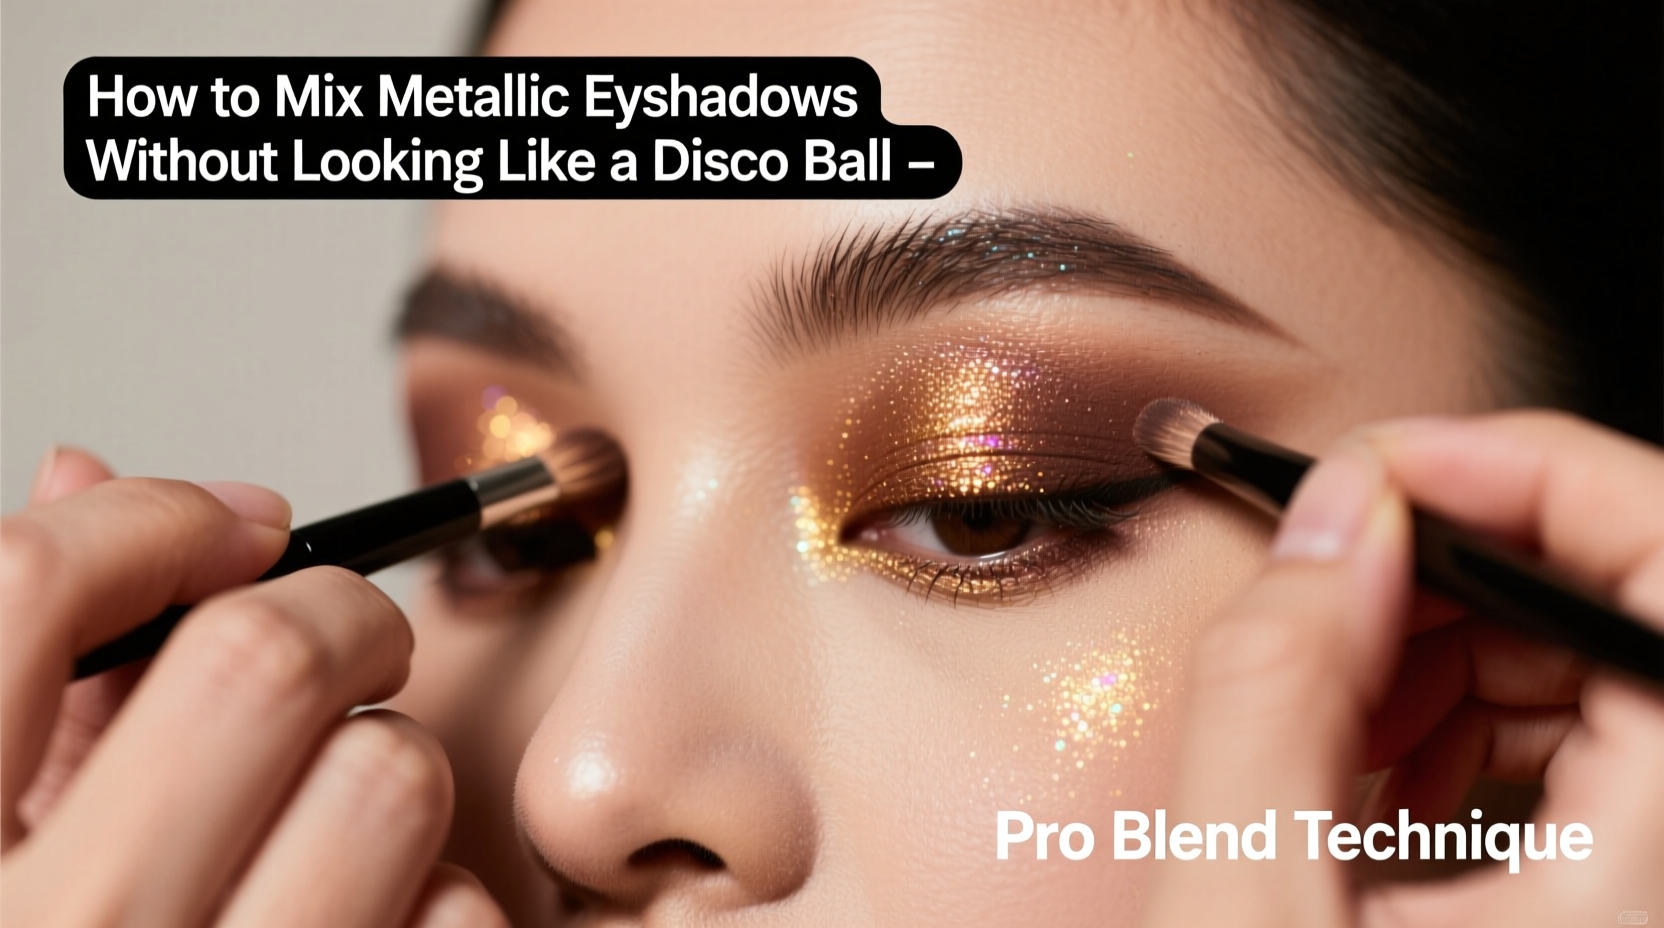
Metallic eyeshadows differ from traditional formulas in both composition and behavior on the skin. They typically contain mica, pearl pigments, or fine metallic particles suspended in a creamy or pressed base. These ingredients create a reflective surface that amplifies light, making the eyelid appear fuller and more prominent.
Not all metallics are created equal. Some have a high-shine foil finish, while others offer a soft satin sheen. Foil-finish shadows are intensely reflective and often come in liquid or cream forms. Satin finishes provide subtle luster without overwhelming brightness—ideal for everyday wear. Knowing the finish helps determine where and how to use each shade.
Tip: Test the intensity of a metallic shadow on your hand before applying it to your eyelid. If it looks blinding under natural light, consider diffusing it with a matte shade.Another critical factor is opacity. Highly pigmented metallics cover completely in one swipe, which can be difficult to blend seamlessly. Sheerer formulas allow for gradual buildup, giving you greater control. For mixing multiple metallics, opt for at least one sheer or moderately opaque option to maintain harmony across the lid.
Choosing Complementary Metallic Shades
Mixing metallics starts with selecting colors that work together harmoniously. Just as clashing wardrobe colors draw unwanted attention, mismatched metallics can make the eyes look chaotic. The goal is cohesion—not uniformity.
A successful metallic combination considers undertone, temperature, and saturation. Warm metallics (gold, copper, bronze) pair well with other warm tones or neutral mattes like taupe or caramel. Cool metallics (silver, pewter, icy rose gold) complement grays, plums, or deep navies. Avoid combining warm and cool metallics unless separated by a matte buffer zone.
“Balance is everything. One standout metallic should anchor the look; the rest should support, not compete.” — Lena Torres, Celebrity Makeup Artist
Consider using a tonal approach: different shades within the same color family. For example, layer champagne over bronze, then highlight the inner corner with a pale gold. This creates dimension while maintaining visual continuity. Alternatively, try analogous metallics—colors next to each other on the color wheel, such as rose gold and copper—to achieve a smooth gradient effect.
| Combination Type | Recommended Pairings | Best For |
|---|---|---|
| Tonal | Champagne + Bronze + Rose Gold | Day-to-evening transitions |
| Analogous | Copper + Peach Gold | Warm-toned skin, sunset-inspired looks |
| Contrast (with caution) | Silver + Bronze (separated by gray) | Dramatic evening styles |
| Monochromatic | Light, medium, and dark gunmetal | Smoky metallic eyes |
Step-by-Step Guide to Blending Multiple Metallics
Mixing metallics requires deliberate layering and blending. Unlike matte shadows, which absorb light and naturally diffuse edges, metallics retain sharpness and reflection. Without proper technique, this leads to patchiness or excessive glare.
- Prime your lids: Use an eyeshadow primer to create a smooth, even base. This prevents creasing and ensures truer color payoff.
- Apply transition shades first: Use a matte brown or taupe in the crease to establish depth. This acts as a grounding layer beneath shiny textures.
- Start with the lightest metallic: Apply a sheer champagne or pearl shade across the mobile lid. Use a flat synthetic brush for packing on pigment evenly.
- Layer mid-tone metallic slightly above the center: Take a denser brush and press a richer tone (like bronze or rose gold) onto the outer third of the lid, blending upward into the crease area—but stop short of the matte transition zone.
- Highlight strategically: Dab a small amount of ultra-reflective shade only on the inner corner or center of the lid. Avoid coating the entire lid in high-shine product.
- Diffuse edges with a clean fluffy brush: Gently blend the perimeter of each metallic section using back-and-forth motions. Never drag too hard—this can lift pigment and cause fallout.
- Set with a translucent powder if needed: If there's excess shimmer migrating below the brow bone, lightly dust away fallout with a clean brush and set with a minimal amount of setting powder.
Common Mistakes That Make You Look Like a Disco Ball
Even experienced makeup wearers fall into traps that amplify shine beyond elegance. Recognizing these pitfalls is half the battle toward refined metallic application.
- Applying metallics all over the lid and up to the brow bone: This maximizes surface area for reflection, creating an unnatural glow. Reserve full-metal coverage for bold editorial looks.
- Mixing three or more highly reflective shades: Too many competing sparkles scatter light unpredictably. Stick to one dominant metallic and one accent.
- Skipping matte transition shades: Without depth, metallics float on the surface with no dimension. Always build around a structured base.
- Using dirty brushes between applications: Residual pigment transfers and muddies clean lines. Clean or wipe brushes between shades, especially when switching from dark to light.
- Ignoring skin tone and lighting conditions: What looks subtle indoors may appear glaring in sunlight. Adjust intensity based on environment.
“In my kit, I keep a matte taupe specifically to mute overly shiny areas. It’s saved countless looks from going ‘too much.’” — Jamal Reeves, Editorial MUA
Real Example: From Office to Evening with Balanced Metallics
Sophia, a marketing executive, wanted a polished look suitable for client meetings but adaptable for after-work drinks. Her initial attempt used a full sweep of rose gold metallic across her lids, topped with silver glitter in the center. Under office lighting, it looked elegant—but once she stepped outside, the reflection caught every passing headlight.
She revised her approach: she applied a matte terracotta in the crease, then used a sheer peach-gold metallic only on the inner two-thirds of the lid. A pinpoint of brighter gold was added to the inner corners. For the evening, she deepened the outer V with a soft plum matte and layered a molten copper liner over the lash line—adding drama without increasing overall shimmer.
The result? Eyes that looked luminous but professional during the day, then subtly intensified at night. By reducing metallic coverage and anchoring it with matte depth, she avoided the disco-ball effect entirely.
Checklist: How to Mix Metallic Eyeshadows Safely
Follow this checklist before building your next metallic eye look:
- ✅ Used an eyeshadow primer
- ✅ Selected no more than two metallic shades (one dominant, one accent)
- ✅ Chose shades with similar undertones or separated contrasting ones with a matte buffer
- ✅ Applied a matte transition color in the crease
- ✅ Limited full-intensity metallic to less than 70% of the lid
- ✅ Highlighted only one focal point (inner corner, center of lid, or brow bone)
- ✅ Blended edges thoroughly with a clean brush
- ✅ Checked the look in natural light before leaving
Frequently Asked Questions
Can I wear multiple metallic shadows every day?
Yes, but scale back intensity. Opt for low-luster satin finishes instead of foils, and limit application to the inner lid or lower lash line. Pair with neutral mattes to keep the look grounded.
How do I fix overly shiny eyeshadow?
Gently pat a small amount of translucent powder or a matching matte shadow over the area using a clean fingertip or sponge. This reduces reflectivity without removing color.
Are metallic shadows harder to blend than matte ones?
They require different tools and techniques. Metallics benefit from denser, more precise brushes for application and clean, fluffy ones for softening edges. Because they don’t diffuse naturally, manual blending is essential.
Final Thoughts: Shine with Intention, Not Excess
Metallic eyeshadows aren’t inherently flashy—they become so when applied without strategy. The most captivating eye looks don’t rely on maximum sparkle but on intelligent use of light and shadow. By treating metallics as accents rather than foundations, you preserve elegance while still embracing modern glamour.
Think of metallics like jewelry: a statement ring draws attention, but wearing five oversized rings distracts. Apply the same principle to your eyes. Choose one focal point, build around it with subtlety, and let the finish enhance your features—not overpower them.
💬 Ready to refine your metallic game? Try one of the techniques above and share your results in the comments. Which metallic combo works best for your eye shape and skin tone?