Floating shelves offer a sleek, minimalist way to display decor, books, or essentials while appearing to defy gravity. The magic lies in their invisible support system—no exposed brackets, no obvious nails. Achieving this illusion requires more than just drilling into drywall; it demands precision, the right tools, and an understanding of structural mechanics. Whether you're upgrading a modern living room or organizing a cluttered bathroom, mastering the art of truly invisible shelf installation transforms both function and aesthetics.
The appeal of floating shelves is their ability to blend utility with elegance. But many DIY attempts fail because they rely on flimsy hardware or misjudged wall composition. The goal isn’t just to make the shelf appear \"floating\"—it’s to ensure it stays securely mounted for years, even under weight. This guide walks through proven techniques that eliminate visible supports entirely, focusing on concealed mounting systems, adhesive innovations, and architectural integration.
Understanding Hidden Support Systems
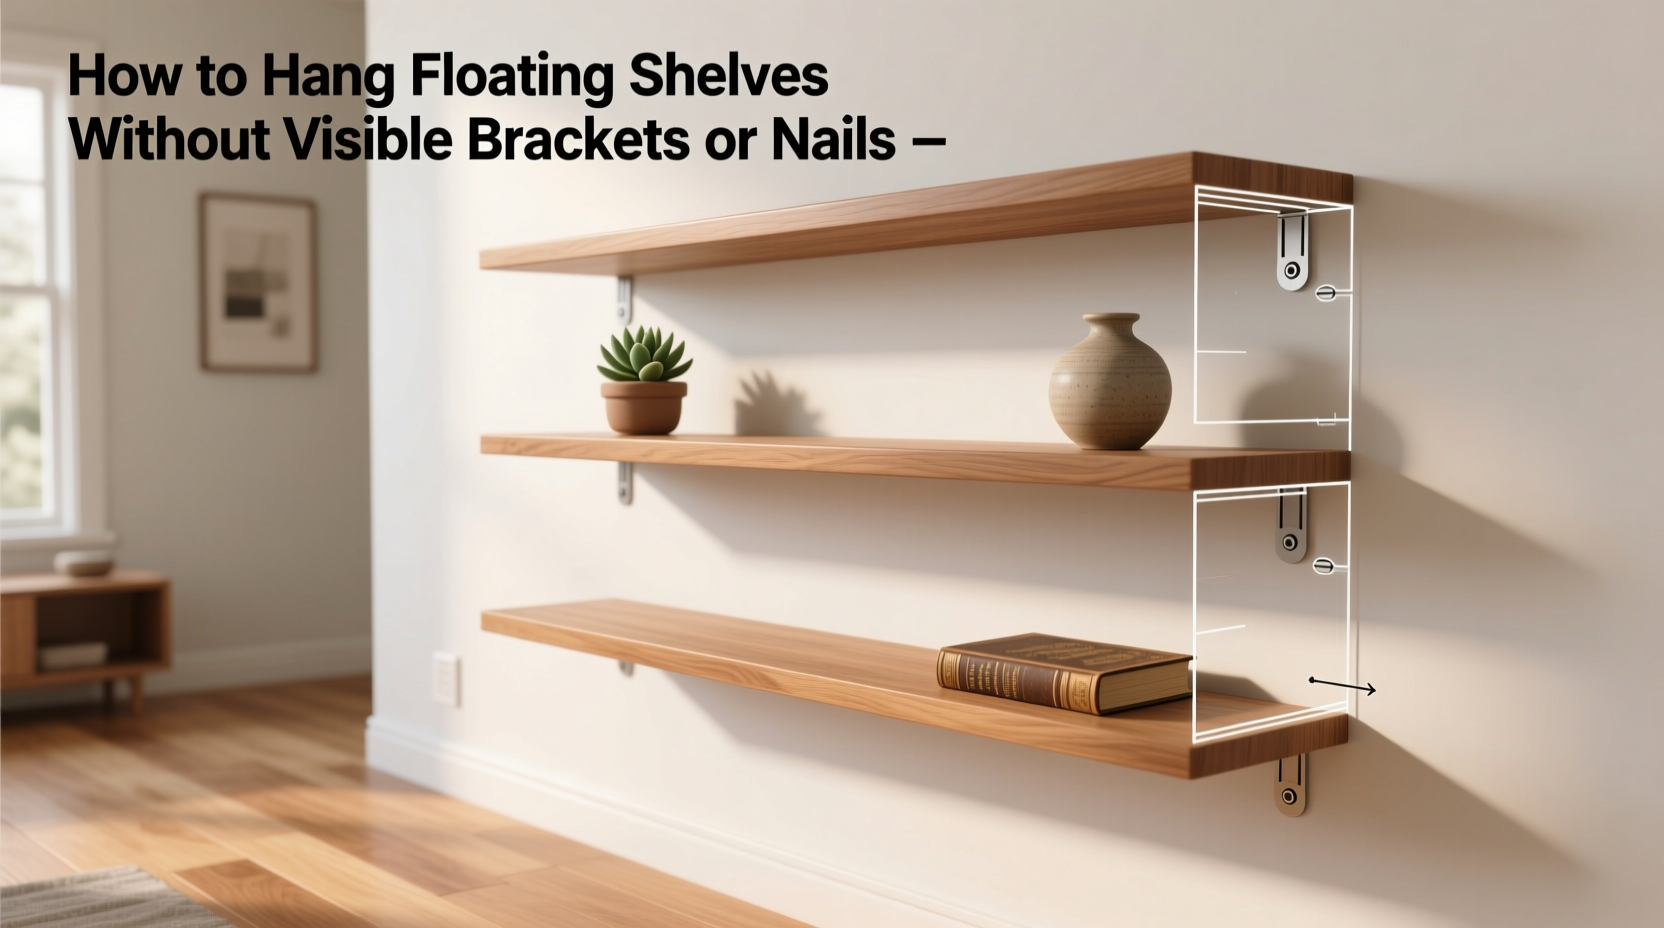
The secret behind invisible floating shelves isn't magic—it's engineering. Unlike traditional shelves that use L-brackets or cleats attached to the front, hidden systems transfer the load behind or inside the shelf itself. There are three primary methods: recessed rail systems, internal support rods, and strong adhesives combined with flush wall anchors.
A recessed rail system involves embedding a metal track into the wall and attaching a corresponding channel to the back of the shelf. Once slid into place, the shelf locks securely with no external hardware visible. These are commonly used in high-end retail displays and modern kitchens where clean lines are essential.
Internal rod systems, also known as \"French cleats\" or \"dowel mounts,\" involve inserting long wooden or metal dowels into pre-drilled holes in the wall. The shelf has matching cavities that slide over the rods. When properly aligned, the entire structure becomes nearly invisible from the front and sides.
Tip: Always locate wall studs before installing any type of hidden shelf system. Even with concealment, structural integrity depends on anchoring into solid framing whenever possible.Step-by-Step: Installing Shelves with Concealed Rails
One of the most reliable ways to achieve a bracket-free look is by using a recessed mounting rail. These kits are available at specialty hardware stores and online retailers, often marketed for museum or gallery installations.
- Measure and mark your desired shelf height. Use a laser level to draw a perfectly horizontal line across the wall.
- Cut a groove into the back of the shelf. Using a router, create a channel deep enough to accommodate the mounting rail (typically 1/4” to 3/8” deep).
- Install the wall rail. Position the metal track along the marked line and secure it directly into wall studs using provided screws. If between studs, use heavy-duty toggle bolts rated for the expected load.
- Attach the shelf. Slide the grooved back of the shelf onto the protruding rail. Some systems include locking pins or set screws accessed from below to prevent lateral movement.
- Touch up if needed. Fill minor gaps at the top edge with paintable caulk to maintain the illusion of levitation.
This method works best with solid wood or plywood shelves at least ¾” thick. Thinner materials may flex under load, compromising safety and appearance.
Adhesive Solutions: When Screws Aren’t an Option
In rental units or historic homes where drilling is restricted, industrial-strength adhesives offer a viable alternative. High-performance construction adhesives like epoxy or polyurethane-based formulas can bond wood directly to drywall, tile, or concrete—but only under specific conditions.
For light loads (under 10 lbs), double-sided tape products such as VHB (Very High Bond) tape from 3M provide surprising strength. These acrylic foam tapes form a permanent bond when applied correctly and are widely used in cabinetry and signage.
Heavier applications require two-part epoxies or specialized mounting putties. For example, a mixture of resin and hardener can be injected into drilled wall pockets and then joined with embedded inserts in the shelf base. Once cured, these bonds can exceed the tensile strength of wood itself.
| Method | Max Load (per ft) | Best For | Limits |
|---|---|---|---|
| Recessed Rail System | 50–75 lbs | Kitchens, living rooms, offices | Requires precise cutting and stud access |
| Dowel Rod Mounts | 30–50 lbs | Bathrooms, bedrooms | Needs thick shelving material |
| VHB Tape | 5–10 lbs | Rented spaces, lightweight decor | Sensitive to moisture and temperature shifts |
| Epoxy Bonding | 20–40 lbs | Tiled walls, non-porous surfaces | Permanent; difficult to reverse |
“True invisibility in shelf design comes not from hiding hardware, but from integrating support into the architecture of the piece itself.” — Marcus Tran, Architectural Woodworker & Designer
Real Example: A Minimalist Bathroom Transformation
Jessica, a graphic designer in Portland, wanted to declutter her small bathroom without sacrificing style. She opted for two 24-inch walnut shelves above the toilet and sink, aiming for a gallery-like presentation of candles, plants, and folded towels.
Since the walls were tiled over drywall and she couldn’t drill extensively, she chose a hybrid approach. She used a recessed aluminum rail behind each shelf, securing it with masonry anchors into the wall studs beneath the tile. The rails were installed during a brief renovation window, allowing minimal grout removal and repair.
The shelves were custom-made with routed channels and finished edges. After sliding them into place, she added a thin bead of clear silicone along the top seam to prevent dust accumulation and enhance the floating effect. Two years later, the shelves remain stable, hold daily-use items, and receive frequent compliments from guests.
Tip: Test fit your shelf multiple times before final installation. Even a 1/16” misalignment can cause binding or uneven gaps.Common Mistakes and How to Avoid Them
- Ignoring wall composition. Drywall alone cannot support heavy loads. Always verify what’s behind the surface—studs, masonry, or furring strips—and choose mounting accordingly.
- Overestimating adhesive strength. While modern glues are impressive, they degrade faster under humidity or vibration. Never use adhesives alone for shelves storing glassware or frequently moved objects.
- Misaligning mounting points. A shelf that wobbles breaks the illusion. Use a level, measure twice, and consider pilot jigs for consistent hole placement.
- Using undersized materials. Thin shelves sag over time. Opt for solid hardwood or multi-ply plywood, especially for spans over 24 inches.
Another frequent error is neglecting future maintenance. Concealed systems should allow for removal or adjustment. Permanent epoxy bonds might look clean now but could complicate repairs later. Whenever possible, choose semi-permanent solutions that balance security with serviceability.
Checklist: Preparing for Invisible Shelf Installation
- Confirm shelf dimensions and weight capacity needs
- Select appropriate hidden mounting system (rail, dowel, adhesive)
- Locate wall studs and map out electrical/plumbing lines
- Acquire necessary tools: stud finder, level, drill, router (if needed)
- Prepare shelf material with routing or pocket modifications
- Dry-fit all components before final mounting
- Seal edges and finish wood prior to installation
- Apply final touches like caulk or touch-up paint after mounting
Alternative Methods for Specific Surfaces
Not all walls are created equal. What works on drywall may fail on tile, brick, or plaster. Tailor your method to the substrate:
Tiled Walls: Avoid breaking tiles. Instead, use mirror mastic or epoxy to bond metal plates to the tile surface. Attach a secondary plate to the shelf and join them with threaded rods or quick-release clips hidden behind the shelf.
Concrete or Brick: Core-drill shallow holes for threaded inserts. Insert stainless steel anchors and thread support rods into them. Slide pre-drilled wooden sleeves over the rods and cap ends with decorative plugs.
Plaster Walls: These are fragile. Locate lath backing and anchor into it using toggle bolts or molly bolts. Consider adding a thin backer board screwed into the lath to distribute weight evenly before attaching the rail.
Frequently Asked Questions
Can I install floating shelves without hitting any studs?
Yes, but with limitations. Use heavy-duty toggle bolts or snap toggles rated for the shelf’s total load. For adhesive-only setups, stick to very light items and ensure perfect surface prep. However, stud-based anchoring is always safer and more durable.
How much weight can a truly invisible shelf hold?
It depends on the system. Recessed rails anchored into studs typically support 30–75 pounds per linear foot. Dowel systems with proper wood thickness handle 20–50 pounds. Adhesives vary widely—check manufacturer specs, but assume no more than 10 pounds for tape and 25 pounds for professional-grade epoxy on ideal surfaces.
Are there completely drill-free options?
Yes, but sparingly. VHB tape works well for lightweight shelves (e.g., displaying photos or small trinkets). Ensure the wall is clean, dry, and non-porous. Press firmly for 30 seconds after application and wait 72 hours before loading. These are best for temporary or low-risk installations.
Final Thoughts and Next Steps
Hanging floating shelves without visible brackets or nails is achievable with the right combination of planning, tools, and technique. The key is shifting focus from external hardware to integrated structural design. Whether you choose a recessed rail, dowel mount, or advanced adhesive, success hinges on attention to detail—from material selection to wall analysis.
Remember, the most beautiful installations are those that feel effortless. A shelf that appears to float effortlessly is the result of deliberate craftsmanship. Take time to measure accurately, choose quality materials, and prioritize safety over speed.
💬 Ready to elevate your space? Start by measuring your wall and sketching a simple plan. Share your project ideas or ask questions in the comments—let’s build smarter, cleaner spaces together.