
Walking from your front door to the driveway at night should never be a hazardous journey. Uneven terrain, hidden obstacles, and poor visibility can make even short trips risky after dark. Solar stepping stones offer an elegant, energy-efficient solution by creating a softly illuminated path that guides your way without increasing electricity costs or requiring complex wiring.
These compact, self-sustaining lights harness sunlight during the day and automatically illuminate at dusk, forming a reliable trail that enhances both safety and curb appeal. When thoughtfully installed, they blend seamlessly into landscaping while serving a practical purpose. This guide walks you through planning, selecting, installing, and maintaining a solar stepping stone pathway that lasts for years.
Why Choose Solar Stepping Stones?
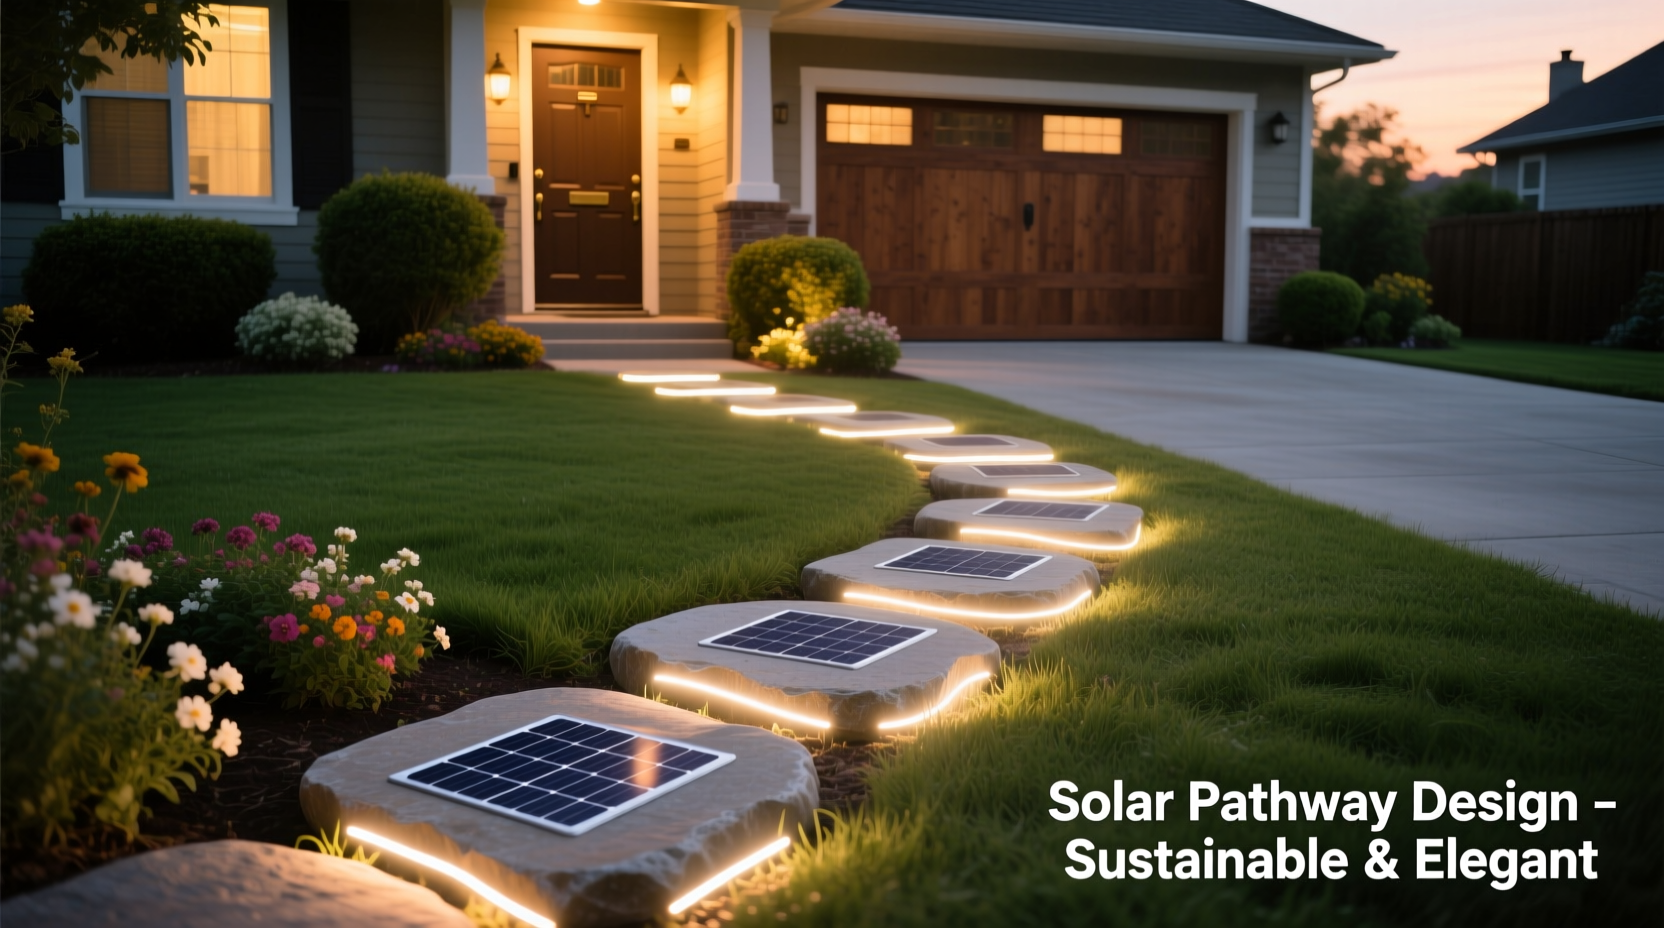
Solar-powered pathway lighting has become increasingly popular due to its sustainability, ease of installation, and low maintenance. Unlike traditional wired landscape lighting, solar stepping stones require no trenching, electrical permits, or connection to your home’s power grid. They’re ideal for homeowners seeking an eco-friendly upgrade that doesn’t compromise on style or functionality.
Each unit contains a small photovoltaic panel, rechargeable battery, LED light, and photoresistor sensor. During daylight hours, the panel charges the internal battery. At nightfall, the sensor detects reduced ambient light and activates the LED, typically offering 6–10 hours of illumination depending on sun exposure and battery capacity.
Beyond convenience, solar stepping stones improve nighttime visibility, reduce tripping hazards, deter trespassers, and add subtle charm to your exterior space. Their modular nature allows for flexible layout designs—straight lines, curves, or zigzags—that follow natural foot traffic patterns from your entryway to the garage or street.
“Solar stepping stones are one of the most cost-effective ways to enhance outdoor safety without altering your property’s infrastructure.” — Marcus Tran, Landscape Lighting Consultant
Planning Your Light Trail: Layout and Spacing
Before purchasing any materials, map out the intended route from your front door to the driveway. The goal is to create a continuous visual guide that feels intuitive and evenly lit. Consider these factors when designing your layout:
- Traffic Flow: Observe how you and visitors naturally walk. Does the path curve around flower beds? Do steps or slopes require extra attention?
- Obstacle Avoidance: Mark areas with roots, drainage grates, or uneven surfaces. Adjust placement so lights highlight rather than obscure potential hazards.
- Spacing: For consistent guidance, space stones 2 to 3 feet apart. Closer spacing (2 ft) works well in darker zones or near stairs; wider gaps (3 ft) suit open, flat stretches.
- Height Leveling: Ensure each stone sits flush with surrounding ground or pavers to prevent tripping. Slight elevation is acceptable if edges are beveled.
If your yard has dense tree cover or tall shrubs, conduct a sun study. Note which areas receive direct sunlight between 10 a.m. and 3 p.m.—this is critical for optimal charging. Avoid placing stones under overhangs, eaves, or deep shade where solar panels won’t gather sufficient energy.
Recommended Materials for Installation
You don't need specialized tools, but having the right supplies ensures a clean, durable setup. Here's what to gather:
| Item | Purpose | Notes |
|---|---|---|
| Solar stepping stones (6–12 units) | Main lighting elements | Choose weather-resistant models with tempered glass covers |
| Shovel or trowel | Digging base holes | Use narrow trowel for tight spaces |
| Level | ||
| Ensure stones sit flat | ||
| Crushed gravel or paver base | Drainage and stability | ½ inch layer prevents sinking |
| Sand (optional) | Final leveling bed | Use coarse sand, not fine play sand |
| Rubber mallet | Gently set stones in place | Avoid damaging plastic housings |
Step-by-Step Installation Guide
With your layout planned and materials ready, proceed with installation. Allow 2–3 hours for a standard 8-stone path, depending on soil conditions.
- Clear and Prepare the Path: Remove debris, weeds, and loose mulch along the marked line. Trim grass edges cleanly if adjacent to lawn.
- Dig Holes for Each Stone: Excavate shallow pits approximately 3–4 inches deep and slightly wider than the stone base. Depth depends on model thickness—check manufacturer specs.
- Add Base Layer: Pour ½ inch of crushed gravel into each hole. Tamp down firmly with the back of a shovel or mallet to create a stable, draining foundation.
- Optional Sand Bed: Add ¼ inch of coarse sand on top of gravel for fine-tuning height. This allows minor adjustments without disturbing the base.
- Position First Stone: Place the initial unit near your front step or porch. Press gently until level. Use a bubble level across multiple axes to confirm evenness.
- Align Remaining Stones: Work toward the driveway, placing each subsequent stone 2–3 feet away. Check alignment visually and with the level. Maintain consistent orientation—most models have directional solar panels.
- Test Activation: Wait until dusk or cover the solar panel briefly to test auto-on function. Confirm all lights activate uniformly.
- Backfill Gaps: Once satisfied with positioning, fill around edges with soil, gravel, or decorative rock to secure units and blend with surroundings.
Maintenance and Long-Term Performance
Solar stepping stones are low-maintenance but benefit from seasonal care to ensure longevity and brightness. Over time, dust, bird droppings, fallen leaves, and snow can block sunlight from reaching the panels, reducing charge efficiency.
Clean each unit every 3–4 months using a soft cloth and mild soapy water. Avoid abrasive scrubbers or pressure washers, which can scratch lenses or damage seals. Inspect rubber gaskets periodically for cracks—these prevent moisture from entering the housing and corroding internal components.
Battery lifespan varies by model but generally lasts 2–3 years with regular use. Signs of degradation include dim output, flickering, or failure to stay lit through the night. Most units have replaceable NiMH or Li-ion batteries; refer to product manuals for compatible replacements.
In colder climates, remove stones only if freezing expansion poses a risk to embedded electronics. Many modern models are freeze-thaw rated, but prolonged ice buildup over panels will inhibit charging. Gently brush off snow instead of chipping it away.
“Even high-quality solar lights degrade faster without basic upkeep. A five-minute wipe-down every few months doubles their effective life.” — Lena Patel, Sustainable Landscaping Technician
Real-World Example: The Henderson Family Pathway
The Hendersons live in a Pacific Northwest neighborhood with mature oak trees shading much of their front yard. Their original concrete walkway ended abruptly at the edge of the lawn, forcing nighttime foot traffic across muddy ground. After two family members nearly twisted ankles, they decided to install a lighted path to the driveway.
They selected eight amber-lit solar stepping stones with stainless steel trim, opting for warm-toned LEDs to complement their cottage-style home. Using a string line and measuring tape, they laid out a gentle S-curve avoiding tree roots and a buried irrigation line.
Installation took a Saturday morning. They used a mix of crushed granite and sand for the base, ensuring proper drainage in the rainy climate. Within a week, they noticed improved confidence walking at night—and unexpected compliments from neighbors about the “inviting glow” of their entrance.
Nine months later, performance remains strong. By cleaning panels quarterly and replacing one battery preemptively, they’ve maintained consistent illumination throughout winter months with limited daylight.
Choosing the Right Stepping Stones: What to Look For
Not all solar stepping stones are created equal. With dozens of models on the market, focus on durability, brightness, and design integration. Key features to evaluate include:
- Lumen Output: Aim for 10–50 lumens per stone. Below 10 may be too dim; above 50 can feel harsh in residential settings.
- Color Temperature: Warm white (2700K–3000K) creates a welcoming ambiance. Cool white (5000K+) appears clinical and may attract insects.
- Weather Resistance: Look for IP65 or higher rating, indicating protection against dust and water jets.
- Battery Type: Rechargeable lithium batteries outperform older NiCd types in cold weather and cycle life.
- Design Aesthetics: Choose finishes—copper, slate, mosaic, frosted glass—that coordinate with your home’s exterior.
Frequently Asked Questions
How long do solar stepping stones last?
Most quality models operate effectively for 3–5 years. LED bulbs can last 25,000+ hours, but batteries typically need replacement every 2–3 years. Proper placement and cleaning extend overall lifespan.
Do they work in winter or cloudy regions?
Yes, but with reduced runtime. Units charge slower in low-light conditions. In consistently overcast areas, expect 4–6 hours of light instead of 8–10. Positioning in south-facing zones maximizes available sun.
Can I mix different styles or brands?
It’s technically possible, but not recommended. Different charging efficiencies, lumen outputs, and activation thresholds can lead to inconsistent lighting. Stick to one series for uniform appearance and performance.
Final Checklist Before You Begin
Before starting your project, run through this quick checklist to ensure success:
- ✅ Measured and marked the full path from door to driveway
- ✅ Confirmed sunlight exposure during peak hours (10 a.m.–3 p.m.)
- ✅ Selected stepping stones with appropriate brightness and finish
- ✅ Purchased enough units based on 2–3 ft spacing
- ✅ Gathered tools: shovel, level, gravel, sand, mallet
- ✅ Checked local HOA guidelines (if applicable) for outdoor lighting
- ✅ Scheduled installation during a dry forecast window
Conclusion: Illuminate with Confidence
A well-lit path from your front door to the driveway isn’t just functional—it reflects thoughtful design and care for household safety. Solar stepping stones deliver this benefit sustainably, blending into your landscape while operating autonomously year-round. With minimal effort, you can transform a dark, uncertain journey into a guided, pleasant experience.
By following sound planning principles, choosing durable products, and performing simple upkeep, your light trail will serve you reliably for seasons to come. Whether returning late from work, welcoming guests, or stepping outside for fresh air, you’ll appreciate the quiet reassurance of a glowing path beneath your feet.
🚀 Ready to light your way? Start measuring your path today—your safer, more beautiful entryway is just a few stones away. Share your installation story or ask questions in the comments below!