Snake plants (Sansevieria) are among the most resilient houseplants, known for thriving in low light and surviving occasional neglect. Yet even these hardy greens can show distress—most commonly through yellowing leaves that turn soft and mushy. When this happens, it’s a clear signal that something in the plant’s environment or care routine has gone awry. While it may seem alarming, identifying the root cause early can save your plant and restore its vibrant health.
Yellow, mushy leaves are not just cosmetic issues—they often point to systemic problems like overwatering, poor drainage, or root rot. Left unaddressed, these conditions can lead to irreversible damage. The good news? With timely intervention and proper care adjustments, most snake plants can recover. This guide breaks down the most common causes of yellowing and mushiness, offers actionable solutions, and provides expert-backed strategies to keep your snake plant strong and healthy for years.
Understanding the Snake Plant’s Natural Preferences
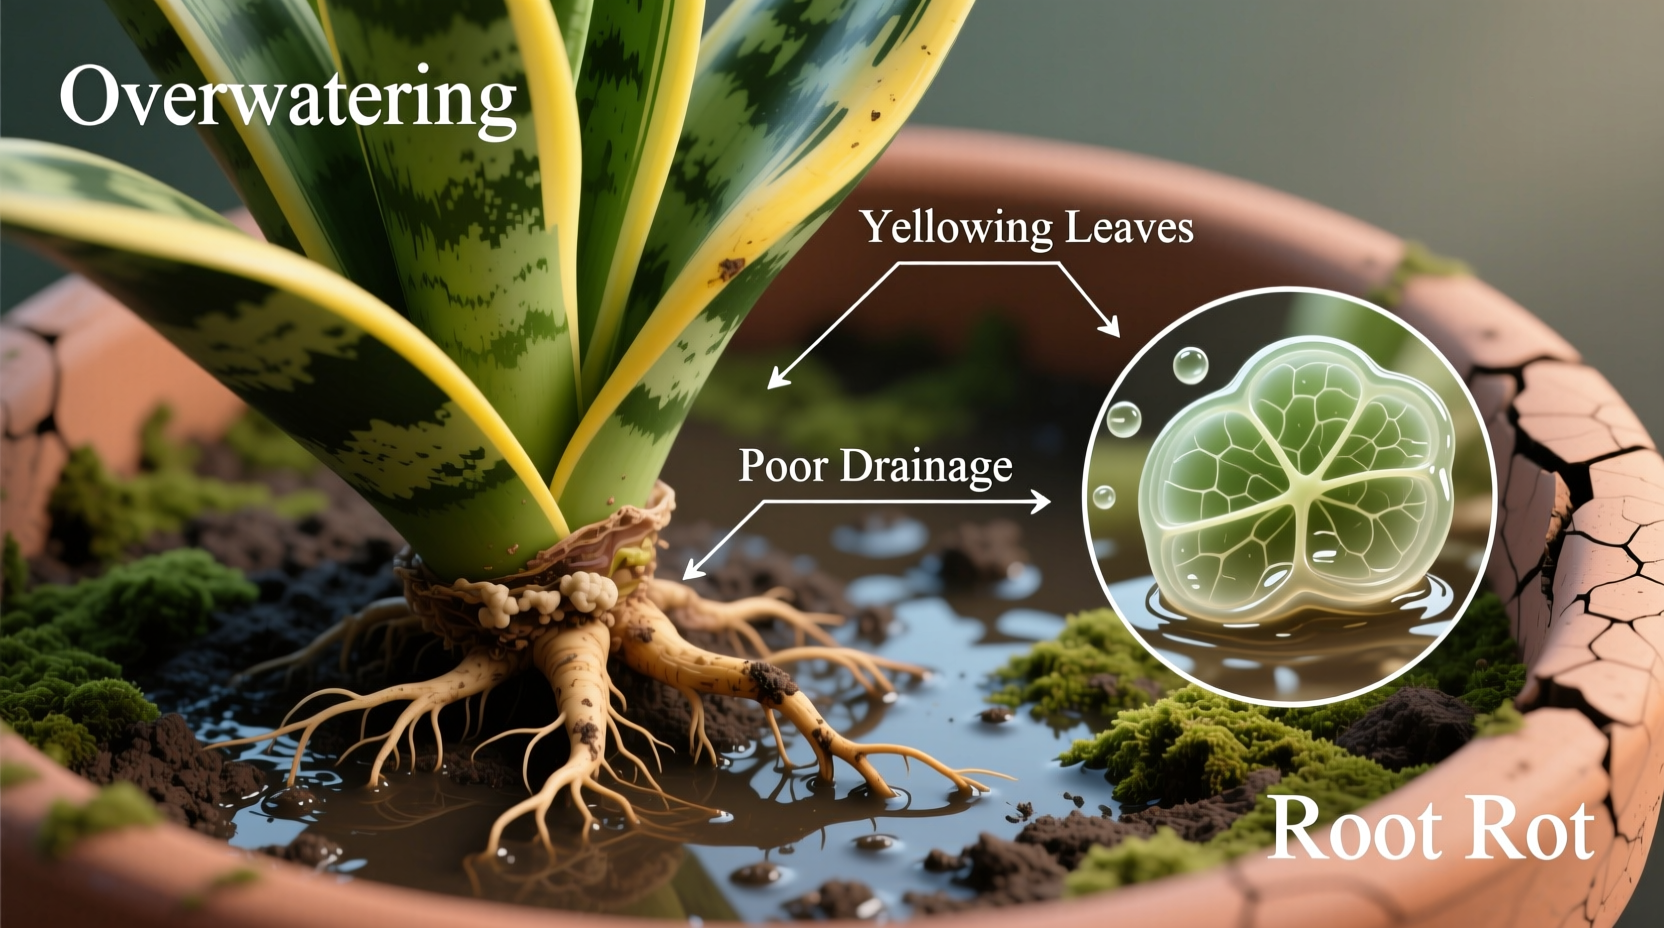
Succulent by nature, snake plants store water in their thick, upright leaves. Native to arid regions of West Africa, they evolved to survive long dry spells with minimal rainfall. Their physiology makes them highly efficient at conserving moisture—but also extremely vulnerable to excess water.
In indoor environments, the biggest threat to a snake plant isn’t drought—it’s drowning. Overwatering disrupts oxygen flow to the roots, creating ideal conditions for fungal pathogens like *Pythium* and *Fusarium*, which cause root rot. Once root decay begins, nutrients and water can no longer be absorbed effectively, leading to yellow, limp foliage above ground.
Beyond watering, other environmental stressors—including poor soil, insufficient light, and temperature extremes—can compound the issue. Understanding what snake plants need helps you diagnose problems accurately and apply targeted fixes.
Tip: Let the soil dry completely between waterings—stick your finger 2 inches into the pot to check moisture before watering.Top Causes of Yellow and Mushy Leaves
1. Overwatering and Root Rot
This is the leading cause of yellowing in snake plants. These plants prefer infrequent but thorough watering. When watered too often or left sitting in wet soil, roots suffocate and begin to rot. Signs include:
- Lower leaves turning yellow from the base upward
- Leaves feeling soft, soggy, or collapsing at the base
- Foul odor from the soil
- Mushy brown or black roots when inspected
2. Poor Drainage
Even if you don’t water frequently, a pot without drainage holes or dense, compacted soil can trap moisture. Heavy soils like standard garden dirt retain water far too long for snake plants. Over time, this leads to chronically damp roots and eventual decay.
3. Inappropriate Pot Size
Too-large pots hold excess soil that stays wet long after watering. A snake plant in a 12-inch pot with only a small root system will struggle because most of the soil never dries out. This creates a breeding ground for root rot.
4. Low Light Conditions
While snake plants tolerate low light, prolonged exposure to dim environments slows photosynthesis and reduces metabolic activity. This makes the plant less efficient at using water, increasing the risk of overhydration even with moderate watering.
5. Cold Temperatures and Drafts
Sudden cold exposure—such as near drafty windows in winter or air conditioning vents—can shock the plant. Cold stress weakens cell walls, making leaves more susceptible to yellowing and mushiness, especially when combined with moist soil.
“Over 80% of snake plant failures I see in home environments stem from overwatering. These plants don’t die from thirst—they die from kindness.” — Dr. Lena Torres, Urban Horticulturist & Plant Pathologist
Action Plan: How to Save a Yellowing Snake Plant
If your snake plant shows signs of distress, act quickly. Follow this step-by-step recovery process to assess damage and implement corrective measures.
Step 1: Remove the Plant from Its Pot
Gently slide the plant out, supporting the base of the leaves. Shake off excess soil to inspect the root system. Healthy roots are firm and white or light tan. Rotten roots appear dark, slimy, and may fall apart when touched.
Step 2: Trim Damaged Roots and Leaves
Using sterilized scissors or pruning shears, cut away all mushy, blackened roots. Also remove any leaves that are entirely yellow or soft at the base. Sanitize tools between cuts to avoid spreading pathogens.
Step 3: Treat with Fungicide (Optional)
To prevent further infection, dip remaining healthy roots in a hydrogen peroxide solution (1 part 3% H₂O₂ to 3 parts water) or use a commercial fungicide labeled for houseplants. Allow roots to air-dry for a few hours before repotting.
Step 4: Repot in Fresh, Well-Draining Soil
Choose a clean pot with drainage holes, ideally one size smaller than the previous container. Fill with a cactus or succulent mix, or create your own blend:
- 2 parts potting soil
- 1 part perlite
- 1 part coarse sand or pumice
Replant carefully, ensuring the crown sits slightly above the soil line to prevent stem rot.
Step 5: Hold Off on Watering
Do not water immediately after repotting. Wait 5–7 days to allow any root wounds to callous over and reduce infection risk. Resume a careful watering schedule only once the top 2 inches of soil are completely dry.
Tip: Water deeply but infrequently—soak the soil until water drains from the bottom, then empty the saucer within 30 minutes.Preventive Care Checklist
Once your plant is on the mend, maintain its health with consistent, appropriate care. Use this checklist to avoid future issues:
- ✅ Water only when the top 2 inches of soil are dry
- ✅ Use a pot with drainage holes
- ✅ Choose fast-draining soil (cactus/succulent mix)
- ✅ Place in bright, indirect light (avoid deep shade)
- ✅ Keep temperatures above 50°F (10°C), away from drafts
- ✅ Rotate the plant monthly for even growth
- ✅ Fertilize sparingly—once in spring and once in summer with diluted balanced fertilizer
- ✅ Inspect monthly for pests like spider mites or mealybugs
Do’s and Don’ts: Quick Reference Table
| Do | Don’t |
|---|---|
| Water every 2–6 weeks depending on season and light | Water on a fixed weekly schedule |
| Use terracotta pots for better moisture control | Keep in plastic pots without drainage |
| Provide bright, indirect sunlight (east or north window) | Place in dark corners or full midday sun |
| Allow soil to dry completely between waterings | Let the plant sit in standing water |
| Clean leaves occasionally with a damp cloth | Wet the leaves regularly or mist the plant |
Real Example: Reviving a Neglected Office Snake Plant
A client brought in a large snake plant from her office lobby that had turned half-yellow and was drooping. The maintenance staff had been watering it weekly “to keep it alive,” despite the space receiving minimal natural light. The pot lacked drainage, and the soil was constantly damp.
After removing the plant, we found extensive root rot. We trimmed affected tissue, treated the roots, and repotted it in a terra-cotta container with proper mix. It was moved to a brighter corner with indirect light and watering paused for a week. Within three months, new green shoots emerged from the base, and the plant regained its upright form. The key changes? Proper soil, correct pot, and a shift from routine watering to responsive care based on soil dryness.
Frequently Asked Questions
Can a yellow snake plant turn green again?
Individual leaves that have turned yellow and mushy will not revert to green. However, the plant itself can recover and produce new, healthy growth once the underlying issue—usually overwatering—is corrected.
How often should I water my snake plant?
There’s no universal schedule. In warm, bright conditions, watering every 2–3 weeks may be appropriate. In cooler, low-light settings, extend that to 5–6 weeks. Always check soil moisture first. During winter, most snake plants need water only once every 6–8 weeks.
Is it safe to propagate a snake plant with yellow leaves?
Yes, as long as you use healthy leaf sections. Cut a firm, green portion of the leaf into 3–4 inch segments, let them dry for 24 hours, then place in soil or water. Avoid using mushy or discolored tissue, as it may rot before rooting.
Final Thoughts: Prevention Is the Best Cure
The resilience of snake plants makes them forgiving, but not invincible. Yellow, mushy leaves are a warning sign—not a death sentence. By understanding their desert-like needs and adjusting your care accordingly, you can reverse decline and foster long-term vitality.
Remember: these plants thrive on neglect, not constant attention. Less watering, better soil, and adequate light go much further than frequent feeding or misting. Monitor your plant closely during seasonal transitions, especially in winter when growth slows and water needs drop dramatically.
💬 Have a snake plant success story or a recovery tip? Share your experience in the comments—your insight could help another plant lover save their green companion!