Nail art has evolved from simple polish to wearable miniature masterpieces. Among the most captivating trends are spider and snake designs—bold, edgy, and rich in symbolism. These motifs blend mystery, elegance, and a touch of rebellion, making them favorites among fashion-forward individuals and nail artists alike. Whether you're aiming for Halloween drama or year-round avant-garde flair, mastering these intricate patterns requires more than just creativity—it demands precision, technique, and an understanding of design principles.
This guide dives deep into the world of arachnid and serpent-inspired nail art, offering actionable strategies, professional insights, and structured workflows to help you create polished, eye-catching results at home or in the salon.
Understanding the Aesthetic: Symbolism and Style
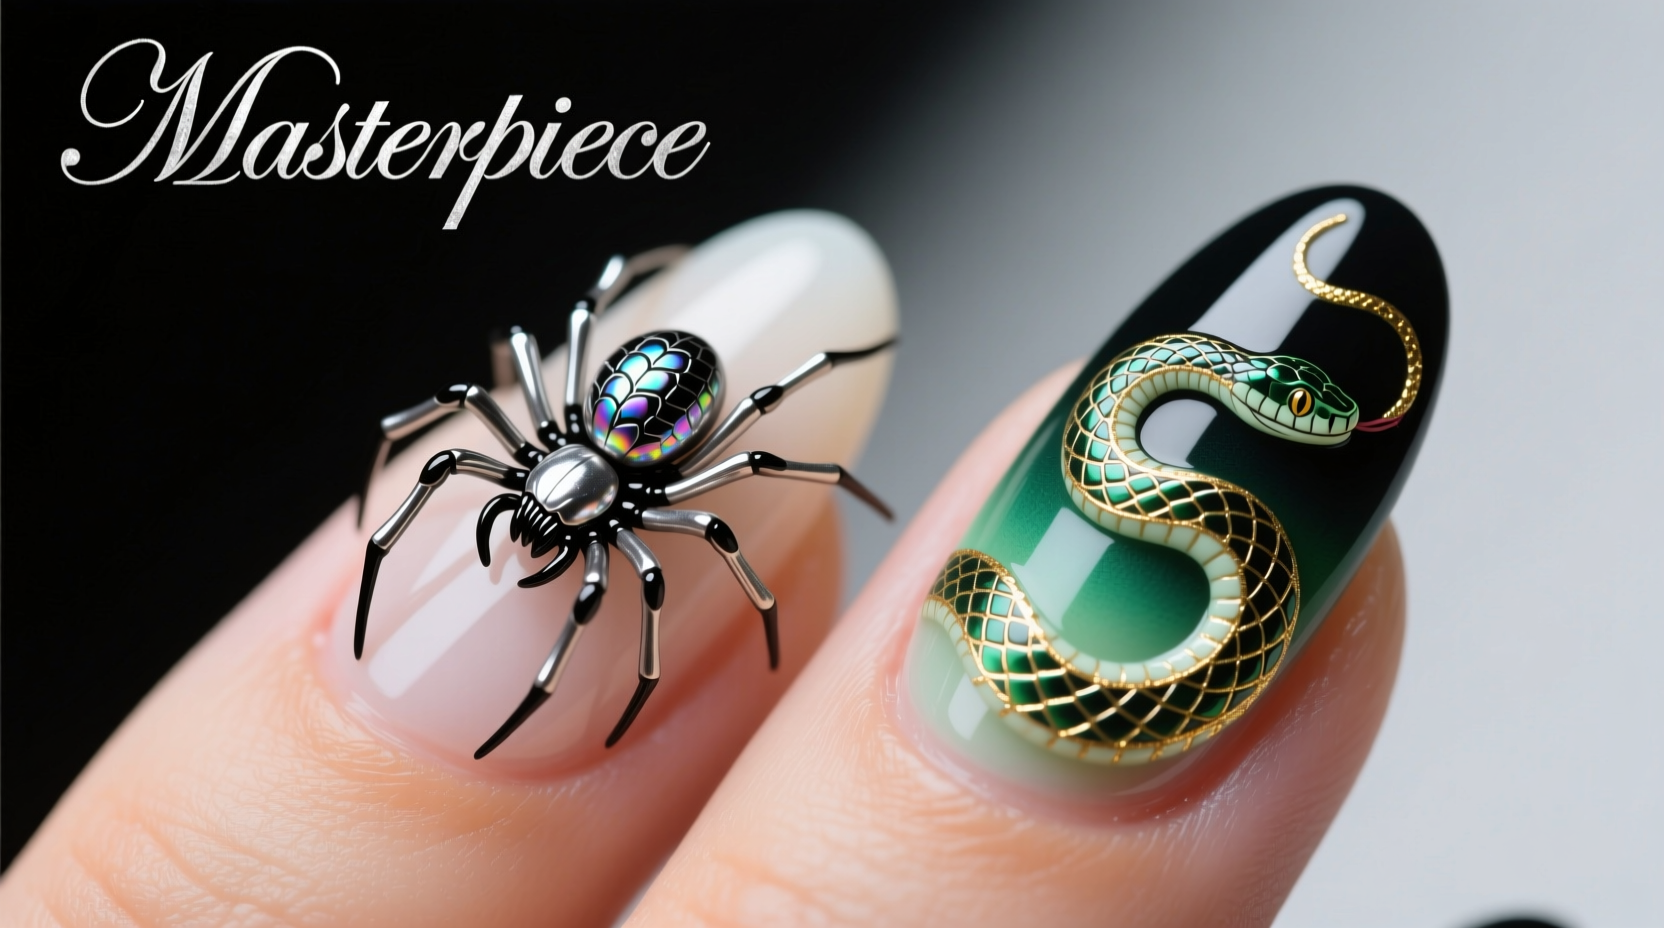
Before picking up a brush, it's essential to understand what makes spider and snake designs so powerful. Both creatures carry centuries of cultural meaning. Spiders symbolize creativity, patience, and interconnectedness, while snakes represent transformation, rebirth, and hidden wisdom. In nail art, these themes translate into fluid lines, dramatic contrasts, and layered textures.
Stylistically, spider designs often emphasize symmetry and fine linework—think delicate webs stretching across the nail bed or a single black widow perched at the cuticle. Snake patterns rely on sinuous curves, scale detailing, and gradient color transitions mimicking reptilian skin. Combining both elements can result in a striking fusion, such as a serpent coiled around a webbed backdrop.
Tip: Sketch your design on paper first. Mapping out complex shapes improves accuracy when translating them onto small nail surfaces.Essential Tools and Materials for Precision Work
Success in detailed nail art starts with the right toolkit. Unlike basic polish application, spider and snake motifs require specialized tools for control and finesse.
| Tool | Purpose | Recommended Type |
|---|---|---|
| Fine Detail Brushes | Creating thin lines for webs and snake outlines | Size 00 or 0/1 round liner brushes |
| Striping Brush | Painting clean, straight lines (e.g., web spokes) | Metal-tipped, ultra-fine |
| Nail Art Pens | Quick line work without paint loading | Water-based ink pens with variable tips |
| Sponge Applicators | Blending gradients for snake scales | Makeup sponges cut into triangles |
| Dotting Tools | Spider bodies, eyes, or scale accents | Dual-ended metal tools (small/large ball) |
In addition to tools, use high-pigment gel or acrylic paints rather than regular polish—they offer better opacity and control. Always work on a cured base coat to prevent smudging during layering.
Step-by-Step Guide to Creating Spider Nail Art
Start with one accent nail to perfect the technique before applying it across all nails.
- Prep the nail: Apply a base coat and cure. Choose a dark background (black, deep purple, or navy) to make web details pop.
- Map the web structure: Using a striping brush and white or silver polish, draw five to seven evenly spaced radial lines from the cuticle outward, like wheel spokes.
- Build concentric circles: Starting near the center, paint curved lines connecting the spokes to form spiral loops. Gradually expand outward.
- Add depth: Use a slightly thinner brush to redraw inner sections with broken or dotted lines, simulating natural web irregularities.
- Place the spider: With a dotting tool, apply a small black sphere for the body. Add eight thin legs using a fine brush, angling them outward symmetrically.
- Final touches: Paint two tiny white dots on the spider’s head for highlights. Seal with a high-gloss top coat.
Techniques for Realistic Snake Scale Effects
The key to authentic snake nails lies in texture and color gradation. Instead of painting individual scales, simulate their pattern through strategic layering.
- Gradient Base: Sponge-layer two or three complementary colors (e.g., emerald green fading into gold) to mimic natural iridescence.
- V-Shaped Overlays: Once dry, use a thin brush to paint inverted \"V\" shapes down the nail, staggered like roof tiles. Alternate shades slightly darker or lighter than the base.
- Highlighting: Add micro-lines along the top edge of each V with a metallic polish to catch light, enhancing the 3D effect.
- Eyes & Tongue Accents: On one or two nails, paint a serpent head with slitted yellow eyes and a flicked red tongue for dramatic impact.
“Snake scale illusions work best when you embrace imperfection. Nature isn’t symmetrical—vary the size and angle of your Vs to avoid a robotic look.” — Lila Torres, Editorial Nail Artist for Vogue México
Design Checklist: From Concept to Completion
Follow this checklist to ensure every manicure meets professional standards:
- ✅ Clean, shaped, and dehydrated nails before starting
- ✅ Base color fully cured (if using gel)
- ✅ Tools cleaned between colors to prevent muddying
- ✅ Web symmetry checked under magnification (jeweler’s loupe or phone zoom)
- ✅ Negative space used intentionally (e.g., leaving parts of the web incomplete for realism)
- ✅ Top coat applied evenly, wrapping over the free edge to seal design
- ✅ Final inspection under natural light to spot inconsistencies
Mini Case Study: Transforming a Client’s Halloween Look
Jasmine, a client preparing for a themed photoshoot, wanted a dramatic yet wearable spider-scape across her nails. She opted for a matte black base with holographic webbing and a single 3D rhinestone spider on her ring finger.
The artist began by airbrushing a subtle gray mist toward the cuticle to create depth. Fine silver chrome paint was used for the web, with extra layers on the central coils for shine. For the centerpiece spider, a pre-made polymer clay figurine was adhered with UV glue and secured with clear gel encapsulation.
The result? A tactile, multidimensional design that became the focal point of her ensemble—proving that even small surfaces can deliver big impact with thoughtful execution.
Common Mistakes and How to Avoid Them
Even experienced nail artists encounter pitfalls. Awareness prevents repetition.
| Mistake | Consequence | Solution |
|---|---|---|
| Overloading the brush | Bleeding lines and blurred details | Wipe excess paint on foil before each stroke |
| Rushing the drying process | Smudged webs or misaligned scales | Cure each layer under LED/UV lamp if using gels |
| Ignoring nail curvature | Distorted patterns that don’t follow nail shape | Adapt design flow to the natural arch of the nail |
| Skipping top coat | Dull finish and chipping within hours | Use a thick, domed top coat for protection and shine |
FAQ
How long does spider or snake nail art last?
With proper prep and a quality top coat, intricate designs can last 7–10 days without chipping. Avoid prolonged water exposure and wear gloves during chores to extend wear.
Can beginners attempt these designs?
Absolutely. Start with simplified versions—single web strands or abstract snake waves—and build skill gradually. Practice on nail tips or silicone pads before working on natural nails.
Are there cruelty-free alternatives to snake skin patterns?
Yes. The designs themselves are artistic interpretations, not endorsements of real animal products. Use synthetic materials and vegan polishes to align with ethical standards.
Conclusion: Elevate Your Nail Game with Bold Creativity
Spider and snake nail art isn’t just about following a trend—it’s about expressing identity through meticulous craftsmanship. By combining symbolic depth with technical precision, you transform fingertips into storytelling canvases. Whether you're designing for personal satisfaction or client commissions, the techniques outlined here provide a foundation for innovation and excellence.
💬 Ready to try your own design? Share your spider or snake manicure journey in the comments—we’d love to see your creations and hear your tips!