Cutting a dog’s nails is a routine part of pet care, but it becomes significantly more challenging when the nails are black. Unlike clear or light-colored nails, where the pinkish quick—the blood-rich tissue inside the nail—is visible, black nails obscure this crucial landmark. Accidentally cutting into the quick causes pain, bleeding, and can make your dog fearful of future trims. However, with the right techniques and tools, you can confidently identify the quick and trim your dog’s nails safely from home.
Why Black Nails Are More Difficult to Trim
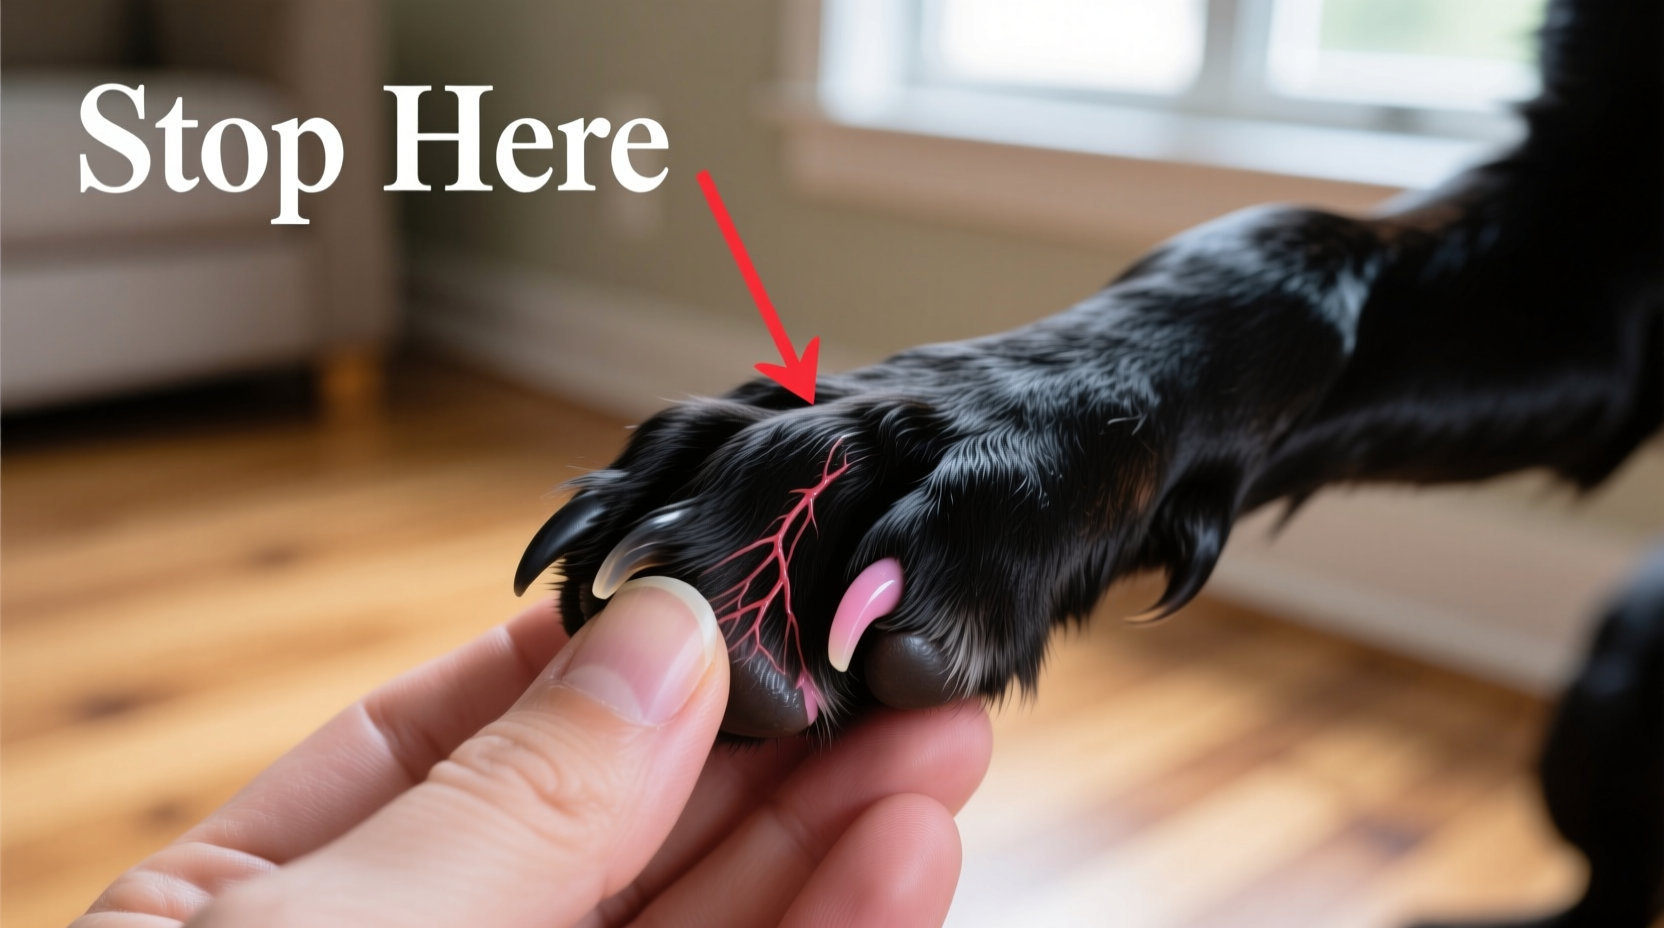
The quick is a bundle of nerves and blood vessels that runs through the center of each nail. In dogs with transparent or white nails, the quick appears as a soft pink area beneath the surface. As the nail grows, the quick extends slightly, but its boundary remains visible—making it easy to avoid during trimming.
Black nails, however, are opaque. The pigment in the keratin blocks visibility, hiding the quick completely. This forces owners to rely on indirect methods to estimate safe cutting zones. Misjudgment leads to over-trimming, which not only hurts the dog but also creates negative associations with grooming.
“Owners often hesitate to trim black nails because they fear causing harm. But with patience and proper technique, it’s entirely manageable at home.” — Dr. Laura Simmons, DVM, Canine Dermatology & Grooming Specialist
Step-by-Step Guide to Identifying the Quick on Black Nails
Safely trimming black nails requires a methodical approach. Follow these steps to minimize risk and increase accuracy:
- Examine the Nail Shape and Structure: Look at the underside of the nail. A healthy nail tapers to a point. The quick generally follows the curve of the nail’s interior. If the nail is thick and blunt, the quick may extend further than expected.
- Look for the Central Dot (Core Method): Use a bright flashlight to shine directly up through the bottom of the nail. In some cases, especially if the nail isn’t fully pigmented, you might see a dark central core—this is the quick. Avoid cutting near this area.
- Use the 45-Degree Angle Rule: Hold your clippers at a 45-degree angle to the nail and make small, shallow cuts from the tip backward. Stop every few millimeters to inspect the newly cut surface.
- Check the Cut Surface for Clues: After each snip, examine the flat surface of the nail. When you reach the quick, a small dark circle or dot will appear in the center. This is the telltale sign to stop immediately.
- File Instead of Clip for Precision: Once you’re close to the desired length, switch to a motorized nail grinder. It removes tiny layers at a time, reducing the chance of sudden penetration into the quick.
Tools That Improve Accuracy and Safety
Using the right tools makes a dramatic difference in confidence and precision. Consider investing in the following:
- LED Nail Clippers with Illumination: These specialized clippers have built-in lights that shine through the nail, helping reveal the location of the quick even in dark nails.
- Rotary Nail Grinders: Devices like the Dremel or PetSafe PawTrimmer allow gradual filing. You control exactly how much material is removed, minimizing risk.
- Magnifying Lamp or Headlamp: Enhanced lighting helps detect subtle changes in nail texture and color, especially when examining the cut surface.
- Styptic Gel with Applicator: Faster and less messy than powder, ideal for pinpoint application if bleeding occurs.
| Tool | Best For | Caution |
|---|---|---|
| Guillotine Clippers | Dogs with small to medium nails | Risk of pinching; hard to control depth on black nails |
| Scissor-Style Clippers | Precision cutting; larger breeds | Requires steady hands; not ideal for squirmy dogs |
| LED-Lit Clippers | Identifying the quick in dark nails | May not work on very thick or fully pigmented nails |
| Rotor Grinder | Gradual shaping and avoiding the quick | Noise may scare sensitive dogs; use gradually |
Real Example: How Sarah Learned to Trim Her Labrador’s Black Nails
Sarah adopted a rescue Labrador named Max who had long-overdue nail maintenance. His nails were thick, black, and curled under. She tried clipping once but hit the quick on two toes, causing Max to yelp and pull away. Guilt-ridden, she avoided trimming for months.
After consulting her groomer, Sarah learned the “core inspection” method using a flashlight. She began by shining a bright LED light beneath each nail. On one hind toe, she noticed a faint shadow in the center. She marked that nail with a piece of tape and used her grinder to remove 1mm at a time. After five sessions over three weeks, all nails were shortened safely. Max no longer slipped on hardwood floors, and he now tolerates grinding with treats and praise.
Her key takeaway? “Small steps and good lighting made all the difference. I didn’t need perfect vision—just consistency and the right tools.”
Checklist for Safe Home Trimming of Black Dog Nails
Before each session, run through this checklist to ensure safety and success:
- ✅ Gather supplies: clippers, grinder, styptic powder, treats, towel
- ✅ Choose a calm time when your dog is relaxed
- ✅ Examine each nail for shape, thickness, and curvature
- ✅ Use a flashlight to inspect the underside for any visible core
- ✅ Make only small cuts or light passes with the grinder
- ✅ Inspect the cut surface after each snip
- ✅ Stop immediately if you see a dark spot in the center
- ✅ Reward your dog after each nail, even if only one is done
Frequently Asked Questions
How far back should I cut a black dog nail?
There’s no universal measurement—it depends on the individual dog and nail length. As a general rule, start by trimming just the hooked tip. Then, make incremental cuts every few days, checking the cut surface each time. When a small dark circle appears in the center, you’re within 1–2mm of the quick and should stop.
Can I use a human nail drill on my dog?
While some human drills resemble pet grinders, they may lack safety guards or operate at unsafe speeds. Pet-specific grinders are designed with lower RPM settings and protective housings to prevent overheating or slipping. It’s best to use a tool made for animals.
What if my dog won’t sit still for a trim?
Start with desensitization. Touch your dog’s paws daily, offer treats, and mimic the trimming motion without cutting. Gradually introduce the sound of the grinder. Short, positive sessions build trust. If anxiety persists, consult a professional groomer or veterinarian for assistance.
Final Tips for Long-Term Success
Regular nail maintenance prevents the quick from extending too far. Dogs that go too long between trims develop longer quicks, making future cuts riskier. Aim to check nails weekly and trim or file every 3–4 weeks.
Keep a log of your dog’s nail condition and progress. Note which toes are thicker or grow faster. Over time, you’ll recognize patterns and gain confidence. Remember: even experienced groomers take their time with black nails. Patience isn’t just kind—it’s essential for safety.
💬 Your dog’s comfort starts with your confidence. Start small, stay consistent, and celebrate every successful trim. Share your journey or ask questions in the comments—let’s support each other in keeping our pets happy and healthy!