Pet ownership brings joy, companionship, and a little chaos—especially around mealtimes. Whether you have an eager Labrador who digs into their bowl like it’s the last meal on Earth or a finicky cat that flicks kibble across the room, pet food spills are inevitable. Left unchecked, these messes can lead to slippery floors, pest infestations, unpleasant odors, and long-term damage to flooring materials. The good news is that with thoughtful planning and consistent habits, you can minimize—and even prevent—these issues. From smart feeding setups to daily maintenance routines, here’s how to protect your floors while keeping your pets happy and well-fed.
Design a Pet-Friendly Feeding Zone
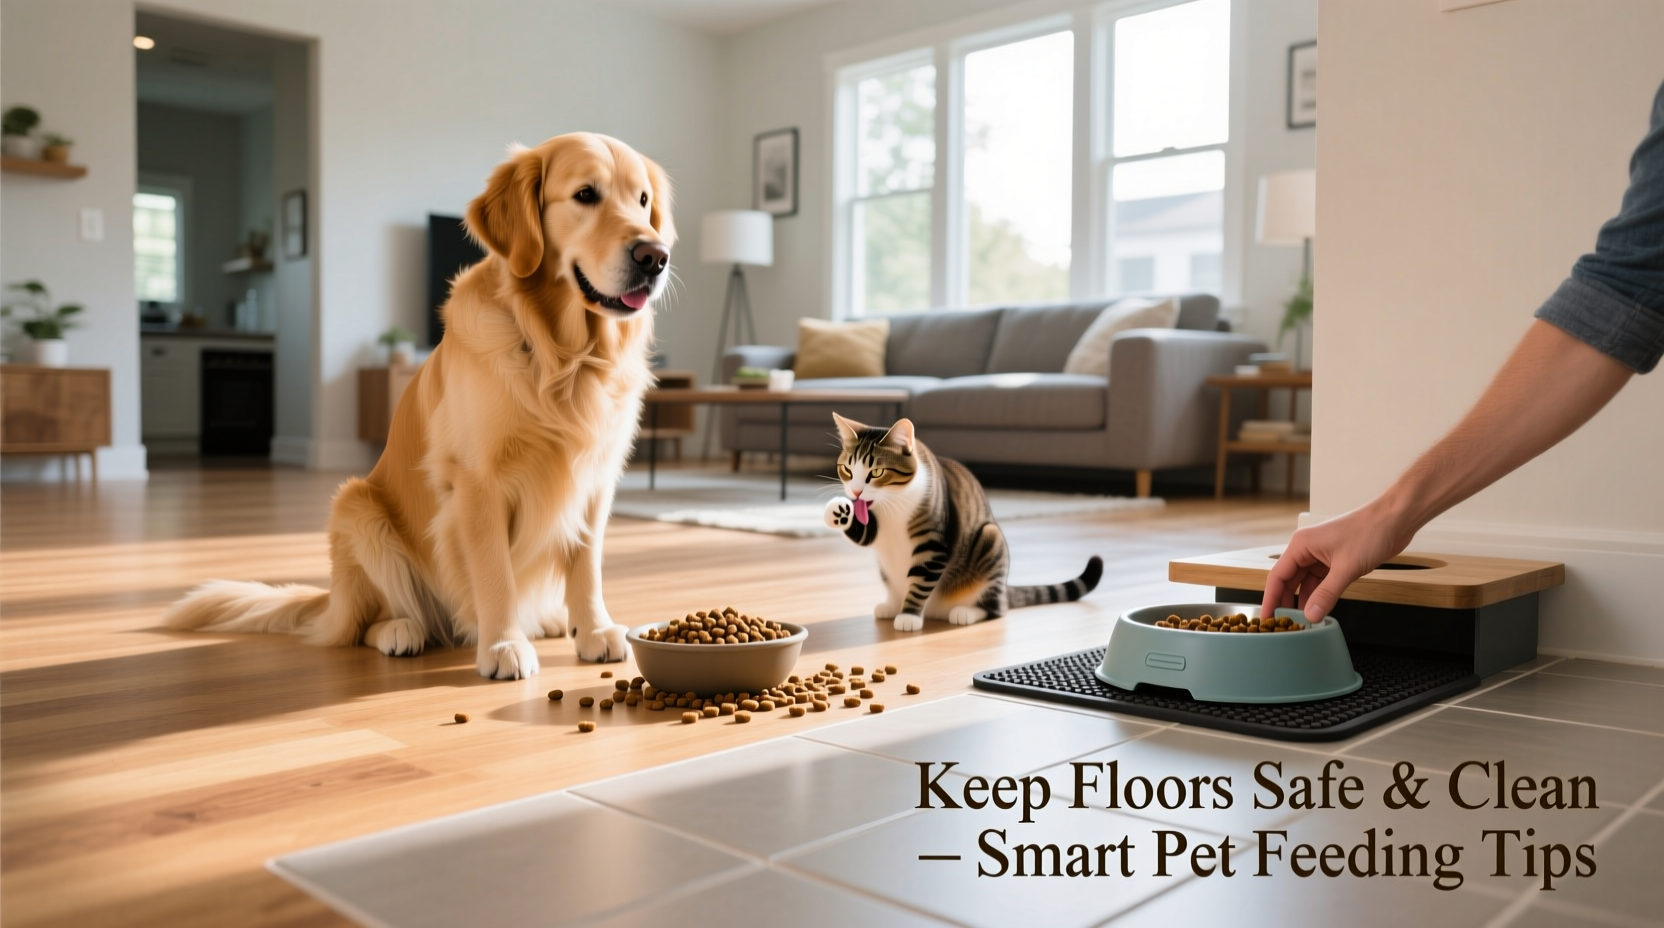
The first line of defense against pet food messes is controlling where meals happen. A designated feeding zone acts as a containment area, making cleanup easier and reducing the spread of debris throughout your home. Choose a spot with durable, easy-to-clean flooring such as tile, vinyl, or sealed concrete. Avoid carpeted areas, which trap crumbs and absorb liquids, leading to lingering smells and potential mold growth.
Within this zone, use a non-slip mat under food and water bowls. Ideally, select one with raised edges to catch stray kibble and splashed water. Rubber-backed mats work well because they stay in place and resist moisture absorption. For larger dogs or particularly messy eaters, consider a full-size feeding tray designed specifically for pets—one that extends beyond the bowl footprint to capture flying debris.
Tip: Place the feeding station near a doorway to another room so spills don’t easily migrate into high-traffic living spaces.Choose the Right Bowls and Feeders
Bowl design plays a surprisingly large role in spill prevention. Traditional flat bowls encourage pets to root around aggressively, sending food flying. Elevated feeders align better with your pet’s natural posture, promoting slower eating and reducing strain on joints—especially beneficial for larger breeds. Studies suggest elevated feeders can reduce mess by up to 35% simply by improving ergonomics.
For pets prone to overexcitement, slow-feed bowls are a game-changer. These feature maze-like patterns that force animals to eat more deliberately, minimizing aggressive digging and scattering. Stainless steel or ceramic options are ideal—they’re durable, dishwasher-safe, and less likely to harbor bacteria than plastic.
“Pets who eat too quickly not only make more mess but also risk choking or bloating. A slow-feed bowl addresses both safety and cleanliness.” — Dr. Lena Reyes, DVM, Small Animal Nutrition Specialist
Implement a Spill-Containment Checklist
Consistency is key when managing pet-related messes. Use this daily checklist to maintain control over your feeding area and protect your floors long-term.
- Position mats properly: Ensure feeding mats fully surround bowls and are cleaned daily.
- Inspect bowls regularly: Replace cracked or warped containers that may leak or tip easily.
- Sweep or vacuum immediately after meals: Prevent crumbs from embedding into floor seams or attracting insects.
- Wipe down surrounding surfaces: Clean baseboards, walls, and nearby furniture legs where food often lands.
- Monitor portion sizes: Overfilling bowls increases the chance of overflow and waste.
- Train your pet: Reinforce calm behavior during feeding using positive reinforcement.
Compare Feeding Setup Options
Different homes and pets require different approaches. This table compares common feeding configurations based on effectiveness, cost, and ease of maintenance.
| Setup Type | Spill Reduction | Cost Range | Maintenance Level | Best For |
|---|---|---|---|---|
| Basic Floor Bowls + Flat Mat | Low | $5–$15 | High (daily deep cleaning) | Small, neat eaters; budget-conscious owners |
| Elevated Feeder + Containment Mat | Moderate | $25–$50 | Medium | Medium to large dogs; households with hardwood floors |
| Slow-Feed Bowl in Tray System | High | $30–$60 | Low to Medium | Fast eaters; multi-pet homes |
| Wall-Mounted or Built-In Feeding Station | Very High | $100+ | Low | Custom kitchens; serious spill prevention needs |
Establish a Post-Meal Cleanup Routine
Even with preventive measures, some mess is unavoidable. What matters most is how quickly and thoroughly you respond. Follow this step-by-step process after each feeding:
- Wait for your pet to finish: Remove bowls only once your pet has walked away to avoid triggering food guarding.
- Lift bowls and inspect the mat: Check for trapped moisture or clumped food underneath.
- Dry wipe first: Use a microfiber cloth to pick up visible crumbs and smears before wet cleaning.
- Vacuum or sweep: Focus on cracks between tiles or along baseboards where debris accumulates.
- Sanitize the mat and floor: Use a pet-safe disinfectant spray or mild vinegar solution (1:3 vinegar to water).
- Rinse and dry mats: If washable, clean mats weekly in the sink or dishwasher to prevent bacterial buildup.
- Inspect for wear: Look for fraying edges or warping that could compromise future containment.
A Real-Life Example: Managing a Multi-Pet Household
The Thompson family in Portland shares their home with two dogs—a rambunctious Border Collie and a senior Basset Hound—and a cat who treats dog food like gourmet snacks. Their kitchen had become a minefield of kibble and sticky paw prints. After replacing flat bowls with elevated slow-feed models and installing a large rubber feeding tray, they noticed immediate improvements. They now sweep the area twice daily and wash the tray every other day. Within three weeks, ant sightings dropped to zero, and floor scratches from embedded debris disappeared. “We didn’t realize how much damage tiny bits of food were doing until we stopped ignoring them,” says Sarah Thompson. “Now our floors look newer than they did a year ago.”
Common Mistakes That Worsen the Problem
Some well-intentioned habits actually increase the risk of floor damage. Avoid these pitfalls:
- Using decorative rugs under bowls: They absorb spills but are hard to clean and promote bacterial growth.
- Letting pets eat unattended: Unsupervised meals often result in overeating and excessive mess.
- Skipping regular mat maintenance: Grime builds up in textured mats, creating slipping hazards.
- Feeding near wood floors without protection: Moisture from wet food or drool can warp finishes over time.
- Ignoring behavioral cues: Pets that scatter food may be anxious or overly excited—addressing the cause reduces mess at the source.
Frequently Asked Questions
How often should I clean my pet’s feeding mat?
At minimum, wipe it down daily with a damp cloth. Deep clean with soap and water or in the dishwasher (if labeled safe) at least once a week to prevent odor and bacteria accumulation.
Can spilled dry food really damage my floors?
Yes. Over time, kibble breaks down and attracts moisture, which can stain grout or seep into wood grain. Additionally, crushed food particles act like sandpaper underfoot, accelerating wear on finishes.
Are there flooring types I should avoid for pet feeding areas?
Avoid unsealed wood, laminate, or carpet in feeding zones. These materials absorb liquids, swell with repeated exposure, and trap odors. Opt instead for waterproof vinyl, tile, or polished concrete.
Final Thoughts: Protect Your Floors Without Compromising Pet Comfort
Keeping your floors safe from pet food spills doesn’t mean sacrificing convenience or your pet’s enjoyment. With the right tools, setup, and routine, you can create a feeding environment that works for both your home and your animal companion. The investment in a quality mat, proper bowls, and consistent cleanup pays off in cleaner floors, fewer pests, and extended flooring life. Most importantly, these practices support a healthier, more hygienic space for everyone in your household—including your pets.
🚀 Start today: Evaluate your current feeding setup, identify one improvement you can make this week, and take action. Your floors—and your future self—will thank you.