Dogs love the sound of squeakers in their toys—it mimics prey-like noises that trigger instinctual behaviors. But over time, a damaged squeaker can become a choking hazard, or your dog may simply prefer a quieter play experience. Removing the squeaker isn’t always straightforward, especially if you want to preserve the toy’s integrity and ensure your pet’s safety. Done incorrectly, this process can lead to sharp edges, loose stuffing, or even toxic materials being exposed.
This guide outlines practical, vet-approved strategies for removing squeakers safely. Whether you're modifying a well-loved plush toy or preparing a new one for a sensitive pup, these techniques will help you maintain durability while eliminating noise hazards.
Why Remove the Squeaker?
Squeakers enhance play, but they aren’t suitable for every dog or situation. Some dogs become overly stimulated by the noise, leading to hyperactivity or resource guarding. Others may chew through the seams aggressively to reach the squeaker, increasing the risk of ingestion. Puppies, senior dogs, or pets with anxiety may also find the sudden sounds startling.
Veterinarians often recommend removing squeakers from toys given to aggressive chewers. Dr. Laura Bennett, DVM, explains:
“Once a squeaker is exposed, small plastic components can break off and cause intestinal blockages. Proactively removing it from high-risk toys is a smart preventive step.” — Dr. Laura Bennett, Veterinary Behavior Specialist
Step-by-Step Guide to Safely Remove a Squeaker
Follow this methodical approach to extract the squeaker while minimizing damage to the toy and ensuring your dog’s continued enjoyment.
- Inspect the Toy Thoroughly: Look for existing seams, weak stitching, or access points like laundry labels. Avoid cutting through embroidered areas or reinforced zones unless necessary.
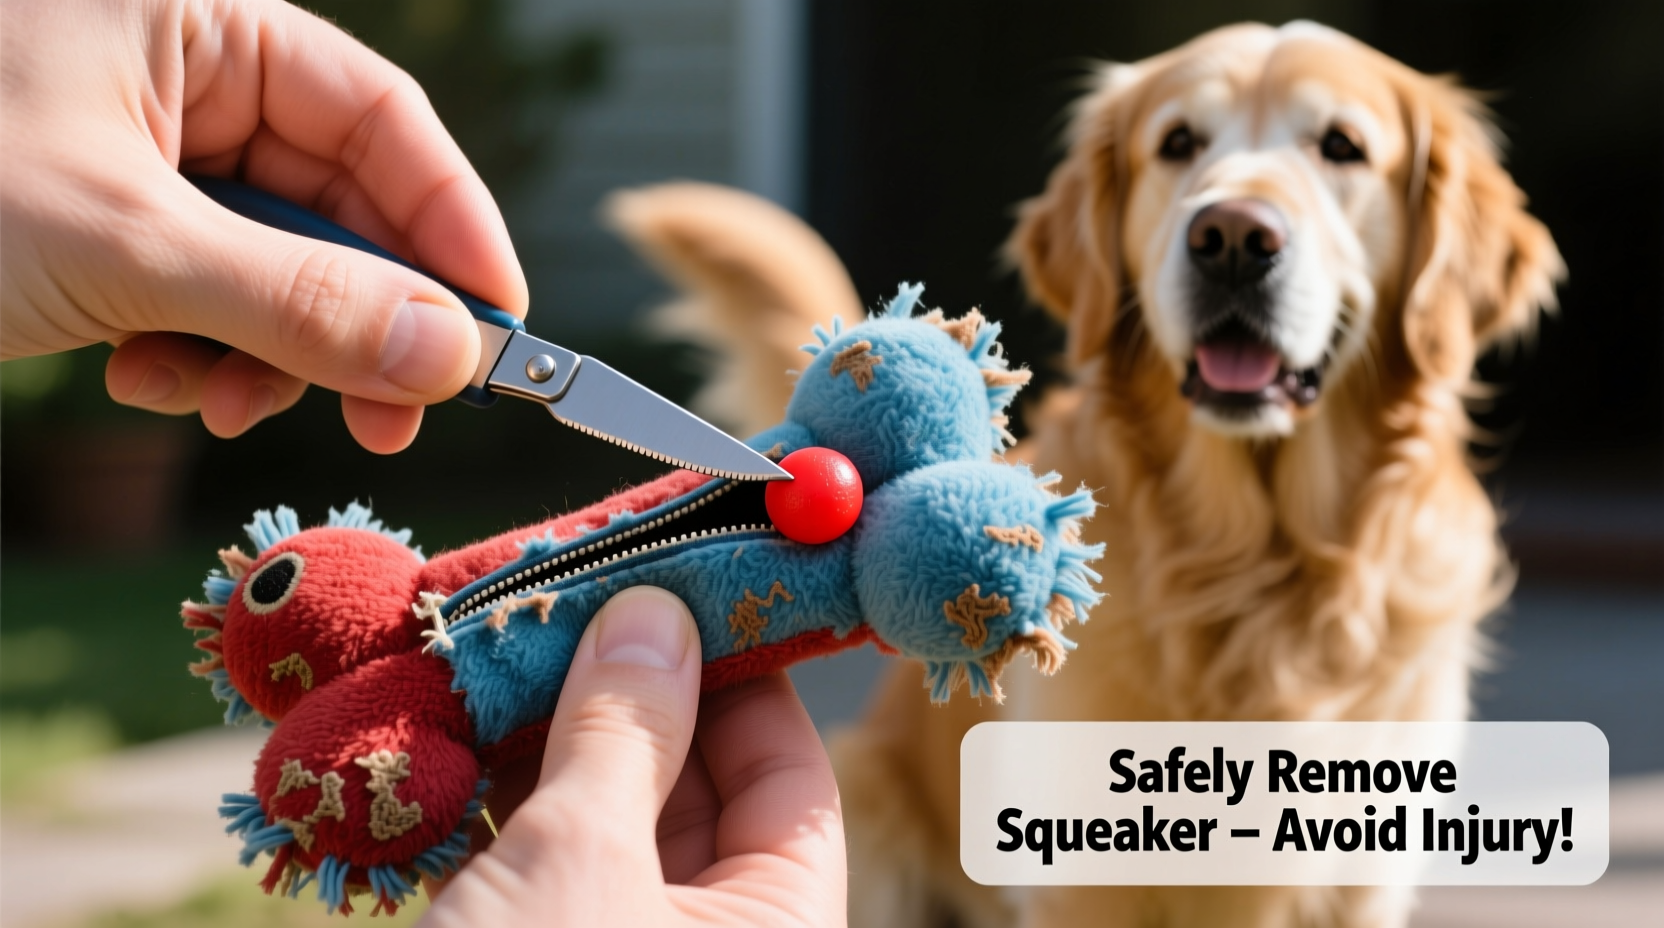
- Gather Your Tools: Use small, sharp scissors, tweezers, and a seam ripper. Wear gloves if handling older, potentially soiled toys.
- Locate the Squeaker: Gently squeeze different sections of the toy. The squeak will usually originate from a central chamber, often sewn into the torso or base of plush figures.
- Cut Along Existing Seams (If Needed): If there’s no accessible opening, use a seam ripper to carefully undo stitches along a hidden seam—typically under the toy or near a tag. Never cut through the main body fabric unless unavoidable.
- Remove the Squeaker: Once the cavity is open, pull out stuffing just enough to locate the squeaker. It’s usually encased in a thin plastic pouch or embedded in foam. Extract it completely using tweezers.
- Re-stuff and Close: Replace the removed stuffing to maintain shape. Hand-sew the opening closed with strong thread, using a whipstitch or ladder stitch for invisibility.
- Inspect for Safety: Check for sharp edges, loose threads, or uneven seams. Trim excess thread and test durability by gently tugging on the repaired area.
Do’s and Don’ts When Modifying Dog Toys
| Do’s | Don’ts |
|---|---|
| Use clean, sterilized tools | Use dull scissors that crush fabric |
| Work in a well-lit area | Rip seams aggressively |
| Wash the toy before and after modification | Leave loose threads that dogs can unravel |
| Test the repaired toy yourself for sturdiness | Allow your dog to play with the toy until fully dry post-wash |
| Save the squeaker for use in a DIY toy project | Assume all squeakers are equally safe—even intact ones degrade over time |
Real Example: Bella the Border Collie
Bella, a 3-year-old Border Collie, adored her duck-shaped squeaky toy but would obsessively tear at it each evening until the squeaker was exposed. Her owner, Mark, noticed she once swallowed a small piece of plastic, prompting a vet visit. After consulting with his veterinarian, Mark decided to modify future plush toys by removing the squeakers preemptively.
Using a seam ripper, he opened the underside of a new rabbit toy, extracted the squeaker, and hand-stitched the seam shut. He washed the toy thoroughly and introduced it alongside treats. Bella accepted the silent version just as enthusiastically, and within weeks, her destructive chewing decreased significantly. The modified toy lasted three times longer than previous versions.
This case illustrates how simple modifications can improve both safety and longevity—without sacrificing play value.
Alternative Methods for Non-Sewers
Not everyone is comfortable sewing. For those who prefer non-invasive or no-sew options, consider these alternatives:
- Freeze and Pop Method: Place the toy in the freezer for 2–3 hours. The cold makes plastic brittle and loosens glue bonds. Then, apply firm pressure to the squeaker area—sometimes the component cracks or shifts enough to disable the sound.
- Sound Muffling: Instead of removal, stuff dense material (like polyester fiberfill) tightly around the squeaker chamber. This dampens the noise without requiring disassembly.
- External Barrier Tape: Apply veterinary-grade tape (e.g., cohesive bandage wrap) around the toy during supervised play. While not permanent, it limits access and reduces noise transmission.
Frequently Asked Questions
Is it safe to leave a broken squeaker inside a toy?
No. A ruptured squeaker can leak chemicals or fragment into sharp pieces. Even if your dog hasn’t accessed it yet, the compromised integrity increases ingestion risks. Remove it immediately.
Can I wash the toy after removing the squeaker?
Yes—and you should. Washing removes bacteria, saliva residue, and potential allergens. Use mild detergent and air-dry completely before giving it back to your dog.
Will my dog still play with the toy without the squeak?
Most dogs adapt quickly. Many respond more to texture, scent, and interaction than sound alone. Introduce the quiet toy with positive reinforcement, such as pairing it with treats or play sessions.
Final Checklist Before Returning the Toy
- Squeaker has been fully removed or disabled
- All stuffing replaced and evenly distributed
- Seam securely closed with no loose threads
- Toy washed and completely dry
- No sharp edges, exposed plastic, or weak spots
- Passed a “tug test” to confirm structural strength
Conclusion
Removing a squeaker from your dog’s favorite toy doesn’t have to mean retiring it. With careful technique and attention to detail, you can extend its life, reduce hazards, and tailor playtime to your pet’s needs. Whether you’re protecting a puppy from choking risks or calming an overstimulated adult dog, proactive toy maintenance is a small act of care that yields big rewards in safety and longevity.
💬 Have a toy-modification success story or tip? Share your experience below and help fellow pet owners keep playtime fun and safe!