Homemade gifts carry a personal touch that store-bought items often lack. One of the most charming and practical handmade presents is brownie mix in a jar. Simple to assemble, visually appealing, and universally loved, these layered dessert jars make excellent gifts for birthdays, holidays, teacher appreciation, or housewarming events. Beyond their nostalgic appeal, they offer recipients the joy of baking fresh brownies with minimal effort. With endless customization options—from gourmet add-ins to decorative packaging—brownie mix jars blend creativity, convenience, and flavor into one delightful package.
The Appeal of DIY Brownie Mix Jars
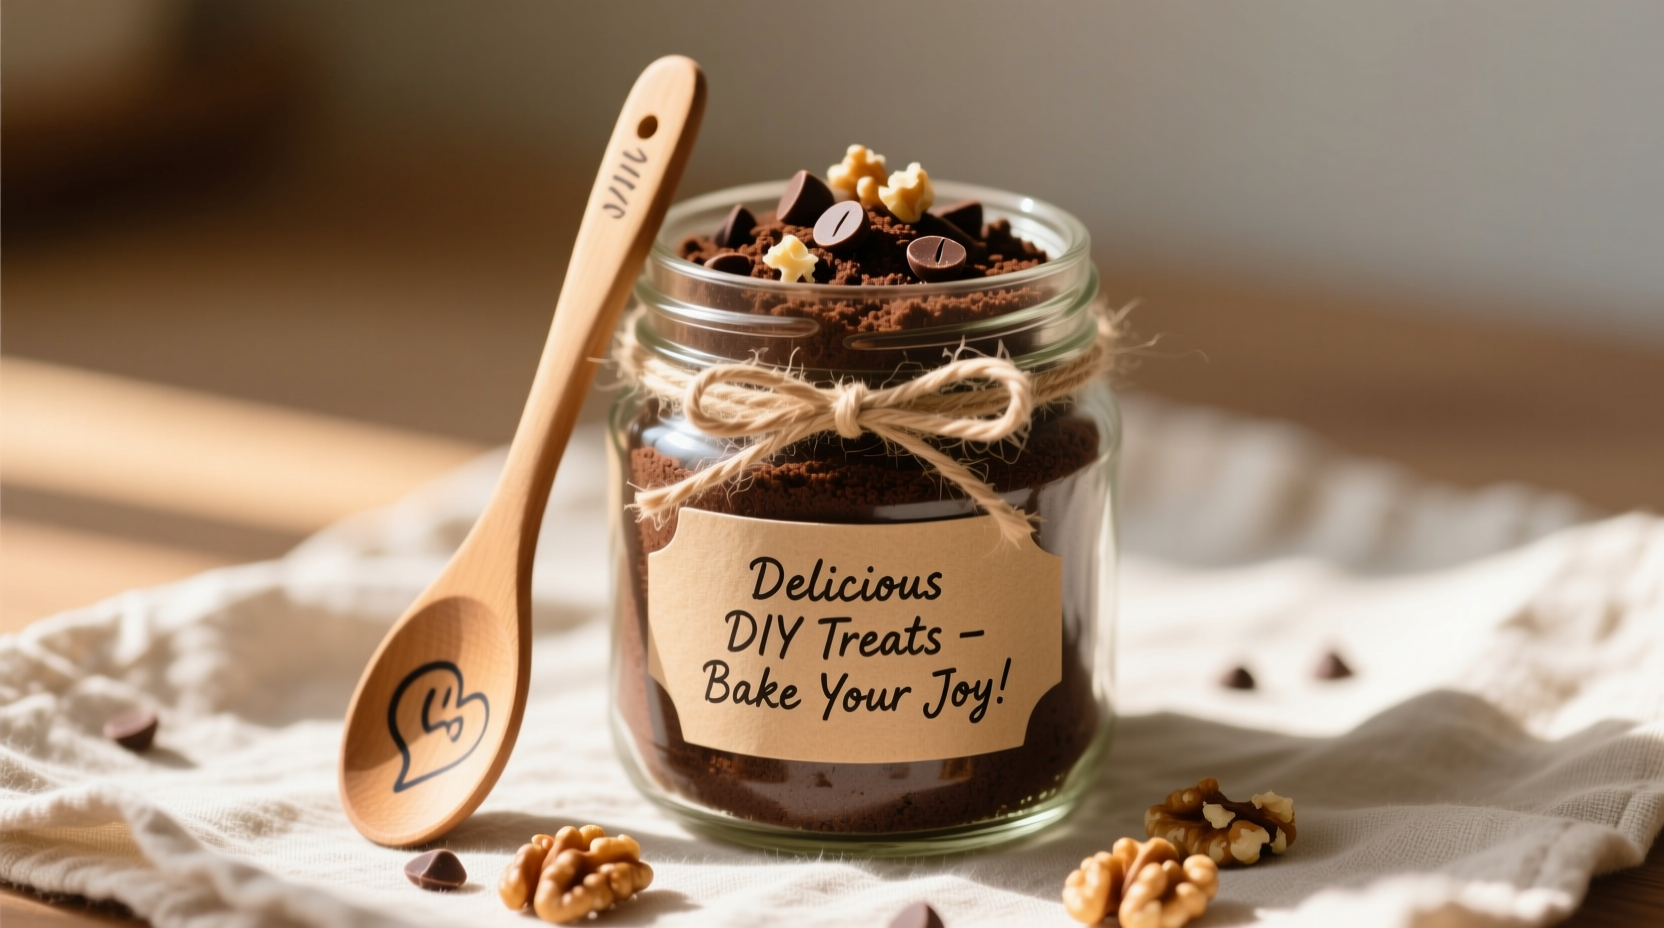
Brownie mix in a jar stands out because it combines practicality with sentiment. Unlike perishable baked goods, these jars have a shelf life of several weeks when stored properly, making them ideal for gifting ahead of time. The visual layering of ingredients adds an artistic flair, turning a simple mason jar into a miniature edible masterpiece. Recipients appreciate not only the thought behind the gift but also the experience of baking something warm and comforting from scratch.
Moreover, this type of gift caters to various skill levels. Even novice bakers can succeed with just a few additional wet ingredients—typically eggs, oil, and water. It’s a small gesture that invites connection, whether through shared memories of childhood desserts or the simple pleasure of homemade treats.
Tip: Use wide-mouth pint-sized mason jars for easier layering and access to ingredients.Essential Ingredients and Layering Order
The success of a brownie mix jar depends on precise ingredient measurement and proper layering. Dry ingredients must be added in a specific sequence to prevent clumping and maintain visual distinction. Wet ingredients like eggs and oil are always excluded and provided separately via instruction tag.
A standard brownie mix includes flour, sugar, cocoa powder, baking powder, salt, and chocolate chips or nuts. Optional additions such as espresso powder, vanilla sugar, or crushed cookies enhance depth of flavor. When layering, follow this order from bottom to top:
- Chocolate chips or nuts (for contrast)
- Sugar
- Flour
- Cocoa powder
- Baking powder and salt (mixed together first)
This sequence prevents the cocoa from sinking and ensures even distribution when mixed later. Spoon each ingredient gently to avoid disturbing previous layers. Tamp lightly if needed, but do not pack down too firmly.
| Ingredient | Amount (per pint jar) | Notes |
|---|---|---|
| Chocolate chips | 1/3 cup | Semi-sweet or dark for richer taste |
| Granulated sugar | 1/2 cup | Can substitute part with brown sugar for fudgier texture |
| All-purpose flour | 1/2 cup | Sift before adding to prevent lumps |
| Unsweetened cocoa powder | 1/4 cup | Dutch-process enhances richness |
| Baking powder + salt | 1/4 tsp + 1/8 tsp | Mix together before adding |
Creative Variations to Elevate Your Gift
While classic chocolate brownies are always welcome, experimenting with flavors transforms your gift from ordinary to extraordinary. Consider themed variations tailored to the recipient’s tastes or the season.
- Peppermint Chocolate: Add crushed candy canes and a hint of peppermint extract (include on instruction card).
- Double Fudge: Double the cocoa and add extra chocolate chunks.
- Walnut Blondie: Omit cocoa, use brown sugar, and add chopped walnuts.
- Salted Caramel: Layer in caramel bits and finish with a sprinkle of sea salt on top.
- Gluten-Free: Substitute flour with almond or oat flour and verify all other ingredients are certified GF.
For holiday gifting, consider seasonal twists—pumpkin spice in autumn, orange zest and dark chocolate for winter, or raspberry chips in spring.
“People remember how you made them feel. A handmade gift like a brownie mix jar says, ‘I thought of you,’ and that’s priceless.” — Sarah Lin, Artisan Food Gifting Consultant
Packaging and Presentation Ideas
No matter how delicious the contents, presentation determines the first impression. Thoughtful wrapping elevates the perceived value and shows care in craftsmanship.
Start with clean, sterilized jars. Use twine, ribbon, or fabric scraps to secure a handwritten label or printable tag. Attach baking instructions clearly: “Add 2 eggs, 1/3 cup oil, and 1 tsp vanilla. Mix, pour into greased 8x8 pan, bake at 350°F for 25–30 minutes.”
Enhance the theme with accessories:
- Mini spatula tied to the jar
- Small bag of sea salt or gourmet vanilla beans
- Recipe card for “next-level” frosting ideas
- Chopstick or wooden spoon as a stirring tool
Step-by-Step Guide to Assembling Your First Jar
Creating a brownie mix jar takes less than 20 minutes. Follow this timeline for flawless results:
- Prep (5 min): Gather ingredients, measuring cups, funnel (optional), and a clean pint jar.
- Layer dry ingredients (10 min): In order—chocolate chips, sugar, flour, cocoa, then leavening mix. Tap jar gently between layers.
- Seal and label (3 min): Wipe rim, apply lid, attach instruction tag with baking directions and expiration note (“Use within 6 weeks”).
- Decorate (2 min): Wrap with ribbon, add a sprig of dried lavender, or include a mini chalkboard sign.
Store assembled jars in a cool, dry place until gifting. Avoid humid environments to prevent clumping.
Real-Life Example: A Teacher Appreciation Success Story
Last spring, Lisa, a parent volunteer, gifted brownie mix jars to her child’s three teachers. She customized each with themed labels—“You’re *SWEET*,” “Classy & Chewy,” and “Top of the Class Treats”—and paired them with mini coffee bags. The response was overwhelming. One teacher emailed saying she baked the brownies the same evening and shared them with colleagues, sparking a conversation about homemade gifts. Two others posted photos on social media, tagging Lisa’s small Etsy shop where she later began selling kits. What started as a kind gesture turned into a micro-business opportunity—all from a simple jar of layered ingredients.
Frequently Asked Questions
Can I include wet ingredients in the jar?
No. Wet ingredients like eggs, oil, and vanilla should never be added to the jar. They spoil quickly and compromise shelf stability. Always list them on the instruction tag as “add-ins.”
How long do brownie mix jars last?
Properly sealed and stored in a cool, dark place, the mix remains fresh for up to six weeks. For longer storage, refrigeration is safe but may cause condensation upon opening.
Are there vegan-friendly options?
Absolutely. Use flax eggs (note substitution on tag: “Mix 1 tbsp ground flax + 3 tbsp water per egg”) and ensure chocolate chips are dairy-free. Label clearly as “Vegan-Friendly Mix.”
Checklist: Perfect Brownie Mix Jar in 7 Steps
- ☐ Choose a clean, dry pint mason jar
- ☐ Measure all dry ingredients precisely
- ☐ Layer in correct order (chips → sugar → flour → cocoa → leavening)
- ☐ Avoid packing layers too tightly
- ☐ Create a clear instruction tag with wet ingredients and baking steps
- ☐ Decorate with ribbon, twine, or thematic embellishments
- ☐ Store in a cool, dry place until gifting
Conclusion: Share Sweetness, One Jar at a Time
Brownie mix in a jar is more than a gift—it’s an invitation to create, connect, and enjoy something genuinely heartfelt. Whether you're crafting a single jar for a neighbor or preparing dozens for a holiday swap, the process fosters mindfulness and generosity. With attention to detail, a dash of creativity, and respect for quality ingredients, your DIY treat becomes a memorable token of care.
💬 Ready to spread sweetness? Try assembling your first brownie mix jar this weekend. Share your design, tag a friend who’d love one, or start a tradition of handmade gifting that warms hearts year-round.