Transforming a blank wall into a captivating visual experience begins with intention. A mural-style background enhanced with hanging paintings blends large-scale artistry with curated personal expression. This approach goes beyond traditional gallery walls—it creates immersive environments where murals set the tone and framed works add depth, narrative, and contrast. Whether in a living room, dining area, or creative studio, this design technique can elevate any interior.
The key lies in balance: harmonizing the expansive nature of a mural with discrete pieces of art without overcrowding or diluting impact. Done well, the result is a dynamic yet cohesive composition that feels both intentional and expressive.
Understand the Concept: Mural Meets Gallery Wall
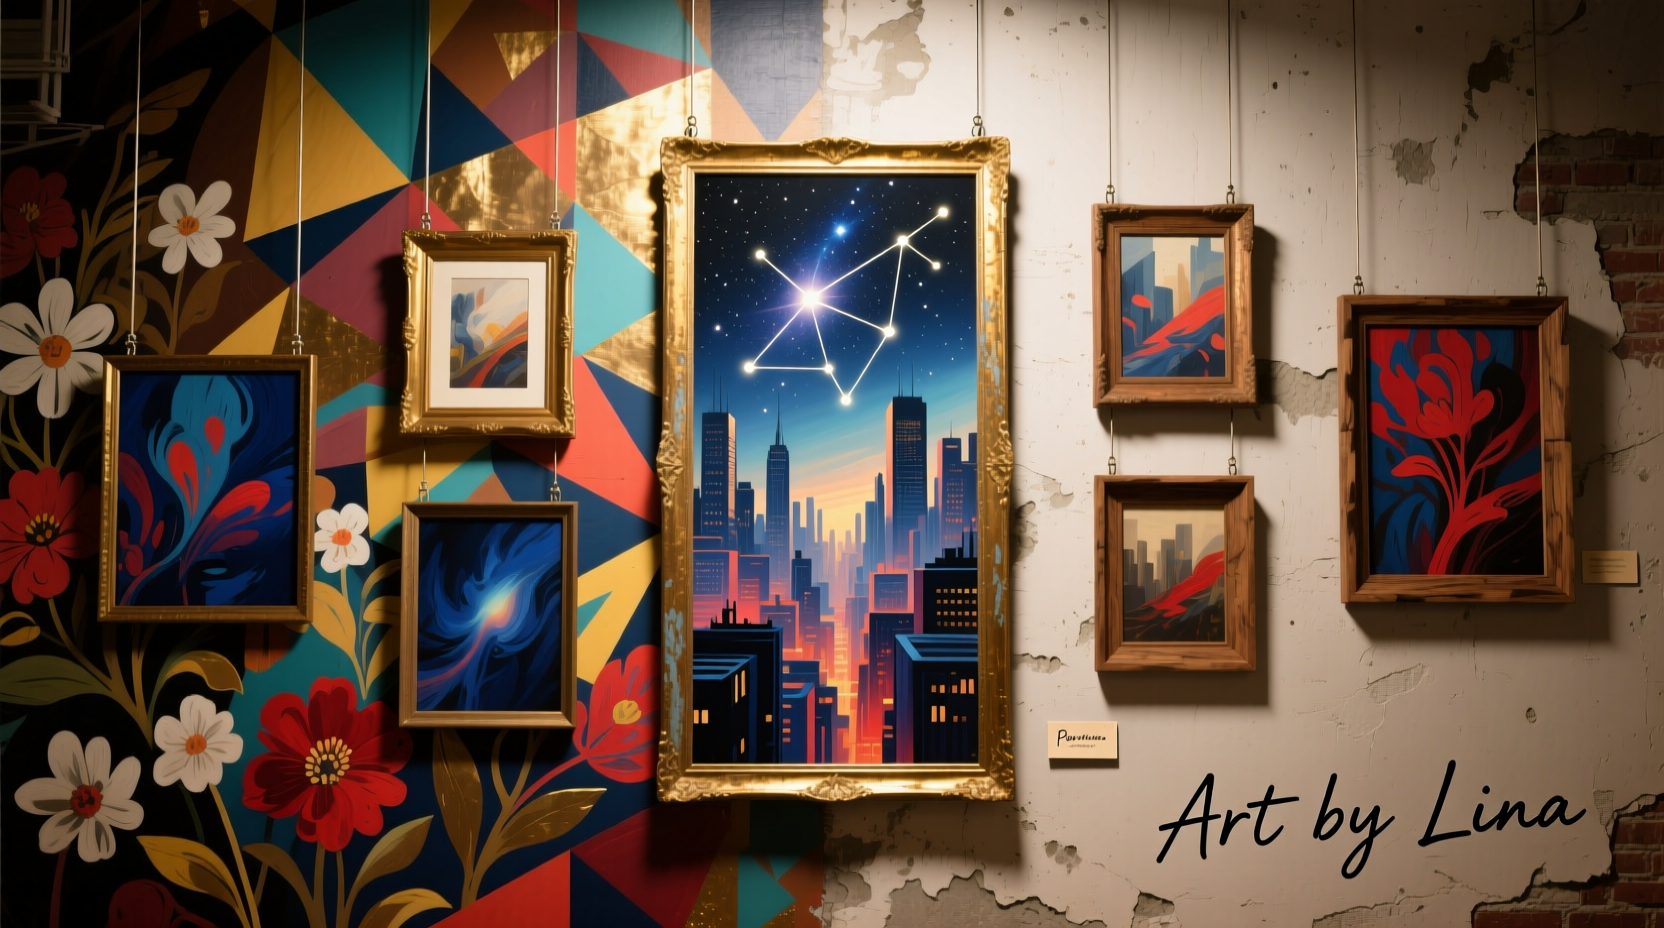
A mural-style background isn’t just a painted wall—it’s a foundational element that sets mood, color palette, and theme. When combined with hanging paintings, it becomes a layered canvas where large-scale imagery interacts with smaller, more intimate artworks. Think of the mural as the stage and the paintings as featured performers.
This hybrid approach works especially well in spaces seeking personality without chaos. For example, a botanical mural might flow across one wall while carefully selected impressionist landscapes or vintage botanical prints hang in deliberate arrangement around it. The mural provides continuity; the frames introduce variation.
“Layering a mural with physical artworks adds dimensionality that flat surfaces can’t achieve. It invites closer inspection and emotional connection.” — Lena Torres, Interior Designer & Spatial Artist
Plan Your Layout and Theme
Start with a clear vision. Ask: What feeling should this space evoke? Calmness? Energy? Nostalgia? Your answer guides both the mural design and painting selection.
Choose a unifying theme—such as coastal scenes, abstract geometry, cultural motifs, or monochrome portraiture. Consistency in subject matter, era, or color temperature ensures cohesion even when styles vary slightly.
Tip: Use a mood board (digital or physical) to collect color swatches, texture samples, and reference images before committing to paint or frame choices.Create a Visual Hierarchy
Not all elements should compete for attention. Establish a focal point—this could be the most vibrant section of the mural or a central framed piece. Arrange surrounding paintings to guide the eye naturally through the composition.
- Place larger or darker-framed works at eye level.
- Use spacing (typically 2–3 inches between frames) to avoid clutter.
- Align bottom edges of frames if hanging over furniture for stability.
Step-by-Step Guide to Execution
- Measure and map the wall: Sketch the wall dimensions on graph paper or use digital tools like RoomSketcher. Mark doors, windows, outlets, and architectural features.
- Design the mural base: Decide whether the mural will cover the entire wall or serve as a backdrop behind select areas. Consider stencils, hand-painting, or removable wallpaper for flexibility.
- Select paintings: Choose 5–9 pieces that complement but don’t duplicate the mural. Mix sizes and orientations for rhythm.
- Dry-fit the layout: Cut paper templates matching each frame’s size. Tape them to the wall using painter’s tape to test arrangements. Step back frequently to assess balance.
- Paint the mural: Complete the mural first. Allow full drying time. If using paint, apply primer and sealant for durability.
- Hang the artwork: Begin from the center outward. Use a level and measuring tape for precision. For heavy pieces, install wall anchors.
- Add lighting: Install picture lights or directional ceiling spots to highlight textures and details.
| Phase | Action | Time Estimate |
|---|---|---|
| Planning | Mood board, measurements, layout sketch | 2–4 hours |
| Preparation | Surface prep, masking, gathering materials | 1–2 hours |
| Mural Application | Base coat, detailing, sealing | 6–12 hours (including drying) |
| Art Installation | Hanging, leveling, final adjustments | 2–3 hours |
Material and Color Coordination
Color harmony is critical. Extract 2–3 dominant hues from the mural and echo them in the mats, frames, or subjects of the paintings. For instance, a desert sunset mural with burnt orange and deep indigo can be echoed in the borders of neutral-toned photographs or abstract canvases.
Framing choices matter. Uniform frames create order; mixed styles add eclecticism. To blend seamlessly:
- Match wood tones across frames.
- Use black or white frames for neutrality.
- Consider floating frames for canvas pieces to reduce visual weight.
Do’s and Don’ts of Integration
| Do | Don't |
|---|---|
| Leave breathing space around the mural edge | Cover electrical outlets or obstruct switches |
| Use UV-protective glass on valuable paintings | Expose delicate works to direct sunlight |
| Seal murals with non-yellowing varnish | Apply harsh cleaners to painted surfaces |
| Balance symmetry with organic flow | Align every frame rigidly unless intentional |
Real Example: Revitalizing a Dining Room Wall
Sarah, a graphic designer in Portland, wanted to transform her narrow dining room. She began with a hand-painted forest mural covering two-thirds of the main wall, fading subtly at the edges to suggest depth. Over several weekends, she tested layouts using paper cutouts.
She selected seven small-to-medium paintings—some her own, others inherited family pieces—with earthy greens and warm ochres. Frames were统一 in dark walnut. She hung them in a loose arc above the sideboard, starting from the mural’s tree line and extending into open wall space.
The effect was striking: guests often paused, mistaking parts of the mural for real shadow. The combination felt personal yet polished. By integrating heirloom art with original painting, Sarah honored memory while creating something entirely new.
Frequently Asked Questions
Can I use a mural wallpaper instead of painting?
Yes. High-quality peel-and-stick mural wallpapers offer realistic textures and are ideal for renters or temporary installations. Ensure seams align perfectly and consider adding a clear sealant along edges for durability.
How do I prevent the wall from looking too busy?
Limit the number of hanging pieces and maintain consistent spacing. Let negative space play a role—empty areas give the eye resting points and enhance overall clarity.
What if my mural and paintings clash?
Reintroduce harmony through unifying elements: repeat a frame color, adjust matting, or overlay a translucent glaze on the mural to mute overpowering sections.
Final Checklist Before Completion
✅ Final Verification Checklist- All frames are securely mounted and level
- Mural is fully sealed and touch-dry
- No glare issues from overhead or natural light
- Artwork heights follow ergonomic viewing standards (center at 57–60 inches from floor)
- Theme and colors feel balanced and intentional
- Wall remains accessible and functional (no obstruction of furniture use)
Conclusion: Bring Your Walls to Life
A mural-style background with hanging paintings is more than decoration—it’s storytelling through space. With thoughtful planning, attention to detail, and respect for proportion, you can craft an environment that resonates emotionally and impresses visually.
Start small if needed. Test a corner, experiment with temporary materials, then scale up. Every great design begins with a single brushstroke or a single frame. Now is the time to make your wall speak.
💬 Have you created a mural-gallery fusion at home? Share your experience, challenges, or photos in the comments—your journey could inspire someone else’s next masterpiece.