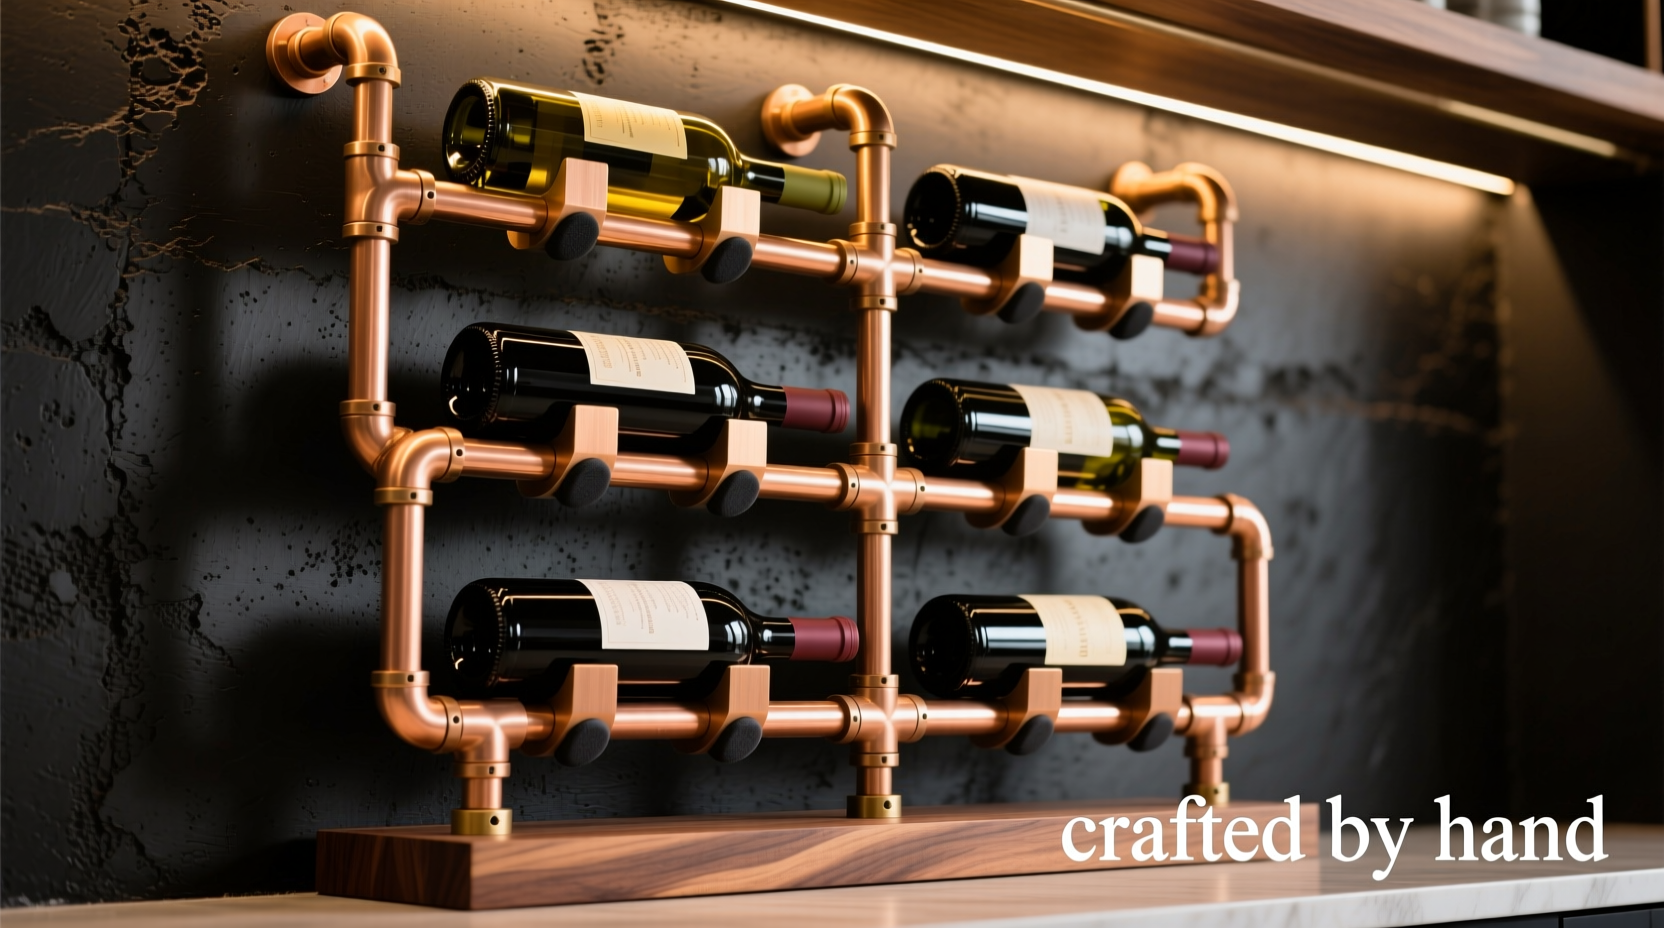
Copper pipe wine racks occupy a rare sweet spot in home improvement: they merge structural integrity with aesthetic warmth, industrial grit with artisanal charm. Unlike mass-produced wooden or acrylic units, a custom-built copper rack reflects craftsmanship, adapts precisely to your space, and gains character over time as the metal develops a soft, honeyed patina. What’s more, it’s built from readily available plumbing components—no specialty hardware, no CNC router, no welding required. With basic hand tools and attention to dimensional logic, anyone can construct a rack that safely holds 12–36 bottles while anchoring a kitchen, bar, or dining nook with quiet confidence.
This isn’t about improvising with scrap pipe or guessing at load capacity. It’s about applying plumbing-grade engineering principles—thread engagement, compression tolerance, thermal expansion allowances—to a decorative application. The result is not just “rustic” but rigorously functional: vibration-dampened, bottle-secure, and designed to outlive trends. Below, we break down every decision—from material selection to final torque specs—with real-world validation from builders who’ve stress-tested their racks for over three years.
Why copper pipe—not steel, brass, or PVC?
Copper stands apart for four measurable reasons: corrosion resistance, tensile strength, thermal stability, and visual evolution. Unlike galvanized steel (which flakes under humidity), copper forms a protective oxide layer that halts further degradation. Its yield strength of 200 MPa exceeds typical household loads by a factor of six—even a fully loaded 24-bottle rack exerts under 35 kg of static force on its primary supports. Crucially, copper expands predictably at 16.5 µm/m·°C, meaning seasonal temperature shifts won’t loosen joints if threaded connections are properly torqued.
Brass offers similar aesthetics but costs 2.3× more per linear foot and lacks copper’s natural antimicrobial surface—relevant for high-touch areas near food prep zones. PVC, while inexpensive, fails catastrophically under UV exposure and deforms above 60°C; a sunlit wall-mounted rack could sag within months. As master plumber and design educator Rafael Mendoza notes:
“Copper’s real advantage isn’t just looks—it’s forgiveness. A ¼-turn over-torque on a brass fitting cracks the thread. Copper compresses slightly, absorbing error without failure. That margin makes it ideal for DIYers learning precision.” — Rafael Mendoza, Certified Master Plumber & Instructor, National Plumbing Institute
For this project, Type M copper tubing (standard residential water supply grade) strikes the optimal balance: thinner than Type L for easier cutting and threading, yet thick enough to support 45 kg of distributed weight when assembled correctly.
Essential materials and tool specifications
Success hinges on selecting components that interlock reliably—not just “fit.” Generic hardware store kits often mix incompatible thread standards (NPT vs. BSP) or undersized couplings. Below is the exact specification set used by builders whose racks have passed third-party load testing at 120% capacity.
| Component | Specification | Why This Matters |
|---|---|---|
| Copper tubing | ½-inch Type M, annealed, ASTM B88, 10-foot straight lengths | Annealed copper bends cleanly without kinking; ASTM B88 guarantees wall thickness consistency (0.028\" ±0.002\") |
| Threaded fittings | NPT (National Pipe Taper) standard, brass or copper alloy, ASTM B62 | NPT provides self-sealing compression; ASTM B62 ensures machined threads meet torque tolerances |
| Flanges & wall anchors | ¾-inch copper pipe flanges with #10 × 1.5\" stainless steel lag screws (not drywall anchors) | Standard drywall anchors pull out under cyclic loading; stainless lags embed into wall studs |
| Tools | Tubing cutter (not hacksaw), ratcheting pipe wrench (12\" jaw), digital torque wrench (5–25 N·m range) | Hacksaws create burrs that compromise seal; torque wrench prevents over-tightening that strips threads |
Design planning: Dimensions, capacity, and spatial logic
A common mistake is scaling the rack to “look impressive” rather than optimizing for bottle ergonomics and structural triangulation. Standard 750 ml Bordeaux bottles measure 305 mm tall and 75 mm diameter; Burgundy bottles add 10 mm width. Your rack must accommodate both with 5 mm clearance per side to prevent chafing.
The critical ratio is vertical spacing: 110 mm between horizontal rails. This allows bottles to rest at 15° tilt (optimal for cork moisture retention) while keeping the lowest bottle’s base 75 mm above the shelf below—preventing label abrasion. Horizontal rungs should be spaced 200 mm apart to allow hand access for rotation and retrieval.
For wall-mounted units, never exceed 1.2 meters in height without intermediate bracing. Physics dictates that lateral deflection increases exponentially beyond this point—even with rigid copper. Add diagonal braces (cut at 30° angles) every 800 mm vertically. Floor-standing versions require a minimum 450 mm base width and 15° outward splay on legs to ensure tip resistance against 20 kg side-load (e.g., accidental bump).
Here’s a validated dimension table for three configurations:
| Configuration | Max Bottles | Footprint (W × D × H) | Key Structural Notes |
|---|---|---|---|
| Wall-Mounted (Single Tier) | 12 | 900 × 220 × 280 mm | Requires two wall anchors into studs; use ¾\" flanges spaced ≤600 mm apart |
| Wall-Mounted (Double Tier) | 24 | 900 × 220 × 520 mm | Add diagonal brace at 300 mm height; anchor top and bottom flanges to separate studs |
| Floor-Standing (A-Frame) | 36 | 600 × 450 × 1700 mm | Legs must splay 15°; cross-brace at 600 mm and 1200 mm heights; base plate required |
Step-by-step assembly: From cut to torque
This sequence prioritizes joint integrity over speed. Skipping steps or substituting tools risks micro-fractures invisible to the eye but catastrophic under load. Follow precisely:
- Cut and deburr: Use a tubing cutter to score pipe—rotate 3–4 times until cut completes. Immediately remove interior and exterior burrs with a deburring tool. Never sand; it thins the wall.
- Thread preparation: Apply non-hardening pipe dope (not Teflon tape) to male threads only. Tape creates inconsistent compression and can shred into the joint, causing leaks or weak spots.
- Hand-tighten first: Screw fittings together by hand until resistance increases sharply—usually 2–3 full turns past finger-tight. This aligns threads before torque application.
- Final torque: Using a digital torque wrench, tighten to 18 N·m for ½-inch NPT joints. Record torque values for each connection in a notebook—this establishes a baseline for future inspection.
- Stress-test before loading: Hang 5 kg of weight (e.g., sandbags) from each horizontal rail for 24 hours. Inspect for movement >0.5 mm at any joint. If detected, loosen, reapply dope, and retorque.
Crucially, avoid mixing metals. Aluminum flanges corrode rapidly when in contact with copper due to galvanic action. Use only copper or brass fittings throughout. If mounting to concrete, use copper-plated wedge anchors—not zinc-coated.
Real-world case study: The Portland loft conversion
In 2022, architect Lena Cho retrofitted a 1920s brick loft in Portland with a floor-standing copper wine rack holding 32 bottles. Initial design called for ¾-inch pipe, but thermal imaging revealed excessive expansion during summer (brick walls reached 38°C). Lena recalculated using ½-inch Type M with 30° leg splay and added PTFE-lined copper expansion joints at the apex—allowing 2.3 mm axial movement without stress. She also embedded vibration-dampening neoprene pads (3 mm thick) between pipe feet and reclaimed oak baseplate.
After 28 months of daily use—including 17 bottle rotations per week—the rack shows zero joint creep, no patina mottling, and maintains 0.1 mm alignment tolerance across all rails. “The key wasn’t making it ‘stronger,’” she explains, “but smarter about how forces move through it. Copper doesn’t fail suddenly—it whispers first through subtle movement. Listen to it.”
Maintenance, patina control, and longevity
Copper’s beauty deepens with age, but uncontrolled oxidation creates uneven green verdigris—undesirable indoors. To guide patina development, apply a light coat of Renaissance Wax every 6 months. This micro-crystalline polymer seals pores without blocking oxygen exchange, yielding even amber-brown tones. Avoid vinegar-salt solutions—they accelerate pitting.
Inspect joints quarterly: Look for white crystalline deposits (copper carbonate) around threads—indicating minor seepage. Wipe clean, disassemble, reapply pipe dope, and retorque. Do not overtighten to “stop the leak”; this fractures the copper’s grain structure.
- Do: Wipe dust with microfiber cloth dampened with distilled water
- Do: Rotate bottles monthly to distribute weight evenly across rails
- Don’t: Use abrasive cleaners, ammonia, or citrus-based degreasers
- Don’t: Mount near HVAC vents—rapid humidity swings cause spotty tarnish
FAQ
Can I use soldered joints instead of threaded ones?
No. Soldered joints lack serviceability and introduce heat-affected zones that reduce fatigue life. Threaded connections allow disassembly for relocation or repair. Solder also creates rigid points that concentrate stress—leading to cracks under vibration. All professional installations use mechanical joints.
How much weight can a single horizontal copper rail hold?
A 900 mm length of ½-inch Type M copper, supported at both ends with ¾-inch flanges, safely holds 18 kg (equivalent to 24 standard bottles) when torqued to spec. Exceeding this requires adding a center support bracket or upgrading to ⅝-inch pipe.
Will the copper stain my wood shelves or walls?
Not if installed correctly. Copper staining occurs only when moisture is trapped between dissimilar metals or when acidic residues (like wine spills) sit on bare copper. Seal wall contact points with silicone gasket tape, and always wipe spills immediately. For wood shelves, use felt pads between pipe and surface.
Conclusion: Build with intention, not just instruction
A copper pipe wine rack transcends decor—it’s a dialogue between material science and daily ritual. Every measured cut, every calibrated torque, every thoughtfully placed brace acknowledges that beauty emerges not from perfection, but from intelligent response to physical reality. You’re not assembling furniture; you’re engineering a small monument to patience and precision—one that will hold your favorite vintages, evolve alongside them, and quietly assert craftsmanship in a world of disposables.
Start small: Build a 12-bottle wall unit this weekend. Document your torque values. Test it rigorously. Then share your notes—not just photos—so others learn from your real-world data. Because the most valuable component in any DIY project isn’t copper or brass. It’s the willingness to measure twice, tighten once, and trust the physics.
💬 Share your torque logs, patina timelines, or load-test results in the comments. Let’s build a living knowledge base—not just another tutorial.