A mini split air conditioning system offers efficient, quiet cooling without the need for ductwork. However, when you notice water pooling around the indoor unit, it’s a clear sign something is wrong. While a small amount of condensation is normal during operation, persistent dripping or leaks indicate an underlying issue that requires attention. Left unaddressed, water leakage can lead to property damage, mold growth, and reduced system efficiency. Understanding the root causes and knowing how to respond can save time, money, and prevent further complications.
Common Causes of Mini Split Water Leaks
Mini splits remove humidity from the air as they cool, producing condensate that normally drains through a dedicated line. When this process is disrupted, water can leak into your living space. Several mechanical and environmental factors contribute to this problem:
- Clogged drain line: The most frequent cause. Algae, dirt, or mold buildup blocks the condensate pipe, preventing proper drainage.
- Improper installation: If the indoor unit isn’t level, water may not flow correctly toward the drain pan and outlet.
- Dirty air filter: Restricted airflow leads to frozen evaporator coils. When they thaw, excess water overwhelms the drain system.
- Cracked or rusted drain pan: Over time, the pan under the evaporator coil can corrode or develop cracks, especially in older units.
- Poor refrigerant levels: Low refrigerant causes coil freezing and subsequent melting, increasing condensate volume beyond what the drain can handle.
- Condensate pump failure (if equipped): In high-mounted units, a pump lifts water to an external drain. A failed pump results in overflow.
- Outdoor temperature extremes: During heat pump mode in cold weather, defrost cycles produce extra water that may drip if not properly managed.
Step-by-Step Guide to Fixing a Leaking Mini Split
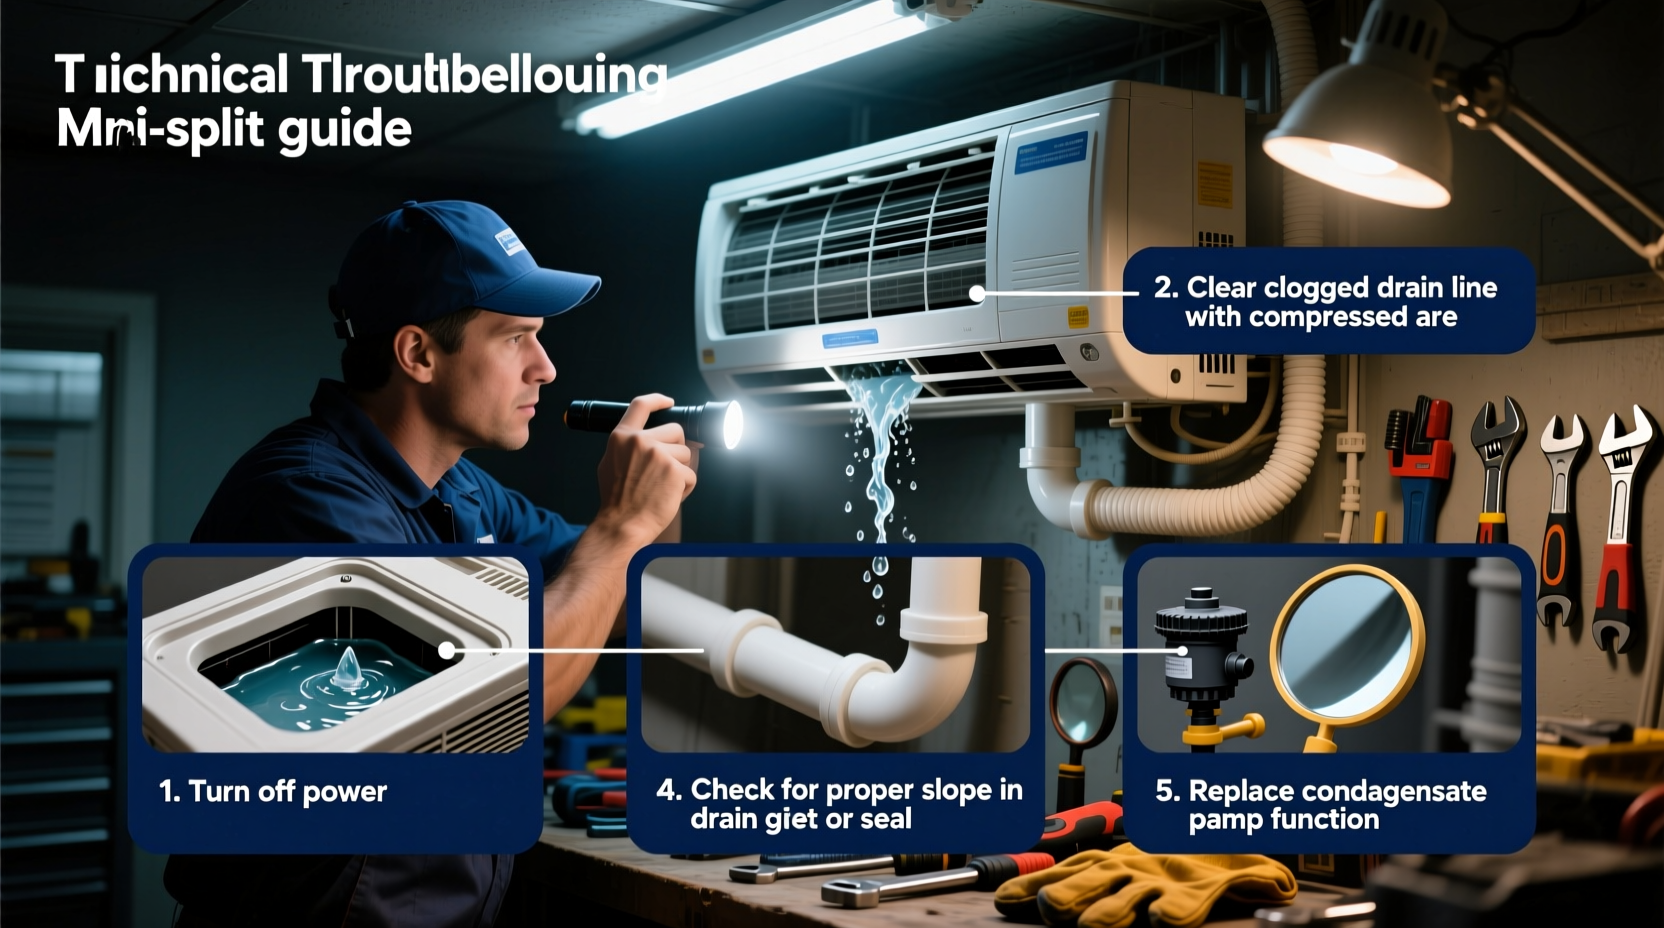
Before calling a technician, many leaks can be diagnosed and resolved with basic tools and careful inspection. Follow this systematic approach:
- Turn off the unit at the thermostat and power breaker. Safety first—avoid electrical hazards when working near moisture.
- Inspect the indoor unit for visible water accumulation. Look around the base, ceiling mount, or wall bracket for signs of dripping or pooling.
- Remove and clean the air filter. A clogged filter restricts airflow and promotes coil icing. Wash reusable filters with mild soap and water; replace disposable ones every 1–3 months.
- Check the drain line for blockages. Locate the PVC or flexible hose connected to the indoor unit’s drain outlet. Use a wet/dry vacuum on low suction to clear debris from the line. Alternatively, flush it with a mixture of warm water and white vinegar or a manufacturer-approved drain cleaner.
- Examine the drain pan. Shine a flashlight inside the unit (if accessible) to look for cracks, corrosion, or standing water. If damaged, replacement may be necessary.
- Verify unit leveling. Use a bubble level across the top of the indoor unit. It should tilt slightly toward the back (about 1/4 inch per foot) to encourage water flow into the drain.
- Test the condensate pump (if installed). Pour a small amount of water into the pump reservoir. It should activate and discharge water through the outlet tube. Listen for humming—if silent, check power and float switch.
- Restart the system and monitor. After completing checks, restore power and run the unit in cooling mode for 30 minutes. Watch for recurring leaks.
“Over 70% of mini split leaks we service are due to clogged drain lines or neglected filters. Regular maintenance prevents most issues.” — Carlos Mendez, HVAC Technician with 15 years of field experience
Do’s and Don’ts When Handling a Leaking Unit
| Action | Do | Don't |
|---|---|---|
| Drain line cleaning | Use a wet/dry vacuum or soft brush to gently clear obstructions | Force a wire deep into the line—this can damage internal seals |
| Filter maintenance | Replace or clean filters monthly during heavy use | Run the system with no filter—this accelerates internal dirt buildup |
| Unit leveling | Ensure slight rearward tilt for gravity drainage | Mount the unit perfectly flat or tilted forward |
| Chemical use | Flush lines with vinegar or enzyme-based cleaners | Pour bleach or harsh solvents regularly—they degrade plastic components |
| Professional help | Call a licensed HVAC tech for refrigerant or electrical issues | Attempt to recharge refrigerant yourself—it’s illegal and dangerous |
Real-World Example: Resolving a Recurring Leak in a Bedroom Unit
In a two-story home in Richmond, VA, a homeowner reported consistent water dripping from the bedroom mini split during summer nights. The installer had mounted the unit flush against the wall with no backward slope, assuming modern designs were self-draining. Over time, condensate pooled instead of flowing to the drain outlet.
The homeowner initially cleaned the filter and flushed the drain line with vinegar, which helped temporarily. But after two weeks, the leak returned. A technician diagnosed the issue: improper pitch. By slightly adjusting the mounting bracket to create a 3-degree incline toward the back, water began draining smoothly. The technician also installed an inline trap in the drain line to prevent airflow disruption and added an annual maintenance reminder to the homeowner’s calendar.
After these corrections, the unit operated leak-free for over 18 months, demonstrating how minor installation flaws can have lasting consequences—and how precise adjustments yield reliable results.
Preventive Maintenance Checklist
To avoid future leaks, incorporate these tasks into your seasonal routine:
- ✅ Clean or replace air filter every 30–60 days during cooling season
- ✅ Inspect drain line for clogs quarterly
- ✅ Flush drain line with vinegar solution biannually
- ✅ Verify indoor unit remains level annually
- ✅ Check condensate pump operation (if applicable) before summer
- ✅ Schedule professional HVAC inspection every 1–2 years
- ✅ Clear outdoor unit of debris to maintain system balance
Frequently Asked Questions
Is it normal for my mini split to drip a little water?
Minimal condensation during heavy cooling is normal, especially in humid climates. However, visible dripping or puddling is not. If water escapes the drain system, investigate immediately.
Can I use bleach to clean the drain line?
Occasional use of diluted bleach (1 part bleach to 16 parts water) can sanitize the line, but repeated use degrades plastic and rubber components. Vinegar or enzyme-based cleaners are safer for regular maintenance.
Why does my mini split leak only in heating mode?
During defrost cycles in heat pump mode, ice melts rapidly on the outdoor coil. Some systems route this water indoors where it drains. If the indoor drain pan is blocked or undersized, temporary dripping may occur. Persistent leaks still require inspection.
Final Thoughts and Next Steps
Water leaking from your mini split is more than a nuisance—it’s a warning signal. Most causes are preventable with routine care and correct installation. By understanding how condensation forms and flows through the system, homeowners can quickly identify issues and take corrective action. Simple habits like changing filters and flushing drain lines go a long way in maintaining performance and avoiding costly water damage.
If basic troubleshooting doesn’t resolve the leak, don’t hesitate to contact a qualified HVAC professional. Systems involving refrigerant, electrical components, or structural repairs require expert handling. Addressing leaks promptly protects your investment and ensures your mini split continues to deliver efficient, comfortable climate control year after year.
🚀 Take action today: Grab a flashlight and check your mini split’s filter and base for moisture. A five-minute inspection could prevent a major leak tomorrow.