Wrapping a column with lights can transform an ordinary architectural feature into a captivating focal point, especially during holidays or special events. Whether you're enhancing a porch post, supporting pillar, or interior design element, doing it right ensures safety, durability, and visual harmony. A poorly wrapped column can look messy, create tripping hazards, or damage the structure. The goal is even spacing, secure attachment, and a clean finish that withstands weather and time.
Many people attempt this task without proper planning, only to end up with tangled wires, uneven loops, or lights that sag within weeks. With the right tools, technique, and attention to detail, you can achieve a polished result that looks professionally installed—even if it's your first time.
Choose the Right Type of Lights
The foundation of a successful column wrap begins with selecting appropriate lighting. Not all string lights are designed for structural wrapping, and using the wrong kind can lead to premature burnout, unsafe connections, or difficulty in securing them.
- LED vs. Incandescent: LED lights consume less energy, generate less heat, and last significantly longer—often 25,000 to 50,000 hours. They’re ideal for long-term installations.
- Weather Resistance: For outdoor columns, use lights rated for outdoor use (look for “UL Listed for Outdoor Use” on packaging). These have sealed sockets and durable insulation.
- Plug Configuration: Consider where the plug will land. End-to-end connectable strands are useful, but ensure the male plug doesn’t interfere with base mounting.
- Bulb Spacing: Standard spacing is 12 inches between bulbs. Closer spacing (6”) creates denser illumination; wider spacing may require double-wrapping for full coverage.
Measure and Plan Before You Begin
Before cutting tape or climbing a ladder, measure the column thoroughly. This prevents mid-project shortages and ensures uniform wrapping.
- Height: Measure from the base to where you want the lights to end (typically just below the capital or top molding).
- Circumference: Wrap a flexible tape measure around the column at multiple points. Columns aren’t always perfectly round—account for any variation.
- Calculate Total Length Needed: Multiply height by 3.14 (π) to get the diagonal length of one spiral loop. Divide total height by desired vertical spacing (e.g., 6–8 inches) to find the number of loops. Multiply loops by circumference to get total linear feet required.
For example, a 9-foot (108-inch) column with a 24-inch circumference, wrapped with 6-inch vertical spacing:
Number of loops = 108 ÷ 6 = 18 Total length = 18 × 24 = 432 inches (36 feet)
Add 10–15% extra for overlap, anchoring, and mistakes. If using multiple strands, plan connection points near power sources or junction boxes.
| Column Height | Circumference | Spacing | Estimated Light Length |
|---|---|---|---|
| 7 ft | 20 in | 6 in | ~28 ft |
| 9 ft | 24 in | 8 in | ~32 ft |
| 12 ft | 30 in | 6 in | ~72 ft |
Step-by-Step Guide to Wrapping the Column
A methodical approach ensures consistency and minimizes rework. Follow these steps for optimal results.
- Prepare the Column Surface: Clean off dust, cobwebs, or moisture. For wooden posts, check for splinters or rot. On metal or concrete, remove rust or debris that could damage wire insulation.
- Mark Starting and Ending Points: Use a small piece of removable tape to mark where the first strand begins (usually at the base) and where it should terminate. Avoid starting at the front face—begin slightly to the side so the plug and first bulb are less visible.
- Secure the First End: Feed the unlit end (female connector or bare wire end) through a plastic cable tie or zip tie anchored low on the column. Pull it snug and trim excess. Do not use nails or staples—they puncture insulation and create fire risks.
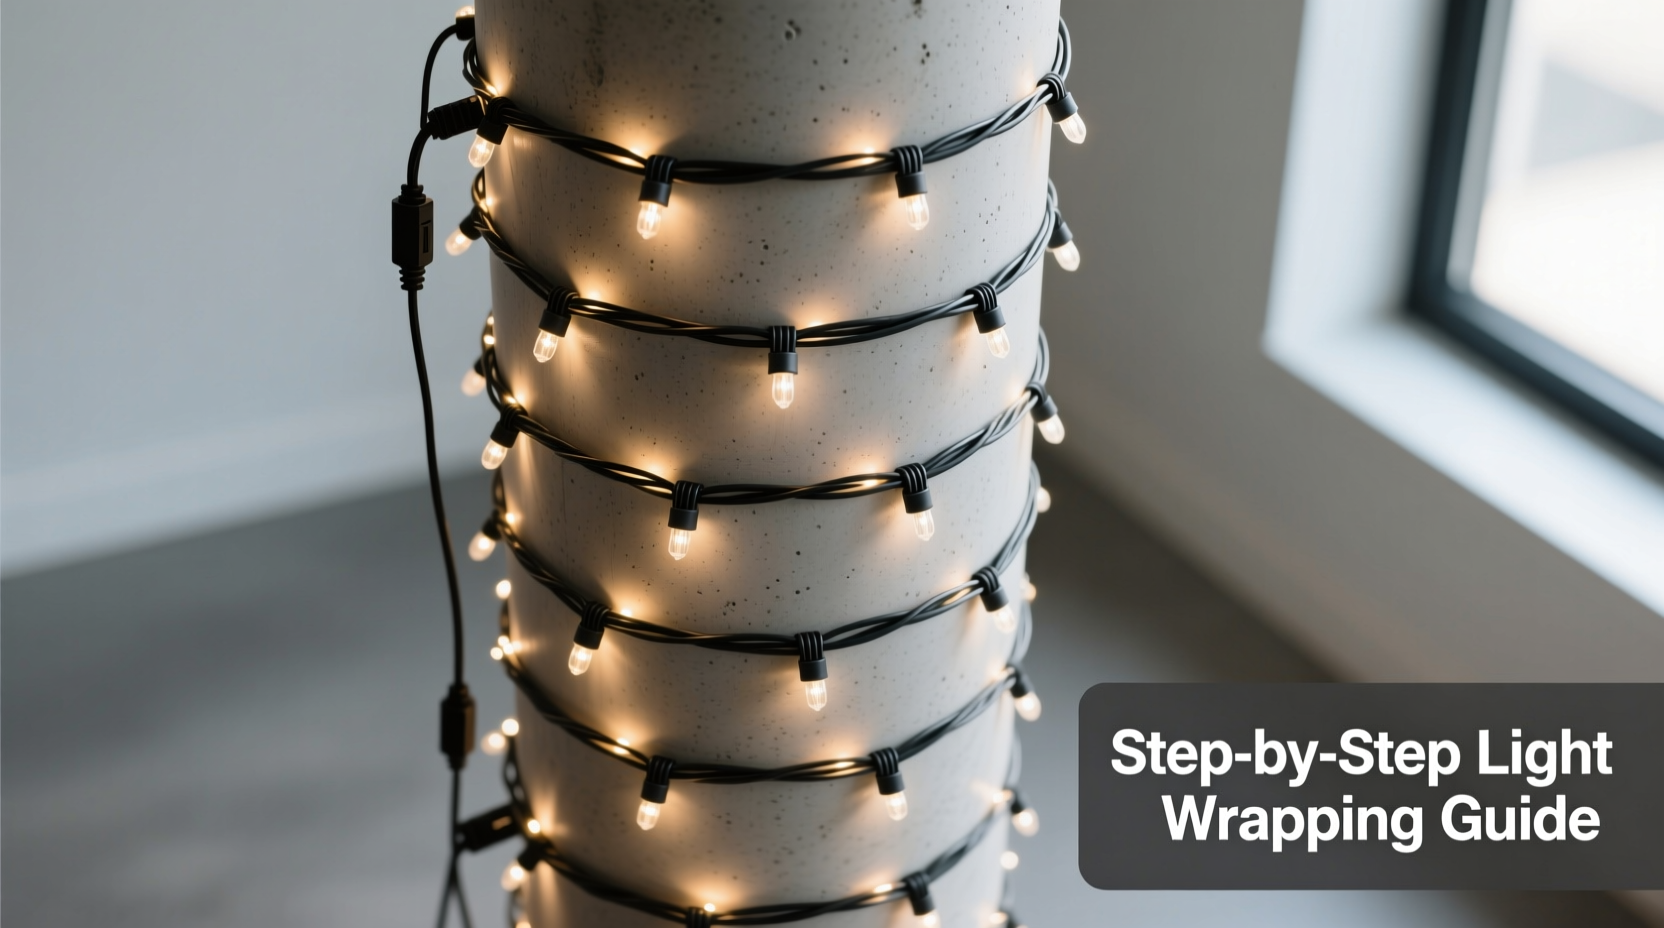
- Begin Spiral Wrapping Upward: Hold the first bulb against the column and begin spiraling upward at your predetermined vertical spacing. Keep tension gentle but firm—don’t stretch the strand.
- Maintain Even Spacing: Use a spacer tool—a small block of wood cut to your desired rise (e.g., 6 inches)—to guide each turn. Place it vertically between loops as you ascend.
- Use Non-Damaging Fasteners Every 2–3 Feet: At regular intervals, secure the strand with UV-resistant zip ties, hook-and-loop wraps (like Velcro One-Wrap), or specialized light clips. Avoid metal staples or adhesive tapes that degrade in sunlight.
- Finish at the Top: Once you reach the top, leave 6–12 inches of slack. Secure the final section with a fastener, coil excess neatly, and protect the male plug with a weatherproof outlet cover if exposed.
- Test Before Finalizing: Plug in the lights to confirm all bulbs work and the pattern looks even. Fix flickering sections immediately.
Securing Lights Without Damage: Best Practices
One of the most common mistakes is damaging the column or wiring during installation. Many opt for convenience over safety, using duct tape, nails, or caulk that deteriorates or causes long-term harm.
Instead, use purpose-built solutions:
- Plastic Zip Ties: Reusable ones allow adjustments. Cut flush to avoid sharp edges.
- Velcro Cable Wraps: Ideal for painted or delicate surfaces. They don’t mar finishes and allow seasonal removal.
- Soffit Clips or Ladder Hooks: For square or rectangular columns, these snap onto edges and cradle the wire.
- Outdoor-rated Silicone Tape: Can be used sparingly to secure wires at anchor points. It stretches, seals out moisture, and doesn’t leave residue.
Avoid adhesives unless they’re specifically labeled for outdoor electrical use. Regular tape fails within months due to UV exposure and temperature shifts.
“Permanent attachment methods like stapling or gluing often lead to costly repairs. Always assume you’ll need to remove or replace the lights.” — Daniel Ruiz, Residential Lighting Installer with 18 years of field experience
Real Example: Wrapping a Porch Column in Suburban Chicago
A homeowner in Evanston, Illinois, wanted to wrap four 10-foot wooden porch columns for the holiday season. Initially, they used standard indoor lights and duct tape, resulting in sagging strands and two failed circuits after one snowstorm.
They consulted a local electrician who recommended rewiring with commercial-grade LED rope lights, spaced at 6-inch intervals, secured with UV-stabilized zip ties every 18 inches. The electrician routed the main power through a GFCI-protected outlet under the eaves and used waterproof connectors.
The second installation lasted five seasons with minimal maintenance. The key differences? Proper materials, even tension, and avoiding surface-damaging fasteners. The homeowner now removes only the plug covers annually—everything else stays intact.
Checklist: How to Wrap a Column with Lights Safely and Evenly
- ☐ Measure column height and circumference accurately
- ☐ Choose outdoor-rated, energy-efficient LED lights
- ☐ Calculate total light length needed + 15% buffer
- ☐ Clean and inspect the column surface
- ☐ Mark start and end points with removable tape
- ☐ Secure the starting end with a non-damaging fastener
- ☐ Maintain consistent vertical spacing using a spacer block
- ☐ Attach lights every 2–3 feet with UV-resistant ties or clips
- ☐ Test all strands before finalizing installation
- ☐ Protect plugs and connections with weatherproof covers
Common Mistakes and How to Avoid Them
Even experienced decorators make errors that compromise safety or aesthetics. Recognizing these pitfalls improves outcomes.
- Over-tightening: Stretching the strand distorts spacing and stresses solder joints. Let the wire lie naturally.
- Inconsistent Spacing: Drifting wider or tighter as you go up breaks visual rhythm. Use a physical guide.
- Hiding Plugs Poorly: Exposed male plugs at ground level are unsightly and vulnerable. Route them behind planters or downspouts.
- Daisy-Chaining Too Many Strands: Most manufacturers recommend no more than 3–5 connected sets. Overloading trips breakers or overheats wires.
- Ignoring Expansion and Contraction: Materials expand in heat and contract in cold. Allow slight slack in fasteners to prevent pulling.
FAQ
Can I leave wrapped lights up year-round?
Yes, if you use commercial-grade outdoor lights, secure them properly, and inspect them biannually. Remove during extreme storm seasons if in hurricane or heavy ice zones.
How do I prevent lights from twisting as I wrap?
Unroll the entire strand before starting and lay it straight in the sun for 15 minutes to relax any factory curl. Handle it gently and feed it smoothly as you spiral upward.
What’s the best way to store lights after removal?
Wrap them around a piece of cardboard cut into a 12-inch circle, or use a dedicated light storage reel. Avoid tight knots or crushing bends that damage internal wires.
Final Tips for Long-Term Success
Once installed, periodic maintenance extends the life of your display. Check connections monthly for corrosion, especially in coastal areas. Replace any cracked bulbs or frayed wires immediately. If using temporary decor like garlands, install those over the lights—not underneath—to avoid trapping moisture.
Consider adding a timer or smart plug to automate on/off cycles. This reduces wear, saves energy, and ensures your column is lit consistently.
For multi-column setups, test alignment across all units. Stand back and view from multiple angles to confirm symmetry. A well-wrapped column enhances curb appeal, boosts seasonal spirit, and reflects careful craftsmanship.
Conclusion
Wrapping a column with lights evenly and securely isn’t just about decoration—it’s about precision, safety, and respect for both the structure and the medium. With thoughtful preparation, the right materials, and disciplined execution, you can create a display that lasts for years and draws admiration season after season.
🚀 Take pride in your space—wrap your next column with confidence, care, and creativity. Share your results or ask questions in the comments below.