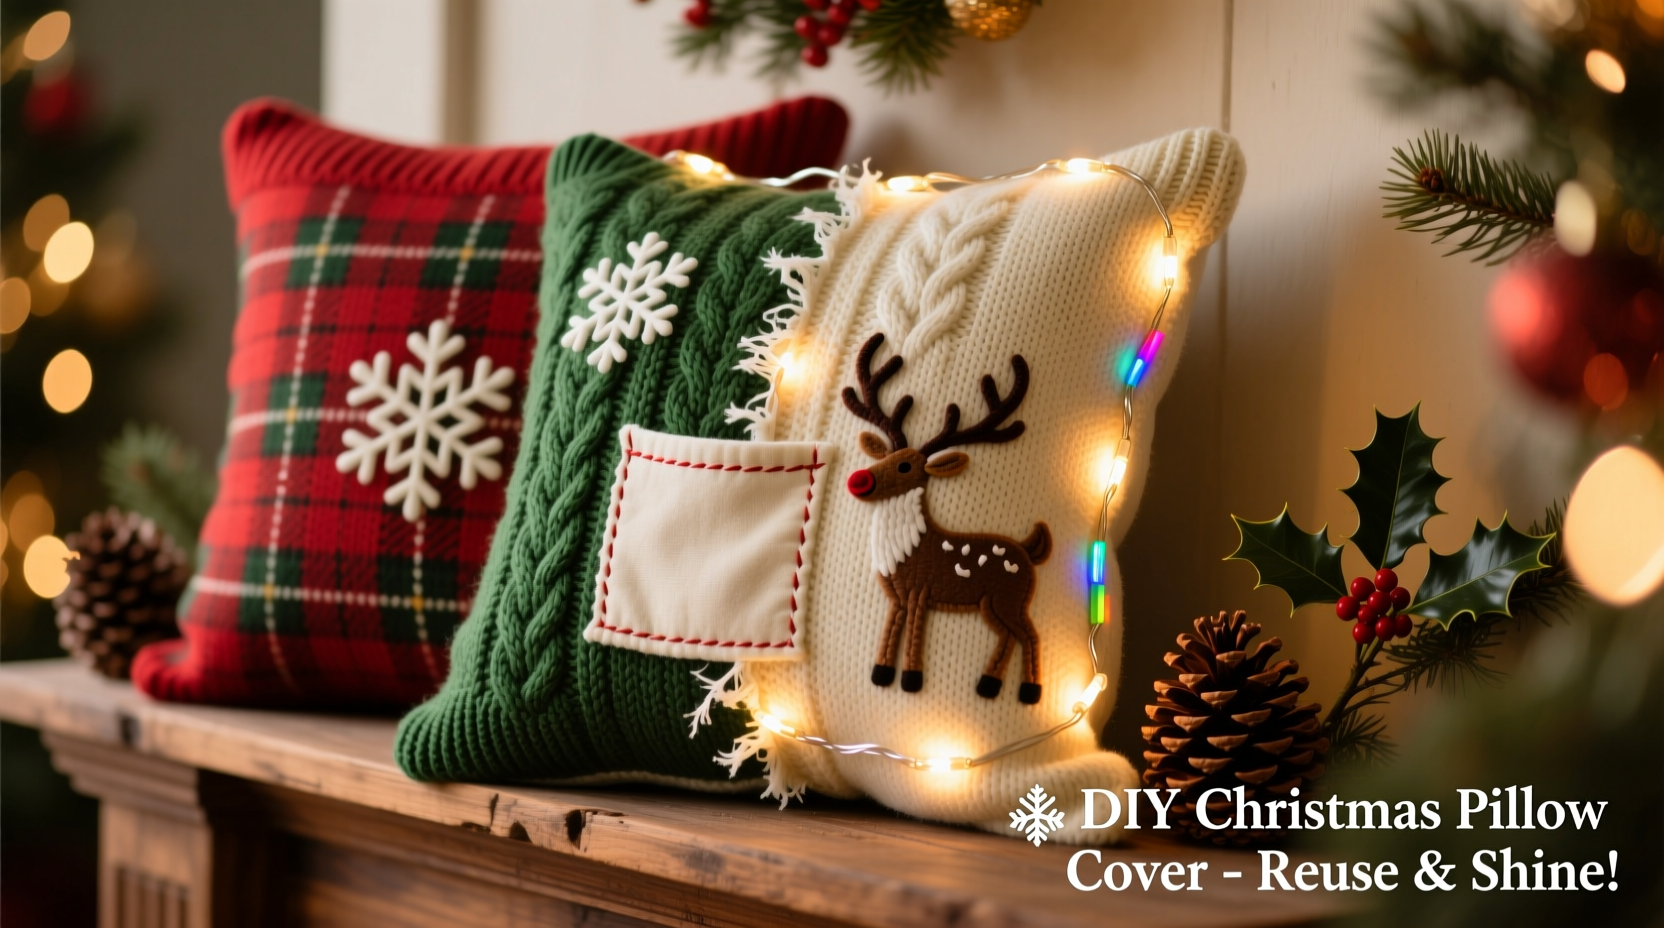
Every holiday season, closets overflow with gently worn wool, cashmere, and acrylic sweaters—some stretched at the elbows, others faded or slightly pilled, but all still rich in texture, warmth, and story. Rather than donating or discarding them, consider this: a single oversized cable-knit sweater can yield two lush, dimensional pillow covers that glow softly from within—not with LEDs taped haphazardly, but with intentional, safe, and elegant integrated lighting. This isn’t just upcycling; it’s heirloom-making. Done right, these covers become tactile centerpieces—soft to the touch, nostalgic in scent, and radiant without glare. They’re also deeply practical: no sewing machine required for the base construction, minimal wiring expertise needed, and fully customizable for any sofa, mantel, or guest room.
Why This Project Matters Beyond Aesthetics
Textile waste is a quiet crisis. The fashion industry produces over 92 million tons of textile waste annually—and wool and knitwear account for nearly 18% of post-consumer landfill volume, despite their biodegradability when untreated. Repurposing a sweater bypasses energy-intensive recycling processes (which often degrade fiber integrity) and avoids the microplastic shedding common in synthetic blends during washing. More importantly, it preserves emotional value: that hand-knit argyle your grandmother gifted you, the thrifted Fair Isle from your first winter in Vermont, the oversized turtleneck you wore through grad school—all hold memory density no mass-produced decor can replicate.
This project bridges sustainability and sentimentality with technical intentionality. Unlike simple no-sew pillow wraps, integrating lights demands thoughtful planning around heat dissipation, wire concealment, and electrical safety—especially when used near flammable fabrics or in homes with children or pets. That’s why every step below prioritizes UL-listed components, low-voltage operation, and structural reinforcement where stress points occur.
Essential Materials & Smart Sourcing
You don’t need specialty tools—but precision matters. Below is a curated list balancing accessibility, safety, and longevity. Avoid dollar-store fairy lights: many lack thermal cutoffs and use unshielded copper wire prone to kinking and short-circuiting.
| Item | Specifications | Why It Matters |
|---|---|---|
| Battery-operated LED string lights | UL-listed, 20–30 LEDs, warm white (2700K), 3V or 4.5V max, flexible copper wire (not rigid plastic-coated) | Low voltage prevents overheating; flexible wire bends cleanly inside seams without poking through fabric |
| Old sweater | 100% wool, wool-blend, or dense acrylic; minimal pilling; no large holes near intended seam lines | Wool felts slightly when washed—adding body and reducing fraying. Avoid thin knits like jersey or open lace |
| Fusible interfacing (medium-weight) | Woven, sew-in or iron-on; avoid ultra-thin “stabilizer” sheets | Provides structure so lights don’t sag or create visible bulges; prevents stretching during handling |
| Embroidery floss + blunt tapestry needle | Size 5 perle cotton or 6-strand floss (color-matched to sweater) | Stronger than regular thread; blunt tip glides between stitches without splitting yarn |
| Small fabric scissors + seam ripper | Sharp, 4-inch embroidery scissors; stainless steel seam ripper with capped tip | Precision cutting prevents accidental snags in adjacent rows; capped tip reduces risk of poking lights |
Step-by-Step Construction Timeline
This process takes 3–4 hours across two days—intentionally paced to allow interfacing to set and adhesive to cure. Rushing leads to puckered seams or misaligned light paths.
- Day 1 — Prep & Stabilize (45 mins): Wash sweater in cold water on gentle cycle with wool-safe detergent (e.g., Eucalan). Lay flat to dry—never tumble dry. Once fully dry, iron *lightly* on wool setting with steam to relax fibers. Cut out two identical 18\" × 18\" squares—one from the front, one from the back—centered on the most visually balanced area (e.g., avoid placing a prominent cable directly on the seam line). Fuse medium-weight interfacing to the wrong side of both squares using a press cloth and 10-second bursts—no dragging.
- Day 1 — Light Path Planning (20 mins): Lay one square face-up. Arrange lights in a gentle spiral or concentric rectangle, leaving 1.5\" border free on all sides. Mark entry/exit points for battery pack with chalk pencil: ideal placement is bottom-center, where the pack rests unseen against furniture. Use a ruler to lightly draw stitch lines ¼\" inside the edge—this becomes your seam allowance guide.
- Day 1 — Secure Lights (35 mins): Thread tapestry needle with doubled embroidery floss. Using a whipstitch *between* knit columns (not through them), anchor lights every 1.5\". Keep stitches loose enough to allow fabric drape but tight enough to prevent shifting. At corners, add two anchoring stitches—one vertical, one horizontal—to prevent torque. Leave 6\" tail at battery entry point for later connection.
- Day 2 — Assemble Cover (50 mins): Place squares right-sides together. Pin along three sides only—leave bottom open. Sew with ¼\" seam allowance using backstitch every 2\" for strength. Clip curves if shaping collar or cuff edges. Turn right-side out, push corners gently with blunt chopstick. Insert battery pack through bottom opening; tuck wires inward. Hand-stitch bottom closed with ladder stitch—nearly invisible and flexible.
- Day 2 — Final Reinforcement (20 mins): Topstitch ⅛\" from all four edges using matching floss. This compresses seam allowances, hides raw edges, and adds subtle quilting texture. Test lights: battery pack should sit flush against pillow insert with zero wire tension.
Real-World Example: The Cedar Hollow Living Room Makeover
In December 2023, interior stylist Maya R. transformed her client’s dated cedar-paneled living room using six sweater pillow covers—each made from donations by family members. One cover featured a deep forest-green Shetland wool sweater with natural lanolin still present; Maya skipped washing it entirely, opting instead for a vinegar-water mist (1:3 ratio) and air-drying to preserve water resistance. She embedded micro-LEDs with silicone-coated wires—chosen after discovering standard copper wires overheated near the wool’s natural insulating properties. The result? Pillows that emitted a soft, buttery glow without warming the fabric surface above ambient temperature (verified with an infrared thermometer). Guests consistently commented on the “warmth you feel before you even see the light”—a testament to how material choice directly shapes sensory experience.
“Light integration in textiles isn’t about brightness—it’s about luminous intimacy. When light emanates *from within* a familiar, tactile surface, it triggers deeper emotional resonance than any standalone fixture.” — Dr. Lena Torres, Textile Interaction Researcher, MIT Media Lab
Safety-Critical Do’s and Don’ts
Electrical safety is non-negotiable—even at low voltage. Wool and acrylic retain heat more readily than cotton or linen, and tightly packed lights in confined spaces increase thermal buildup. These guidelines are based on NFPA 1126 (pyrotechnic and decorative lighting standards) and UL 588 compliance thresholds.
- DO use only battery packs with built-in thermal cutoff switches (they auto-shutoff at 60°C/140°F)
- DO test lights for 30 minutes before final assembly—feel fabric surface with bare hand; if warm to the touch, reposition lights or reduce density
- DO place battery packs *outside* the pillow insert, nestled in the cover’s bottom channel—not buried inside foam or down
- DON’T use USB-powered lights unless connected to a certified 5V/1A wall adapter with surge protection
- DON’T knot or tightly coil excess wire inside seams—it creates localized hot spots
- DON’T operate lights unattended for more than 8 hours continuously, even with thermal cutoffs
FAQ: Troubleshooting & Customization
Can I wash the finished pillow cover?
No—water exposure risks short-circuiting embedded wires and degrades solder joints. Instead, spot-clean with a damp microfiber cloth and mild wool detergent. For odor removal, place inside a sealed bag with ½ cup baking soda for 24 hours, then air out. Always remove battery pack before cleaning.
What if my sweater has a hole or stain?
Embrace it as design. Center small flaws under the battery pack housing, or transform larger ones into intentional features: embroider a sprig of holly over a moth hole using silk thread, or appliqué a contrasting wool scrap (e.g., red felt berry cluster) that doubles as a light-diffusing element. Imperfections signal authenticity—guests will admire the craft, not critique the flaw.
How do I choose the right light color for different sweaters?
Match correlated color temperature (CCT) to fiber warmth. Cool-toned sweaters (heather grey, icy blue, charcoal) pair best with 3000K LEDs—clean but not clinical. Warm-toned sweaters (mustard, rust, cream, burgundy) shine under 2700K—mimicking candlelight. Avoid 2200K (“vintage amber”) unless using antique wool with yellowed patina; it can make newer fibers look dingy.
Conclusion: Stitch More Than Fabric This Season
Repurposing a sweater into a light-embedded pillow cover is an act of quiet resistance—against disposability, against homogenized decor, against the idea that beauty must be bought new. Each stitch anchors memory. Each diode emits not just photons, but presence: the presence of time slowed, of attention paid, of care made visible. You’re not just making a pillow—you’re weaving continuity. That sweater your sister wore to your wedding, the one your father knitted during chemotherapy, the thrifted find that smelled faintly of pipe tobacco and pine needles—these aren’t relics. They’re vessels. And when lit from within, they hold space for something tender and true.
Start with one sweater. Choose the one that feels heaviest in your hands—not in weight, but in meaning. Follow the steps deliberately. Pause where the pattern shifts. Let the rhythm of your needle sync with your breath. Then place it on your sofa, flip the switch, and watch how light pools—not on the surface, but *in* the space between memory and now.
💬 Share your first sweater cover story with us. What did you choose—and what memory does it carry? Your experience could inspire someone else to reach into their closet and begin stitching light into legacy.