
Christmas lights bring warmth and cheer to the holiday season, but nothing dims the spirit faster than a strand that won’t light up. While most people assume a dead section means the entire string must be replaced, the real culprit is often a broken wire connection inside a sealed bulb socket. These sockets are designed to be weather-resistant and tamper-proof, making repairs tricky—but not impossible. With the right tools, patience, and technique, you can restore function to your favorite light strands without buying new ones.
This guide walks through diagnosing faulty connections, safely accessing sealed sockets, repairing internal wiring, and preventing future failures—all while maintaining safety and preserving the integrity of your lights.
Understanding Sealed Christmas Light Sockets
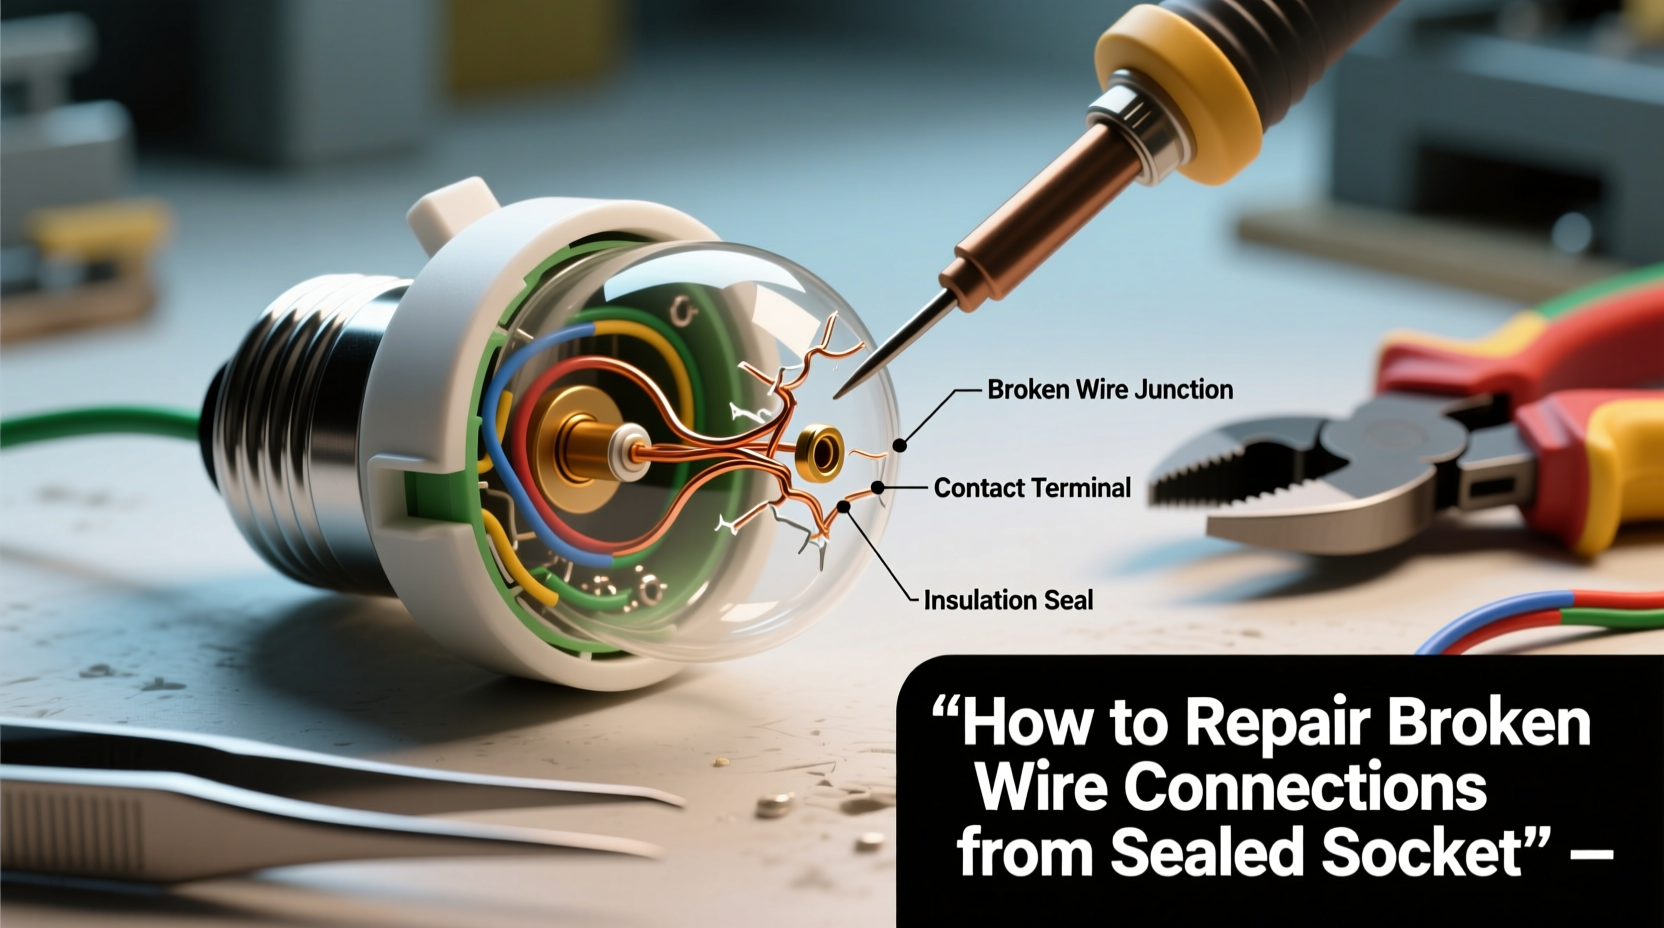
Modern mini Christmas light strings typically use molded, sealed sockets made from durable plastic. The bulbs are inserted into these sockets and held in place by friction or small clips. Unlike older models, newer designs often encapsulate the wire splice point where the filament wires connect to the main power line. This seal protects against moisture and corrosion but also makes access difficult when a break occurs.
Inside each socket, two wires run parallel beneath the bulb base: one feeds current into the bulb, the other carries it out. A break in either wire—especially at the crimp or solder point—will interrupt the circuit. Since most mini-light strings are wired in series, a single bad connection can cause an entire section to go dark.
Manufacturers design these units as disposable for cost efficiency, but environmentally conscious users and budget-minded decorators know that replacing entire strands every year is wasteful and expensive. Learning how to open and repair them extends their life significantly.
“Most electrical failures in holiday lights occur at connection points, not in the filaments themselves.” — Dr. Alan Reeves, Electrical Systems Engineer, Consumer Lighting Institute
Step-by-Step Guide to Repairing a Broken Wire Connection
Repairing a sealed socket requires precision and care. Follow this detailed process to successfully fix a broken wire without damaging surrounding components.
- Identify the Faulty Socket
Use a light tester or multimeter to locate which bulb socket has lost continuity. If unavailable, visually inspect for discoloration, melting, or loose bulbs. Remove suspect bulbs and test with a known working one. - Cut Power and Prepare Workspace
Unplug the strand immediately. Work on a clean, dry surface with good lighting. Wear safety glasses—plastic shards can fly during disassembly. - Expose the Internal Wires
Using a sharp utility knife or X-Acto blade, carefully slice along the seam of the socket housing. Most sealed sockets have a natural parting line around the base. Make shallow cuts to avoid slicing the internal wires. Gently pry open the two halves using tweezers or a small flathead screwdriver. - Inspect the Wire Connections
Once opened, examine both wire leads. Look for signs of:- Frayed or severed copper strands
- Corrosion or green oxidation
- Poor crimps or cold solder joints
- Melted insulation near contact points
- Trim and Strip Damaged Sections
If the wire ends are corroded or broken close to the terminal, cut back about 3–5 mm using flush diagonal cutters. Use fine-gauge wire strippers (20–24 AWG) to remove ~6 mm of insulation from each end. - Solder the Connection
Tin both exposed wire ends with rosin-core solder. Reconnect them to the bulb terminals using a low-wattage iron (15–30W). Apply heat briefly—overheating can melt the plastic housing further. Ensure solid mechanical contact before soldering; consider adding a tiny drop of epoxy afterward for strain relief. - Reassemble the Socket
Close the two halves of the socket. If possible, secure them with a small amount of high-dielectric strength epoxy or silicone sealant. Avoid regular super glue—it’s brittle and not electrically safe. Let cure fully before testing. - Test the Repaired Section
Reconnect the strand and plug it in. Observe whether the repaired bulb and downstream lights illuminate. If not, recheck continuity with a multimeter.
Essential Tools and Materials Checklist
To complete this repair efficiently and safely, gather the following items beforehand:
- Utility knife or precision hobby blade
- Flush-cutting wire cutters
- Fine-tip soldering iron (adjustable temperature preferred)
- Rosin-core electronics solder (60/40 tin-lead or lead-free equivalent)
- Desoldering braid or pump (optional, for cleaning old joints)
- Needle-nose pliers and tweezers
- Digital multimeter with continuity setting
- Heat-shrink tubing (optional, for added insulation)
- Dielectric silicone sealant or epoxy rated for outdoor use
- Safety glasses and well-ventilated workspace
Common Mistakes and What to Avoid
Even experienced DIYers can damage delicate light strings if they rush or use improper techniques. Below is a comparison of recommended practices versus common errors.
| Do | Don’t |
|---|---|
| Use a multimeter to confirm continuity loss before disassembling. | Assume the first non-lighting bulb is the problem—faults may be elsewhere. |
| Make shallow, controlled cuts when opening the socket. | Use excessive force or wide blades that crush internal wires. |
| Solder quickly with proper tinning to prevent overheating. | Hold the iron on the joint for more than 3–5 seconds. |
| Seal the reassembled socket with waterproof adhesive. | Leave the socket open or use non-insulating tape like duct tape. |
| Label repaired sections for future reference. | Plug in untested repairs without double-checking polarity and insulation. |
Real-World Example: Reviving a Vintage Strand
Linda, a homeowner in Vermont, inherited a set of C7 Christmas lights from her parents. The warm white bulbs were strung along her porch railing every winter since 1998. By 2023, several sockets stopped working, and replacement strands didn’t match the nostalgic glow.
Instead of retiring them, she took a multimeter and tested each dark section. She found three sockets with broken internal connections—likely due to years of snowmelt seeping into micro-cracks. Using a hobby knife and a 25W soldering iron, she opened each faulty unit, resoldered the frayed wires, and sealed them with marine-grade epoxy.
The entire repair took under two hours. After rehanging the lights, all bulbs glowed evenly. Linda estimates she extended the life of the strand by at least five more seasons—and preserved a family tradition.
Preventing Future Failures
Once repaired, take steps to protect your work and reduce wear on the rest of the strand:
- Store Properly Off-Season: Coil lights loosely around a cardboard reel or spool. Avoid tight wrapping, which stresses wires and connectors.
- Use Protective Covers: For outdoor installations, install a transparent plastic cover over the plug and any spliced areas to block rain and debris.
- Inspect Annually: Before hanging, check for cracked sockets, stiff wires, or discoloration. Address minor issues early.
- Consider Parallel-Wired Upgrades: For long-term reliability, transition to LED strands with parallel wiring. These remain lit even if one bulb fails.
- Limit Exposure Time: Use a timer to operate lights only during evening hours. Less runtime means less thermal cycling and stress on connections.
“Extending the life of holiday lighting isn’t just economical—it reduces electronic waste and preserves sentimental value.” — Green Holidays Initiative, Sustainable Living Council
Frequently Asked Questions
Can I replace a sealed socket instead of repairing it?
Direct replacement is rarely feasible because sealed sockets are integrated into the wire harness. Aftermarket sockets exist, but they require cutting out the original and splicing in a new unit—which often creates a larger vulnerability than the original seal. Repairing in place is usually more reliable and maintains weather resistance.
Is it safe to solder on Christmas light wires?
Yes, as long as you use proper technique and materials. Always unplug the strand, work in a ventilated area, and ensure all connections are insulated after soldering. Never leave exposed metal or apply solder directly to plastic parts. Use only electronics-grade solder with flux core—avoid acid-core solders used in plumbing.
Why do sealed sockets fail in the first place?
Failures typically stem from thermal expansion and contraction over multiple seasons. Moisture ingress accelerates corrosion, especially in coastal or humid climates. Poor initial manufacturing crimps can loosen over time. Physical stress from wind, animals, or improper storage also contributes.
Conclusion: Keep the Lights Burning Year After Year
Fixing a broken wire inside a sealed Christmas light socket isn't glamorous, but it's deeply rewarding. It combines practical electronics knowledge with craftsmanship and sustainability. Each successful repair saves money, reduces clutter, and honors the memories tied to beloved decorations.
You don’t need advanced training—just attention to detail, the right tools, and a willingness to look beyond disposability. Whether you're restoring vintage strands or extending the life of modern LEDs, mastering this skill pays dividends every holiday season.
💬 Have a success story or tip to share? Tell us how you brought a dark strand back to life—we’d love to hear what works for you!