A rustic chic tree bridges the warmth of countryside tradition with the refined simplicity of modern design. It avoids mass-produced glitter in favor of tactile authenticity: the coarse grain of reclaimed wood, the soft drape of unbleached burlap, the quiet elegance of neutral tones and organic shapes. Unlike conventional trees that rely on uniformity and shine, this version celebrates imperfection—slight variations in wood grain, subtle fraying at burlap edges, asymmetrical ornament placement—all contributing to its grounded, soulful presence. Whether displayed in a farmhouse kitchen, a minimalist loft, or a sun-drenched studio apartment, it serves as both seasonal centerpiece and year-round aesthetic anchor. Its appeal lies not in spectacle, but in intentionality: every element is chosen for texture, origin, and quiet resonance.
Why Rustic Chic Resonates Beyond the Holidays
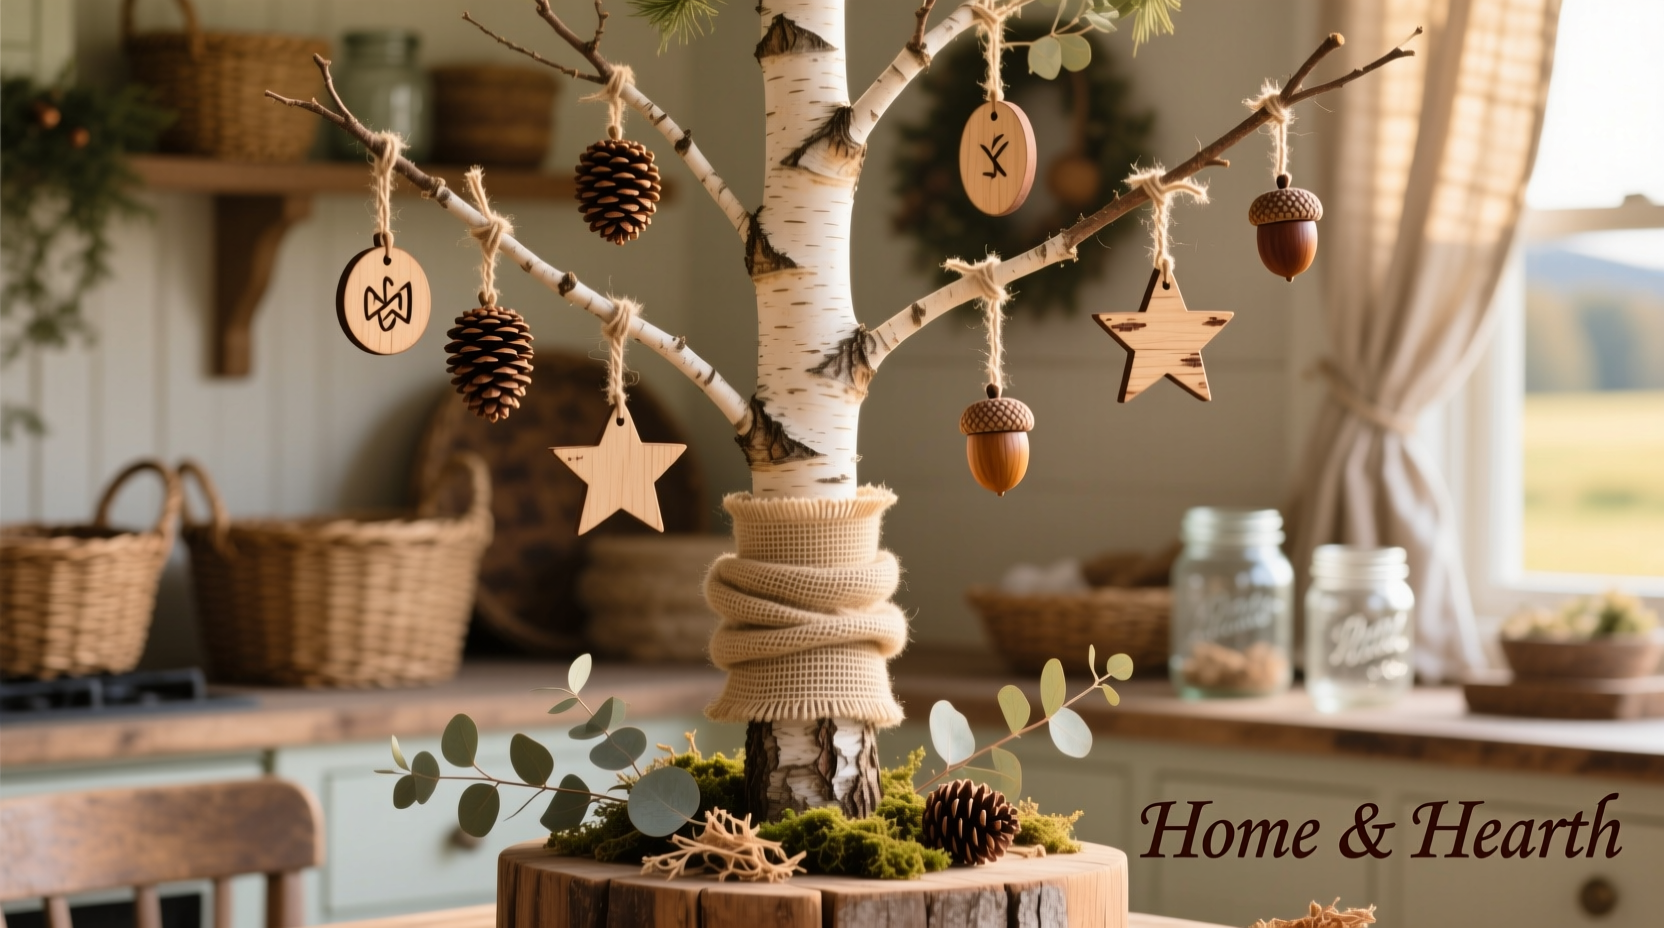
Rustic chic has endured because it answers a deeper cultural need—not just for decoration, but for meaning. In an era saturated with digital noise and disposable aesthetics, this style offers tangible connection: to material history (wood from fallen barn beams), to craft (hand-stitched burlap ribbons), and to restraint (a palette limited to oat, charcoal, clay, and raw umber). Interior designer Lena Torres observes:
“Clients don’t ask for ‘rustic chic’ anymore—they ask for ‘calm with character.’ That’s what this aesthetic delivers: visual quietude anchored by honest materials. A burlap-and-wood tree isn’t a holiday prop; it’s a statement about valuing substance over surface.”This philosophy extends beyond December. Many designers now recommend building the tree structure in late November and keeping it up through February, swapping ornaments seasonally—dried lavender and wheat stalks for winter solstice, pressed ferns and river stones for early spring—transforming it into a living chronometer of the year’s quiet rhythms.
Curating Your Core Materials: Quality Over Quantity
Success hinges less on volume and more on thoughtful curation. Prioritize natural, untreated, or minimally processed materials. Avoid synthetic “burlap-look” fabrics—they lack breathability and fray unnaturally. Likewise, steer clear of stained or lacquered wood ornaments; their finish contradicts the ethos of raw authenticity. Instead, source intentionally:
| Material | Recommended Source | Key Characteristics to Look For | Avoid |
|---|---|---|---|
| Burlap | Local upholstery supply shops or specialty textile mills (e.g., Burlington Textiles, The Burlap Company) | 100% jute, medium-weave (not too loose, not too tight), natural tan or oat tone, slight irregularities in thread thickness | Polyester blends, bleached white burlap, ultra-fine “craft burlap” that lacks body |
| Wood Ornaments | Reclaimed lumber yards, arborist wood chips (ask for clean, dry hardwood scraps), or hand-cut pieces from fallen branches (maple, walnut, oak) | Dry, stable moisture content (<12%), no mold or insect damage, visible grain, natural edge retention | Pressure-treated pine, plywood, painted MDF, green or damp wood |
| Tree Base & Frame | Salvaged wooden crates, vintage ladder rungs, or repurposed wine barrels cut in half | Sturdy weight distribution, natural patina, structural integrity without reinforcement | Plastic stands, particleboard bases, newly sanded wood without character |
The Step-by-Step Assembly Process
Building this tree is iterative, not linear. Allow time for drying, settling, and intuitive adjustments. Rushing compromises texture integrity.
- Select and prepare your base. Choose a low-profile, wide-based structure—ideally 18–24 inches in diameter—to support visual weight without top-heaviness. Sand rough edges only where safety is required; preserve weathered surfaces. Wipe with a damp (not wet) cloth to remove dust, then let air-dry fully.
- Create the trunk silhouette. Cut three to five vertical strips of burlap, each 3–4 inches wide and 48–60 inches long. Lightly mist each strip with water, then twist tightly while damp. Secure ends with twine and hang vertically to dry for 24 hours. This creates a naturally tapered, fibrous “trunk” effect when bundled and secured to the base.
- Build wood ornaments in batches. Work with wood pieces no larger than 3.5 inches in any dimension to maintain scale. Use a fine-grit sandpaper (220+) to smooth sharp edges *only*—do not erase tool marks or grain variation. Drill a single 1/8-inch hole near the top edge of each piece. Thread with undyed cotton string or thin leather cord, knotting securely on the back. Let cords hang freely—no pre-tying.
- Assemble the burlap garlands. Cut 12–15 strips of burlap, each 2 inches wide and 36 inches long. Fold each strip lengthwise once, then tie a loose overhand knot at one end. Slide the knot down 4 inches, creating a soft, textured “puff.” Repeat every 6 inches along the strip. Do not iron or steam—crispness defeats the purpose.
- Layer and drape—not hang—ornaments. Begin at the base: wrap burlap trunk strips around the center post, overlapping slightly. Then, loosely drape burlap puffs around the lower third, letting ends fall naturally. Next, tuck wood ornaments into burlap folds, behind knots, or beneath draped layers—never hanging from wire hooks. Their weight should rest against the structure, not dangle. Finish by weaving dried eucalyptus stems, cinnamon sticks, or preserved rosemary through upper layers for scent and subtle contrast.
Real-World Application: The Hudson Valley Studio Tree
In her 1842 stone studio overlooking the Catskills, ceramicist Maya Chen needed a holiday installation that reflected her practice—slow, earth-rooted, materially honest. She rejected traditional evergreens entirely. Instead, she built a 72-inch-tall “tree” using a salvaged apple orchard ladder laid horizontally across two stacked, moss-covered granite blocks. From the ladder’s rungs, she suspended 42 hand-turned maple ornaments—each carved with a unique grain-revealing groove—and wrapped 18 burlap “branches” made from twisted, unbleached jute rope. No lights, no tinsel, no color beyond natural wood and fiber. Visitors consistently remarked on its stillness: “It doesn’t feel festive,” one said, “it feels like coming home.” Maya kept the structure intact through March, replacing maple ornaments with hand-thrown clay pods filled with dried milkweed fluff and local wildflower seeds—proving the concept’s adaptability beyond December.
Essential Care & Longevity Practices
A rustic chic tree gains depth with age—but only if cared for deliberately. Unlike plastic alternatives, natural fibers and wood respond to environment. Humidity swings cause burlap to stiffen or slacken; direct sunlight fades jute and warps thin wood. Prevention is simpler than correction.
- Rotate seasonally: Store burlap elements flat in acid-free tissue paper inside breathable cotton bags—not plastic bins—to prevent mildew and static buildup.
- Maintain wood integrity: Every 6 months, lightly rub ornaments with food-grade mineral oil using a lint-free cloth. Wipe excess after 15 minutes. This replenishes natural oils without adding shine.
- Refresh scent organically: Place a few whole cloves or star anise inside a small muslin pouch and tuck it beneath the base layer. Replace every 8 weeks.
- Repair, don’t replace: If burlap frays, reinforce the back with a small patch of identical fabric stitched with beeswax-coated linen thread. If wood cracks, fill with a paste of sawdust and hide glue—sand smooth when dry.
FAQ: Addressing Common Practical Concerns
Can I use fresh greenery with this style?
Yes—but selectively. Avoid dense, glossy boxwood or artificial-looking sprigs. Opt for foraged elements: bare willow branches, dried hydrangea heads, or slow-dried magnolia leaves (pressed between parchment and weighted books for 2 weeks). Fresh eucalyptus works exceptionally well—their silvery-blue hue complements raw wood and oat-toned burlap without competing.
How do I secure ornaments on a non-traditional frame like a ladder or crate?
Use gravity and friction, not adhesives. For wood ornaments: drill a shallow recess on the back (1/16 inch deep, 1/4 inch wide) and insert a small cork disc. Press the ornament onto a slightly roughened surface—the cork grips without residue. For burlap puffs: stitch a hidden loop of twine to the back before knotting, then thread it over a protruding nail or screw head on the frame. The tension holds it in place.
Is this style appropriate for small spaces or apartments?
Especially so. Scale is inherent to rustic chic. A 36-inch “tree” built on a vintage footstool, layered with miniature burlap rosettes and acorn-cap ornaments, carries equal presence. Its strength lies in density of texture—not height. In fact, designers report higher engagement in compact spaces because viewers lean in to appreciate grain detail and fiber nuance.
Styling Variations for Year-Round Relevance
The true value emerges when you extend its life beyond the holidays. With minimal swaps, the same structure becomes a vessel for seasonal storytelling:
- Winter Solstice: Swap wood ornaments for hand-poured beeswax candles in simple ceramic holders; add bundles of dried lavender and white sage.
- Early Spring: Replace burlap puffs with woven reed nests holding speckled quail eggs or smooth river stones; hang tiny brass bells from wood pieces for gentle sound.
- Harvest Season: Introduce miniature gourds, dried corn husks, and cinnamon-stick bundles tied with raffia—keeping all wood and burlap as the unifying backbone.
“The most enduring rustic pieces aren’t ‘designed’—they’re edited. You begin with abundance, then remove until only what’s essential, honest, and resonant remains.” — Elias Boone, Sustainable Material Archivist, Appalachian Craft Archive
Conclusion: Your Invitation to Intentional Making
Creating a rustic chic tree isn’t about replicating a Pinterest image—it’s about cultivating a relationship with material. It asks you to feel the resistance of wood under a carving tool, to notice how burlap softens with handling, to understand that beauty lives in the space between control and surrender. There are no mistakes here, only adaptations: a split in the wood becomes a cradle for moss; a mis-knotted burlap puff gains character through asymmetry. This tree grows richer with each season it stands—not because it accumulates ornaments, but because it accumulates meaning. Start small. Choose one wood piece and one burlap strip. Twist, drape, tuck. Observe how light falls across the grain. Listen to the quiet hum of natural things held together with care. When you do, you’re not just making decor—you’re practicing presence. And that, more than any ornament, is the most enduring kind of chic.
💬 Share your first rustic chic creation—or your biggest material discovery—with us in the comments. What wood spoke to you? Which burlap batch felt most alive in your hands? Let’s build a community rooted in real making.