Fog machines and laser Christmas light displays share a quiet, powerful synergy—one that transforms flat, invisible beams into three-dimensional ribbons of light dancing across your yard or living room. But this pairing isn’t plug-and-play. Many homeowners invest in high-lumen green lasers or multi-beam projectors only to discover their effects vanish into thin air—literally—because the atmosphere lacks sufficient particulate density to scatter the light. Others deploy fog machines recklessly, resulting in hazy, uneven diffusion, overheated equipment, or even safety concerns near electrical setups. The truth is nuanced: fog machines *do* work exceptionally well with laser Christmas light displays—but only when matched thoughtfully, timed precisely, and operated with intention.
This isn’t about adding “more atmosphere.” It’s about engineering visibility. Lasers travel in straight lines and remain invisible until they strike airborne particles—dust, moisture, or intentionally introduced fog. Without those particles, even a 5,000mW laser vanishes mid-air. With the right fog, however, the same beam becomes a luminous, sculptural element—crisp, defined, and deeply immersive. Below, we break down the physics, practicalities, and proven field techniques that separate dazzling holiday spectacles from underwhelming flickers.
How Laser Visibility Actually Works (and Why Fog Isn’t Optional)
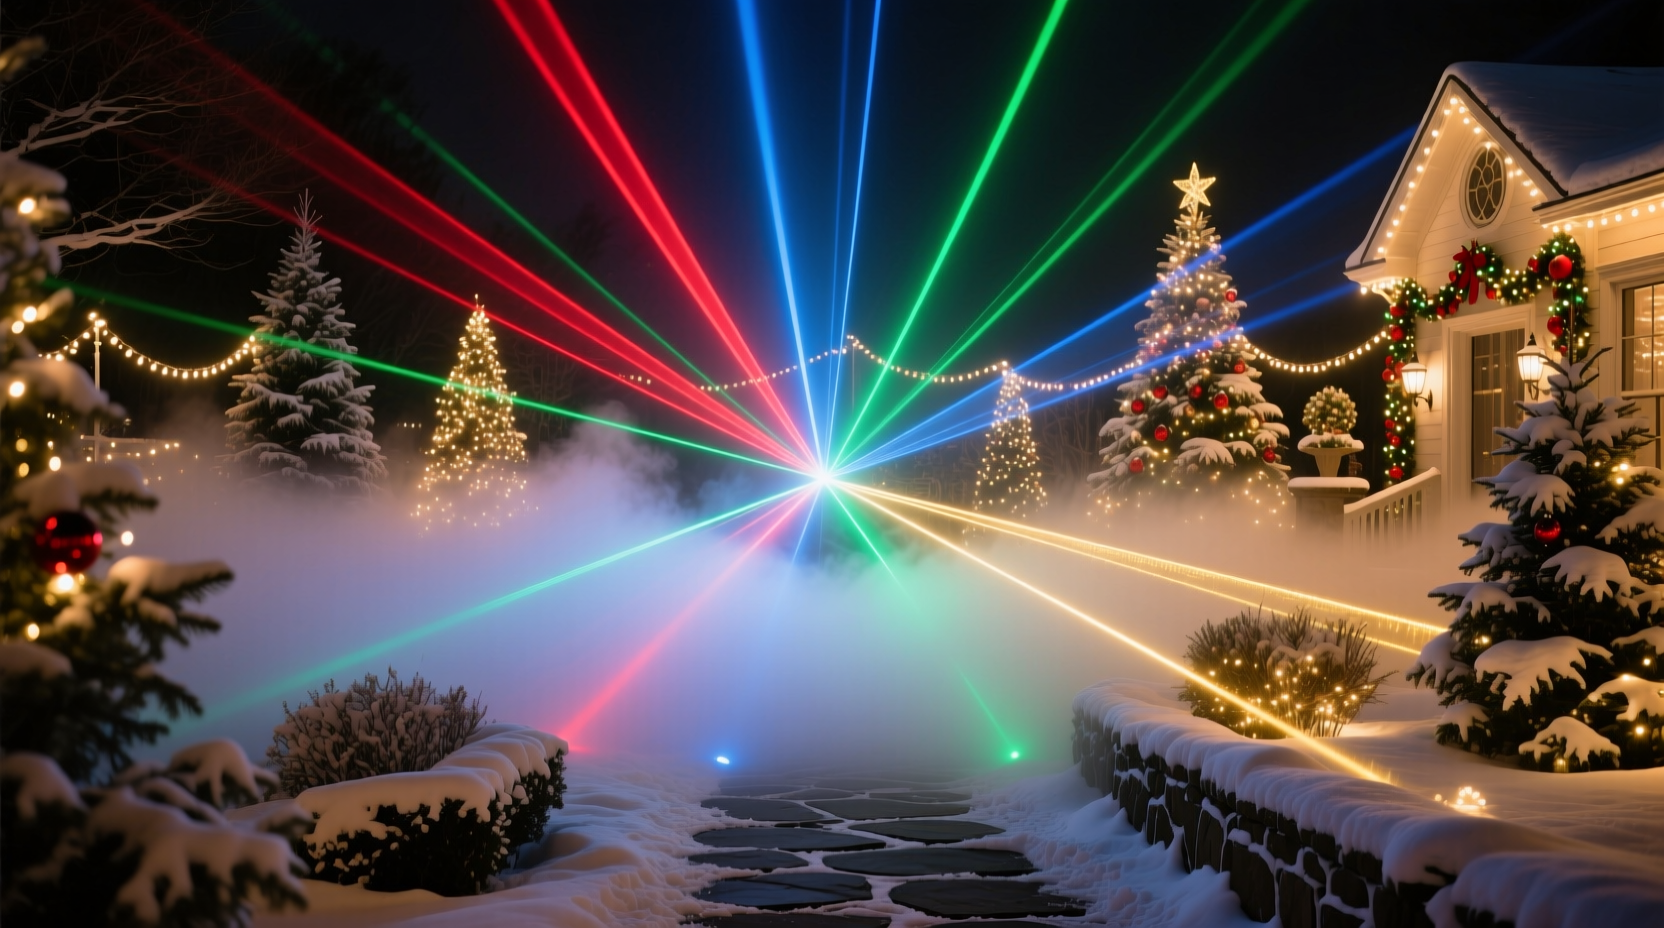
Laser light is coherent and collimated—meaning its photons travel in parallel, tightly focused paths. Unlike incandescent or LED light, which emits in all directions, a laser beam remains narrow over distance. That’s ideal for precision projection—but disastrous for visibility unless something interrupts its path.
The phenomenon at play is Mie scattering: when light encounters particles roughly equal to or larger than its wavelength (green lasers operate at ~532nm; typical fog particles range from 0.5–10μm), it scatters visibly in all directions—including back toward the viewer. This creates the glowing “beam” effect people associate with concerts, planetariums, and premium holiday displays.
Airborne dust or humidity can provide minimal scattering, but it’s inconsistent, weak, and often invisible indoors or on dry winter nights. Fog fluid vaporized into microscopic glycol/water droplets delivers reliable, controllable, and dense particle concentration—making it the only practical medium for consistent beam definition in residential settings.
Tip: Never use “low-lying” or “water-based” fog fluids with laser displays. These produce heavy, wet mist that pools on surfaces, risks shorting outdoor electronics, and fails to lift into the beam path. Always choose ultra-low or haze fluid designed for atmospheric suspension.Choosing the Right Fog Machine—and Matching It to Your Laser Setup
Not all fog machines are created equal—and most consumer-grade units sold alongside Christmas laser kits are ill-suited for beam enhancement. Key distinctions matter:
- Haze vs. Fog: Haze machines generate finer, longer-lasting particles (0.5–2μm) that linger evenly for minutes. Ideal for sustained beam visibility. Fog machines produce coarser, denser clouds (5–10μm) that dissipate quickly and create dramatic bursts—not continuous definition.
- Output Rate & Coverage: A 400-watt fogger may output 2,000–3,000 cubic feet per minute (CFM), but if your display spans 30 feet wide and 20 feet tall, you need even distribution—not a wall of fog at one corner.
- Heat Management: Lasers generate heat. Fog machines generate heat. Placing them within 3 feet of each other—or inside enclosed cabinets—risks thermal shutdown or premature diode failure.
For most residential laser Christmas displays (e.g., 3–5 beam projectors covering a front yard or large patio), a dedicated haze machine rated for 1,500–2,500 CFM is optimal. Units like the Antari Z-350 or ADJ Haze 1000 offer programmable timers, remote control, and quiet operation—critical for synchronized shows.
| Machine Type | Best For | Particle Lifespan | Risk with Lasers |
|---|---|---|---|
| Standard Fog Machine (e.g., Chauvet Hurricane) | Short bursts (door reveals, musical accents) | 30–90 seconds | Over-saturation; beam loss in dense pockets |
| Haze Machine (e.g., Antari Z-350) | Sustained beam visibility across full display | 3–8 minutes | Low—when properly ventilated |
| “Low-Lying” Fog Unit | Ground-level effects (not beams) | 1–2 minutes (settles downward) | High—can pool on laser housings, trip GFCI, obscure ground fixtures |
| DIY Dry Ice + Fan | Indoor, short-duration events only | 45–120 seconds | Very high—condensation, CO₂ buildup, no control |
Timing, Placement, and Environmental Control: The Real Keys to Success
You can own the best haze machine and brightest lasers—and still get poor results if timing and placement aren’t calibrated. Beam visibility depends on three interlocking variables: particle density, air stability, and laser alignment.
Start with placement. Position haze output no closer than 4 feet from any laser emitter—and angle it so vapor flows *across* the beam path, not directly into the lens. Direct injection causes lens fogging, internal condensation, and potential IR sensor interference. Use small pedestal fans (set to low) to gently circulate haze horizontally—this prevents pooling and creates uniform density without turbulence that distorts beam geometry.
Timing is equally critical. Most laser shows run on 30–90 second cycles. Haze should be introduced 10–15 seconds before the first beam activates, allowing particles to disperse evenly. Then, use a programmable controller (like the Pangolin FB4 or even a simple X10 timer) to pulse the haze unit every 60–90 seconds during active display periods. Continuous haze generation wastes fluid, overheats motors, and eventually creates “whiteout” conditions where beams blur into ambient glow.
“The difference between ‘cool’ and ‘cinematic’ is measured in milliseconds—not watts. We time haze onset to the frame-accurate start of the laser sequence, and we never let density exceed 0.35 g/m³. Above that, you lose edge sharpness and depth perception.” — Derek Lin, Lighting Designer, Lumina Displays (12+ years designing commercial holiday installations)
A Real-World Case Study: The Thompson Family Yard Display (Portland, OR)
In December 2023, the Thompsons installed a 7-beam RGB laser projector system across their 40×30-foot front yard—intended to cast animated snowflakes, rotating trees, and scrolling messages onto their garage wall and adjacent oak tree. Initial tests showed bright, vivid wall projections—but zero visible beams in the air. Neighbors praised the “pretty lights on the house,” but missed the immersive experience the family envisioned.
They tried a $40 fog machine from a big-box store. Result: thick, wet fog that clung to the grass, dripped onto their laser housing, and tripped their outdoor GFCI twice. They then rented a professional haze unit—but placed it behind the garage, blowing haze *away* from the beams. Still nothing.
After consulting a local lighting technician, they repositioned a 2,000 CFM haze unit on a 3-foot platform at the yard’s southwest corner, angled 30° upward and northeastward—so vapor rose and drifted *through* the primary beam corridor. They added two 6-inch box fans (on low) mounted to fence posts to stabilize airflow. Using a $25 Bluetooth timer, they programmed haze bursts to begin 12 seconds before each 75-second show segment.
Result: beams appeared as razor-thin emerald and sapphire ribbons, clearly defined up to 35 feet. Depth perception improved dramatically—the “snowflake” animation now floated *in space*, not just on surfaces. Local news featured their display, citing “unusually crisp aerial effects.” Total cost for the fix: $180 (haze fluid, timer, fan mounts). Total time invested: 3.5 hours.
Step-by-Step: Setting Up Fog + Lasers Safely and Effectively
- Evaluate your environment: Measure wind speed (use a $15 anemometer app), note nearby HVAC vents or open windows, and identify natural air currents. Avoid setups where gusts exceed 5 mph outdoors or strong drafts exist indoors.
- Select and position hardware: Choose a haze (not fog) machine rated ≥1,500 CFM. Place it ≥4 ft from any laser, elevated 2–4 ft off ground, angled to cross—not hit—beam paths.
- Test particle density: Run haze for 10 seconds. Wait 20 seconds. Shine one laser beam across the area. If you see a faint, continuous line—ideal. If it’s faint or broken, increase duration by 2 seconds next test. If it’s thick and milky, reduce by 3 seconds.
- Integrate timing: Connect haze unit to a programmable timer. Set activation to begin 10–15 seconds before your laser show starts. For multi-segment shows, schedule pulses every 60–90 seconds during active periods only.
- Verify safety and compliance: Ensure all units are UL-listed for outdoor use (if applicable), plugged into GFCI-protected circuits, and kept clear of flammable materials (dry pine boughs, curtains, vinyl siding). Keep haze fluid containers sealed and stored above 40°F.
FAQ: Common Concerns Addressed
Will fog damage my laser projector?
Properly deployed haze will not damage your laser—if you follow spacing and ventilation guidelines. The real risk comes from coarse fog, direct vapor injection into vents or lenses, or operating both units in enclosed, unventilated spaces. Glycol-based haze fluid is non-corrosive and leaves no residue when used as directed. Always consult your laser’s IP rating: units rated IP65 or higher tolerate light ambient haze better than IP20 models.
Can I use a fog machine indoors with laser lights?
Yes—with strict caveats. Indoor use demands lower output (≤1,000 CFM), excellent cross-ventilation (open windows + exhaust fans), and ceiling height ���8 ft. Never use haze in bedrooms, nurseries, or rooms occupied by people with asthma, COPD, or sensitivities to glycol aerosols. Monitor air quality with a PM2.5 sensor; maintain readings below 35 μg/m³ during operation. When in doubt, skip indoor haze and focus on surface projection instead.
How much haze fluid do I really need?
Average residential displays consume 100–250 mL per hour of active haze time. A 1-liter bottle supports 4–10 hours of intermittent use (typical for holiday displays running 2–4 hours nightly). Don’t buy “bulk” 5-gallon drums unless you’re managing a neighborhood-wide installation—fluid degrades after 12–18 months, especially if exposed to temperature swings or sunlight.
Conclusion: Elevate Your Display with Intentional Atmosphere
Fog machines don’t “make” laser Christmas light displays—they reveal them. They turn theoretical optics into tangible wonder. But that revelation requires respect for physics, attention to detail, and willingness to treat atmosphere as a design material—not an afterthought. You wouldn’t hang expensive art in glare-prone lighting; you wouldn’t plant shade-loving ferns in full sun. Similarly, deploying lasers without calibrated atmospheric support is like composing symphony without acoustics: technically correct, emotionally hollow.
Start small. Test one beam. Time one haze burst. Observe how density changes perceived depth. Adjust fan angles. Note how cold, dry air demands more frequent pulses than humid evenings. Document what works for *your* space, *your* equipment, *your* climate. That knowledge compounds—each season builds on the last, transforming trial into fluency.
Your neighbors don’t remember wattage specs or beam divergence angles. They remember the moment a cobalt laser sliced through winter air like a shard of frozen sky—and how, for three perfect seconds, it felt like magic had weight and texture. That’s what thoughtful fog integration delivers. Not more light. Better presence.
💬 Have you cracked the perfect haze-laser balance? Share your setup, timing tricks, or hard-won lessons in the comments—your insight could help dozens of holiday creators skip months of trial and error.