
It’s the week before Thanksgiving. Your new roof arrives Monday. The neighborhood lights-up contest starts December 1st. You’re standing on a 24-foot extension ladder, string of LED icicle lights in hand, eyeing the eaves where last year’s gutters used to sit—now stripped bare, awaiting new flashing and shingles. Your contractor just texted: “Crew arriving at 7 a.m. sharp.” You wonder: Can I just get the lights up now? It’ll only take 20 minutes.
The short answer is no—not safely, not legally, and not without significant risk. But the reality is more nuanced than a simple “don’t do it.” Roof installation isn’t just about shingles and nails; it’s a tightly choreographed sequence of hazard mitigation, load management, and dynamic site control. Adding decorative lighting—a task that demands balance, reach, repeated repositioning, and often solo operation—into that environment introduces overlapping, compounding dangers. This article details precisely why the practice is hazardous, outlines safer alternatives grounded in OSHA guidance and roofing industry protocols, and provides a practical framework for coordinating holiday preparations without compromising safety or work quality.
Why This Combination Creates Unacceptable Risk
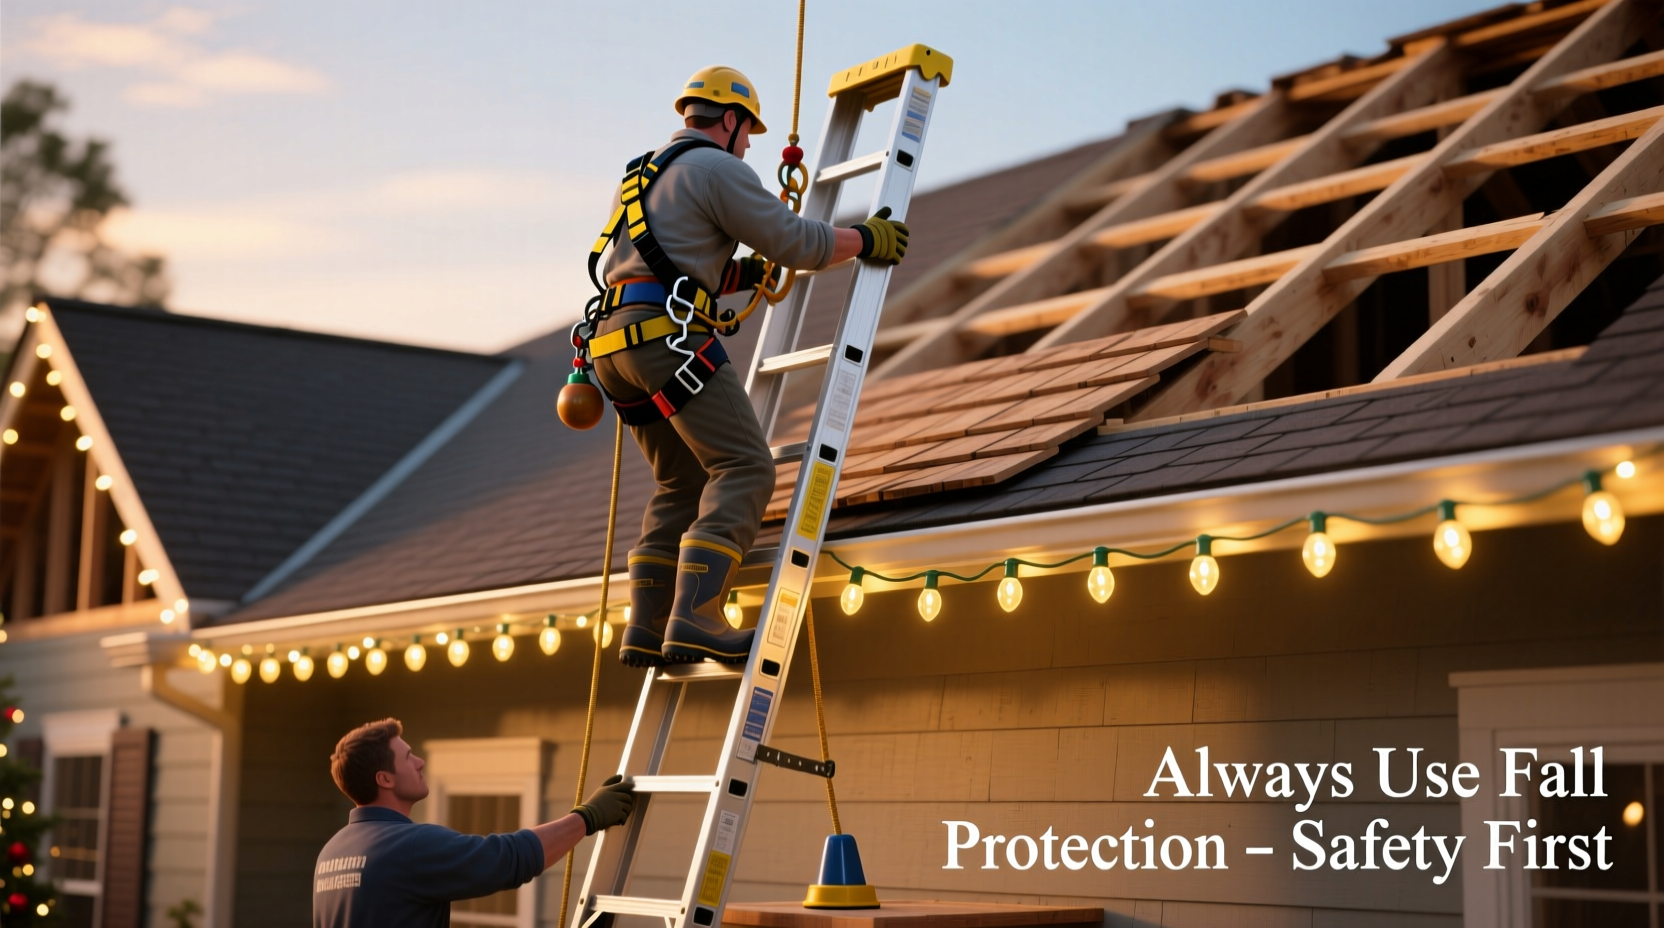
Hanging Christmas lights while roof installation is underway—or even imminent—creates a convergence of three high-consequence hazard categories: fall exposure, structural instability, and human factors overload.
First, ladders placed against a partially installed roof lack reliable anchor points. During roof replacement, fascia boards may be removed or loosened, soffits are often detached for ventilation upgrades, and temporary decking (like OSB sheathing) may be uneven, wet, or missing edge protection. A ladder leaning against such a surface can slip laterally or settle unexpectedly—especially under the shifting weight of a person reaching overhead while handling lightweight but bulky light strings.
Second, roofing crews operate under strict fall protection protocols—including guardrails, personal fall arrest systems (PFAS), and designated access zones. Introducing an untrained, unsecured person on a ladder within the same footprint disrupts those controls. According to OSHA’s 29 CFR 1926.502, any work performed at heights of 6 feet or more requires either guardrail systems, safety nets, or personal fall arrest. A homeowner on a ladder near active roofing work does not meet any of these criteria—and may inadvertently interfere with crew safety lines or anchor points.
Third, cognitive load increases dramatically when two distinct tasks—precision roofing work and delicate light placement—occur simultaneously. Roofers focus on nail spacing, flashing alignment, and material sequencing. A homeowner maneuvering lights nearby diverts attention, creates trip hazards from dangling cords, and risks dropping tools or light reels onto workers below. A 2022 National Safety Council analysis found that 37% of non-fatal rooftop injuries involving third parties occurred when unauthorized individuals entered active work zones during residential construction.
Tip: Never assume “the roof looks stable enough” — sheathing may be dry but unnailed, flashing may be loose, and wind gusts over 15 mph significantly increase ladder instability on open eaves.What Roofing Professionals Actually Recommend
We spoke with four certified roofing contractors with combined experience spanning over 85 years—from family-owned Midwest firms to national commercial installers. Their consensus was unequivocal: Do not attempt light installation during active roof work. But their advice went beyond prohibition—they offered pragmatic, field-tested alternatives.
“Clients ask this every November. I tell them: ‘Your roof is a construction zone for 2–4 days. Treat it like a surgical suite—no visitors, no side projects, no exceptions.’ Once the final inspection passes and we’ve cleared debris, *then* it’s safe to hang lights—even the same day, if you wait until 3 p.m. after cleanup.”
— Marcus Bell, RRO (Roofing Contractor Master Certification), Bell & Sons Roofing, Indianapolis, IN
Bell’s team uses a standardized “roof readiness checklist” before permitting any post-installation activity. Key thresholds include: all flashings sealed and tested, gutters fully reinstalled and secured, no exposed fasteners above the drip edge, and a final sweep for nails, shingle scraps, and adhesive residue. Only then does the site transition from “active construction” to “occupied structure.”
Other contractors emphasized timing windows. Dave Lin, owner of Pacific Crest Roofing in Portland, notes that the safest window for light installation is between 48 and 72 hours after completion: “That gives sealants time to cure, allows us to catch any minor leaks during first rainfall, and ensures all temporary supports are gone. Plus, your gutters are clean and ready to hold clips.”
Safer Alternatives: A Step-by-Step Coordination Plan
Instead of risking injury or delaying roofing work, follow this five-step plan to align holiday lighting with your roof project—without conflict or compromise.
- Pre-installation planning (Weeks 3–4 before roof date): Measure eaves, gables, and dormers. Note existing light clip locations. Photograph current setup for reference. Order lights early—LED sets with commercial-grade wiring and UL 588 certification withstand weather better and reduce re-hanging frequency.
- Contractor coordination (Week 2 before roof date): Ask your roofer for their “site clearance timeline”—not just completion date, but when gutters will be reattached, when final debris removal occurs, and whether they recommend waiting for a weather window (e.g., no rain for 48 hours post-completion).
- Temporary storage (Roof week, pre-installation): Store lights, clips, and controllers indoors—not in garages or sheds prone to temperature swings. Coil strings loosely (never tight loops) and label by section (e.g., “Front Eave – 3 strands”).
- Post-installation readiness check (Day after completion): Walk the perimeter. Confirm gutters are level and bolted every 24 inches, fascia is flush and sanded, and no protruding nails remain. Test ladder stability on firm, level ground—not on mulch, gravel, or freshly disturbed soil near foundation trenches.
- Light installation (Optimal window: Day 2–3 post-completion): Work in daylight, with a spotter on ground. Use a ladder stabilizer (not just standoffs) to prevent lateral movement. Install clips first—then drape, never yank—lights. Leave 6 inches of slack at each end for thermal expansion.
Do’s and Don’ts: Holiday Lighting Around Roof Work
| Action | Do | Don’t |
|---|---|---|
| Ladder placement | Use a ladder leveler on uneven ground; lean against intact, anchored fascia only after roofer confirms stability | Lean against temporary decking, loose flashing, or gutters not yet torqued to spec |
| Light type | Choose UL-listed, low-voltage LED sets with built-in surge protection | Use older incandescent strings or non-certified “dollar store” lights near new roofing materials |
| Timing | Install lights after final cleanup and gutter verification—ideally on a calm, dry afternoon | Attempt installation the morning after roofing ends, before debris sweep or flashing inspection |
| Electrical safety | Plug into GFCI-protected outdoor outlets; use timers rated for exterior use | Run cords under shingles, through flashing gaps, or across newly sealed valleys |
| Team coordination | Share your light-installation schedule with the roofer; confirm no follow-up visits (e.g., warranty inspections) are scheduled same day | Assume “they’ll be done by noon” and start hanging lights at 10 a.m. without confirmation |
Real-World Example: The Cedar Ridge Incident
In late November 2023, a homeowner in Cedar Ridge, Ohio attempted to hang lights on the north gable while his roof was still partially covered—two sections remained unshingled, and the crew was installing ice-and-water shield on the south slope. He used a 28-foot aluminum ladder braced against a temporarily installed starter strip. As he reached to secure a clip near the ridge, a gust of wind caught the unshingled deck panel beneath him. The panel lifted slightly, shifting the ladder’s top contact point. He lost balance, grabbed the ridge vent (still unsealed), and pulled it free—causing a 3-foot tear in the underlayment. He fell backward onto stacked shingles, avoiding serious injury but requiring emergency medical evaluation for a shoulder contusion. The roofer had to replace $1,200 in damaged materials and delay the project by 36 hours. Crucially, the incident triggered an OSHA consultation visit—because the homeowner’s ladder was within 10 feet of active work, violating 29 CFR 1926.501(b)(13) regarding unprotected sides and edges.
This wasn’t negligence born of recklessness—it was misjudgment of interdependent systems. The homeowner saw “a roof that looked almost done.” What he didn’t see were the hidden vulnerabilities: unnailed sheathing, uncured adhesives, and dynamic wind loads acting on incomplete surfaces. His story underscores why visual assessment alone is insufficient—and why professional guidance must govern timing.
Frequently Asked Questions
Can I hang lights on the ground-level soffits or porch roof while the main roof is being replaced?
Yes—if those areas are physically separated from the active work zone by at least 20 feet and have no overhead hazards (e.g., falling debris, crane paths, or material lifts). However, verify with your roofer first: some soffit vents or fascia sections may be part of the roofing system’s integrated ventilation and require coordination.
What if my roofer says it’s “fine” to hang lights during installation?
Respectfully clarify their statement. Reputable contractors will specify *exactly* when and where it’s safe—not offer blanket permission. If they say “go ahead anytime,” request written confirmation referencing OSHA 1926.502 and ask whether they’ll assume liability for falls or property damage resulting from your activity. Most will retract the offer once liability is framed explicitly.
How long should I wait after roof installation before using a pressure washer near the eaves for light cleaning?
Wait a minimum of 14 days. New asphalt shingles need time for granules to fully embed and sealants to cure. Pressure washing too soon can dislodge granules, void warranties, and force water behind flashing. For light maintenance, use a soft brush and garden hose on low pressure—never exceeding 1,200 PSI.
Conclusion: Safety Isn’t Seasonal—It’s Structural
Your roof is the most critical protective system your home possesses. Its integrity depends not just on quality materials and skilled labor—but on disciplined sequencing, respect for physics, and awareness of how seemingly unrelated tasks interact. Hanging Christmas lights isn’t frivolous; it’s meaningful tradition. But traditions endure best when built on foundations of care, not compromise. Choosing patience—waiting those extra 48 hours, verifying stability, coordinating with your contractor—doesn’t diminish your holiday spirit. It honors it. It ensures your lights shine not just on December nights, but for many seasons to come—on a roof that performs as designed, without hidden stress or avoidable risk.
Take action today: Review your roofing contract for “site access” clauses. Text your contractor the question: “What’s your recommended earliest safe date for light installation?” Then mark that date on your calendar—not the day the crew finishes, but the day they certify the site is ready. That small shift in timing reflects profound respect—for your safety, your investment, and the professionals entrusted with protecting both.
💬 Have you coordinated holiday lighting with a major home project? Share your timeline, lessons learned, or pro tips in the comments—we’ll feature the most practical insights in next month’s safety round-up.