Choosing the right hair dryer attachment isn't just about convenience—it can make or break your styling routine. The two most common attachments, the concentrator nozzle and the diffuser, serve fundamentally different purposes. One focuses airflow to smooth and straighten; the other disperses it to enhance curl and reduce frizz. Understanding their mechanics, benefits, and ideal use cases is essential for achieving salon-quality results at home.
How Hair Dryer Attachments Work
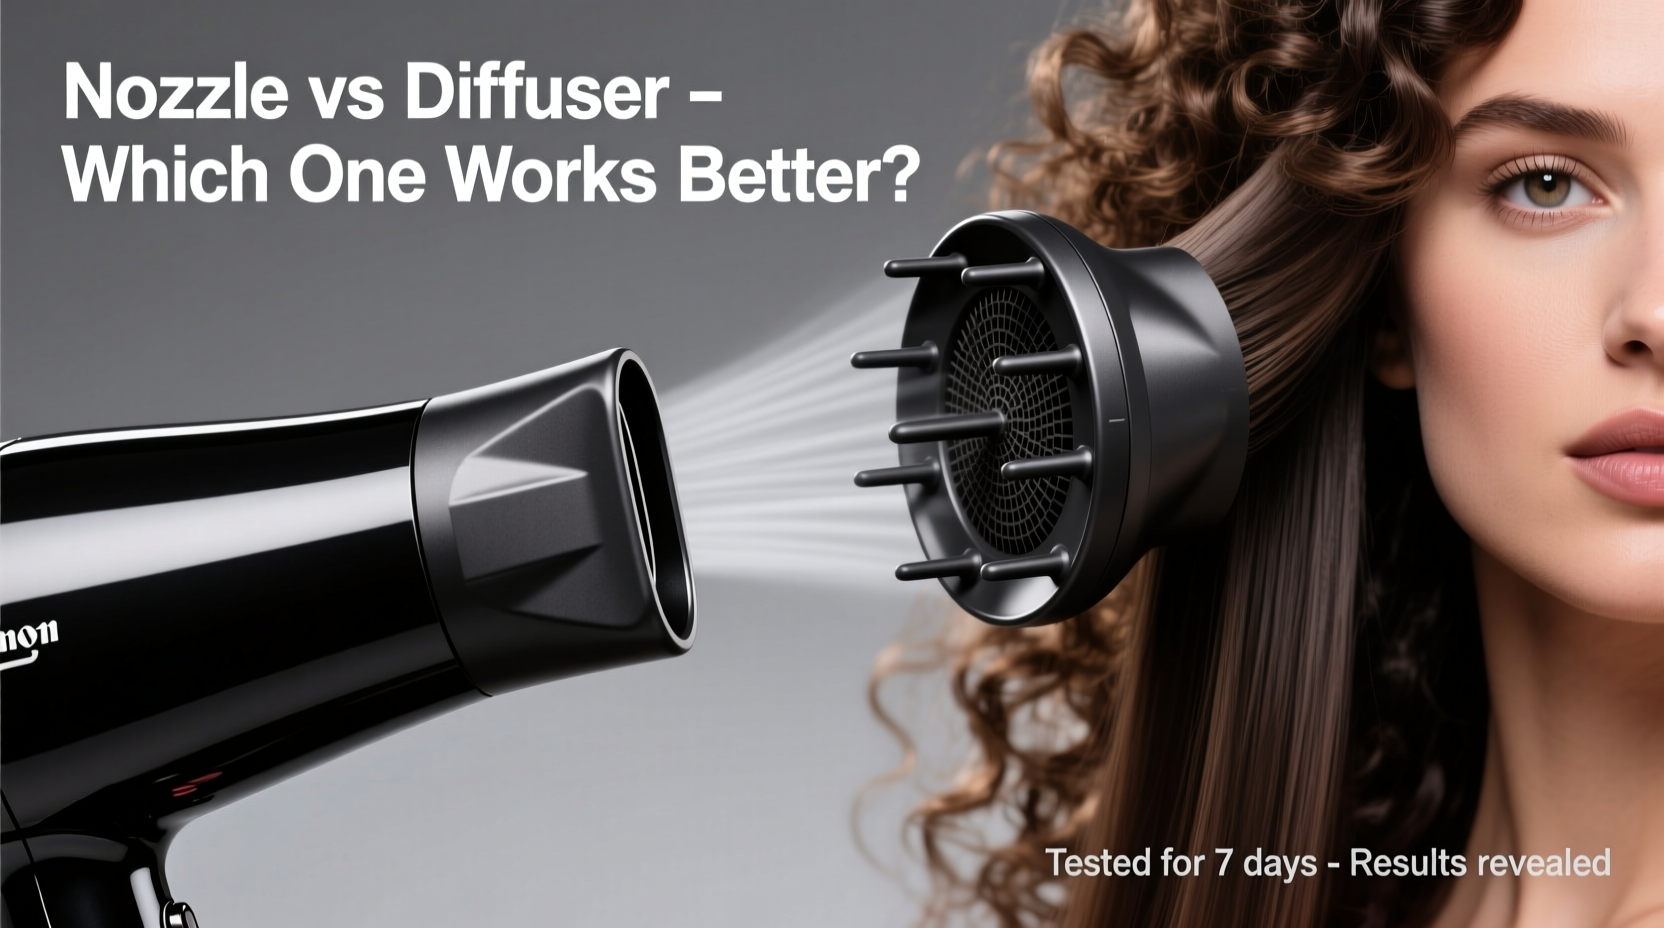
The effectiveness of a hair dryer depends not only on heat and speed settings but also on how air is directed. Attachments modify airflow to suit specific styling needs.
A **concentrator nozzle** (also called a concentrator attachment or focus nozzle) narrows the airstream into a precise, high-velocity jet. This allows targeted drying, making it ideal for smoothing cuticles, reducing volume, and creating sleek styles. It's commonly used in blowouts and flat iron prep.
A **diffuser**, on the other hand, spreads airflow across multiple prongs or fingers that gently lift and separate curls without disturbing their natural pattern. By minimizing direct wind contact, it reduces frizz and preserves moisture—critical for curly, wavy, or coily textures.
“Using the wrong attachment can lead to over-drying, frizz, or loss of definition. Match the tool to your hair’s structure, not trends.” — Jasmine Reed, Celebrity Stylist & Texture Specialist
Concentrator Nozzle: Precision and Control
The concentrator nozzle excels when precision matters. Its focused airflow enables section-by-section drying with minimal disruption to surrounding hair. This makes it indispensable for:
- Smoothing fine or straight hair types
- Creating polished blowouts
- Prepping hair for flat irons or thermal styling
- Speeding up drying time on thick, dense hair
Because the concentrated stream flattens the hair cuticle as it dries, it enhances shine and reduces flyaways. However, this same action can be detrimental to curly hair, where cuticle disruption leads to puffiness and loss of curl formation.
Tip: Hold the concentrator parallel to your head and move it slowly down each section to avoid overheating roots or ends.Diffuser: Enhancing Natural Texture
The diffuser is engineered for texture preservation. Its wide, cup-like shape with extended prongs allows air to circulate evenly while lifting roots and supporting curl clumping. Key benefits include:
- Reduced frizz by minimizing mechanical disturbance
- Enhanced curl definition and volume at the root
- Even drying without hot spots
- Maintained moisture balance in porous or coarse strands
Curly and wavy hair types benefit most from diffusing, especially when using a low heat and medium airflow setting. Techniques like “scrunching” during drying help activate spring patterns, while “plopping” (drying over a cotton T-shirt) before diffusing can cut drying time significantly.
Even those with looser waves find value in diffusers—they prevent the “helmet hair” effect caused by aggressive airflow, resulting in softer, more natural movement.
Mini Case Study: From Frizzy to Defined
Lena, a 32-year-old with 3A curls, had struggled for years with frizz and undefined waves. She used her hair dryer’s default setting—no attachment—for quick drying, often leading to puffiness and shrinkage. After switching to a diffuser and adopting the “praying hands” technique (gently pressing curls upward), she noticed immediate improvement. Within two weeks, her curls were bouncier, shinier, and held their shape longer. Her drying time increased slightly, but the trade-off in quality was well worth it.
Choosing Based on Hair Type: A Practical Guide
There is no universal “best” attachment—only what works best for your unique hair. Consider your texture, density, and desired outcome when deciding.
| Hair Type | Best Attachment | Why |
|---|---|---|
| Straight / Fine | Concentrator Nozzle | Provides smoothness, adds shine, prevents flatness |
| Wavy (2A–2C) | Diffuser | Defines waves, reduces frizz, maintains volume |
| Curly (3A–3C) | Diffuser | Preserves curl pattern, minimizes tangling |
| Coily / Kinky (4A–4C) | Diffuser | Distributes moisture, lifts roots, prevents shrinkage |
| Thick / Coarse (any type) | Both (strategic use) | Nozzle for roots, diffuser for mid-lengths/ends |
Step-by-Step: How to Use Each Attachment Effectively
Using a Concentrator Nozzle
- Towel-dry hair until damp (not dripping).
- Apply a heat protectant from roots to ends.
- Attach the concentrator to your dryer.
- Set dryer to medium heat and high speed.
- Take small sections, place the nozzle at the root, and glide down to the tip, following the brush motion.
- Repeat until dry, finishing with a cool shot to seal the cuticle.
Using a Diffuser
- Plop or gently squeeze out excess water with a microfiber towel.
- Apply leave-in conditioner and curl cream.
- Attach the diffuser securely to your dryer.
- Set dryer to low or medium heat, medium speed.
- Invert your head and place curls into the diffuser bowl. Lift gently toward the scalp to encourage volume.
- Hold for 20–30 seconds per section, rotating as needed.
- Allow curls to dry 80–90%, then scrunch out any crunch from product.
Common Mistakes to Avoid
- Using high heat on curls: Causes frizz and dryness—opt for warm or cool settings.
- Dragging the diffuser through hair: Disrupts curl formation—use a “hover” or “cup” method instead.
- Skipping heat protection: Both attachments expose hair to heat stress—always apply a thermal barrier.
- Over-drying with a nozzle: Can lead to brittleness—stop once hair is smooth and dry, not parched.
FAQ
Can I use both attachments in one session?
Yes. Many stylists recommend combining both: use the concentrator on the roots for volume and the diffuser on the lengths for curl definition. This hybrid approach maximizes control and texture.
Do diffusers work on short hair?
Absolutely. Short curly or wavy hair benefits from diffusing just as much as longer styles. Smaller diffusers designed for short cuts are available, or you can use a standard one carefully around shorter layers.
Is a concentrator nozzle bad for curly hair?
Used aggressively, yes. Direct, focused airflow breaks up curl clumps and increases frizz. However, if used lightly on roots only, it can add volume without sacrificing definition.
Checklist: Choosing Your Ideal Attachment
- ✅ Identify your hair type and primary concerns (frizz, volume, smoothness)
- ✅ Test both attachments on clean, conditioned hair
- ✅ Observe how your hair responds after drying (definition, shine, puffiness)
- ✅ Adjust heat and speed settings accordingly
- ✅ Combine techniques if needed for balanced results
- ✅ Clean attachments monthly to prevent dust buildup and airflow blockage
Final Verdict: Which Gives You Better Hair?
The answer lies not in superiority, but in suitability. The concentrator nozzle delivers better results for sleek, straight, or fine hair that thrives under controlled airflow. The diffuser wins for textured, curly, or frizz-prone hair that needs gentle handling and definition.
Better hair comes not from owning the fanciest tool, but from understanding how to use it correctly. Whether you prioritize polish or personality in your style, choosing the right attachment transforms your routine from functional to transformative.
💬 Ready to upgrade your drying game? Try both attachments this week and share which one gave you better definition, shine, or manageability. Your perfect style might be one switch away.