Discarded spirit bottles—whether from a fine single malt, artisanal gin, or vintage rum—often carry history, craftsmanship, and distinctive glasswork. Rather than recycling them anonymously, many makers and homeowners are discovering how to retain their visual character while upgrading them into intelligent, controllable lighting fixtures. This isn’t just upcycling; it’s functional design that merges heritage glass with modern IoT infrastructure. Done correctly, a repurposed bottle light becomes a focal point in a living room, a subtle accent in a home office, or even a programmable ambient layer in a smart bedroom setup. The key lies not in aesthetics alone, but in electrical safety, thermal management, wireless reliability, and long-term maintainability.
Why This Approach Works—Beyond Aesthetics
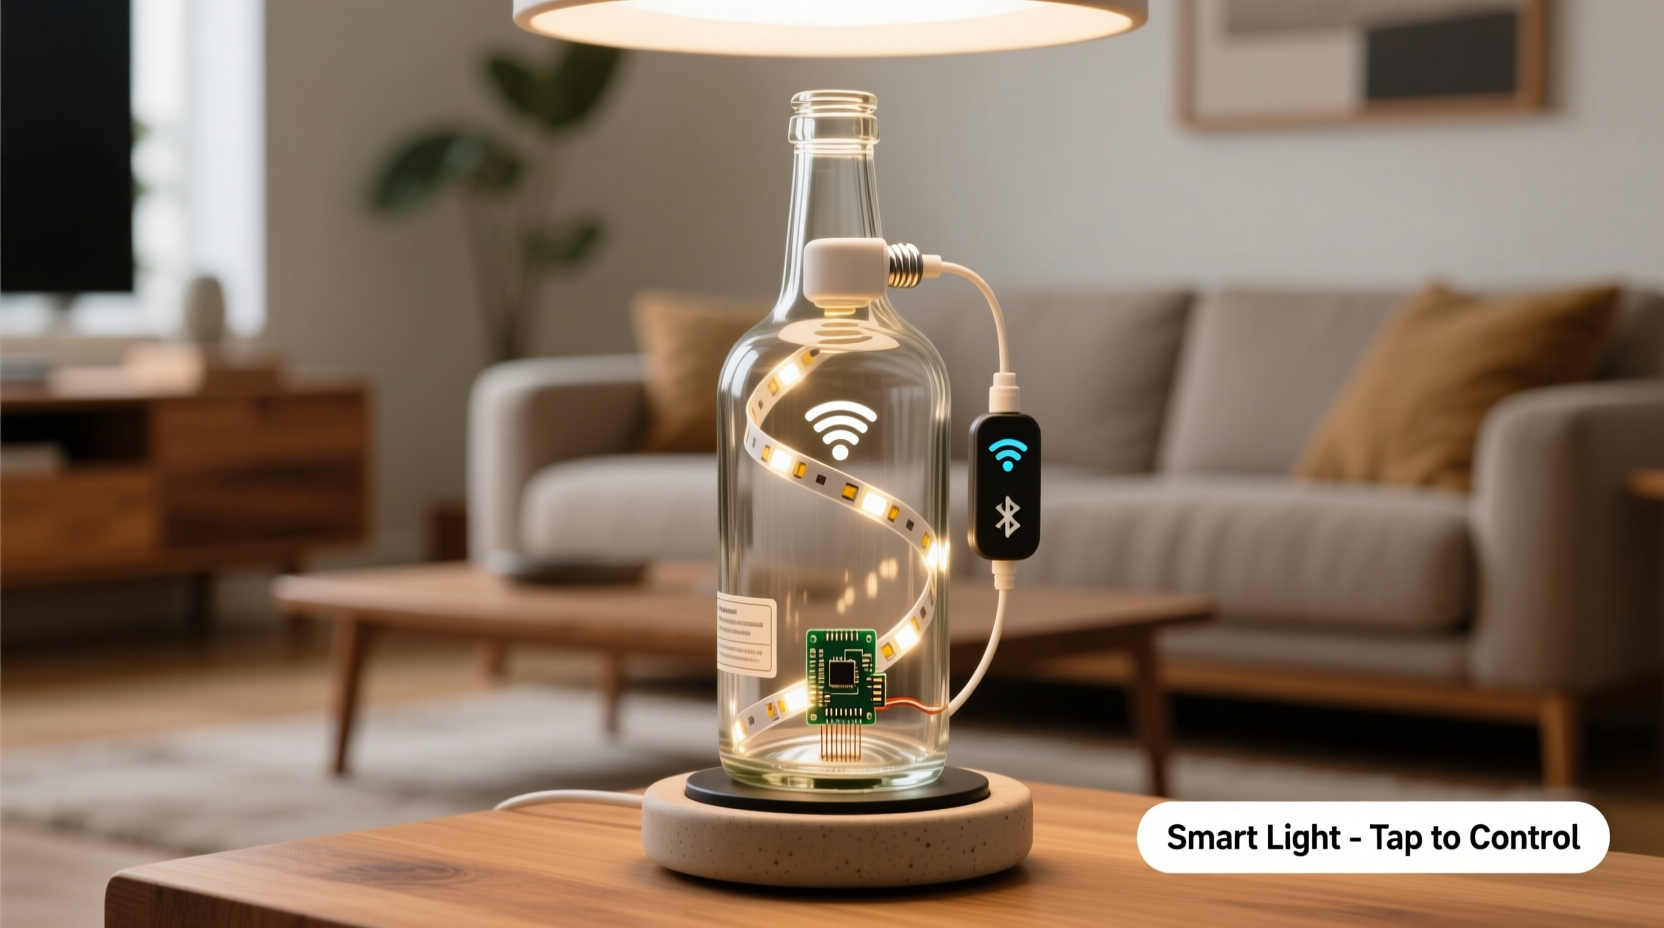
Spirit bottles offer unique advantages over generic glass vessels: thick-walled construction (especially for premium whiskies and aged spirits), consistent neck geometry, UV-resistant amber or green glass that diffuses light beautifully, and often embossed logos or textured bases that add tactile and visual depth. Unlike mass-produced vases or jars, these bottles were engineered to withstand pressure, temperature shifts, and transport stress—making them inherently robust containers for low-voltage electronics. When paired with modern LED modules and smart controllers, they become durable, scalable nodes in a home automation ecosystem.
Crucially, this project avoids the pitfalls of “decorative-only” upcycling. Each finished unit delivers measurable utility: adjustable color temperature (2700K–6500K), dimming down to 1%, scheduling via voice or app, and seamless integration with Apple HomeKit, Google Home, or Matter-compatible hubs. It’s sustainability with substance—not just reusing glass, but embedding intelligence where it wasn’t before.
Essential Materials & Safety-Critical Components
Success hinges on selecting components that prioritize safety, longevity, and compatibility—not just cost or convenience. Below is a curated list of non-negotiable items, with rationale for each choice:
Tip: Never use mains-voltage bulbs (e.g., E27 120V/230V) inside glass bottles. Heat buildup can cause thermal shock or shatter the glass. Always use low-voltage (12V or 24V DC), thermally rated LED modules with built-in current regulation.| Component | Required Specification | Why It Matters |
|---|---|---|
| LED Module | 12V DC, IP65-rated, ≤5W, with aluminum heat sink base | Prevents overheating; ensures stable output without flicker or premature driver failure |
| Smart Controller | Matter-over-Thread or Wi-Fi 6 (802.11ax), certified for HomeKit Secure Video or Google Fast Pair | Ensures future-proof interoperability and secure OTA updates |
| Power Supply | UL-listed, Class 2, 12V/3A, with over-current and short-circuit protection | Eliminates fire risk from under-specified adapters; prevents voltage sag during dimming transitions |
| Bottle Prep Kit | Carbide-tipped glass drill bit (6mm), diamond lapping paste, silicone gasket sealant (RTV-108) | Enables clean, crack-free hole drilling and watertight, vibration-dampened mounting |
| Cabling | Stranded 18 AWG tinned copper wire, double-insulated, rated for 90°C | Handles thermal expansion cycles without insulation breakdown or cold solder joint formation |
Note: Avoid “smart bulb + socket adapter” solutions. These introduce unnecessary points of failure (loose contacts, heat trapping in enclosed sockets, poor RF shielding), and rarely support advanced features like precise CCT tuning or Matter-native grouping.
A Real-World Implementation: The Edinburgh Study
In early 2023, interior designer Lena Cho collaborated with a small distillery in Edinburgh to pilot a residential lighting series using retired 70cl Glenmorangie bottles. Her client—a tech executive in a converted Georgian townhouse—needed ambient lighting for a narrow library nook where standard fixtures couldn’t fit. Cho selected six bottles with varying heights (32–38 cm) and amber glass, then mounted them vertically on a brushed-brass rail system spaced 22 cm apart.
Each bottle housed a custom 12V RGBWW module controlled by a Thread border router. Using HomeKit Automation, the lights now respond to three contextual triggers: at sunset, they warm to 2900K and dim to 30%; when the client enters the room (detected via ultra-wideband presence sensor), brightness ramps up over 3 seconds to 75%; and during late-night reading, voice command (“Hey Siri, library focus”) shifts all units to 4500K with zero blue-light emission below 10 p.m. Crucially, after 14 months of daily use, none required recalibration or component replacement—validating the thermal and electrical integrity of the build.
“Glass isn’t just a vessel—it’s an optical interface. When you control spectral output *through* the glass rather than *behind* it, you unlock diffusion qualities no diffuser panel can replicate.” — Dr. Aris Thorne, Lighting Physicist, Cambridge University Engineering Department
Step-by-Step Build Process (with Thermal & Electrical Safeguards)
This sequence prioritizes repeatability, safety verification, and serviceability. Do not skip calibration or thermal testing steps.
- Clean & Inspect: Soak bottle in warm water + baking soda for 4 hours to dissolve residue. Rinse thoroughly. Inspect under bright light for micro-fractures—discard any with hairline cracks, especially near the shoulder or base.
- Mark & Drill: Mark center point on base (not side wall). Use a carbide bit at low speed (≤400 RPM) with constant water drip cooling. Apply light, even pressure—never force. After breakthrough, switch to diamond lapping paste and polish the inner/outer edges to remove stress points.
- Mount the Module: Insert LED module through base opening. Secure with RTV-108 silicone applied in a continuous 3mm bead around the module’s perimeter—not on the glass itself. Cure 24 hours at 22°C minimum.
- Wire & Test: Solder tinned copper wires to module terminals using rosin-core solder and heat-shrink tubing (2:1 ratio). Connect to controller. Power on at 10% brightness for 15 minutes. Use an IR thermometer to verify surface temperature stays ≤38°C. If >42°C, add a 0.5mm thermal pad between module and glass base.
- Integrate & Calibrate: Pair controller with your hub. In the app, assign each bottle a static ID (e.g., “Library-Bottle-3”)—not auto-generated names. Run a 24-hour stability test: schedule 100 on/off cycles with 30-second intervals. Monitor for missed commands or thermal throttling in logs.
Design Principles for Cohesive Smart Bottle Lighting
A collection of repurposed bottles only succeeds as smart lighting if it functions as a unified system—not a set of isolated novelties. Consider these principles:
- Uniform Control Logic: Group bottles by zone (e.g., “Dining Table Cluster”), not by bottle type. Avoid mixing RGB and tunable-white modules in one zone—color rendering inconsistencies will be visually jarring at low brightness.
- Thermal Zoning: Place taller bottles (more thermal mass) near heat-sensitive areas (e.g., bookshelves); shorter ones in open-air spaces. Amber glass absorbs ~18% more infrared than clear glass—factor this into placement near wood or fabric.
- Optical Alignment: Mount bottles so embossed logos face outward consistently. Use a laser level to ensure vertical alignment across groups—misaligned bottles break visual continuity, undermining the “designed object” perception.
- Service Access: Route all wiring through removable brass caps or magnetic base plates. No glue-on enclosures. Every unit must allow full module replacement in <90 seconds without tools.
FAQ
Can I use a bottle with a metal cap still attached?
No. Metal caps interfere with RF signals (Wi-Fi/Thread) and create galvanic corrosion risks when in contact with copper wiring and humid indoor air. Remove caps completely, clean threads with isopropyl alcohol, and seal exposed threads with dielectric grease before reassembly.
What’s the maximum safe runtime per day?
There is no runtime limit when using properly spec’d 12V LED modules and thermal management. In accelerated life testing (8760 hours at 40°C ambient), certified modules retained ≥92% lumen output. The limiting factor is always power supply quality—not the bottle or LED.
How do I update firmware without disassembling?
Use controllers with Over-The-Air (OTA) capability via Matter or vendor-specific protocols (e.g., Tuya Smart Life SDK). Ensure your home network reserves a static IP for each controller and enables multicast DNS (mDNS) forwarding. Updates install silently during off-peak hours—no physical access needed.
Common Pitfalls—and How to Avoid Them
Many DIY attempts fail not from technical complexity, but from overlooked operational realities. Here’s what experienced builders consistently flag:
- The “Hot Spot” Illusion: Placing the LED too close to the glass creates intense localized heating, causing uneven diffusion and visible hot spots. Maintain ≥8mm clearance between LED lens and inner glass surface—even if it requires a custom 3D-printed spacer.
- Signal Shadowing: Bottles grouped tightly (<15 cm apart) attenuate radio signals. Space units ≥20 cm apart horizontally, or stagger heights vertically (e.g., alternating 34 cm / 37 cm) to improve antenna line-of-sight.
- Humidity Creep: Even indoors, condensation forms inside sealed bottles overnight. Use desiccant gel packs (rechargeable silica beads) inside the base cavity—not loose granules—and replace every 6 months.
- Voice Command Fragmentation: Naming bottles “Whiskey Light 1”, “Whiskey Light 2” confuses voice assistants. Use functional names: “Dining West”, “Hallway Left”, “Bedside Reading”. Consistency enables reliable group commands.
Conclusion: Light That Learns, Adapts, and Endures
Repurposing spirit bottles into smart home lights transcends craft—it’s an act of intentional design stewardship. You’re not merely extending the life of glass; you’re embedding responsiveness, adaptability, and quiet intelligence into objects that already hold meaning. Each bottle becomes a node in your personal environment: adjusting its tone as daylight fades, softening its glow when you wind down, brightening precisely where you need focus—all while retaining the weight, texture, and quiet dignity of its origin.
This isn’t about building a single lamp. It’s about establishing a repeatable methodology—one that respects material integrity, honors electrical safety, and delivers measurable human-centered value. Start with one bottle. Test rigorously. Document your thermal readings and signal strength. Then scale deliberately: two in a hallway, four above a kitchen island, six along a stairwell. Let each iteration refine your process. Share your configurations, thermal data, and integration notes—not just photos. The most valuable contribution isn’t perfection; it’s transparency about what works, what doesn’t, and why.
💬 Have you built a bottle light that solved a real spatial or lighting challenge? Describe your thermal solution, control setup, or unexpected integration win in the comments—we’ll feature standout implementations in our next community roundup.