Creating a beautiful, well-fitting bracelet begins long before you string the first bead. The secret lies in precision—specifically, in how accurately you measure your beads and account for their impact on fit, drape, and durability. Whether you're crafting for yourself, gifting, or selling your designs, understanding bead dimensions ensures consistency and professional results. This guide walks through the essential techniques, tools, and considerations that turn guesswork into accuracy.
Why Accurate Bead Measurement Matters
A bracelet that’s too tight can pinch; one that’s too loose slips off. Both outcomes stem from inaccurate bead assessment. Unlike fabric or leather, beads have fixed diameters and spacing behaviors that directly influence the final length of a piece. Even a 0.5mm miscalculation per bead compounds over 20–30 units, resulting in a bracelet that’s visibly too short or too long.
Beyond comfort, precise measurement affects design balance. A pattern relying on symmetry or repeating sequences fails if bead sizes vary unexpectedly. Crafters who sell their work also face reputational risk when sizing inconsistencies lead to customer returns or negative reviews.
“Accurate bead measurement isn’t just about size—it’s about predictability. When you know exactly what each component contributes, your designs become repeatable and reliable.” — Lila Chen, Jewelry Designer & Instructor at BeadCraft Academy
Essential Tools for Measuring Beads
Not all rulers are created equal. To measure beads effectively, use tools designed for fine detail:
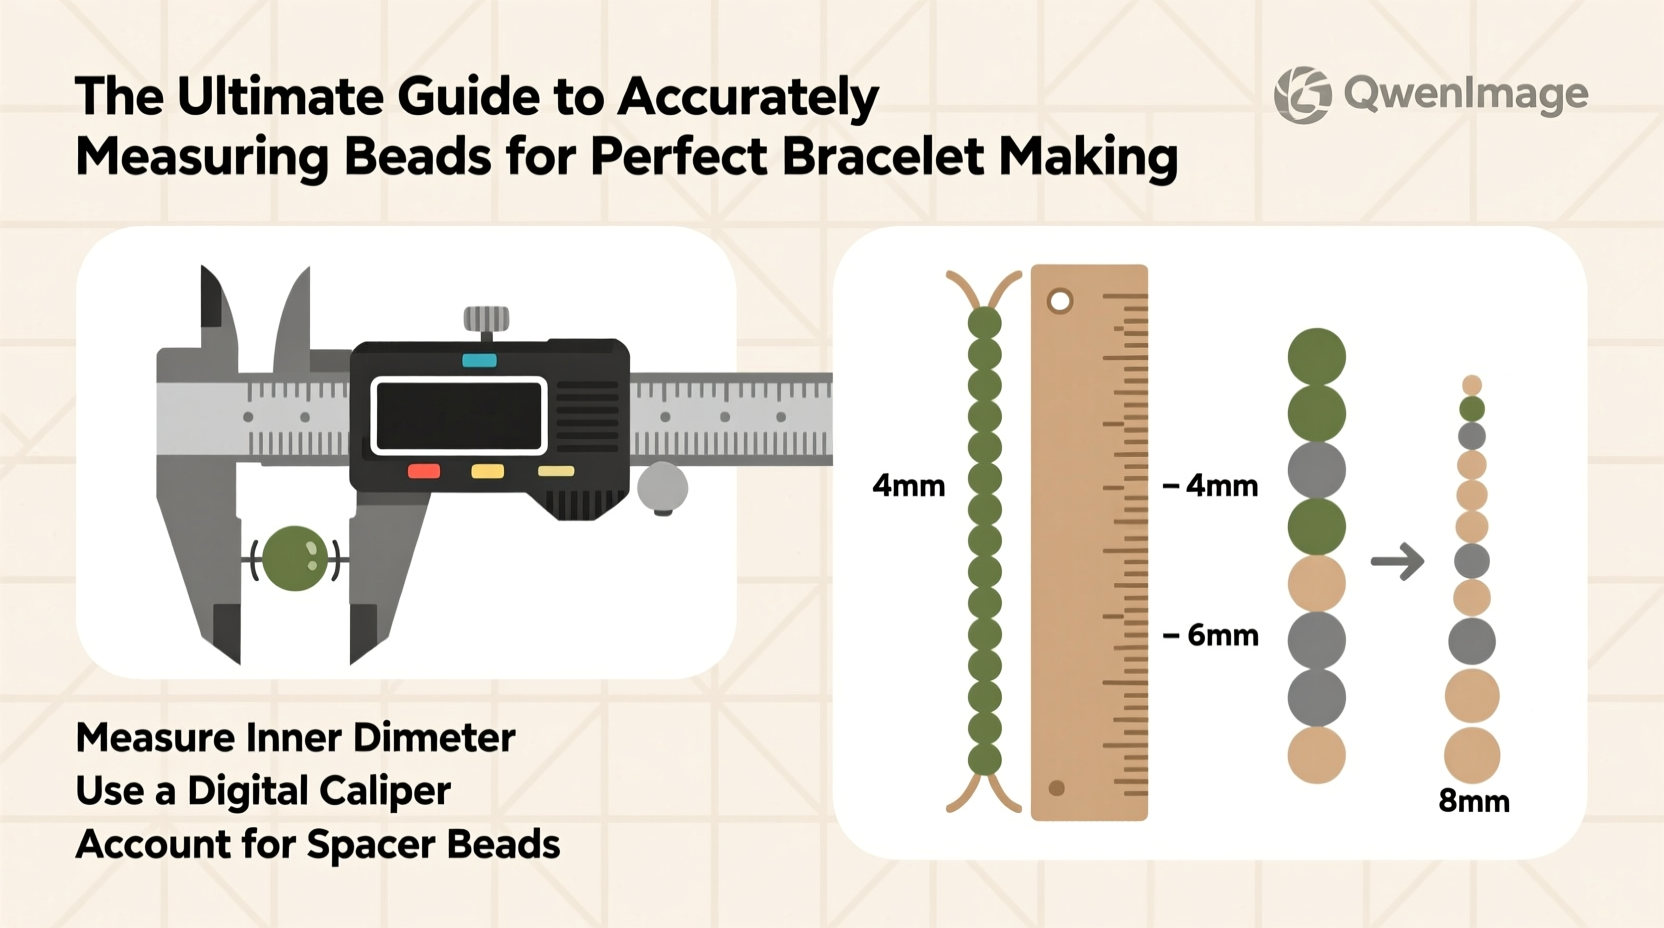
- Digital Calipers: The gold standard. Measure diameter, hole size, and thickness in millimeters with up to 0.01mm precision.
- Metric Ruler with Millimeter Marks: Useful for quick estimates but lacks the precision of calipers.
- Bead Gauge: A flat plastic or metal tool with graduated holes. Slide beads into slots to determine approximate size.
- Stringing Board: Features marked grooves and a built-in ruler to lay out designs and test total length before assembly.
Step-by-Step Guide to Measuring Beads Correctly
Follow this process to ensure consistent and accurate measurements every time:
- Collect a Sample: Pull 5–10 beads from your batch. Do not assume uniformity across the entire pack.
- Use Digital Calipers: Gently close the caliper jaws around the widest part of the bead (usually the center for round beads).
- Record the Diameter: Note the measurement in millimeters. Repeat for each sample bead.
- Calculate the Average: Add all measurements and divide by the number of beads tested.
- Check Hole Size: Insert the caliper tip into the bead hole to measure internal diameter—critical for selecting appropriate stringing material.
- Factor in Spacing: If using spacers or knots between beads, include their thickness in your total calculation.
For example, if you’re using 8mm average beads with 0.5mm spacers and plan a 20-bead bracelet, the math is: (20 × 8mm) + (19 × 0.5mm) = 160 + 9.5 = 169.5mm total beaded length. Add clasp allowance (typically 10–15mm per side) for final project length.
Understanding Bead Sizing Standards
Beads come in standardized sizes, especially seed beads, which use a numbering system like “11/0” or “8/0.” The higher the number before the slash, the smaller the bead. However, these are nominal sizes—not exact measurements.
| Seed Bead Size | Average Diameter (mm) | Common Uses |
|---|---|---|
| 15/0 | 1.3 | Micro embroidery, detailed weaving |
| 11/0 | 2.0 | Bracelets, peyote stitch patterns |
| 10/0 | 2.3 | Necklaces, fringe accents |
| 8/0 | 3.0 | Bolder designs, children's jewelry |
| 6/0 | 4.0 | Statement pieces, spacers |
Round, cube, and bicone beads often list exact millimeter dimensions (e.g., 6mm round). Always verify with calipers, as different manufacturers may slightly vary. Glass, gemstone, and wood beads are particularly prone to size fluctuations due to natural materials and hand-finishing.
Real Example: Fixing a Recurring Fit Issue
Sophie, a craft fair vendor, received repeated complaints that her popular “Ocean Mist” bracelet ran small. She used 8mm turquoise rounds labeled as such, yet customers with average wrist sizes (6.5 inches) found them uncomfortable. After testing 20 beads with calipers, she discovered the actual average was 7.6mm—but her design included tightly tied silk knots between each bead, adding 0.8mm of spacing per unit. Her total beaded section was nearly 1.5cm shorter than intended.
She revised her pattern: switching to flexible FireLine thread with micro spacer beads reduced added length per gap to 0.3mm. She also began listing her bracelets with exact internal circumference (e.g., “7-inch inner length”) rather than vague terms like “medium.” Customer satisfaction improved immediately, and returns dropped by 70%.
Do’s and Don’ts of Bead Measurement
| Do | Don't |
|---|---|
| Measure multiple beads per batch | Assume all beads in a package are identical |
| Include spacer and knot thickness in calculations | Forget to account for clasp bulk |
| Use digital calipers for critical projects | Rely solely on packaging labels |
| Test-fit your design on a stringing board | String final piece without a mock-up |
| Record average sizes for future reference | Reuse old measurements for new batches |
Frequently Asked Questions
How do I convert bead measurements from millimeters to inches?
To convert millimeters to inches, divide the mm value by 25.4. For example, an 8mm bead is approximately 0.315 inches (8 ÷ 25.4). Most jewelry designers work in millimeters for greater precision, but conversion is useful when communicating with clients unfamiliar with metric units.
Can I mix bead sizes in one bracelet without affecting fit?
Yes, but only with careful planning. Mixing sizes alters weight distribution and flexibility. Calculate the total length by multiplying each bead type’s count by its average diameter, then add spacing. Use a stringing board to prototype the layout and check drape before final assembly.
Why do my finished bracelets never match the length I planned?
The most common culprits are unaccounted-for elements: knotting reduces usable string length, crimps add bulk, and inconsistent tension during stringing compresses or stretches the piece. Always build a test strand first and measure under light tension—similar to how it will sit on the wrist.
Final Checklist Before Stringing
- ✔️ Measured at least 5 beads from current batch
- ✔️ Calculated average diameter and hole size
- ✔️ Included spacer, knot, and crimp dimensions in total length
- ✔️ Verified clasp adds no more than 15mm per side
- ✔️ Tested full layout on a stringing board
- ✔️ Compared final inner circumference to standard wrist sizes
- ✔️ Double-checked stringing material compatibility with bead holes
Conclusion: Precision Leads to Perfection
Measuring beads accurately transforms jewelry making from a hit-or-miss hobby into a repeatable craft. With the right tools and disciplined approach, you eliminate sizing errors, enhance design integrity, and deliver pieces that feel as good as they look. Every bracelet you create becomes a testament to attention to detail—not just creativity.
💬 Ready to refine your technique? Grab your calipers, pull a batch of beads, and run a quick measurement audit today. Share your findings or ask questions in the comments—let’s build a community of precision-minded makers.