Piping is one of the most expressive skills in baking—transforming a simple dessert into an elegant creation. While commercial pastry bags are widely available, mastering the art of making and using homemade versions unlocks flexibility, cost savings, and creativity. Whether you're decorating cupcakes, filling éclairs, or crafting intricate cake designs, a well-made DIY pastry bag gives you control without compromise. This guide walks through reliable methods, practical tips, and pro-level techniques to help you craft effective, reusable, and hygienic piping tools from everyday materials.
Why Make Your Own Pastry Bag?
Store-bought disposable bags work, but they often lack durability and environmental sustainability. Homemade alternatives allow customization based on size, strength, and reusability. Many bakers discover that DIY solutions perform just as well—if not better—than mass-produced options, especially when tailored to specific tasks like fine detail work or high-volume filling.
Additionally, having a reliable method to create a piping tool on demand means never being caught off guard mid-recipe. A quick substitution can save a baking session when supplies run low.
Tip: Always test your homemade bag with water before loading it with frosting to check for leaks or weak seams.Step-by-Step Guide: Creating Effective DIY Pastry Bags
There are several ways to construct a functional pastry bag at home. The best method depends on your needs—whether you want single-use convenience or a washable, long-term solution.
- Choose Your Material: Clear plastic freezer bags, parchment paper, or food-safe silicone sheets work best.
- Cut or Fold Into Cone Shape: For parchment, cut a large triangle and roll into a cone, sealing the edge with tape or a dab of water.
- Insert a Tip (Optional): Fit a metal piping tip inside the opening before sealing. You can also snip the end later for freehand piping.
- Secure the Seam: Use waterproof tape, a staple (removed before use), or fold-and-tuck method to keep the bag intact.
- Fill and Pipe: Spoon your mixture in, twist the top closed, and apply even pressure while guiding the tip.
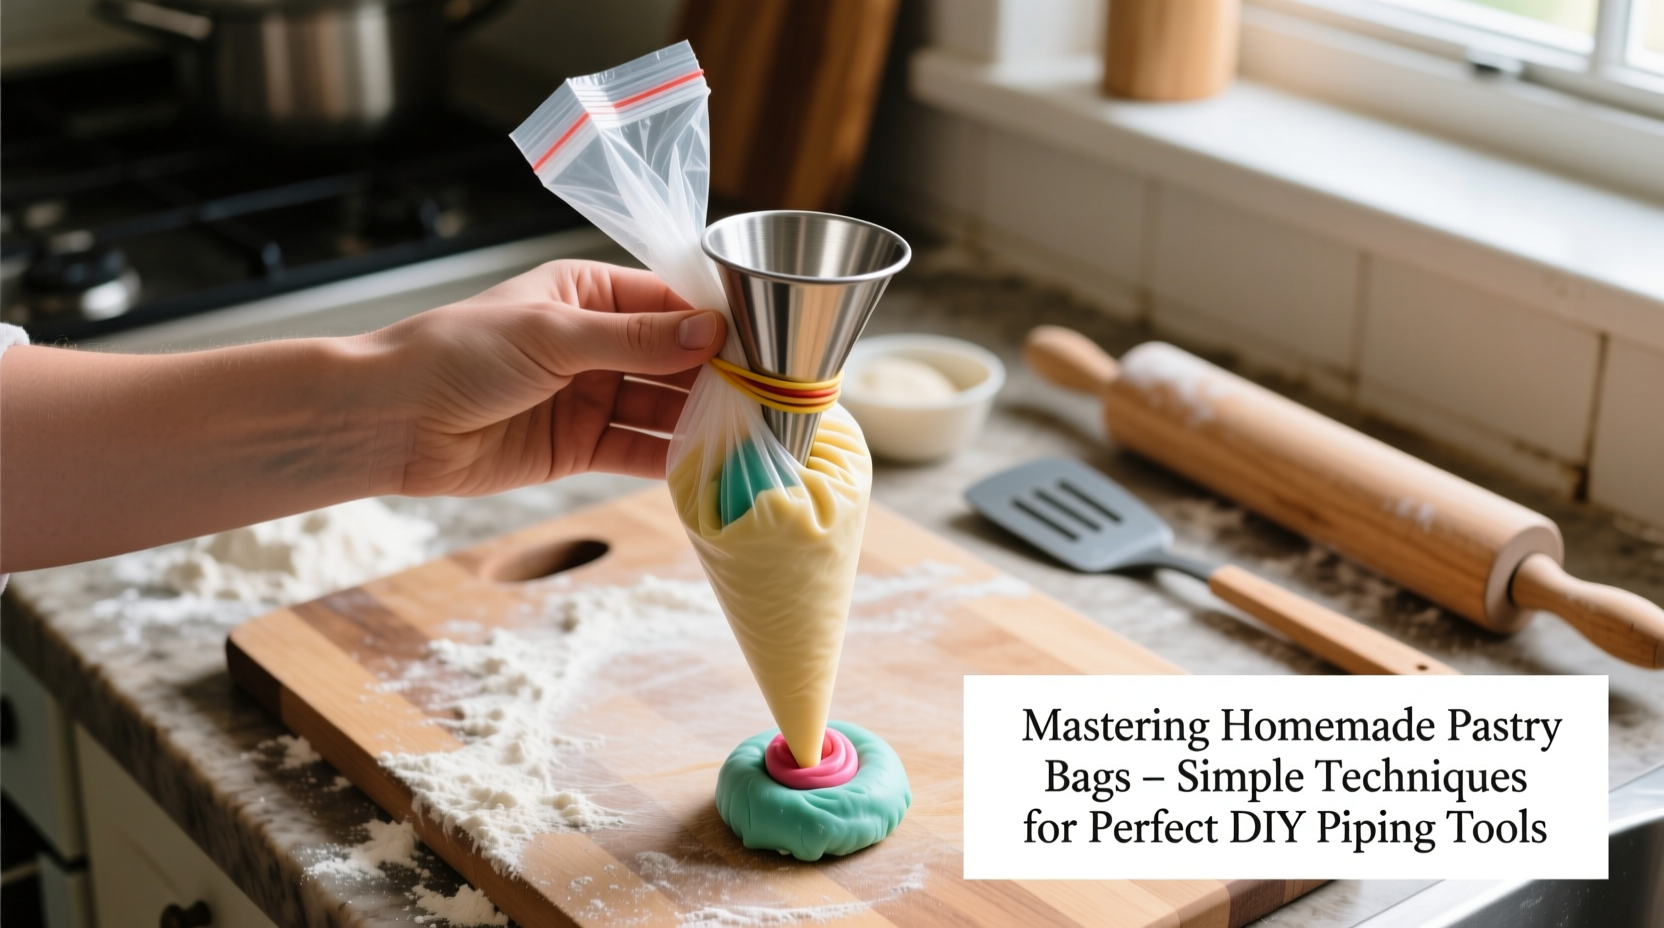
For freezer bag versions, simply snip the corner and insert a coupler or tip. These hold up surprisingly well under thick batters and buttercreams.
Best Materials Compared
| Material | Reusability | Strength | Best For |
|---|---|---|---|
| Heavy-duty freezer bags | Single use (can be washed carefully) | High – resists tearing | Thick frostings, choux pastry |
| Parchment paper | Single use | Low to medium | Fine details, small batches |
| Silicone sheets | Reusable (up to 50+ uses) | Very high | Professional results, frequent bakers |
| Plastic sandwich bags | Single use | Low – prone to bursting | Simple outlines, kids’ projects |
Expert Insight: Precision Starts With Preparation
“Even the best buttercream won’t look professional if your delivery tool fails mid-pipe. A securely sealed, properly shaped bag is half the battle.” — Clara Nguyen, Pastry Instructor at Midwest Culinary Academy
According to professionals, consistency in pressure and flow comes not only from hand technique but from equipment reliability. A leaking or misshapen bag disrupts rhythm and ruins delicate work. Taking time to assemble your DIY tool correctly ensures smoother execution and cleaner lines.
Tips for Optimal Performance
- Use tall, narrow containers to hold the bag open while filling—this prevents messy spills.
- Double-bag thin plastic types when working with stiff doughs like cookie batter.
- Chill filled bags for 10 minutes before piping soft icings to reduce spreading.
- Always wipe excess frosting from the outside after filling to avoid smearing.
- Trim only enough of the tip opening to fit your nozzle—too wide and you lose control.
Real Example: Baking for a Birthday Party
Sophia, a home baker in Portland, needed to decorate 24 cupcakes for her daughter’s birthday but realized she’d run out of disposable pastry bags. Instead of rushing to the store, she turned heavy-duty freezer bags into piping tools using star tips from her kit. She double-lined each bag for extra strength and placed them in tall glasses to fill efficiently. Not only did they hold up through two batches of American buttercream, but cleanup was fast—she rinsed and reused two of them later in the week for royal icing practice.
“I was skeptical,” she said, “but they worked so well I might stick with this method for smaller jobs.”
Dos and Don'ts of DIY Piping Tools
| Do | Don’t |
|---|---|
| Test seal integrity with water first | Overfill the bag beyond halfway |
| Use sharp scissors for clean cuts | Use regular printer paper—it absorbs moisture and tears |
| Twist the top tightly to maintain pressure | Reuse single-use bags without thorough cleaning |
| Store pre-cut cones flat in a dry container | Apply excessive force—let the tip do the work |
Maintaining Reusable Options
If you opt for washable materials like silicone or thick food-grade polyethylene, proper care extends usability. After each use, disassemble the tip, rinse thoroughly with warm soapy water, and air-dry completely before storage. Avoid twisting or folding reusable bags sharply, as creases can weaken over time.
Sanitize periodically by soaking in a vinegar-water solution (1:3 ratio) for 10 minutes, especially if used with dairy-based fillings.
FAQ
Can I use wax paper instead of parchment?
No. Wax paper has a coating that can melt or degrade when exposed to fats and oils. Parchment paper is heat-resistant and non-stick, making it the safer choice for piping applications.
How do I prevent clogging with chocolate ganache?
Ensure the ganache is cooled but still fluid before loading. Warm the tip slightly with hot water before starting, and pipe continuously without stopping mid-line. If clogging occurs, pause, remove the tip, flush with warm water, and resume.
Are DIY bags safe for meringue or whipped cream?
Yes, as long as the material is clean and structurally sound. Freezer bags and parchment both work well. For best results, chill the filled bag for 10–15 minutes before piping to stabilize airy mixtures.
Checklist: Building a Reliable Homemade Pastry Bag
- ☐ Select appropriate material (freezer bag, parchment, or silicone)
- ☐ Cut or shape into a secure cone or pouch
- ☐ Seal seams tightly using water, tape, or folding
- ☐ Insert piping tip or trim opening to desired size
- ☐ Test with water to confirm no leaks
- ☐ Fill using a funnel or spatula, avoiding overfilling
- ☐ Twist top closed and apply steady pressure while piping
- ☐ Clean immediately after use if reusable
Conclusion
Mastering homemade pastry bags isn’t about replicating store-bought products—it’s about gaining independence, precision, and resourcefulness in the kitchen. With the right techniques, even basic household items can become high-functioning tools capable of producing beautiful, professional-quality results. From last-minute fixes to sustainable baking habits, the ability to craft a reliable piping bag on demand empowers bakers at every level.
🚀 Ready to try it? Grab a freezer bag or parchment sheet today and pipe your first rosette. Share your DIY setup or favorite tip in the comments—your insight could inspire another baker’s breakthrough!