Crafting accessories at home offers both creative satisfaction and functional rewards. Among the most charming and versatile pieces is the bowknot scrunchie—a blend of elegance and practicality that elevates any hairstyle. Unlike mass-produced versions, handmade bowknot scrunchies allow full customization in fabric, color, and size. With just a few basic supplies and some patience, you can create a boutique-quality accessory in under an hour. This guide walks you through every stage, from selecting materials to securing the final stitch.
Selecting the Right Materials
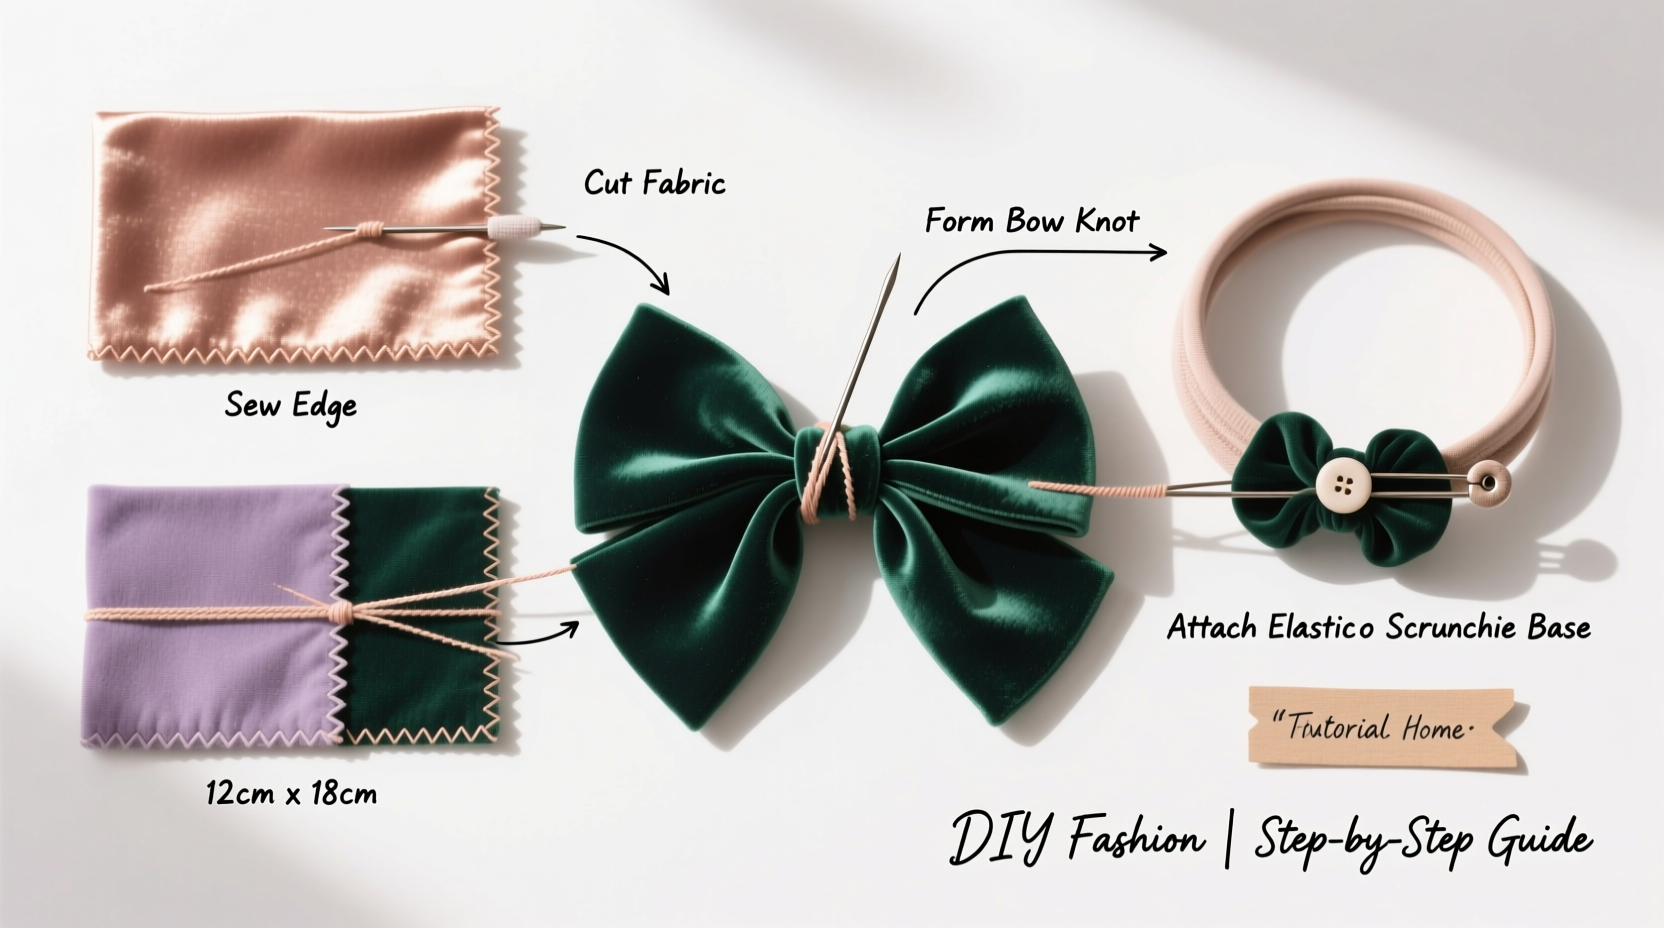
The foundation of a beautiful bowknot scrunchie lies in thoughtful material selection. The right fabric not only enhances visual appeal but also ensures comfort and durability. While many fabrics can be used, lightweight cotton, satin, and silk are top choices due to their drape and sheen.
Satin and silk lend a luxurious finish ideal for formal occasions, while cotton offers breathability and ease of sewing—perfect for everyday wear. Avoid stiff or heavy textiles like denim or canvas, as they won’t gather smoothly into soft ruffles.
Tip: Pre-wash your fabric to prevent shrinkage after completion, especially with natural fibers like cotton or silk.Elastic is another critical component. Use 1/4-inch wide braided elastic for a secure yet gentle hold. Thicker elastic may feel bulky, while thinner strands can lose tension over time. Always opt for high-quality, non-roll elastic to maintain consistent shape.
Essential Tools and Preparation
Before beginning construction, assemble the following tools:
- Fabric (9 inches x 3.5 inches for outer layer; 8 inches x 2 inches for bow center)
- 1/4-inch elastic (6.5 inches long)
- Matching thread
- Scissors or rotary cutter
- Pins or clips
- Sewing machine (or needle for hand-sewing)
- Iron and ironing board
- Tape measure or ruler
- Safety pin or bodkin (for threading elastic)
Begin by cutting two fabric strips: one measuring 9” x 3.5” for the ruffled band, and a smaller 8” x 2” piece for the bow overlay. Press both pieces flat with an iron to eliminate wrinkles and ensure clean seams during assembly.
Step-by-Step Construction Process
Follow this detailed sequence to build your bowknot scrunchie with precision.
- Cut and prepare fabric: Cut the main band and bow strip as specified. If using patterned fabric, ensure the right side faces outward in final presentation.
- Sew the main band tube: Take the 9” x 3.5” strip, fold it in half lengthwise with right sides together, and sew along the long edge using a 1/4-inch seam allowance. Turn the tube right side out and press flat, aligning the seam neatly down one side.
- Create gathering stitches: Along one long edge of the pressed band, set your machine to the longest stitch length. Sew two parallel lines of basting stitches: one 1/4 inch from the edge, and another 1/2 inch in. Do not backstitch—leave long thread tails at both ends.
- Gather the ruffle: Gently pull the bobbin threads of the inner basting line to gather the fabric until it matches the circumference of your elastic (approximately 6.5 inches). Distribute gathers evenly and knot thread ends to secure.
- Attach the elastic: Pin the raw edges of the gathered band to the cut ends of the 6.5-inch elastic, stretching slightly to match lengths. Sew securely with a zigzag stitch or narrow back-and-forth motion to ensure durability during use.
- Enclose the elastic: Fold the unsewn edge of the band over the elastic, enclosing it completely. Tuck in seam allowances and hand-stitch or machine-stitch the closure closed with matching thread.
- Make the bow overlay: Take the 8” x 2” strip. Fold both long edges toward the center so they meet in the middle, then fold once more in half lengthwise. Sew across the center 1/2 inch wide to form a neat knot-like base.
- Attach the bow: Position the finished bow centered over the seam of the scrunchie band. Hand-stitch through the knotted section to anchor it firmly in place.
Design Variations and Customization
Once you’ve mastered the basic structure, explore creative variations to personalize your scrunchies. Mixing textures—such as pairing satin bands with cotton bows—adds visual interest. You can also experiment with sizes: narrower bands (2.5 inches wide) yield delicate, minimalist scrunchies, while wider cuts (up to 5 inches) create bold, voluminous ruffles.
For themed sets, consider seasonal fabrics—florals for spring, deep velvets for winter. Adding lace trim along the edge before gathering introduces a romantic touch. Some crafters even attach small embellishments like beads or miniature charms to the bow center for extra flair.
“The bowknot scrunchie has returned not just as a trend, but as a symbol of intentional, slow fashion. Making them at home allows people to reconnect with craftsmanship.” — Lila Monroe, Textile Designer & Sustainable Style Advocate
Common Pitfalls and How to Avoid Them
Even experienced sewers encounter challenges when making scrunchies. Below is a comparison of frequent issues and proven solutions.
| Issue | Why It Happens | How to Fix It |
|---|---|---|
| Bunching or uneven gathers | Pulling only one thread or inconsistent tension | Use both bobbin threads and adjust gathers slowly, redistributing fabric by hand |
| Elastic twists inside casing | Not securing elastic properly before closing | Ensure elastic lies flat before stitching; check alignment after threading |
| Bow detaches after washing | Insufficient anchoring stitches | Sew through all layers with tight, reinforced hand stitches or double-knot thread |
| Scratchy or uncomfortable feel | Rough seams or exposed elastic edges | Press seams flat and fully enclose elastic without gaps |
Mini Case Study: Sarah’s Gift Set Success
Sarah, a freelance graphic designer from Portland, began making bowknot scrunchies as holiday gifts for her team. Using leftover silk remnants from a dressmaking project, she crafted six unique pieces in coordinating jewel tones. She packaged them in handmade linen pouches with personalized tags. The response was overwhelming—three colleagues asked to purchase extras, and one even requested a tutorial. Within weeks, Sarah launched a small Etsy shop focused on sustainable hair accessories, sourcing deadstock fabrics from local designers. Her initial hobby became a side business built entirely on thoughtful, handcrafted design.
Final Checklist Before Wearing or Gifting
Ensure your scrunchie meets quality standards with this quick verification list:
- ✅ All seams are secure and hidden where possible
- ✅ Elastic is fully enclosed and non-twisted
- ✅ Gathered ruffle distributes evenly around the band
- ✅ Bow is centered and tightly attached
- ✅ No loose threads or skipped stitches
- ✅ Fabric is clean and pressed
Frequently Asked Questions
Can I wash my handmade bowknot scrunchie?
Yes, but gently. Hand-wash in cool water with mild detergent and air dry flat. Avoid wringing or machine drying, especially with delicate fabrics like silk or satin, as this can damage fibers and weaken elastic.
How do I make a child-sized version?
Reduce the band length to 7 inches and use 5.5 inches of elastic. Keep the same width or go slightly narrower (3 inches) for proportionate scaling. Adjust bow size accordingly for balance.
Is it possible to make this without a sewing machine?
Absolutely. While a machine speeds up the process, all steps can be completed by hand using a backstitch for strength. Basting and gathering take more time but remain achievable with fine, even stitches.
Bring Creativity Into Your Everyday Style
Crafting a bowknot scrunchie at home is more than a DIY project—it’s a celebration of individuality and mindful creation. Each piece reflects your taste, from fabric choice to finishing details. Whether worn daily or gifted to someone special, these accessories carry a quiet elegance that store-bought items often lack. With practice, you’ll refine your technique, experiment with new designs, and maybe even inspire others to pick up a needle and thread.
💬 Ready to start your first bowknot scrunchie? Gather your fabric scraps and begin today—your next favorite accessory is just a few stitches away.