Balloon twisting is more than just a party trick—it’s a blend of precision, creativity, and showmanship. Among the most iconic designs in the world of balloon artistry is the balloon dog. Recognizable, charming, and surprisingly intricate, mastering this classic sculpture elevates any entertainer or hobbyist. Whether you're preparing for a child's birthday, performing at community events, or simply exploring a new creative outlet, learning how to make a flawless balloon dog is an essential skill. This guide walks you through the process with professional clarity, offering tips, tools, and techniques that ensure consistent results.
The Essentials: Tools and Materials
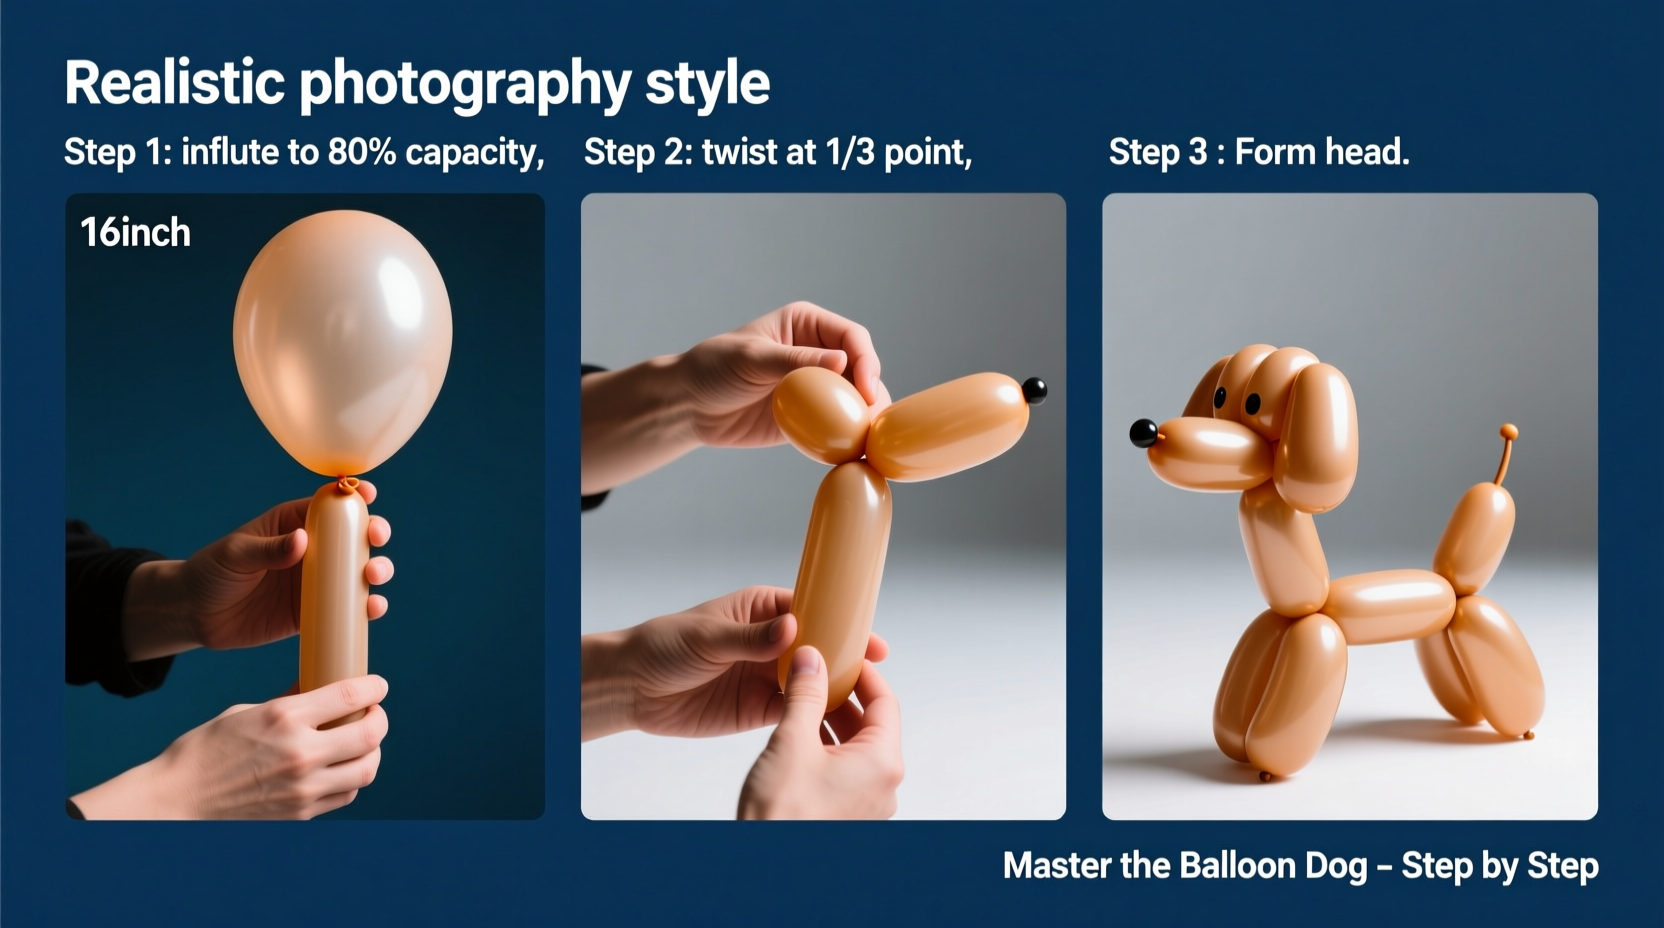
Before shaping your first balloon dog, gather the right supplies. Using proper materials makes a significant difference in durability, appearance, and ease of construction.
- Qualatex 260 twisting balloons: These long, thin balloons (measuring approximately 2” x 60”) are industry standard. They stretch evenly and hold air well under manipulation.
- Hand pump: Inflating balloons by mouth is inefficient and risks overexertion. A reliable hand pump ensures consistent inflation and reduces strain.
- Measuring template (optional but helpful): Many professionals use a cardboard strip with marked segments to maintain uniform lengths across twists.
- Scissors (for bursting mistakes): Keep a small pair nearby to quickly pop flawed balloons without damaging others.
Step-by-Step Guide to Crafting a Balloon Dog
Follow this detailed sequence to create a balanced, proportional balloon dog. Each twist serves a structural purpose—accuracy ensures stability and visual appeal.
- Inflate the balloon: Use your hand pump to fill a 260 balloon, leaving 3–4 inches uninflated. Tie the nozzle securely.
- Create the nose: Make a small bubble of about 2 inches. Twist it once to secure.
- Form the first ear: Measure 3 inches from the nose twist and create another 2-inch bubble. Twist to lock.
- Form the second ear: Repeat the previous step—another 3-inch segment followed by a 2-inch bubble. You now have three locked bubbles: nose, ear, ear.
- Lock twist the head: Bring the last two ear bubbles together and perform a lock twist by twisting both base points half a turn into each other. This forms the dog’s head with ears on top.
- Create the neck: From the head, measure a 2-inch section down the balloon. Twist once.
- Front left leg: Make a 4-inch bubble for the leg, then twist. Immediately follow with a 2-inch bubble (the foot).
- Front right leg: Repeat the same—4-inch leg, 2-inch foot—twisting at the base.
- Body and back legs: After the second front foot, make a 5-inch body segment. Then create the back left leg: 4-inch leg, 2-inch foot. Repeat for the right back leg.
- Tail: The remaining balloon length forms the tail. Push the final knot up slightly to give the tail a natural curve.
- Final adjustment: Gently tug each bubble to even out tension and improve shape. Avoid pulling too hard—this can cause weak spots.
Common Structural Mistakes and How to Fix Them
Even experienced twisters encounter issues. Knowing how to troubleshoot keeps frustration low and performance high.
| Issue | Causes | Solutions |
|---|---|---|
| Dog collapses or legs droop | Uneven bubble lengths, poor lock twists | Use a measuring template; reinforce joints with tight, clean twists |
| Ear bubbles pop during twisting | Overinflation or sharp fingernails | Leave proper uninflated tip; file nails and use smooth twisting motion |
| Dog won’t stand upright | Legs too short or unbalanced | Ensure all leg bubbles are 4 inches; adjust foot bubbles for balance |
Pro Tips for Polished Results
A great balloon dog isn’t just structurally sound—it’s expressive and durable. Apply these advanced techniques to refine your craft.
Tip: Practice in a temperature-stable environment. Cold balloons are brittle; hot ones stretch unpredictably.- Smooth transitions: When moving from one bubble to the next, roll the twist gently between your palms to prevent kinking.
- Expressive heads: Slightly elongate the nose bubble for a playful look, or shorten it for a sturdier profile.
- Color psychology: Blue and green convey calmness—ideal for quieter settings. Bright red or yellow adds energy for active parties.
“Consistency in measurement and technique separates novices from performers who get rebooked.” — Carlos Mendez, Professional Balloon Artist & Trainer
Mini Case Study: From Backyard Fun to Birthday Circuit
Jamie Rivera started making balloon dogs at her nephew’s birthday using party store balloons and YouTube tutorials. Early attempts were lopsided and popped easily. She invested in a quality hand pump and began using a homemade cardboard measuring gauge. Within six weeks, she was crafting stable, symmetrical dogs in under two minutes. Local parents noticed, and word spread. By month ten, Jamie had performed at 17 events, charging a modest fee and building a reputation for reliability and charm. Her secret? “I practiced five dogs every morning before work. Muscle memory made all the difference.”
Checklist: Preparing for Your First Performance
Before stepping into a live setting, ensure you’re fully prepared. Use this checklist to stay organized and confident.
- ✅ Pack at least 20 balloons (colors varied)
- ✅ Bring two hand pumps (one as backup)
- ✅ Include scissors and a small trash bag for popped pieces
- ✅ Wear non-slip shoes and comfortable clothing
- ✅ Practice five full balloon dogs before arriving
- ✅ Have a simple greeting ready (“Would you like a balloon animal?”)
Frequently Asked Questions
How long does a balloon dog last?
Indoors, away from heat and sunlight, a properly twisted balloon dog can retain its shape for 5–7 days. Outdoors or in dry conditions, it may begin to deflate within hours due to micro-porosity in the latex.
Can I reuse a balloon if it doesn’t pop?
No. Once stretched and twisted, the latex loses elasticity and structural integrity. Reusing increases the risk of snapping mid-twist and looks unprofessional. Always use a fresh balloon.
Are there alternatives to latex balloons?
Synthetic foil balloons don’t twist like latex and aren’t suitable for sculptures. For eco-conscious options, consider biodegradable latex brands such as Qualatex EcoTwist, which break down faster under appropriate conditions.
Making It Your Own: Beyond the Classic Dog
Once you’ve mastered the foundational dog, experiment with variations. Add a floppy tongue using a small extra balloon. Create a balloon flower collar or a tiny hat. Some artists integrate LED lights into the tail for evening events. The key is to build confidence through repetition before adding flourishes.
Children respond not just to the final product but to the process. Engage them with simple questions: “What color should the dog be?” or “Should it have a long tail or a curly one?” Interaction enhances the experience and builds rapport.
Conclusion
Creating the perfect balloon dog is an art rooted in discipline and delight. It demands attention to detail, patience in practice, and joy in sharing. With the right tools, consistent technique, and a willingness to learn from each twist, anyone can master this timeless design. Don’t aim for perfection on the first try—aim for progress. Every balloon you twist brings you closer to confidence, speed, and audience connection.
🚀 Grab your pump, pick your color, and twist your first balloon dog today. Share your creation in the comments or tag a friend who needs a little whimsy in their life!