
Hanging Christmas lights along the roofline can transform a home into a winter wonderland. But for many homeowners, the process involves risky climbs, unstable ladders, and uneven spacing that undermines the effort. The good news is that you don’t need to scale your roof to achieve a polished, professional look. With the right tools, techniques, and planning, it’s entirely possible to install perfectly spaced holiday lighting from the ground—safely and efficiently.
Each year, thousands of people suffer falls during holiday decorating. According to the U.S. Consumer Product Safety Commission, over 7,000 emergency room visits are linked to Christmas light installation annually—most involving ladder accidents. Avoiding those risks doesn’t mean sacrificing beauty. In fact, modern solutions often result in straighter lines, consistent spacing, and easier future installations.
Plan Your Layout Before Touching a Light
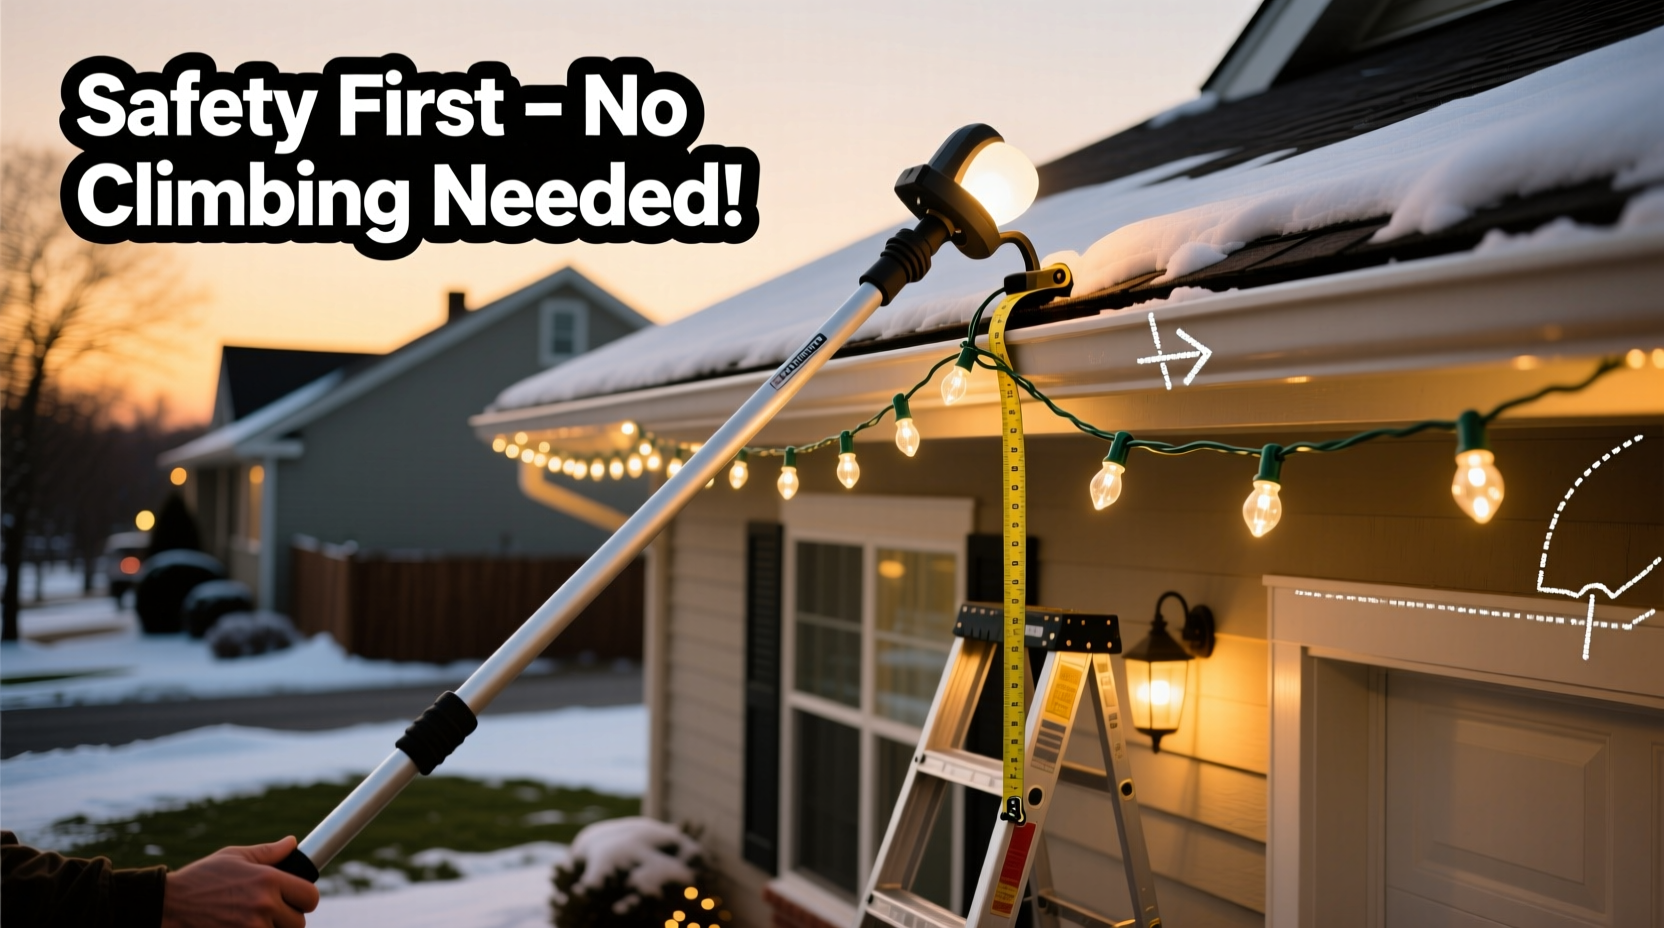
The foundation of even, attractive light placement begins long before any bulb leaves its box. Start by walking around your home and identifying key architectural features: eaves, gables, dormers, and gutters. Sketch a rough diagram or use a digital tool to map where you want lights to go. This mental rehearsal helps avoid mid-project improvisation, which often leads to crooked lines or gaps.
Decide whether you’re outlining the entire perimeter, highlighting specific sections, or creating patterns like zigzags or waves. If your goal is uniformity, measure the length of each roofline section. For example, if your front eave spans 30 feet and your light strands are 25 feet long with 50 bulbs, plan for one full strand plus a partial run. Use these numbers to calculate spacing between clips or fasteners.
Tip: Use painter’s tape and a laser level from the ground to project alignment lines onto your roof. This gives you visual reference points without leaving the lawn.Use Ground-Based Tools to Hang Lights Safely
The most effective way to avoid climbing is to bring the roof down to you—with extension tools designed specifically for light installation. These range from simple pole hooks to advanced magnetic or suction systems that attach clips while you remain firmly on the ground.
Light Hanging Poles
These extendable poles (often 8 to 20 feet long) come with rotating heads that grip gutter hooks or clip directly into shingles. Some models feature built-in string guides, allowing you to thread the light strand through the pole and snap it into place. Brands like Gorilla Ladder and LightKeeper Pro offer kits that include multiple attachments for different roof types.
Magnetic Roof Clip Applicators
If your roof has metal flashing or gutters, magnetic applicators can securely place clips without physical reach. Attach a pre-loaded plastic clip to the magnet tip, position it over the desired spot, and release. This works best when combined with self-adhesive clips that bond to non-metal surfaces.
Suction Cup Launchers
Originally developed for marine use, mini suction cup launchers can fire a lightweight line over the peak of your roof. Tie the end of your light strand to the line and pull it across smoothly. While this method requires some practice, it eliminates the need for ladders entirely once set up.
“More than half the injuries we see during the holidays stem from improper ladder use during decoration setup. Simple tools like extension poles reduce risk dramatically.” — Dr. Alan Prescott, Emergency Room Physician & Home Safety Advocate
Step-by-Step Guide: Installing Roof Lights from the Ground
Follow this proven sequence to hang lights evenly and safely without stepping on a ladder.
- Measure and mark spacing on the ground. Using a tape measure, determine ideal clip intervals (typically 12–18 inches). Mark these distances on a string laid flat along the base of the house.
- Select the right clips. Choose adhesive-backed gutter clips for aluminum or vinyl gutters, or shingle tabs for direct roof attachment. Ensure they’re rated for outdoor, cold-weather use.
- Attach first clip manually at one end. You may need a short step stool for the starting point, but keep movements minimal and stable.
- Use an extension pole to place remaining clips. Align each clip with your pre-marked spacing. Rotate the pole head to lock the clip into position.
- Thread the light strand through the pole guide. Feed the plug end first, securing it to the initial clip. Then, use the pole to guide each subsequent bulb into its designated clip.
- Check alignment visually. Step back every few feet to ensure the line appears straight and even from street level.
- Connect strands and test before finalizing. Plug in the lights temporarily to confirm all bulbs work and spacing feels balanced.
- Secure excess cord and transformer. Use zip ties or cord wraps to bundle extra wire neatly near outlets. Elevate transformers off the ground using a weatherproof stand.
Do’s and Don’ts of Ladder-Free Light Installation
| Do | Don’t |
|---|---|
| Use LED lights—they’re lighter, cooler, and more energy-efficient. | Overload circuits; stick to 80% of outlet capacity. |
| Pre-test all strands before installation. | Use staples or nails that damage roofing materials. |
| Label each strand with its location (e.g., “Front Eave Left”) for next year. | Leave connections exposed to rain or snow. |
| Use a second person to help manage cords and alignment. | Work in windy or wet conditions. |
| Invest in clips with swivel bases to follow roof contours. | Pull lights taut—allow slight sag to accommodate temperature changes. |
Real Example: A Two-Story Home Decorated Without a Single Climb
Consider the case of Maria Thompson, a homeowner in Denver with a steep-pitched two-story colonial. After her husband suffered a minor fall hanging lights in 2022, she resolved to find a safer alternative. She purchased a 16-foot telescoping light-hanging pole with interchangeable tips and adhesive clips rated for -20°F.
Maria began by measuring her rooflines and marking 15-inch intervals with chalk on the driveway. She used a laser level against the siding to project vertical guides. Starting at the garage side, she applied the first clip with a small stool, then used the pole to place 42 additional clips along the eaves and gables. Each light strand was fed through the pole’s threading guide, ensuring consistent placement.
The entire job took four hours over two days—but not once did she leave ground level after the first clip. Neighbors commented on the straightness of the lines, and Maria now reuses the same clip locations every year, simply snapping new strands into place. Her system paid for itself in peace of mind alone.
Smart Accessories That Make a Difference
Beyond poles and clips, several accessories enhance safety and precision:
- Cord management reels – Keep strands untangled and ready to deploy.
- Wireless remote controllers – Turn lights on/off or cycle displays without touching outlets.
- Weatherproof outlet covers – Protect GFCI outlets from moisture while allowing plug access.
- Modular connector kits – Allow quick disassembly and reassembly each season.
- Roofline templates – Reusable stencils that align clips perfectly year after year.
One emerging innovation is the use of drone-assisted deployment for hard-to-reach peaks. While still niche, hobbyists have successfully flown small drones with lightweight lines to pull light strings over ridges. This method requires skill and local airspace awareness but shows promise for complex roofs.
FAQ: Common Questions About Safe Light Installation
Can I reuse adhesive clips next year?
Yes, most high-quality outdoor adhesive clips can be reused if removed carefully. Warm them slightly with a hairdryer to loosen the bond, then clean off residue with isopropyl alcohol. Inspect for cracks or warping before reapplying.
How do I space lights evenly without being up close?
Use proportional measurement. If your strand has 50 bulbs over 25 feet, that’s one bulb every 6 inches. Place clips every 18 inches for three bulbs per clip. Mark these distances on your extension pole with colored tape for quick reference.
Are gutter clips safe for all roof types?
They’re generally safe for vinyl, aluminum, and steel gutters. Avoid using them on wooden gutters or historic homes with fragile materials. For shingle roofs, use only clips designed to slide under the shingle edge without puncturing.
Essential Checklist for a Ladder-Free Lighting Project
- Measure all roofline sections and calculate total light length needed.
- Purchase LED strands with consistent bulb spacing and durability ratings.
- Buy enough adhesive or shingle clips with appropriate weather resistance.
- Acquire an extendable light-hanging pole with bulb-guide attachment.
- Test all lights indoors before installation.
- Mark spacing intervals on the ground or on your pole.
- Apply first clip manually at starting point.
- Use the pole to install remaining clips at measured intervals.
- Thread lights through clips using the pole guide.
- Plug in and test display; adjust misaligned sections.
- Secure cords and transformers with protective covers.
- Document clip locations for faster setup next year.
Conclusion: Celebrate Safely, Shine Brightly
Stringing Christmas lights evenly on a roof doesn’t require heroics. It requires planning, the right tools, and a commitment to safety. By staying grounded and leveraging modern accessories, you can achieve a display that rivals professional installations—all without risking a fall.
The holidays are about joy, not injury. Take pride in a job well done, knowing your family and home remained protected throughout the process. Whether you’re a seasoned decorator or hanging lights for the first time, the methods outlined here offer a smarter, safer path to festive brilliance.
💬 Have a ladder-free lighting hack that worked for you? Share your story in the comments and inspire others to decorate safely this season!