
Selecting the right backpack is one of the most critical decisions a hiker can make. A poorly chosen pack can turn an enjoyable trail into a painful experience, while the right fit enhances comfort, balance, and endurance. The ideal backpack isn’t just about brand or aesthetics—it’s about matching capacity, fit, and features to your specific hike duration and gear load. Whether you're planning a quick day hike or a week-long backcountry trek, understanding how trail length and equipment needs influence your choice will ensure you stay light on your feet and free from strain.
Understanding Backpack Capacity: The Role of Trail Length
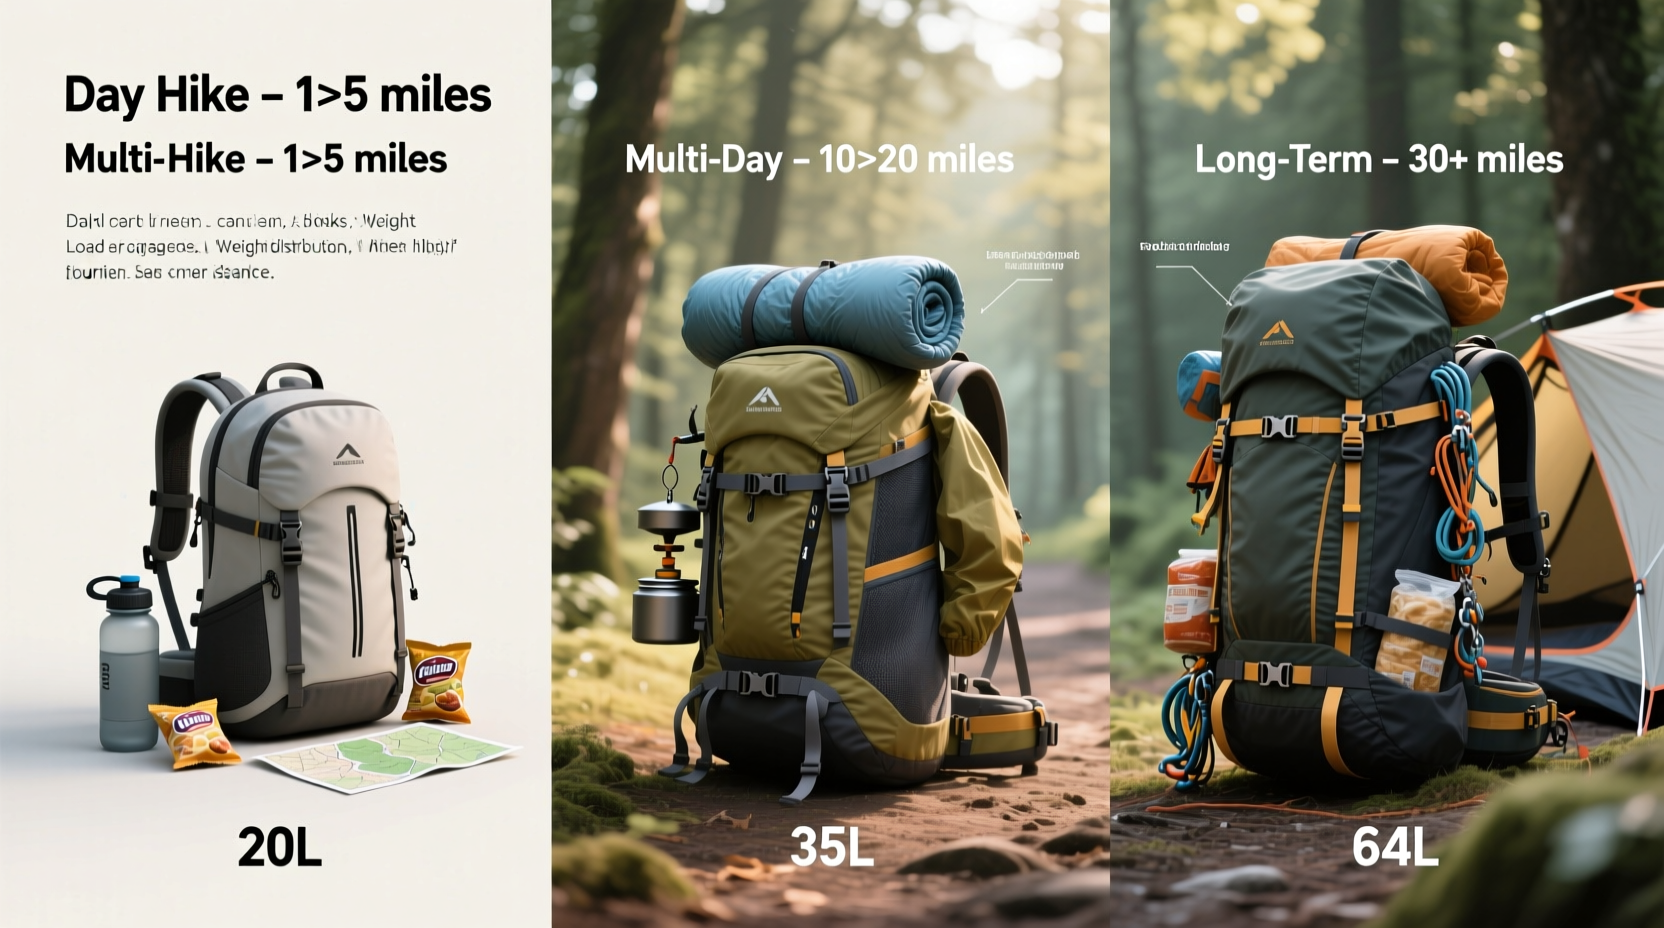
Backpack capacity is measured in liters and directly correlates with how long you plan to be on the trail. Choosing a volume that matches your trip duration ensures you have enough space without carrying unnecessary weight. Here's a breakdown by trail length:
- Day hikes (under 12 hours): 20–35 liters. Ideal for water, snacks, layers, first aid, and a rain jacket.
- Overnight trips (1–2 nights): 35–50 liters. Fits a sleeping bag, lightweight tent, cooking system, and extra clothing.
- Multiday treks (3–5 days): 50–70 liters. Accommodates bulkier gear like a full-size sleeping bag, bear canister, and extended food supply.
- Extended expeditions (6+ days): 70+ liters. Necessary for cold-weather gear, freeze-dried meals, and additional safety equipment.
It’s tempting to over-pack a larger bag, but excess volume increases weight and throws off balance. Conversely, stuffing a small pack leads to discomfort and damaged gear. Stick to the minimum viable capacity for your trip length.
Tip: When in doubt between two sizes, opt for the smaller one—most experienced hikers prioritize weight savings over extra space.Finding the Right Fit: Torso Length and Hip Belt Alignment
A well-fitting backpack transfers up to 80% of the load to your hips, reducing shoulder fatigue. Two key measurements determine fit: torso length and hip size.
To measure your torso length, use a flexible tape from the C7 vertebra (at the base of your neck) to the top of your iliac crest (the bony part of your hip). Most adult torsos range from 14 to 20 inches. Backpacks are typically labeled as “short,” “regular,” or “tall” to match these ranges. Always try on a pack with weight inside—preferably 15–20 pounds—to assess real-world comfort.
The hip belt should sit snugly across the top of your pelvis, not on your stomach. It’s the primary weight-bearing component. Shoulder straps should contour your shoulders without digging in, and the sternum strap helps stabilize movement.
“Proper fit isn’t negotiable. A misaligned pack can cause chronic back pain and reduce hiking efficiency by up to 30%.” — Dr. Lena Torres, Outdoor Ergonomics Researcher, University of Colorado
Gear Load and Packing Strategy: Matching Volume to Equipment Needs
Your backpack must accommodate essential gear without compression or overextension. Consider the core components of a typical hiking load:
- Sleep system (sleeping bag + pad)
- Shelter (tent, tarp, or hammock)
- Cooking setup (stove, fuel, pot)
- Food and water storage
- Clothing layers (base, insulation, shell)
- Navigation tools and emergency supplies
Ultralight gear allows for smaller packs—even a 45-liter model may suffice for a three-day trip if your base weight (pack + shelter + sleep system) is under 10 pounds. In contrast, traditional gear often requires 65 liters or more for the same duration.
Packing strategy also affects performance. Heavier items should be close to your back and centered between your shoulder blades. Use compression straps to eliminate internal shifting, which destabilizes your center of gravity.
Checklist: Pre-Purchase Backpack Evaluation
- Measure your torso length and hip circumference.
- Determine trip duration and total gear volume.
- Try on multiple models with a loaded pack (ask staff at outdoor stores to assist).
- Check for adjustable suspension systems (especially load lifters and hip belt).
- Ensure access points suit your gear (top-loading vs. panel-loading vs. front-zip).
- Verify presence of hydration sleeve, trekking pole loops, and ice axe attachment.
- Assess ventilation—mesh-backed designs reduce sweating on hot days.
Comparative Guide: Backpack Types by Hike Duration
| Trip Type | Recommended Size (Liters) | Typical Gear Load | Key Features to Look For |
|---|---|---|---|
| Day Hiking | 20–35L | Water, snacks, rain layer, first aid, map | Hydration reservoir compatibility, ventilated back panel, zip pockets |
| Weekend Trip (1–2 nights) | 35–50L | Light tent, sleeping bag, stove, food for 2 days | Top lid compartment, sleeping bag compartment, side access |
| 3–5 Day Trek | 50–70L | Full camping kit, bear canister, extra clothes | Adjustable torso, frame support, external attachment points |
| Expedition (6+ days) | 70L+ | Cold-weather gear, large food supply, repair kits | Removable daypack, dual access (top + front), heavy-duty zippers |
Real-World Example: Choosing the Right Pack for a 4-Day Appalachian Trail Section
Jamal, an intermediate hiker, planned a four-day solo trek through the Smoky Mountains. His initial instinct was to rent a 75-liter mountaineering pack, assuming bigger meant better preparedness. However, after listing his actual gear—a lightweight tent (3 lbs), down sleeping bag (2 lbs), dehydrated meals (1.5 lbs/day), and minimal clothing—he calculated a total load of 28 pounds, including water.
At 5'8\" with a 17-inch torso, he visited a specialty outdoor retailer and tried on several 55–65 liter packs. The 65-liter model felt bulky and rode high on his back, while the 55-liter Deuter Aircontact Lite fit perfectly, with the hip belt securing comfortably over his pelvis and the shoulder straps wrapping smoothly.
After testing both on a treadmill with a 30-pound load, Jamal chose the smaller pack. He saved nearly 2 pounds in pack weight alone and reported significantly less fatigue during his trip. His experience underscores that optimal pack selection balances capacity with precision fit—not maximum volume.
Step-by-Step Guide: How to Select Your Hiking Backpack
- Define your hiking goals: Are you doing day trips, weekend getaways, or extended backcountry journeys?
- List your essential gear: Weigh each item and calculate total packable volume.
- Measure your body: Determine torso length and hip size using a soft tape measure.
- Narrow your search: Filter backpacks by capacity (liters) and fit range (S/M/L or adjustable).
- Test in person: Visit a store, load a demo pack with 15–20 lbs, and walk around for 10–15 minutes.
- Evaluate comfort: Check for pressure points, stability, and ease of access.
- Confirm features: Ensure it includes necessary attachments (hydration, poles, ice axe) and weather-resistant zippers.
- Finalize and break in: Use the pack on short outings before committing to a long trip.
“The best backpack disappears on your back. You shouldn’t be thinking about it mid-hike—that means it fits and functions correctly.” — Sarah Kim, Lead Guide, Pacific Crest Trail Expeditions
Frequently Asked Questions
Can I use a 65-liter backpack for day hikes?
You can, but it’s impractical. Larger packs lack targeted support for light loads and tend to bounce or sway. They also encourage over-packing. A dedicated daypack offers better ventilation, organization, and agility.
What’s the difference between internal and external frame packs?
Internal frame packs integrate a rigid structure within the fabric, offering sleek profiles and better weight transfer—ideal for technical terrain. External frames sit outside the pack bag, creating airflow and allowing heavier, irregular loads (e.g., game meat). They’re less common today due to bulk and reduced stability.
How do I know if a backpack fits properly?
A proper fit means the hip belt carries most of the weight, the shoulder straps don’t slip or dig, and the load stays close to your body. There should be no excessive movement when walking or bending. Adjust all straps—including load lifters—and re-evaluate comfort with weight inside.
Final Thoughts: Make Every Mile Comfortable
Choosing the right backpack isn’t a one-size-fits-all decision—it’s a personal calculation of distance, gear, and anatomy. By aligning pack size with trail length, ensuring a precise torso and hip fit, and prioritizing functionality over features, you set the foundation for enjoyable, sustainable hiking. Remember, the goal isn’t to carry everything possible, but to carry what’s necessary—with comfort, balance, and confidence.
🚀 Ready to hit the trail with confidence? Measure your torso, list your gear, and test-fit your next backpack with intention. Share your pack choice and experience in the comments—your insight could help another hiker find their perfect match.