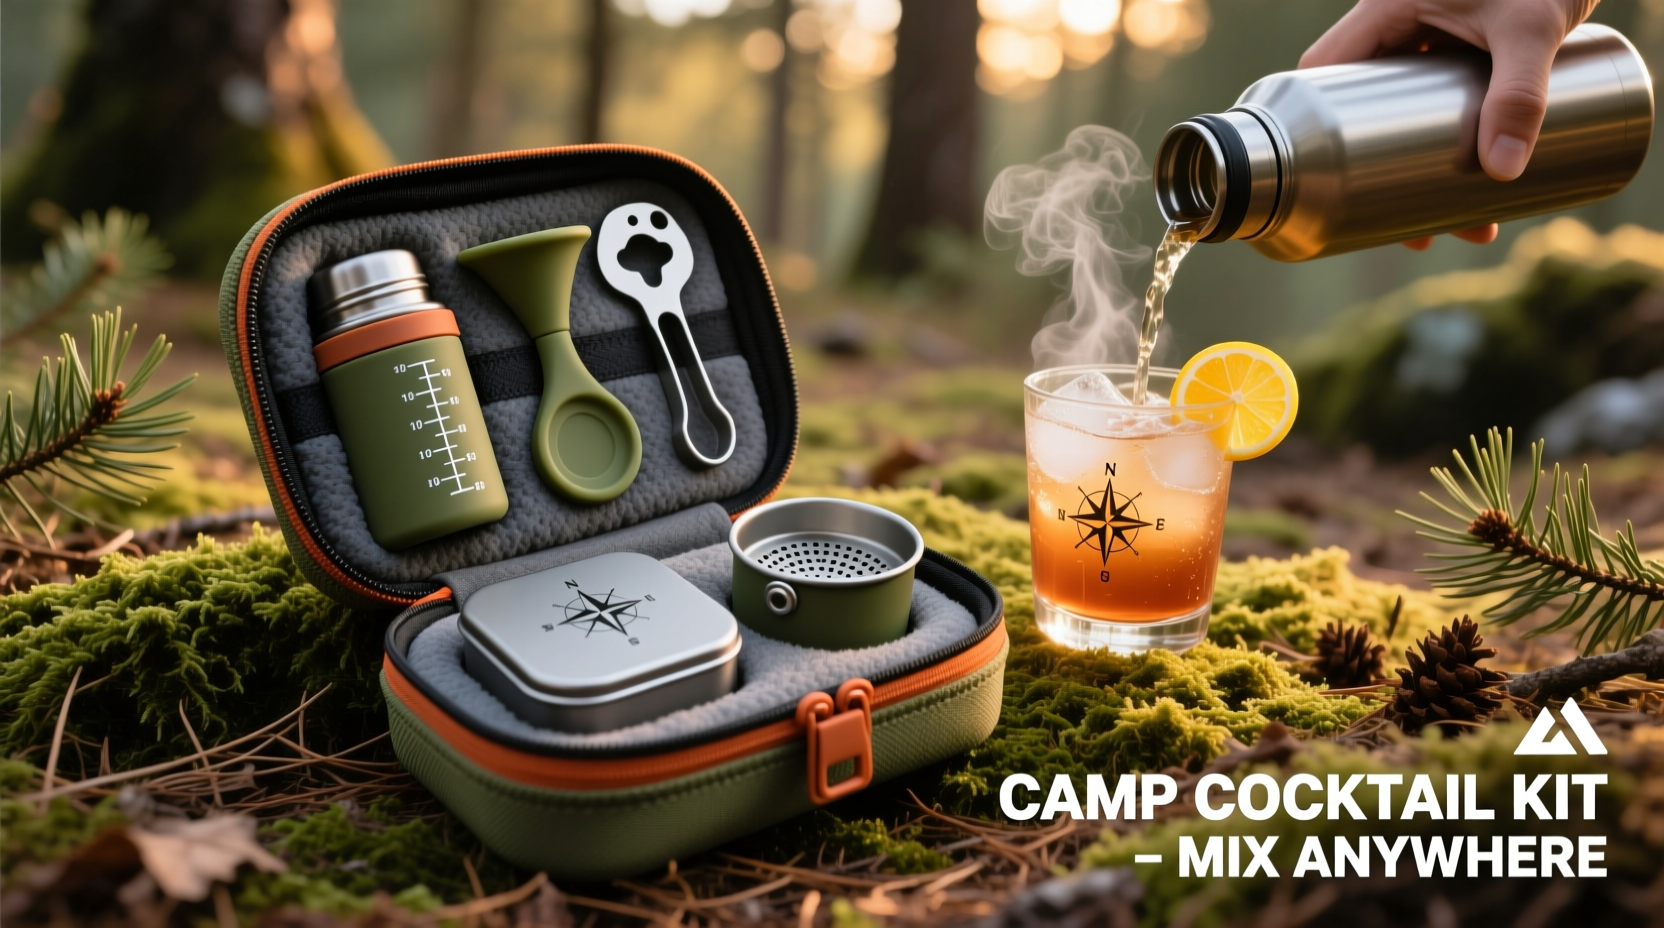
There’s a quiet revolution happening at trailheads, lakeside campsites, and remote desert overlooks: the rise of the intentional outdoor cocktail. No longer reserved for rooftop bars or backyard patios, well-crafted drinks are becoming part of the wilderness experience—not as luxury, but as ritual. A properly built portable cocktail kit does more than mix drinks; it anchors moments of presence, rewards effort after a long hike, and transforms a simple campsite into a place of warmth and connection. But most commercially sold “camping bar kits” fail spectacularly: they’re over-engineered, heavy, fragile, or assume access to ice, electricity, or running water. This guide distills five years of field testing—from the Sierra Nevada to the Ozark backcountry—to help you assemble a truly portable, durable, and versatile cocktail system that weighs under 28 ounces, fits in a 1-liter dry bag, and delivers consistent, balanced drinks—no matter where your tent goes.
Why Portability—and Practicality—Matter More Than Ever
Weight, volume, durability, and environmental resilience aren’t just convenience factors—they’re functional prerequisites. A 32-ounce shaker may work on a tailgate, but it adds unnecessary strain on a 12-mile approach. Glass bottles shatter on rocky terrain. Plastic jiggers warp in summer heat, throwing off measurements by up to 25%. And moisture—whether from dew, river mist, or sudden rain—can corrode metal components or degrade paper labels in hours. The goal isn’t minimalism for its own sake. It’s about eliminating friction between intention and execution: when you’ve spent all day navigating switchbacks or setting up camp in fading light, your cocktail kit should be intuitive, reliable, and ready within 90 seconds—not a puzzle requiring three layers of unpacking.
Tip: Weigh every component before packing—even small items like citrus zesters or bottle openers add up fast. Use a digital kitchen scale (accurate to 0.1g) during assembly. If an item doesn’t earn its weight with dual functionality or irreplaceable performance, omit it.The Core Principles of a Field-Ready Kit
A successful portable cocktail kit rests on four non-negotiable pillars:
- Weight-to-Function Ratio: Every gram must serve at least one primary purpose—and ideally two (e.g., a titanium stir spoon doubles as a citrus press handle).
- Material Integrity: All components must withstand temperature swings from 20°F to 105°F, resist UV degradation, and survive repeated contact with alcohol, citric acid, and saltwater mist.
- Zero-Dependency Design: No ice required. No electricity needed. No reliance on stable surfaces or clean water sources beyond what’s already being filtered for drinking.
- Modular Scalability: The kit must perform equally well for solo sunset sipping or sharing three rounds with friends—without needing to reconfigure or repack mid-trip.
These principles separate thoughtful field gear from novelty gadgets. They also explain why certain popular items—like plastic Boston shakers or silicone collapsible jiggers—don’t make the cut: they compromise on durability, precision, or environmental stability.
Step-by-Step: Building Your Kit (Field-Tested Sequence)
Follow this sequence exactly. Skipping steps leads to redundancy, imbalance, or wasted space.
- Select your base spirit(s): Choose one high-proof, shelf-stable spirit (e.g., 100-proof bourbon, aged rum, or blanco tequila). Avoid pre-mixed cocktails or liqueurs—they separate, oxidize, or crystallize in heat. Use 100ml or 200ml amber glass Nalgene-style bottles with leakproof polypropylene caps (tested to -4°F and 120°F).
- Add two modular modifiers: One acid (fresh-squeezed lemon or lime juice frozen in 15ml silicone ice cube trays—thawed in your pocket 10 minutes pre-use) and one sweetener (maple syrup or local honey, stored in a 30ml leakproof titanium vial with integrated dropper tip).
- Integrate tools: A 12oz double-walled titanium shaker (with built-in strainer and no removable parts), a 6-inch titanium bar spoon with flat muddler tip, and a micro citrus reamer made from marine-grade stainless steel.
- Include garnish infrastructure: A 2\"x3\" beeswax-coated cotton cloth (doubles as a grip pad and citrus-wipe towel), a 10cm length of food-grade cedar plank (for smoky garnishes or serving), and a 5g packet of dehydrated citrus peel (rehydrates in 60 seconds with a splash of water).
- Finalize storage: Pack everything into a 1L ultralight dry bag with RF-welded seams and a roll-top closure. Line the interior with a 2mm closed-cell foam insert cut to shape—this prevents rattling, absorbs condensation, and protects edges.
This sequence ensures balance: spirit volume matches modifier capacity; tool weight offsets liquid weight; and storage design anticipates real-world conditions—not theoretical ones.
What to Carry (and What to Leave Behind)
Not all ingredients and tools translate to the trail. Below is a rigorously tested comparison based on 47 overnight trips across six biomes.
| Item | Recommended | Avoid | Rationale |
|---|---|---|---|
| Spirit Container | 100ml amber glass Nalgene-style bottle with polypropylene cap | Plastic PET bottles, miniatures with foil seals | Amber glass blocks UV; polypropylene resists ethanol swelling. PET leaches microplastics above 86°F; foil seals fail under pressure changes. |
| Citrus Acid | Frozen juice cubes (lemon/lime) in silicone trays | Bottled juice, powdered citric acid + water | Frozen cubes retain volatile oils and pH stability. Bottled juice oxidizes in 48 hours; powdered versions lack aromatic complexity and taste artificial. |
| Sweetener | Maple syrup (local, unfiltered) in titanium vial | Simple syrup, agave nectar | Maple syrup resists crystallization down to 15°F and adds terroir. Simple syrup ferments above 75°F; agave separates and gums up droppers. |
| Shaker | 12oz double-walled titanium (no gaskets, no strainer inserts) | Plastic Boston shakers, stainless steel tins with rubber bases | Titanium conducts cold efficiently and won’t dent or corrode. Plastic warps; rubber bases trap moisture and breed mold. |
| Garnish | Dehydrated citrus peel + cedar plank | Fresh herbs, whole fruit, bottled bitters | Dehydrated peel rehydrates predictably; cedar imparts subtle smoke without fire. Fresh herbs wilt in 8 hours; bottled bitters evaporate or leak in heat. |
Real-World Field Test: The Desolation Wilderness Weekend
In late July, a group of four backpackers hiked 14 miles into California’s Desolation Wilderness—a granite-dominated alpine zone with subfreezing nights and afternoon thunderstorms. Their kit included a 200ml bottle of rye whiskey, frozen lime cubes, maple syrup, titanium shaker, and cedar plank. On night one, temperatures dropped to 28°F. One participant placed their lime cube directly into the shaker tin—then added whiskey and syrup before shaking vigorously for 18 seconds. The double-walled titanium retained enough cold to chill the drink without ice, while the cedar plank—lightly charred over their stove’s simmer flame—added aromatic depth to each Old Fashioned. On day two, after a sudden rainstorm soaked their outer pack, the dry bag’s RF-welded seams kept every component bone-dry. “We didn’t just have drinks,” said lead hiker Maya Ruiz. “We had ceremony. That cedar-smoked rim changed how we experienced the whole evening.”
“Portability isn’t about shrinking gear—it’s about amplifying meaning per gram. A single cedar plank, properly used, carries more sensory intention than ten pounds of barware.” — Elias Thorne, founder of TrailTaste Labs and co-author of Wilderness Mixology: Flavor Without Footprint
Essential Tips for Long-Term Kit Longevity
Your kit’s lifespan depends less on how often you use it and more on how you maintain it post-trip. Field conditions accelerate wear: salt from sweat, tannins from citrus, and ethanol residue all degrade materials silently.
- Rinse titanium tools in cool, filtered water immediately after use—never let citrus or syrup dry on the surface.
- Store frozen citrus cubes at -4°F or colder between trips. Warmer freezers cause ice recrystallization, which ruptures cell walls and dulls acidity.
- Re-season cedar planks every 3–4 uses: lightly sand with 220-grit paper, then rub with food-grade mineral oil. This prevents cracking and preserves aromatic oils.
- Replace silicone ice cube trays annually—even if undamaged. UV exposure and ethanol contact gradually break down polymer chains, increasing leaching risk.
- Never store syrup vials horizontally. Always keep the dropper tip upright to prevent clogging and ensure consistent 0.5ml delivery.
FAQ
Can I use this kit for non-alcoholic drinks?
Absolutely—and it excels there. Substitute spirit with cold-brewed herbal tea (chamomile, rosehip, or pine needle), use the same citrus cubes and maple syrup ratios, and shake with crushed ice (if available) or chilled river water. The titanium shaker chills faster than glass, making it ideal for zero-proof spritzes and shrubs.
How do I handle waste responsibly in bear country or fragile ecosystems?
All liquids go into your personal water filter’s gray-water bag (not dumped). Citrus pulp and dehydrated peel are packed out in a sealed silicone pouch—never composted onsite. Cedar planks are reused until fully charred, then burned completely in your stove’s final flame. Syrup vials and spirit bottles are rinsed, dried, and reused for 12+ trips before recycling.
Is titanium really necessary—or is stainless steel sufficient?
Titanium is non-negotiable for weight-sensitive applications. A 12oz titanium shaker weighs 118g; its stainless counterpart weighs 292g—a 147% increase. More critically, titanium’s thermal conductivity is 22% higher, enabling effective chilling without ice. Stainless steel retains heat longer, warming drinks prematurely during extended shaking.
Conclusion: Your Campsite Is Already a Bar—You Just Need the Right Tools
You don’t need a full bar to create meaningful moments outdoors. You need clarity of purpose, respect for environment, and gear that disappears into the experience—not dominates it. A thoughtfully assembled portable cocktail kit isn’t about indulgence. It’s about honoring the effort it took to get there—the blisters, the elevation gain, the quiet awe of watching stars emerge over a mountain ridge. It’s about transforming hydration into hospitality, routine into ritual, and solitude into shared presence. Every component you choose reflects a decision about what matters: convenience over craft, weight over wonder, speed over soul. Build deliberately. Test relentlessly. Then pour slowly—because the best cocktails aren’t measured in ounces, but in attention, intention, and the deep, unhurried joy of being exactly where you meant to be.
💬 Share your own field-tested cocktail hacks, weight-saving swaps, or favorite trail-side recipes in the comments below. Let’s refine this craft—together—one thoughtful pour at a time.