Hiking boots are one of the most critical pieces of gear for any outdoor enthusiast. No matter how advanced the cushioning or ankle support, if water seeps through with every step, comfort and safety quickly deteriorate. Wet feet lead to blisters, reduced traction, and even hypothermia in cold environments. While many modern boots come with built-in waterproof membranes like Gore-Tex, these aren’t maintenance-free. Over time, seams weaken, outer materials lose their resistance, and membranes can fail—especially under prolonged exposure to mud, salt, or abrasion.
Waterproofing isn't a one-time purchase feature—it's an ongoing care process. Applying the right waterproofing techniques not only extends the life of your boots but also ensures consistent performance across seasons and terrains. From selecting the correct treatment for your boot material to understanding when and how often to reapply, proper waterproofing is both science and habit.
Understanding Boot Materials and Their Water Resistance
Before applying any waterproofing product, it’s essential to identify the material of your hiking boots. Different materials respond differently to treatments, and using the wrong product can do more harm than good.
| Material | Water Resistance Level | Recommended Treatment | Avoid |
|---|---|---|---|
| Full-Grain Leather | High (when treated) | Wax-based conditioners, beeswax, mink oil | Silicone sprays (can clog pores) |
| Nubuck/Suede | Low to Moderate | Specialized spray sealants, nano-coating sprays | Heavy oils (darkens material) |
| Synthetic Mesh (with membrane) | Moderate (membrane-dependent) | Fluoropolymer sprays, DWR refreshers | Waxes or oils (can damage membrane) |
| Textile Uppers | Low | Durable Water Repellent (DWR) sprays | Heat-intensive treatments |
Leather naturally absorbs moisture but can be made highly water-resistant with proper conditioning. Synthetic uppers rely heavily on factory-applied Durable Water Repellent (DWR) coatings, which degrade over time. Recognizing your boot’s construction helps determine whether you need deep-penetrating conditioners or surface-level repellents.
Tip: Always clean your boots before waterproofing. Dirt and old wax create barriers that prevent new treatments from penetrating.Step-by-Step Guide to Waterproofing Your Hiking Boots
Effective waterproofing follows a clear sequence. Skipping steps may result in uneven coverage or trapped moisture that accelerates deterioration.
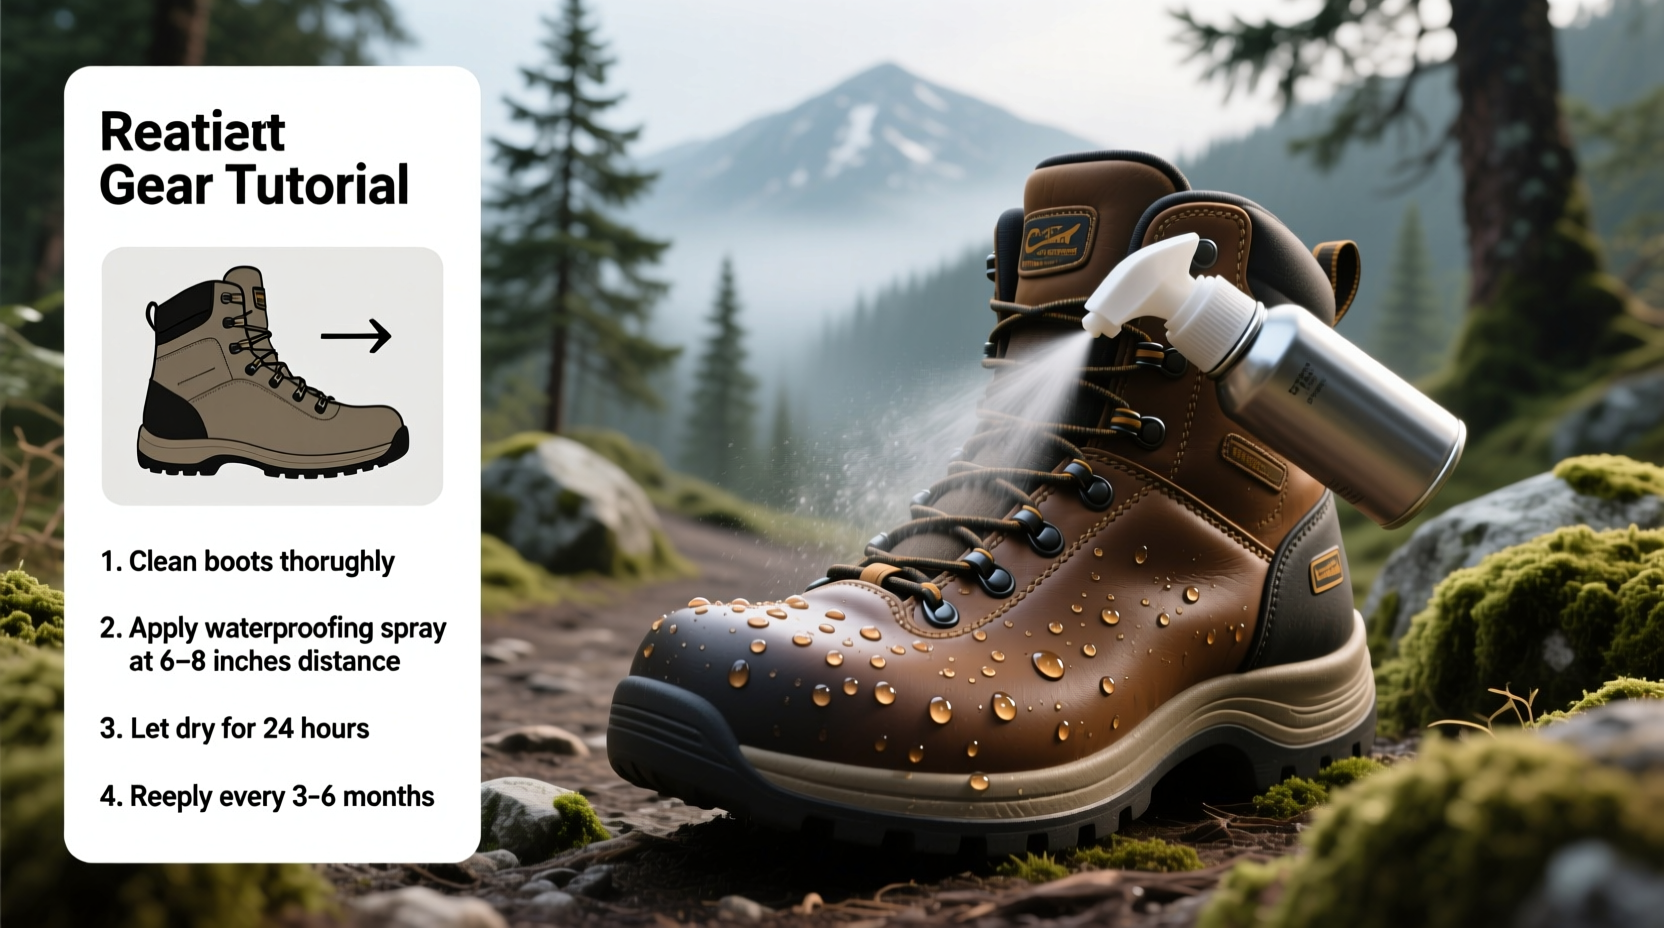
- Clean Thoroughly: Use a soft brush and mild soap (like Nikwax Tech Wash or dish soap diluted in water) to remove mud, salts, and grime. Pay attention to seams and laces.
- Rinse and Dry Naturally: Never use direct heat. Let boots air-dry at room temperature for 24–48 hours, stuffing them with newspaper to maintain shape and absorb moisture.
- Select the Right Product: Match the treatment to your boot material as outlined in the table above.
- Apply Evenly: For leather, use a cloth to rub conditioner into the grain. For sprays, hold 6–8 inches away and coat all surfaces, including stitching.
- Allow Curing Time: Most products require 12–24 hours to fully bond. Avoid wearing or exposing boots to moisture during this period.
- Test Performance: After curing, sprinkle water on the surface. If it beads up, the treatment worked. If it soaks in, reapply.
This process should be repeated every 3–6 months for regular hikers, or immediately after noticing reduced water repellency.
Choosing the Right Waterproofing Products
Not all waterproofing solutions are equal. The market offers waxes, sprays, liquids, and conditioners—each with specific advantages.
- Wax-Based Treatments (e.g., Obenauf’s Heavy Duty LP): Ideal for full-grain leather. Penetrate deeply, nourish fibers, and provide excellent water resistance. Downside: can darken light-colored boots and require buffing.
- Spray-On DWR (e.g., Nikwax TX.Direct Spray-On): Best for synthetic or mesh boots with waterproof linings. Restores factory finish without altering breathability.
- Conditioner Creams (e.g., Lexol or Bick 4): Lighter than waxes, good for routine maintenance. Less water-resistant but safer for frequent use.
- Nano-Coating Sprays (e.g., ReviveX Nano Seal): Advanced polymer technology that creates an invisible shield. Effective on suede and nubuck without changing texture.
“Re-waterproofing isn’t just about keeping feet dry—it’s about preserving the structural integrity of the boot. A well-maintained leather upper can last twice as long as a neglected one.” — Daniel Reeves, Outdoor Gear Technician at Trailcare Labs
Real-World Example: A Season of Rain in the Pacific Northwest
Consider Sarah, an avid backpacker tackling Oregon’s Timberline Trail. She invested in high-quality leather boots but skipped waterproofing, assuming the “waterproof” label was permanent. Within two weeks of heavy rain, her boots absorbed water like sponges. The lining delaminated, and she developed persistent blisters. After consulting a local outfitter, she learned her boots had lost their natural oils and DWR coating.
She cleaned them, applied a beeswax-leather conditioner, and resealed the seams with a silicone-free seam grip. On her next trip, despite similar rainfall, her boots repelled water effectively. More importantly, they remained breathable and comfortable. This experience transformed her approach: she now waterproofs every season and carries a travel-sized conditioner on long trips.
Tip: Re-treat boots after crossing streams, walking through snowmelt, or hiking in salty coastal areas.Common Mistakes That Undermine Waterproofing
Even experienced hikers make errors that compromise their efforts. Avoid these pitfalls:
- Using Household Oils: Motor oil, coconut oil, or Vaseline may seem moisturizing but attract dirt and degrade leather fibers.
- Applying Heat to Dry: Placing boots near radiators or in direct sunlight cracks leather and warps glue bonds.
- Over-Waxing: Too much wax blocks pores, reducing breathability and trapping sweat inside.
- Ignoring Seams and Stitching: These are common entry points for water. Consider using a seam sealer periodically.
- Storing Wet Boots: Long-term storage while damp leads to mold, odor, and material breakdown.
Frequently Asked Questions
How often should I waterproof my hiking boots?
For regular use (weekly hikes), treat every 3–4 months. Occasional hikers can do it once or twice a year. Reapply whenever water stops beading on the surface.
Can I use the same product on leather and synthetic boots?
No. Waxes and oils designed for leather can clog the pores of synthetic materials and damage waterproof membranes. Always match the product to your boot type.
Do waterproof sprays affect breathability?
Poor-quality sprays can. However, fluoropolymer-based DWR treatments like Nikwax or Grangers are engineered to maintain breathability while restoring water repellency.
Essential Waterproofing Checklist
- ✅ Clean boots with gentle soap and brush
- Remove all dirt and old residue.
- ✅ Air-dry completely (no heat)
- Prevents cracking and internal damage.
- ✅ Choose material-specific treatment
- Leather = wax/conditioner; Synthetics = DWR spray.
- ✅ Apply evenly, cover seams and eyelets
- Don’t miss high-wear zones.
- ✅ Cure for 12–24 hours
- Let the product bond properly.
- ✅ Test with water droplets
- Ensure beading before heading out.
Conclusion
Waterproofing your hiking boots is not a luxury—it’s fundamental maintenance. Whether you're trekking alpine passes or navigating muddy forest trails, dry feet mean safer, more enjoyable adventures. By understanding your boot materials, choosing the right products, and following a disciplined care routine, you protect not just your investment but your overall outdoor experience.
💬 Ready to keep your feet dry and your boots durable? Start your next hike with confidence—re-treat your boots today and feel the difference.