Types of Yeast Dough Bowls
A yeast dough bowl is a large, deep kitchen vessel specifically designed to hold and support the rising process of yeast-based bread dough. These bowls must accommodate expansion, retain moisture, and provide an ideal environment for fermentation. The material of the bowl significantly influences the dough's texture, rise, and overall baking success.
Beyond mere functionality, the right bowl can enhance your bread-making experience by improving consistency, convenience, and even aesthetics. Below is a detailed comparison of the most common types of dough rising bowls, including their benefits, limitations, and ideal uses.
Wooden Dough Rising Bowls
Crafted from natural hardwoods like beech or maple, wooden bowls offer a traditional, artisanal approach to bread making. Their porous surface gently absorbs excess moisture, helping maintain an optimal hydration balance during proofing.
Advantages
- Natural moisture regulation prevents drying
- Promotes even fermentation and reduces crust formation
- Timeless aesthetic, often doubles as servingware
- Durable when properly maintained
- Excellent thermal insulation
Limitations
- Requires regular oiling to prevent cracking
- Not dishwasher-safe; hand washing only
- Porous nature may retain odors if not cleaned properly
- Heavier than other materials
Best for: Artisan bakers, sourdough enthusiasts, and those who value traditional craftsmanship
Ceramic Dough Rising Bowls
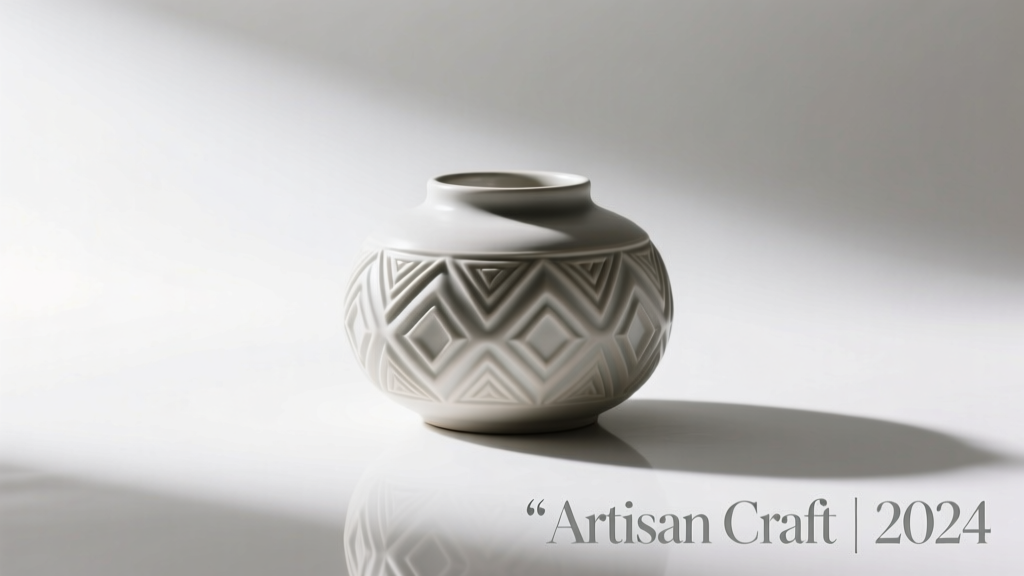
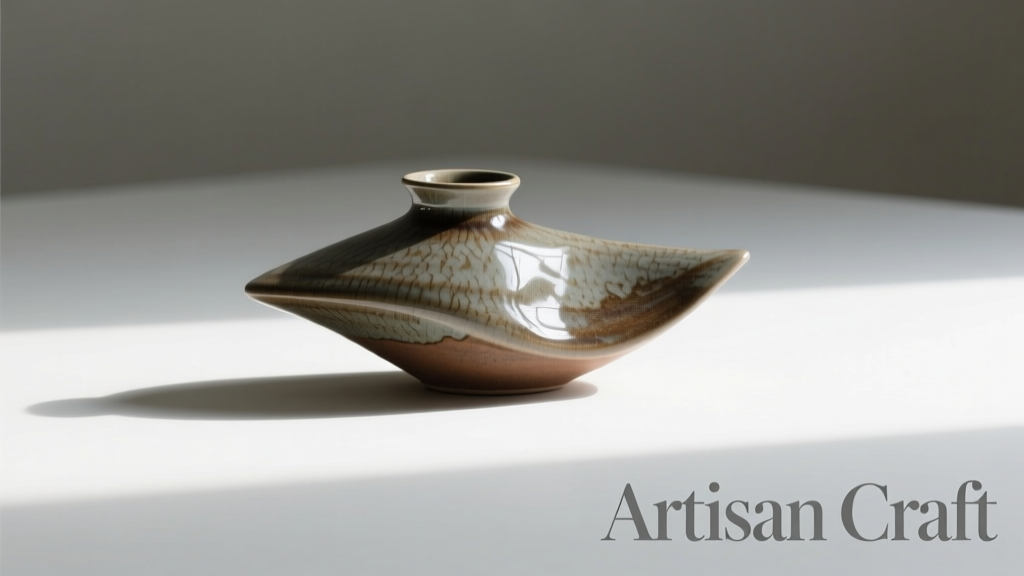
Glazed ceramic bowls combine functionality with visual appeal. The non-porous, smooth surface locks in moisture effectively, creating a humid microclimate ideal for rising dough.
Advantages
- Excellent moisture retention
- Attractive designs enhance kitchen decor
- Stable and heavy, resists tipping
- Often comes with matching lids or cloches
- Can double as serving bowls
Limitations
- Fragile—can chip or crack if dropped
- Most are not microwave or dishwasher-safe
- Limited heat conductivity for warm-rise techniques
- Glaze may wear over time
Best for: Home bakers who appreciate style and functionality; ideal for countertop proofing and presentation
Stainless Steel Dough Rising Bowls
Known for their durability and hygiene, stainless steel bowls are a favorite in both home and professional kitchens. Their non-reactive surface makes them versatile for all types of dough and ingredients.
Advantages
- Highly durable and resistant to dents and corrosion
- Non-porous and odor-resistant
- Dishwasher-safe and easy to sanitize
- Conductive—can be warmed slightly to accelerate rising
- Stackable for space-efficient storage
Limitations
- Can feel cold and less inviting
- May require a towel or lid to retain moisture
- Reflective surface may not suit all kitchen styles
- Can be noisy when mixing
Best for: Frequent bakers, commercial kitchens, and those seeking low-maintenance, multi-purpose bowls
Glass Dough Rising Bowls
Clear glass bowls offer a unique advantage: visibility. Their transparent walls allow bakers to monitor dough expansion and yeast activity without disturbing the rising process.
Advantages
- Allows visual monitoring of dough rise and yeast activity
- Non-porous and easy to clean
- Microwave and oven-safe (if tempered)
- Resistant to stains and odors
- Can be used for both proofing and baking (in some cases)
Limitations
- Heavier and more fragile than other materials
- Can be more expensive
- May not retain heat as well as ceramic or wood
- Requires careful handling to avoid breakage
Best for: Beginners learning fermentation, visual learners, and bakers who want versatility in proofing and heating
| Material | Moisture Retention | Durability | Visibility | Best For |
|---|---|---|---|---|
| Wooden | Excellent | Good | No | Artisan bread, sourdough, traditional baking |
| Ceramic | Very Good | Good | No | Countertop proofing, decorative use, family baking |
| Stainless Steel | Fair (with cover) | Excellent | No | High-volume baking, hygiene-focused kitchens |
| Glass | Good | Good | Yes | Learning, monitoring rise, multi-functional use |
Expert Tip: For optimal rising results, lightly oil or flour your bowl before adding the dough to prevent sticking. Cover with a damp cloth or plastic wrap to maintain humidity, especially in dry environments. For faster proofing, place the bowl in a slightly warm area (75–80°F / 24–27°C) away from drafts.
Design of Yeast Dough Bowl: Features, Materials, and Best Practices
While various types of mixing and proofing bowls exist for different culinary purposes, yeast dough bowls share a set of essential design characteristics tailored to support the unique needs of fermentation. From shape and size to material and surface texture, each element plays a crucial role in ensuring optimal dough development, ease of handling, and consistent baking results.
Core Design Features of Yeast Dough Bowls
Shape: Wide Top, Tapered Base
Yeast dough bowls are typically deep and generously sized to accommodate the significant expansion that occurs during proofing. The most effective designs feature a wide opening at the top and a narrower base. This shape provides ample space for mixing ingredients thoroughly without spillage, while the tapered sides help contain the dough as it rises, minimizing excessive spreading.
The curved interior also makes it easier to perform stretch-and-fold techniques or degas the dough manually. A rounded bottom prevents corners where dough can get trapped, simplifying cleanup and reducing waste.
Size: Accommodating Dough Expansion
Most yeast dough bowls range from 2 to 4 quarts in capacity, which is ideal for standard home baking batches. However, the key principle is selecting a bowl that is **at least twice the volume** of the initial dough. This allows room for the dough to double—or even triple—during its rise without overflowing.
For example, if you're working with 2 cups of raw dough, choose a bowl with a minimum 4-quart capacity. Larger bowls also make it easier to cover the dough securely and reduce the risk of dried edges forming during long fermentation periods.
Material: Balancing Functionality and Performance
The material of the dough bowl significantly influences temperature retention, moisture control, and overall usability:
- Wooden Bowls: Traditionally used for centuries, wooden bowls naturally insulate the dough, helping maintain a warm, stable environment ideal for fermentation. They also absorb excess moisture, preventing a soggy surface while retaining internal hydration. However, they require careful maintenance to avoid cracking or bacterial growth.
- Glass Bowls: Non-porous and inert, glass resists odors and stains. Its transparency allows bakers to monitor dough rise without disturbing it. Glass retains heat moderately well and is dishwasher-safe, making it a practical choice for modern kitchens.
- Stainless Steel: Durable and lightweight, stainless steel bowls are excellent conductors of heat, which can be both beneficial and challenging. They cool quickly but can be pre-warmed to create an ideal rising environment. Highly resistant to scratches and corrosion, they’re easy to clean and sanitize.
- Ceramic & Stoneware: These materials offer excellent thermal mass, holding warmth longer than metal. Glazed versions are non-porous and easy to clean, though care must be taken to avoid thermal shock when exposing them to extreme temperature changes.
Surface Texture: Impact on Dough Handling
The interior texture of the bowl affects how easily the dough releases after proofing and how it interacts with moisture:
Rougher surfaces, such as those found in untreated wooden bowls, may cause the dough to stick slightly. To prevent this, it's common practice to lightly oil the bowl or dust it with flour before adding the dough. This not only protects the wood but also ensures smooth removal post-rise.
In contrast, smooth surfaces like glass, ceramic, or polished stainless steel allow for effortless release, especially when combined with a light coating of oil. Smooth bowls are also easier to clean and less likely to harbor residue or microbes, making them more hygienic for frequent use.
Covering Options: Maintaining Moisture and Temperature
While many dough bowls do not come with built-in lids, proper covering is essential during proofing to prevent the dough surface from drying out and forming a crust. Effective covering options include:
- Damp Cloth: A clean, lint-free kitchen towel moistened with warm water traps humidity and provides gentle insulation. Ideal for shorter rises at room temperature.
- Plastic Wrap: Creates an airtight seal, locking in moisture and preventing skin formation. Can be lightly oiled on the inner side to avoid sticking to the dough.
- Reusable Silicone Lids or Bowls with Lids: Eco-friendly and convenient, these provide a snug fit and allow visibility. Some are designed specifically for fermentation and include venting options.
- Pre-Warmed Towels: For cold environments, some bakers microwave or place towels on a radiator before draping them over the bowl. The added warmth accelerates yeast activity and supports consistent rise.
Regardless of method, ensure the cover is loose enough to allow expansion but tight enough to retain moisture. Avoid letting the cover directly touch sticky dough unless it’s oiled or lined.
| Design Feature | Functional Benefit | Best Use Case |
|---|---|---|
| Wide, Tapered Shape | Facilitates mixing and contains rising dough | All-purpose proofing and folding |
| 2–4 Quart Capacity | Accommodates doubling/tripling of dough | Standard bread and pizza dough batches |
| Wooden Construction | Natural insulation and moisture regulation | Long, slow ferments in stable environments |
| Smooth Interior (Glass/Steel) | Easy release and cleaning | Frequent baking and hygiene-sensitive settings |
| Covering Compatibility | Prevents drying and maintains warmth | Room-temperature or cold-weather proofing |
Tip: Always match your bowl choice to your baking routine. For overnight cold fermentation, a non-porous material like glass or stainless steel is preferable. For daily sourdough baking, a well-maintained wooden bowl can enhance consistency. Regardless of material, always clean thoroughly after use and avoid soaking wooden bowls to preserve their integrity.
How to Choose a Yeast Dough Bowl
Selecting the right yeast dough bowl is more than just picking a container—it's about creating the ideal environment for fermentation, texture development, and consistent baking results. The material, size, shape, and maintenance of your bowl all play crucial roles in how well your dough rises and performs. Whether you're a beginner or an experienced home baker, understanding these factors will help you make informed decisions and elevate your bread-making process.
Material: Functionality and Fermentation Support
The material of your dough bowl directly impacts temperature retention, moisture control, and ease of use. Different materials offer unique benefits depending on your baking style and climate.
- Stainless Steel: Durable, non-porous, and excellent for consistent temperature control. Ideal for warm kitchens or fast-rising doughs. Resists odors and doesn’t absorb moisture.
- Glass: Non-reactive and easy to clean. Allows you to see dough expansion clearly. Retains cool temperatures well, making it great for slow, cold fermentation.
- Wood (e.g., Olive or Maple): Naturally insulating and moisture-retentive. Creates a warm, humid microclimate that prevents dough from drying out—perfect for long rises or dry environments. Over time, wood can develop a natural "seasoning" that may enhance fermentation.
- Ceramic: Offers moderate insulation but can be porous if not glazed properly. Choose fully vitrified or sealed ceramic to prevent absorption of moisture and yeast residue.
Pro tip: In dry climates or air-conditioned spaces, wooden bowls help maintain hydration. In humid areas, stainless steel or glass prevent excess moisture buildup.
Size: Matching Capacity to Your Baking Needs
The right bowl size ensures proper dough expansion—typically, yeast dough doubles in volume during the first rise. Choosing incorrectly can lead to overflow or inadequate aeration.
- A 4-quart (3.8 L) bowl suits most standard bread recipes (1–2 loaves).
- For sourdough or large batches, opt for a 6–8 quart (5.7–7.6 L) bowl to allow room for growth.
- Beginners can start with a 2–3 quart (1.9–2.8 L) bowl for smaller test batches before scaling up.
- Always leave at least 50% headspace above the dough to prevent spillage and allow even rising.
Key consideration: If doubling a recipe, don’t just double the dough—upgrade to a significantly larger bowl to maintain airflow and structure.
Shape: Impact on Dough Development and Handling
While round bowls are most common, the shape influences how dough behaves during fermentation and shaping.
- Round Bowls: Promote even rising and are ideal for boules (round loaves). The curved sides support dough structure and make folding easier.
- Oval Bowls: Better suited for batards or sandwich loaves. Facilitate shaping and fit neatly in proofing baskets or refrigerators.
- Square/Rectangular Bowls: Maximize space in refrigerators or cabinets. Useful for banneton alternatives or sheet pan-style baking prep.
- Avoid wide, shallow bowls—they increase surface exposure, leading to skin formation on the dough.
Baker’s insight: A slightly tapered round bowl helps concentrate gases in the center, promoting a more uniform rise.
Cleaning and Maintenance: Long-Term Hygiene and Care
Proper cleaning ensures food safety and extends the life of your dough bowl. Porosity and material reactivity determine how easy it is to maintain.
- Non-porous materials (glass, stainless steel): Dishwasher-safe and resistant to bacterial growth. Wipe or wash with mild soap—no special care needed.
- Wooden bowls: Hand wash only with minimal water. Dry immediately and occasionally condition with food-grade mineral oil to prevent cracking.
- Ceramic: Check for cracks or chips in the glaze—damaged surfaces can harbor bacteria. Avoid thermal shock (e.g., hot water after refrigeration).
- Never use abrasive scrubbers on any dough bowl to avoid micro-scratches that trap residue.
Critical note: Residual yeast or starch buildup can affect fermentation over time—clean thoroughly after each use.
Price vs. Value: Investing in Baking Success
Dough bowls range from basic kitchenware to artisanal pieces. While cost matters, long-term value often outweighs initial savings.
- Budget Options ($5–$15): Plastic or basic ceramic bowls. Functional but may warp or absorb odors over time.
- Mid-Range ($15–$35): High-quality stainless steel, tempered glass, or food-safe wooden bowls. Best balance of durability and performance.
- Premium ($35+): Handcrafted wooden bowls, enameled cast iron, or specialty fermentation crocks. Often double as serving pieces.
- Consider multi-use bowls—those suitable for mixing, rising, and even serving—maximize value.
Smart investment: A well-made wooden or stainless steel bowl can last decades with proper care.
Additional Features to Consider
Beyond the basics, certain features can enhance your baking experience and results.
- Lids or Covers: Some bowls come with breathable cloths or plastic lids, reducing the need for additional coverings.
- Measurement Markings: Graduated quarts or liters help with scaling recipes without extra tools.
- Stackability: Important for compact storage, especially if you own multiple sizes.
- Non-slip Base: Prevents movement during folding or mixing, improving safety and control.
- Thermal Mass: Heavier materials (like cast iron or thick wood) retain warmth longer, aiding fermentation in cooler kitchens.
Pro tip: Pre-warm your bowl with warm water before adding dough in cold environments to kickstart fermentation.
Expert Recommendation: For most home bakers, a 4-quart stainless steel or tempered glass bowl offers the best combination of performance, durability, and ease of cleaning. If you frequently bake in dry conditions or prefer long, slow ferments, invest in a high-quality wooden bowl. Always prioritize function over aesthetics—your dough bowl is a working tool, not just a decorative piece.
| Material | Best For | Cleaning Method | Lifespan |
|---|---|---|---|
| Stainless Steel | Fast rises, humid climates, frequent use | Dishwasher safe, no special care | 10+ years |
| Glass | Cold fermentation, beginners, visibility | Dishwasher safe, non-porous | 8+ years (if not chipped) |
| Wood | Slow rises, dry environments, artisan baking | Hand wash, oil occasionally | 15+ years with care |
| Ceramic (glazed) | Decorative use, moderate baking | Hand or gentle machine wash | 5–7 years |
Final Tips for Optimal Dough Performance
- Use a damp cloth or plastic wrap: Cover the bowl to prevent a dry crust from forming on the dough surface.
- Pre-warm for winter baking: Rinse the bowl with warm water before adding dough to maintain ideal fermentation temperature (75–78°F).
- Avoid direct sunlight: Even with a cover, prolonged sun exposure can overheat the dough and kill yeast.
- Label your bowls: If using multiple bowls for sourdough starters or different flours, label them to avoid cross-contamination.
- Rotate your bowls: Having two bowls allows one to be in use while the other is cleaning or cooling.
Choosing the Right Bowl for Yeast Dough: A Practical Guide
Selecting the appropriate bowl for working with yeast dough is more than just a matter of convenience—it can significantly impact the texture, rise, and overall success of your bread. Different materials offer unique benefits depending on the type of dough, fermentation method, and kitchen environment. This guide explores seven common baking scenarios and recommends the best bowl materials to achieve optimal results every time.
Pro Tip: Always lightly oil or flour your bowl before adding dough to prevent sticking, regardless of the material. This simple step ensures easy removal and maintains the integrity of your dough's structure.
Best Bowl Materials by Baking Scenario
- Basic Bread Recipes
For everyday bread making, a glass mixing and rising bowl is an excellent choice. Glass is non-reactive, maintains its shape under pressure, and allows you to monitor the dough’s rise clearly. It won't warp during vigorous mixing and provides a stable, smooth surface that prevents dough from catching on rough edges.
- Working with Dry Dough
When handling drier, stiffer doughs that are prone to drying out, a wooden bowl is ideal. Wood has natural insulating properties and helps retain moisture around the dough during proofing. Its slightly porous surface also absorbs excess moisture, creating a balanced microclimate that prevents the outer layer from forming a dry crust—especially beneficial during long first rises.
- Large Batches of Dough
Stainless steel bowls are the top choice for large quantities of dough due to their strength, durability, and resistance to dents and corrosion. They’re lightweight yet sturdy, easy to clean in a dishwasher, and safe for use with metal tools. Their smooth interior allows for effortless scraping, and they can withstand frequent use in both home and professional kitchens.
- Sourdough or High-Hydration Dough
Wet, sticky doughs like sourdough or high-hydration levains benefit from bowls made of smooth, non-porous materials such as glass or stainless steel. These surfaces minimize sticking and make cleanup much easier. Unlike wood, which can absorb moisture and become difficult to sanitize, glass and steel resist bacterial growth and can be thoroughly cleaned after each use.
- Slow Fermentation in a Cool Environment
For extended cold ferments—such as overnight retards in the refrigerator—ceramic or clay bowls are highly effective. These materials have excellent thermal mass, helping maintain a consistent, cool temperature that slows yeast activity. This promotes flavor development in artisan breads, especially sourdough, by allowing complex acids and aromas to build gradually.
- Warm Dough Rising
In cooler kitchens, particularly during winter months, ceramic or wooden bowls help retain ambient warmth, creating a cozy environment for active yeast fermentation. Both materials act as insulators, reducing heat loss and supporting a steady rise. Placing a covered bowl inside a turned-off oven with a bowl of hot water enhances this effect even further.
- Multiple Doughs or Batch Proofing
When proofing several doughs at once—such as during weekend baking sessions or recipe testing—a set of matching glass or stainless steel bowls offers unmatched practicality. They’re stackable, easy to label, and allow you to see each dough’s progress at a glance. Their hygienic surfaces prevent cross-contamination, making them perfect for gluten-free or flavored doughs.
| Baking Scenario | Recommended Bowl Material | Key Benefits | Considerations |
|---|---|---|---|
| Basic Bread Recipes | Glass | Stable, non-reactive, easy to monitor rise | Can be heavy; avoid thermal shock |
| Dry Dough Handling | Wood | Moisture regulation, natural insulation | Requires hand washing; not dishwasher-safe |
| Large Dough Batches | Stainless Steel | Durable, lightweight, easy to clean | Less insulating; may cool quickly |
| High-Hydration Dough | Glass or Stainless Steel | Smooth surface, minimal sticking, sanitary | Avoid abrasive scrubbing to prevent scratches |
| Slow Fermentation (Cool) | Ceramic or Clay | Excellent heat retention, promotes flavor development | Heavy; fragile; requires careful drying |
| Warm Rising Conditions | Ceramic or Wood | Insulating properties retain warmth | Wood needs seasoning; ceramic can crack if overheated |
| Batch Proofing Multiple Doughs | Set of Glass or Stainless Steel Bowls | Hygienic, stackable, visually clear | Higher initial cost for full sets |
Expert Insight: Rotate your bowl materials based on the recipe and season. For example, use ceramic for slow winter ferments and stainless steel for quick summer bakes. Having a variety of bowl types expands your baking versatility and improves consistency across different conditions.
Care Tips for Dough Bowls by Material
- Glass: Wash with warm soapy water; avoid sudden temperature changes to prevent cracking.
- Stainless Steel: Dishwasher-safe; use non-abrasive cleaners to maintain shine.
- Wood: Hand wash only, dry immediately, and occasionally treat with food-grade mineral oil.
- Ceramic/Clay: Ensure fully glazed interior; hand wash and dry thoroughly to prevent odor retention.
Choosing the right bowl isn’t just about convenience—it’s a key factor in controlling fermentation, moisture, and dough development. By matching your bowl material to your baking goals, you enhance both the process and the final loaf. Whether you're a casual baker or a dedicated artisan, investing in the right tools makes a measurable difference in your bread-making journey.
Frequently Asked Questions About Dough Proofing Bowls
Q1: Are yeast dough bowls necessary?While a dedicated dough rising bowl is not strictly necessary, it can significantly enhance your bread-making process. Most home bakers can successfully rise dough in any standard mixing bowl—glass, metal, or plastic—as long as it's large enough to accommodate expansion. However, specialized dough bowls are designed to create an optimal environment for fermentation.
- Wooden dough bowls: Naturally absorb excess moisture and help regulate temperature, providing a stable microclimate for consistent rising.
- Porcelain or stoneware bowls: Retain heat well and often come with lids to trap humidity, preventing the dough surface from drying out.
- Non-reactive materials: Ensure no chemical interaction with acidic doughs like sourdough, preserving flavor and texture.
For casual bakers, a regular kitchen bowl works fine. But serious bakers may appreciate the improved consistency and control offered by a purpose-built dough bowl.
Q2: What do I put in my dough bowl?A dough bowl is specifically used for mixing, fermenting, and proofing bread dough during the baking process. Inside the bowl, you’ll typically place:
- Freshly mixed dough: After combining flour, water, yeast (or starter), salt, and other ingredients.
- A light coating of oil or flour: To prevent sticking—especially important for high-hydration or sticky doughs.
- A damp cloth or lid: To cover the bowl and maintain humidity, which prevents a dry crust from forming on the dough surface.
Some bakers also use their dough bowls for cold fermentation (retarding) by placing the covered bowl in the refrigerator overnight. This slow rise enhances flavor development, particularly in artisan sourdough and baguette recipes.
Q3: Do you need a special bowl for proofing dough?No, you don’t need a special bowl for proofing dough—any clean, non-leaking container that provides enough space for the dough to double (or even triple) in size will work effectively. That said, using a dedicated proofing bowl offers several advantages:
| Feature | Regular Kitchen Bowl | Dedicated Proofing Bowl |
|---|---|---|
| Material | Various (glass, stainless steel, plastic) | Often wood, ceramic, or food-grade plastic with thermal properties |
| Heat Retention | Moderate to low | High—helps maintain consistent temperature |
| Lid Availability | Rare or requires separate cover | Often includes a fitted lid for humidity control |
| Capacity Markings | Usually absent | Frequently includes volume indicators to track rise |
| Cost & Accessibility | Inexpensive and widely available | Higher cost but tailored for baking performance |
If you bake bread regularly, investing in a quality proofing bowl can streamline your process and improve results. For occasional use, a standard mixing bowl with a towel or plastic wrap works perfectly well.
Q4: Can I use a plastic bowl for proofing dough?Yes, a food-safe plastic bowl is perfectly suitable for proofing dough, provided it meets a few basic criteria:
- Size: Choose a bowl at least 2–3 times larger than the initial dough volume to allow room for expansion without overflow.
- Material: Use BPA-free, non-reactive plastic that won’t leach chemicals or absorb odors.
- Cleanliness: Ensure the bowl is thoroughly cleaned before use, as residual grease or detergent can inhibit yeast activity.
- Shape: Round bowls are ideal—they encourage even rising and make it easier to perform stretch-and-fold techniques.
Plastic bowls are lightweight, durable, and often come with measurement markings, making them convenient for tracking dough rise. Just avoid placing hot dough directly into cold plastic, as extreme temperature changes may cause warping or cracking.
Q5: How do you keep a dough bowl warm?Creating a warm, draft-free environment is key to encouraging consistent and efficient dough fermentation. Here are several proven methods to keep your dough bowl warm:
- Oven with light on: Place the covered bowl in a turned-off oven with just the interior light on—it generates gentle, steady warmth ideal for rising.
- Slightly warmed oven: Heat the oven to the lowest setting (around 100°F/38°C), turn it off, then place the dough inside with the door closed.
- Warm towel method: Dampen a kitchen towel, warm it in the microwave for 15–20 seconds, and drape it over the bowl to retain heat and moisture.
- Proofing box or yogurt maker: Specialized appliances that maintain precise temperature and humidity levels for optimal fermentation.
- On top of the fridge: Appliances generate ambient heat—this spot is naturally warmer and often draft-free.
- Instant Pot or sous-vide setup: Use a water bath or smart cooker with a “yogurt” setting to maintain a steady 75–85°F (24–29°C) environment.
The ideal proofing temperature for most yeast doughs is between 75°F and 85°F (24°C–29°C). Too cold, and fermentation slows; too hot, and you risk killing the yeast or developing off-flavors. Monitoring with a thermometer ensures best results.