For cat owners managing outdoor or semi-outdoor felines, providing a clean, accessible, and hygienic place for elimination is essential. Unlike indoor setups, an outdoor litter box faces exposure to rain, wind, temperature extremes, and pests. A poorly designed system quickly becomes unusable—overflowing, muddy, or avoided entirely by cats. The solution lies in building a litter box that’s not only functional but engineered to endure the elements while maintaining cleanliness and appeal for your cat.
A well-constructed outdoor litter box improves sanitation, reduces odor migration, and encourages consistent use. More importantly, it protects your cat’s health by minimizing contact with contaminated soil and standing water. This guide walks through every critical element: materials, design principles, placement strategies, maintenance routines, and real-world adjustments that ensure lasting performance.
Design Principles for Longevity and Functionality
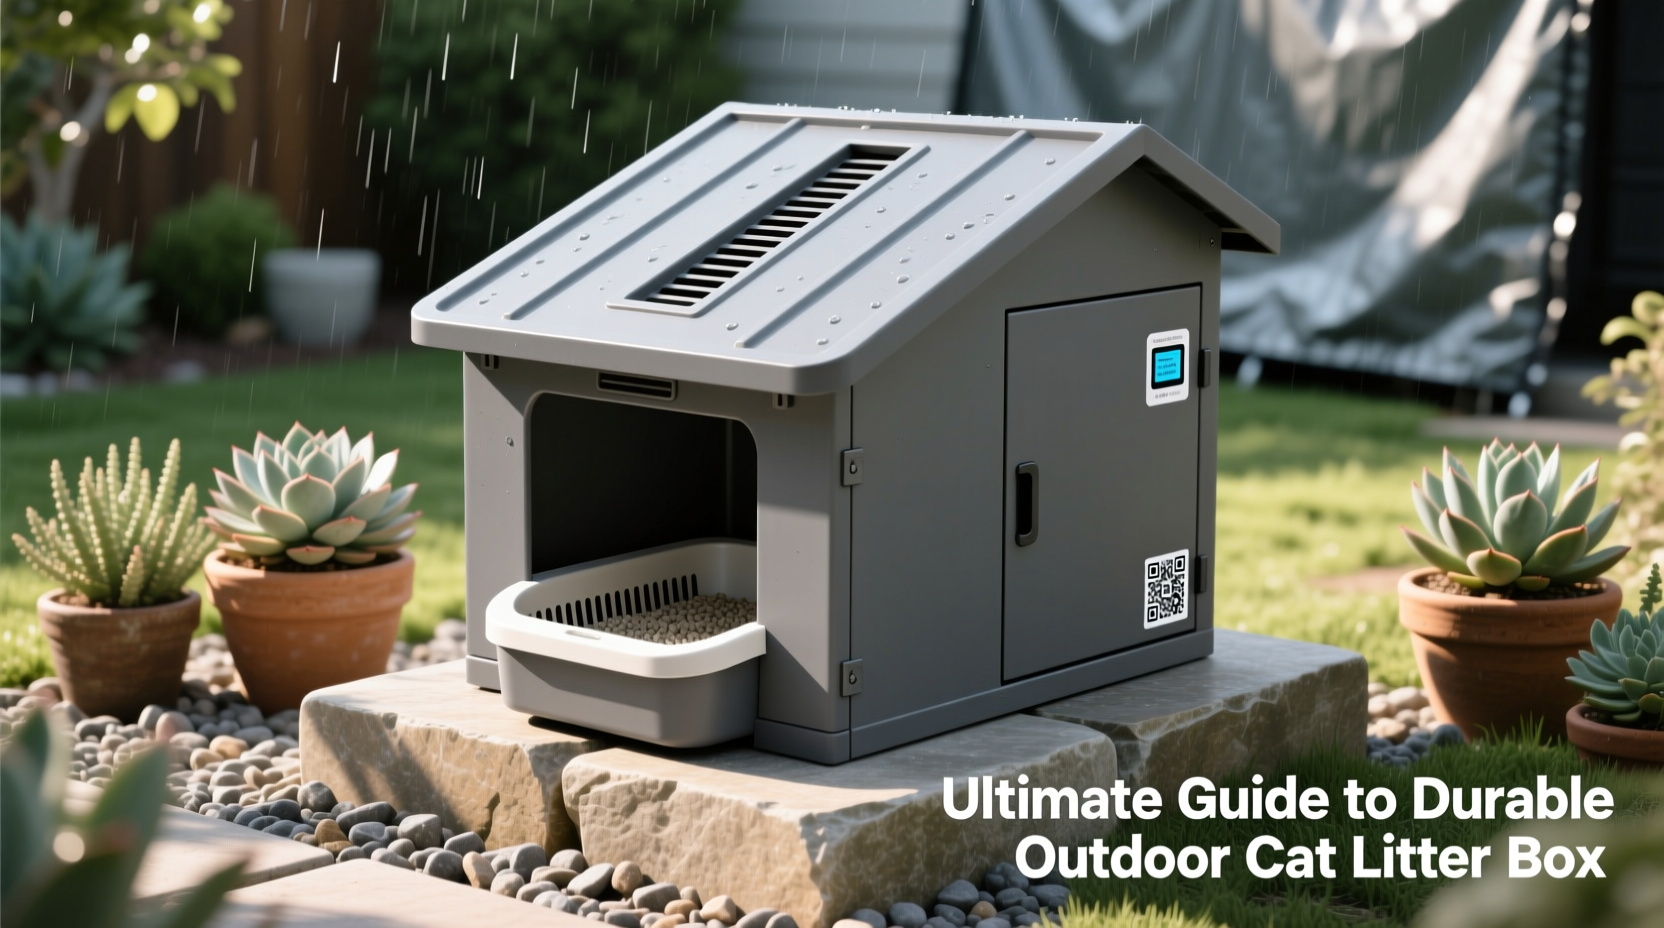
The foundation of a successful outdoor litter box is thoughtful design. It must balance accessibility for cats, protection from weather, ease of cleaning, and resistance to degradation. Key considerations include height, enclosure style, drainage, and insulation against moisture.
Elevating the box slightly off the ground prevents water pooling during heavy rains. A sloped roof directs runoff away from the interior. Ventilation slots near the top allow air circulation without letting in rain, reducing ammonia buildup from waste. The entrance should be large enough for adult cats but shielded to block wind and curious wildlife.
Tip: Use a hinged, lockable lid to prevent raccoons and other animals from accessing the box at night.Size matters. A single cat requires a minimum space of 18” x 18”, but larger breeds or multi-cat households need proportionally bigger boxes. Overcrowding leads to avoidance, so plan accordingly. If multiple cats use the space, consider dividing the interior into zones or installing dual compartments.
Choosing Weather-Resistant Materials
Material selection directly impacts durability. Many DIY attempts fail because they rely on untreated wood or flimsy plastic that warps, cracks, or rots within months. To withstand UV exposure, moisture, and temperature swings, only high-performance materials should be used.
| Material | Durability | Maintenance Needs | Best For |
|---|---|---|---|
| Marine-grade plywood | ★★★★☆ | Seal annually | Framed enclosures |
| Recycled poly-lumber | ★★★★★ | None | Full structure builds |
| Rotomolded plastic | ★★★★☆ | Low | Pre-fab bases |
| Pressure-treated pine | ★★☆☆☆ | Seal biannually | Budget builds (with coating) |
| Stainless steel liner | ★★★★★ | Wipe clean | Interior lining |
Poly-lumber—a composite made from recycled plastics—is ideal for outdoor applications. It resists rot, doesn’t absorb moisture, and never needs painting. While more expensive upfront, its lifespan exceeds 15 years with zero maintenance. Pair it with UV-resistant sealants if using wood, and always line the interior with a non-porous, washable surface like marine vinyl or stainless steel sheeting.
“Outdoor litter systems fail most often due to moisture retention. Using non-absorbent linings and ensuring airflow can extend usability by years.” — Dr. Lena Torres, Feline Environmental Specialist
Step-by-Step: Building Your Weatherproof Litter Box
Follow this sequence to assemble a robust, long-lasting unit tailored for outdoor conditions.
- Measure and cut frame pieces using marine plywood or poly-lumber to desired dimensions (e.g., 24” x 24” base, 16” walls).
- Assemble the base and sides with exterior-grade screws and waterproof wood glue. Reinforce corners with galvanized brackets.
- Install a removable tray liner made of food-grade plastic or stainless steel for easy cleaning and replacement.
- Add a slanted roof using polycarbonate panels or asphalt shingles over plywood; overhang edges by at least 2 inches.
- Attach a front flap or tunnel entrance made of flexible rubber or PVC to block rain and wind while allowing cat access.
- Drill small ventilation holes near the top on two opposing sides, covered internally with mesh to deter insects.
- Mount the box on concrete blocks or short legs to elevate it 2–3 inches above ground level.
- Seal all joints externally with silicone caulk rated for outdoor use.
Once assembled, test stability in mild wind and simulate rainfall with a hose to check for leaks or pooling.
Maintenance Checklist for Year-Round Performance
Even the best-built box degrades without proper upkeep. Establish a routine to preserve hygiene and structural integrity.
- Remove waste daily using a scooper designed for clumping litter.
- Replace litter fully every 7–10 days, depending on usage.
- Wash interior surfaces monthly with pet-safe disinfectant (avoid bleach).
- Inspect seals and joints quarterly for cracking or wear.
- Clean ventilation mesh biannually to prevent clogging.
- Reapply protective sealant to wooden parts every 6–12 months.
- Check for pest intrusion signs (droppings, nesting) monthly.
Real-World Example: Community Cat Shelter Success
In Portland, Oregon, a neighborhood cat caretaker installed five custom outdoor litter stations for a managed colony of 14 cats. Each unit was built from recycled poly-lumber with stainless steel liners and polycarbonate roofs. Positioned under partial cover near feeding zones, they were elevated on gravel pads for drainage.
After one year, all units remained fully functional despite frequent rain and winter freezes. Volunteers reported near-daily use and minimal odor complaints from neighbors. By rotating disposable liners and scheduling weekly cleanings, contamination stayed low and parasite transmission decreased compared to previous open-sand areas. The project demonstrated that durability and feline acceptance go hand-in-hand when design meets practicality.
Common Pitfalls and How to Avoid Them
Many outdoor litter solutions fail due to avoidable mistakes. Recognizing these early prevents wasted effort and expense.
- Using garden soil or sand as filler: These retain moisture, promote bacterial growth, and attract pests. Always use commercial, clumping, clay-based or silica litter.
- Placing the box too close to walls: Poor airflow increases odor retention. Allow at least 6 inches of clearance around all sides.
- Ignoring local wildlife: In areas with raccoons or rodents, secure lids with childproof latches.
- Overlooking sun exposure: Direct afternoon sunlight can make interiors unbearably hot. Face the entrance north or northeast for cooler operation.
Frequently Asked Questions
Can I convert a storage bin into an outdoor litter box?
Yes, but only if modified properly. Choose a large, opaque, lidded tote made of thick HDPE plastic. Cut a cat-sized entry in one side, add ventilation near the top, and elevate it on bricks. Line the interior with a removable tray for easier cleaning. Avoid transparent bins—they degrade faster under UV light.
How do I stop rain from getting inside?
Adequate overhang, a slanted roof, and a tunnel-style entrance are key. Install a flexible flap at the opening to act as a rain shield while still allowing cats to enter freely. Position the box under eaves or install a standalone canopy for added protection.
Will cats actually use an outdoor box consistently?
Most will, provided the box is clean, dry, and located in a quiet, familiar area. Introduce it gradually by placing some used litter inside to create scent familiarity. Monitor usage for the first week and adjust placement if avoidance occurs.
Final Recommendations and Next Steps
Creating a durable, weatherproof outdoor cat litter box isn't just about convenience—it's a commitment to animal welfare and environmental hygiene. With the right materials, smart engineering, and consistent care, you can provide a reliable solution that lasts for years. Whether supporting a single outdoor cat or managing a community colony, investing time in a well-built system pays dividends in health, cleanliness, and peace of mind.
💬 Ready to build yours? Start by sketching your design, sourcing UV-resistant materials, and sharing your progress with fellow cat caretakers. Your efforts could inspire a cleaner, safer environment for cats everywhere.