For many dogs, especially larger breeds or those with joint issues, eating from floor-level bowls can cause strain on the neck, shoulders, and spine. A properly designed raised dog bowl stand promotes better posture during meals, improves digestion, and supports overall joint health. While commercial options exist, they often lack customization, durability, or aesthetic appeal. Building your own custom raised dog bowl stand allows you to tailor height, materials, and design to your pet’s specific needs—and it’s more affordable than you might think.
Why Elevation Matters: The Health Benefits of Raised Bowls
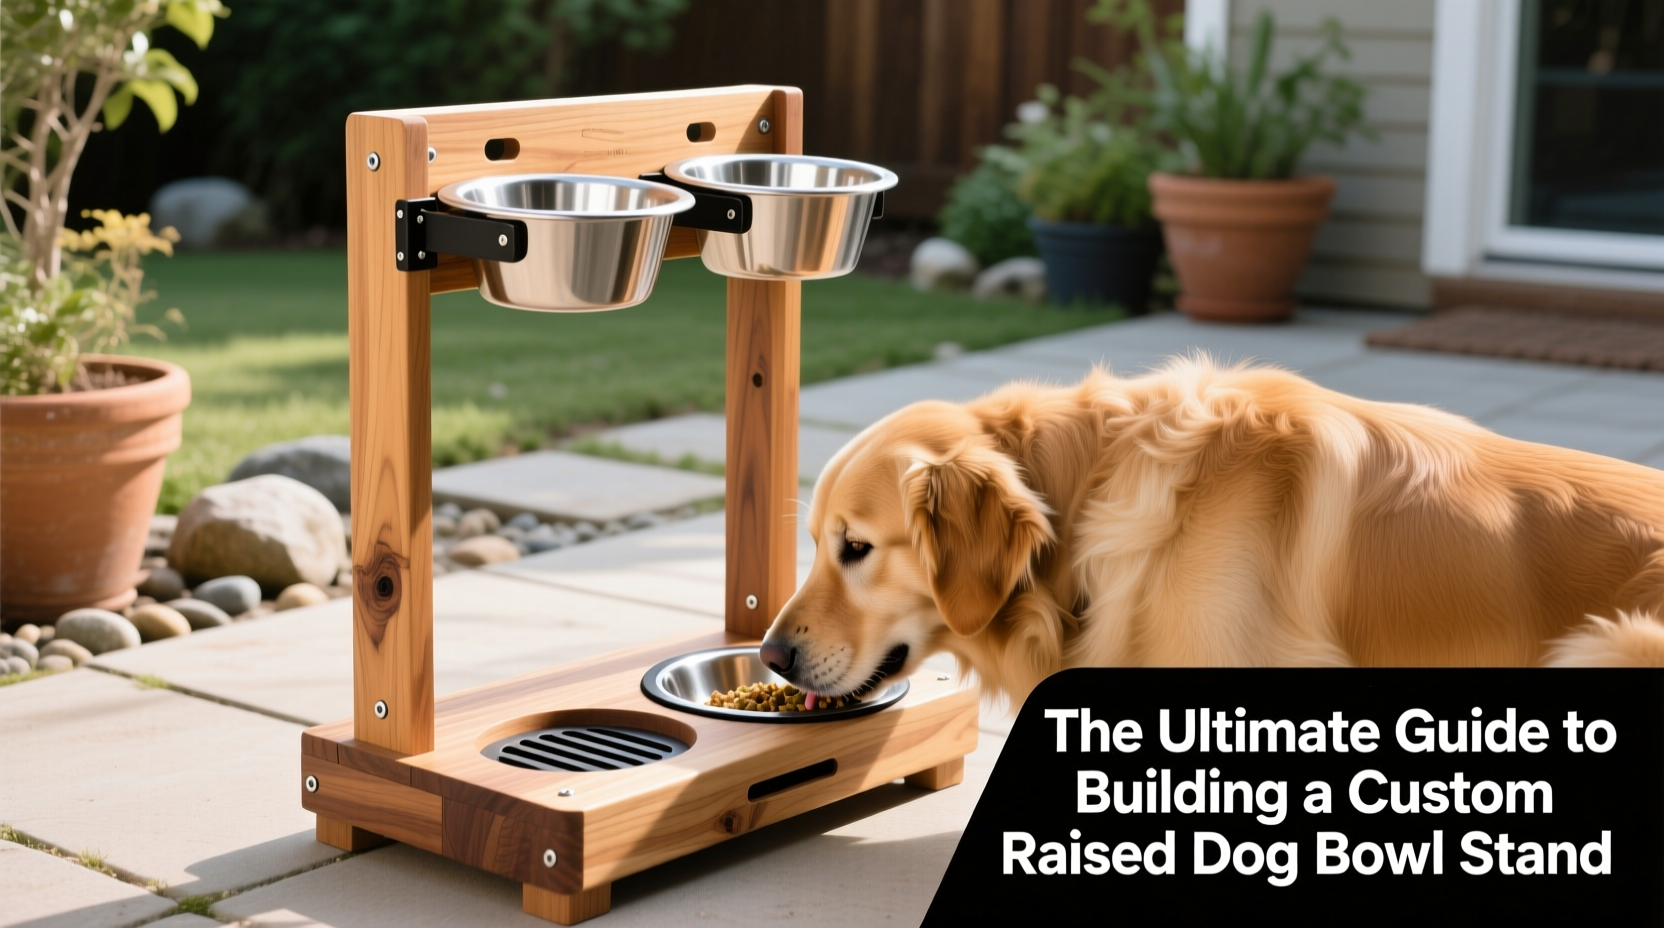
Dogs that eat with their heads down are forced into an unnatural posture. Over time, this can contribute to musculoskeletal stress, particularly in large or deep-chested breeds like Great Danes, German Shepherds, and Labradors. Elevated feeders help align the esophagus with the stomach, which may reduce the risk of swallowing excess air—a known contributor to bloat (gastric dilatation-volvulus), a life-threatening condition.
“Elevating food and water bowls can significantly reduce cervical strain in large-breed dogs, especially those showing early signs of arthritis.” — Dr. Lena Reyes, DVM, Canine Orthopedic Specialist
Additionally, older dogs or those recovering from injury benefit from reduced bending, making mealtimes more comfortable and encouraging consistent hydration and nutrition intake.
Tip: Measure your dog from the ground to the top of their shoulder (withers) to determine the ideal bowl height—typically 6–12 inches below this point.Design Considerations Before You Begin
Before selecting materials or tools, assess your dog’s size, eating habits, and your home environment. A poorly designed stand can tip over, harbor bacteria, or become a tripping hazard.
- Breed & Size: Larger dogs require sturdier builds and higher stands; small breeds need lower platforms.
- Stability: The base must be wide enough to prevent tipping when your dog leans into the bowls.
- Material Safety: Avoid treated woods or finishes with toxic chemicals. Opt for pet-safe sealants.
- Maintenance: Choose materials that resist moisture and are easy to clean.
- Aesthetics: Match the stand to your home decor—hardwood finishes, painted wood, or metal accents can blend seamlessly.
Choosing the Right Height
The optimal height ensures your dog eats with a neutral spine. Use this simple formula:
- Measure your dog from the floor to the top of their shoulder (withers).
- Subtract 4–6 inches for food bowls (for proper neck alignment).
- Subtract 2–4 inches for water bowls (slightly lower to encourage drinking).
Example: A Labrador with a wither height of 24 inches should have food bowls at approximately 18–20 inches high.
Step-by-Step Guide to Building Your Custom Stand
This guide assumes basic woodworking skills and access to common tools. The design uses sturdy hardwood and pocket-hole joinery for strength and clean lines.
Materials Needed
| Item | Quantity | Notes |
|---|---|---|
| Hardwood boards (e.g., oak, maple) | 4 pieces | Legs: 2”x2”x desired height x 4; Top frame: 1”x6” |
| Screws (2.5 inch) | 8–12 | Wood screws with pilot holes recommended |
| Wood glue | 1 bottle | Pet-safe, non-toxic formula |
| Sandpaper (120 & 220 grit) | 2–3 sheets | For smoothing edges |
| Pet-safe wood finish or sealant | 1 can | Water-based polyurethane recommended |
| Non-slip pads | 4 | Attach to bottom of legs |
Tools Required
- Circular saw or miter saw
- Drill/driver
- Kreg Jig (optional, for pocket holes)
- Tape measure
- Clamps
- Square
Construction Steps
- Cut the legs: Cut four legs to your measured height using a miter saw for precision.
- Build the top frame: Cut two 1x6 boards to fit the width and depth of your bowl setup (typically 16\"x12\"). Join them into a rectangle using corner braces or pocket screws.
- Attach legs: Position one leg at each corner beneath the frame. Drill pilot holes and secure with screws and wood glue for added strength.
- Reinforce joints: Add triangular corner blocks or use angled bracing if your dog is particularly active.
- Sand thoroughly: Start with 120-grit, then finish with 220-grit for a smooth surface.
- Apply sealant: Coat all surfaces with a pet-safe finish. Allow 24 hours to cure before use.
- Add non-slip feet: Attach rubber pads to the bottom of each leg to protect floors and prevent sliding.
Real-Life Example: Helping Max Eat Pain-Free
Max, a 7-year-old Golden Retriever from Portland, began showing reluctance to eat his evening meal. His owner noticed he would dip his front paws forward, stretching awkwardly to reach his bowl. A vet visit revealed early-stage hip dysplasia and mild arthritis in his shoulders.
After researching elevated feeders, Max’s owner built a custom stand using walnut wood, set at 14 inches high—perfect for Max’s 22-inch wither height. Within days, Max stood straighter during meals and finished his food without hesitation. Six months later, his vet noted improved muscle tone around the neck and reduced strain on his forelimbs.
The stand also featured a removable tray for easy cleaning and blended into the kitchen’s modern farmhouse aesthetic—proof that function and form can coexist.
Do’s and Don’ts of DIY Dog Bowl Stands
| Do’s | Don’ts |
|---|---|
| Use hardwoods like maple, birch, or poplar | Use particleboard or MDF (swells with moisture) |
| Seal all surfaces against spills | Leave raw wood exposed |
| Anchor the stand if your dog is rambunctious | Make it too narrow or top-heavy |
| Include drainage or a catch tray | Allow bowls to sit directly on wood |
| Customize height per your dog’s needs | Use one-size-fits-all measurements |
Frequently Asked Questions
Can raised bowls cause bloat?
While some older studies suggested a link, recent veterinary research indicates that elevation does not cause bloat. In fact, for certain breeds, it may reduce air ingestion during meals. However, genetics, eating speed, and exercise timing play larger roles. Always consult your vet if your dog is at high risk.
How do I clean a wooden dog bowl stand?
Wipe down the surface daily with a damp cloth and mild soap. For deeper cleaning, remove the bowls and use a pet-safe disinfectant. Avoid soaking the wood. Reapply sealant every 6–12 months to maintain protection.
Can I build a stand for multiple dogs?
Absolutely. Design a wider top frame with space for two sets of bowls, ensuring each is positioned within easy reach. Use extra support legs in the center if spanning more than 24 inches.
Final Checklist Before Use
- ✅ Measured dog’s wither height accurately
- ✅ Selected non-toxic, durable materials
- ✅ Built a stable, wobble-free structure
- ✅ Sanded all edges to prevent splinters
- ✅ Applied pet-safe sealant to all surfaces
- ✅ Attached non-slip pads to legs
- ✅ Tested with bowls and water/food weight
Conclusion: Build Comfort, One Meal at a Time
A custom raised dog bowl stand isn’t just a piece of furniture—it’s an investment in your pet’s long-term comfort and health. By taking the time to measure, design, and build thoughtfully, you create a solution that fits your dog perfectly and complements your home. Whether you’re supporting an aging companion or proactively caring for a growing pup, this project delivers lasting benefits with minimal cost and effort.
💬 Have you built a custom feeder for your dog? Share your design tips, challenges, or photos in the comments—your experience could inspire another pet parent to take action today.