A dog leash is only as strong as its weakest component—and for many pet owners, that weak point often becomes the clasp. Over time, metal clasps can corrode, springs weaken, or latches fail, posing a serious risk during walks. Rather than replacing the entire leash, you can save money and maintain consistency in your gear by simply swapping out the clasp. With the right tools and technique, this repair is straightforward and safe. This guide walks you through every stage of replacing a dog leash clasp, ensuring your pet stays secure while extending the life of your favorite walking companion.
Why Replace Your Leash Clasp?
The clasp is one of the most frequently stressed parts of a dog leash. It endures constant tugging, exposure to moisture, dirt, and sometimes salt from winter roads. Even high-quality hardware can degrade over time. A failing clasp might not open smoothly, close securely, or may snap under pressure—especially dangerous with strong or reactive dogs.
Replacing the clasp proactively prevents accidents. It’s also more sustainable than discarding an otherwise functional leash. Many leashes are made from durable materials like nylon, biothane, or leather, which last years. Upgrading just the clasp keeps performance high without unnecessary waste.
“Inspecting and maintaining leash hardware should be part of routine pet gear care. A broken clasp is one of the leading causes of escape incidents.” — Dr. Lena Torres, Certified Pet Safety Instructor
Tools and Materials You’ll Need
Before starting, gather the necessary supplies. Most of these items are commonly found at hardware stores or online pet supply retailers.
- New clasp: Choose a heavy-duty, rust-resistant metal (like solid brass or marine-grade stainless steel) that matches your leash width.
- Leather punch or awl: For creating clean holes in thick material.
- Rivet tool or stitching needle and nylon thread: Depending on whether you're riveting or sewing.
- Measuring tape or ruler: To align the clasp correctly.
- Scissors or utility knife: For trimming excess material.
- Lighter or fray check (for synthetic leashes): To seal cut ends and prevent unraveling.
- Clamp or vise (optional): Helps hold the leash steady during installation.
Step-by-Step Guide to Replacing the Clasp
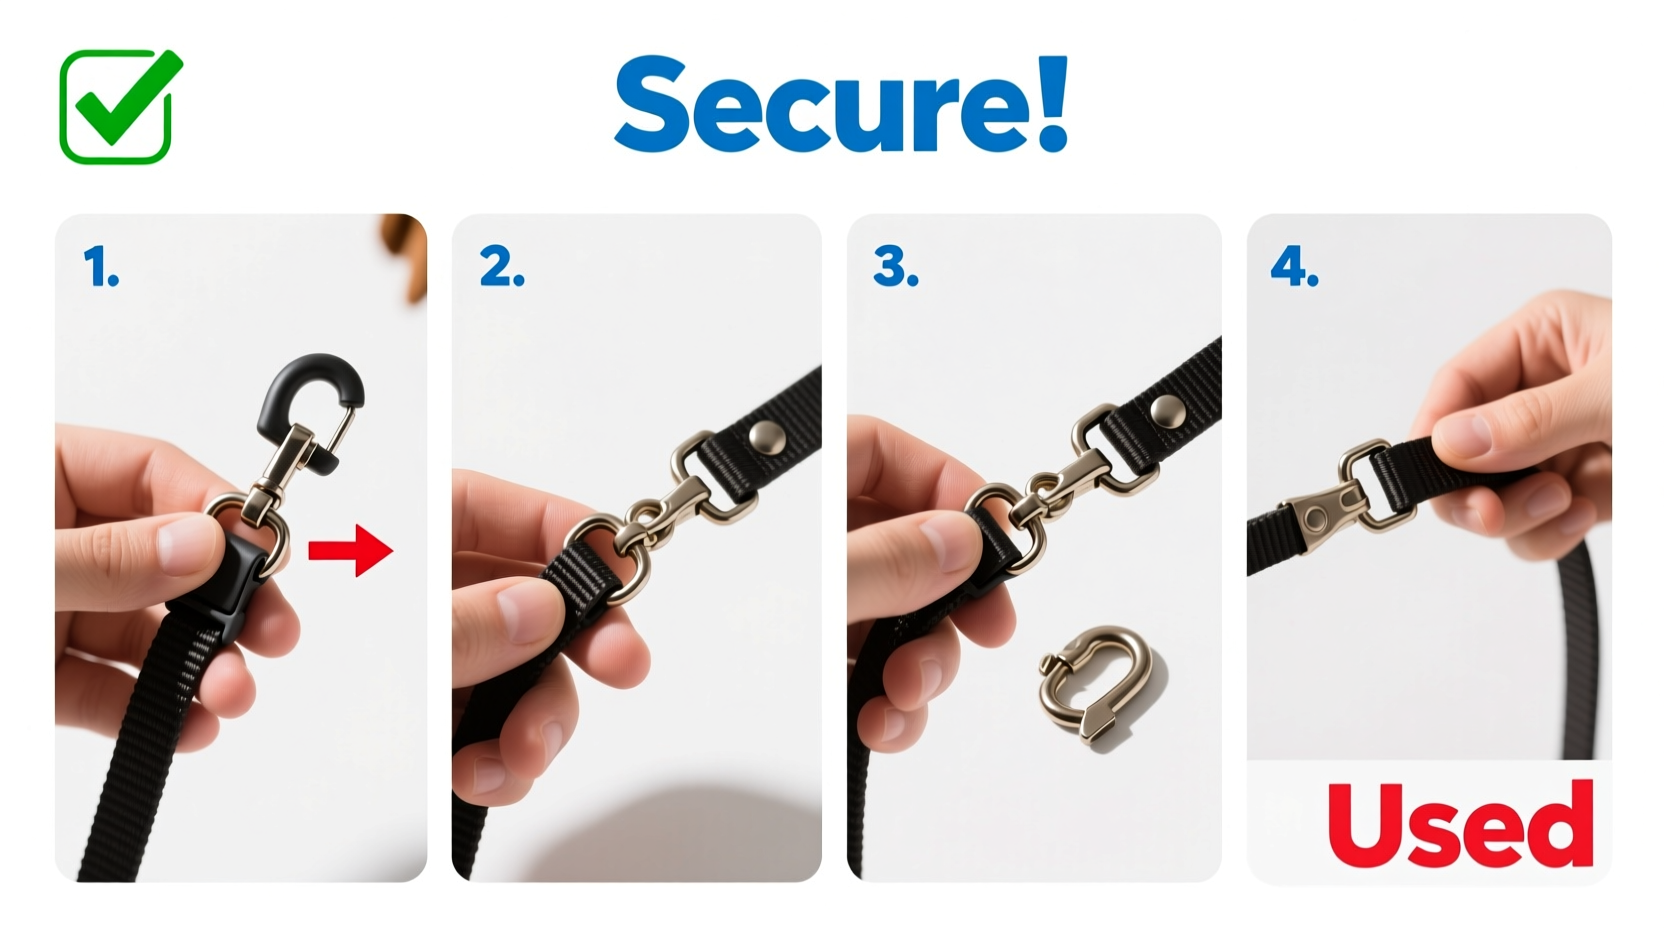
- Remove the Old Clasp: If the clasp is attached with a rivet, use a rotary tool or small drill bit to carefully grind down the rivet head. For sewn clasps, use a seam ripper or small blade to cut stitches cleanly without damaging the leash webbing.
- Clean the Leash End: Once the old hardware is removed, wipe the end of the leash with a damp cloth. Inspect for fraying or internal damage. Trim any loose threads or damaged fibers.
- Position the New Clasp: Slide the new clasp onto the leash end. Align it so that when closed, the clasp sits flush and allows full range of motion. Mark the hole location with a fabric pen or chalk.
- Punch the Hole: Use a leather punch or awl to create a clean, centered hole through the leash. Match the diameter to the attachment pin on the new clasp. For thick biothane or layered nylon, clamp the leash to avoid slipping.
- Attach the Clasp: Insert the clasp’s prong through the hole. If using a rivet, place the cap on the back and compress with a rivet setter and hammer or handheld rivet press. For sewing, use a saddle stitch with heavy-duty nylon thread for maximum strength.
- Secure and Test: Once fastened, tug firmly on the clasp to confirm it doesn’t pull through. Operate the latch multiple times to verify smooth function. Check that the leash swings freely without catching.
Choosing the Right Replacement Clasp
Not all clasps are created equal. The wrong type can compromise safety or comfort. Below is a comparison of common clasp types to help you choose wisely.
| Type | Best For | Pros | Cons |
|---|---|---|---|
| Spring Snap Hook | Small to medium dogs, quick attachment | Fast to use, widely available | Can fail under sudden force; spring wears over time |
| Heavy-Duty Lobster Claw | Active or large breeds | Strong grip, reliable latch | Slightly slower to operate |
| Trigger Clip | Daily walks, service dogs | Ergonomic, easy one-handed use | More expensive; complex mechanism |
| Side-Release Buckle (non-metal) | Training leads, lightweight use | Easy adjustment | Not ideal for high-tension situations |
For dogs that pull or lunge, opt for a lobster claw or trigger clip rated for at least 3x your dog’s weight. Look for clasps labeled “load tested” or “break strength: 500+ lbs” for added assurance.
Mini Case Study: Preventing a Park Escape
Sarah, a dog owner in Portland, noticed her Australian Shepherd’s leash clasp was stiff and occasionally failed to click shut. She delayed replacement, assuming it would hold. During a walk at a busy off-leash park, the clasp popped open when her dog lunged at a squirrel. The dog bolted into traffic before being safely recovered by a bystander.
Afterward, Sarah replaced the clasp herself using a marine-grade stainless steel trigger clip. She now inspects all her pet gear monthly. “I learned the hard way,” she said. “Five minutes of maintenance could’ve prevented a terrifying situation.” Her story underscores how a simple hardware upgrade can prevent real danger.
Common Mistakes to Avoid
- Using undersized clasps: A 3/4-inch clasp on a 1-inch leash creates a stress point and risks slippage.
- Skipping alignment: Misaligned holes cause uneven wear and reduce clasp lifespan.
- Ignoring material compatibility: Some metals react with certain coatings—e.g., galvanized steel can corrode when used with treated biothane.
- Over-tightening rivets: Can crush webbing and weaken structural integrity.
Checklist: Safe Clasp Replacement in 7 Steps
- ☐ Select a high-strength, corrosion-resistant clasp
- ☐ Remove old clasp carefully without damaging leash
- ☐ Clean and inspect the leash end for wear
- ☐ Align and mark the new hole position accurately
- ☐ Punch a clean, properly sized hole
- ☐ Secure clasp with rivet or reinforced stitching
- ☐ Test function and strength before first use
Frequently Asked Questions
Can I replace a clasp on a leather leash the same way?
Yes, but use a diamond-point awl for cleaner holes in dense leather. Consider using a Chicago screw or rivet designed for leather instead of plastic inserts. Seal the cut edge with leather conditioner to prevent drying.
How often should I check my leash clasp?
Inspect it before every walk. Perform a deeper check—looking for cracks, rust, or spring fatigue—every month. Replace immediately if you notice any signs of weakness.
Is sewing stronger than riveting?
It depends. A well-executed saddle stitch with bonded nylon thread can exceed the strength of a rivet, especially on flexible materials. However, rivets offer quicker installation and consistent results for DIY repairs.
Final Thoughts and Action Step
Your dog’s safety hinges on reliable equipment. A worn clasp is a ticking hazard—one that’s both preventable and inexpensive to fix. By replacing it yourself, you gain control over quality, fit, and timing. Whether you’re maintaining a favorite leash or upgrading for a growing pup, this small repair delivers big peace of mind.
💬 Take action today: Pull out your dog’s leash and test the clasp. If it sticks, wobbles, or shows rust, start your replacement project now. Share your experience or ask questions in the comments—help other pet owners stay safe and informed!