Pet owners know the joy of traveling with their furry companions—but they also know the aftermath: a car interior blanketed in stubborn pet hair. Whether it's fine undercoat from a cat or thick shedding from a Labrador, pet hair clings to fabric, leather, and crevices with surprising tenacity. Over time, accumulated hair can dull upholstery, trigger allergies, and make your vehicle look unkempt. The good news is that removing pet hair from car seats doesn’t require expensive tools or professional detailing—just the right techniques and a little consistency.
This guide delivers actionable, science-backed strategies to clean your car seats thoroughly and efficiently. From everyday hacks using household items to long-term prevention tips, you’ll learn how to keep your vehicle looking fresh while still enjoying road trips with your four-legged friend.
Why Pet Hair Sticks So Stubbornly to Car Seats
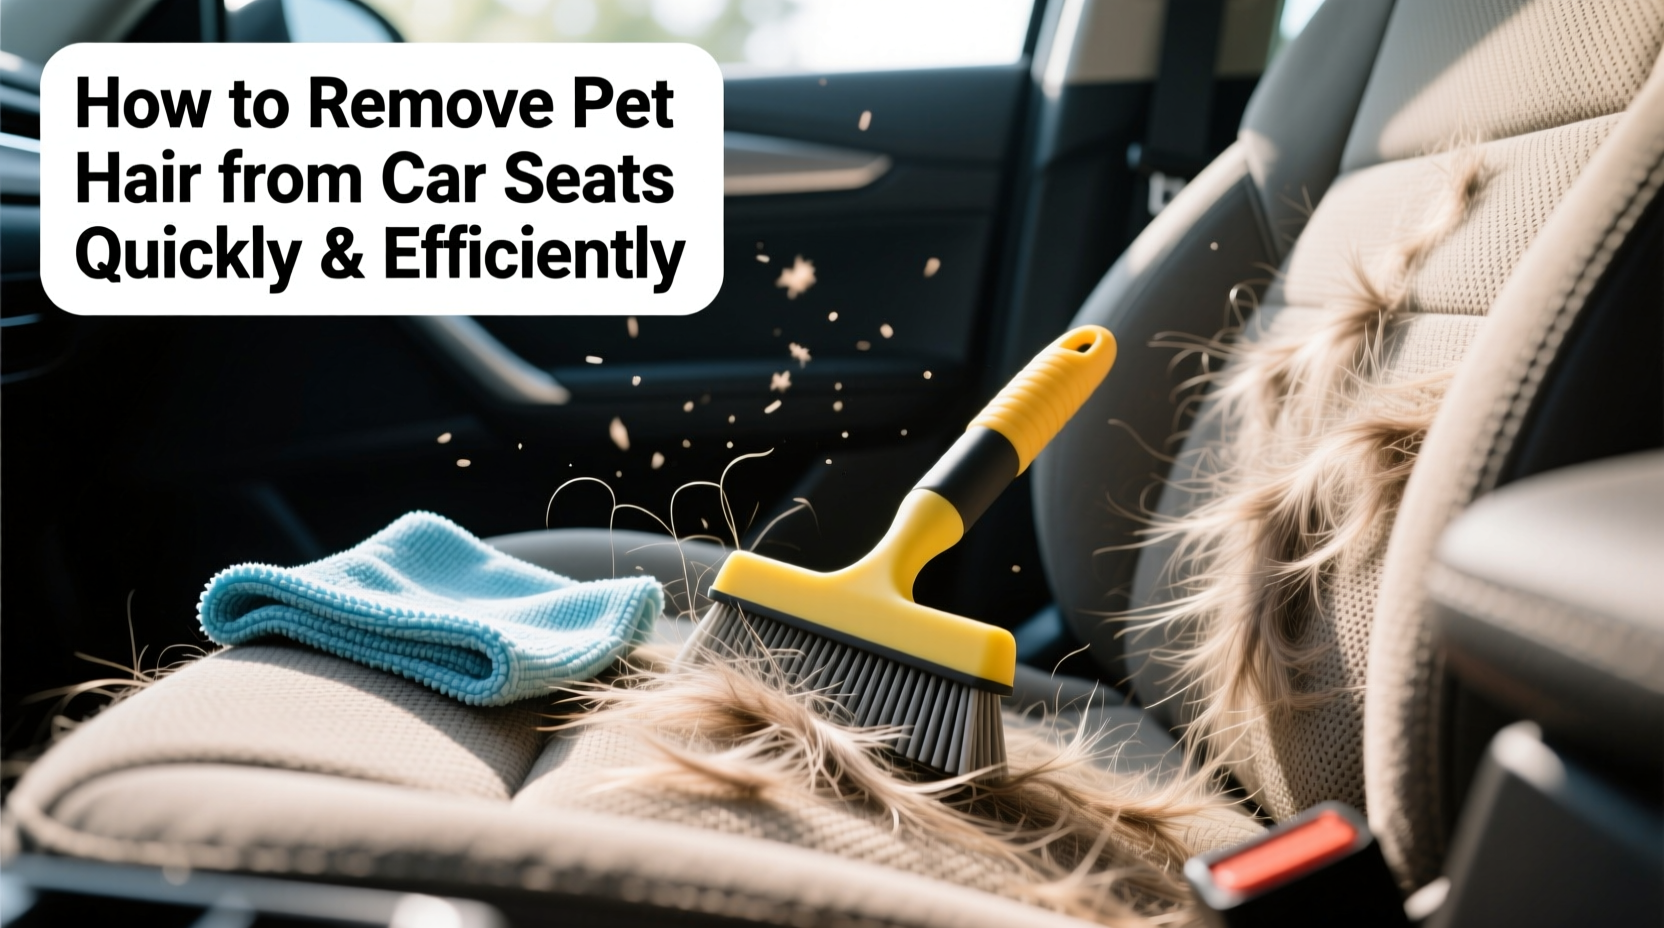
Pet hair isn’t just unsightly—it’s engineered by nature to cling. Most animal fur carries a static charge, especially when rubbed against synthetic fabrics common in car interiors. This electrostatic attraction causes hair to leap onto surfaces and resist removal through casual brushing or wiping. Additionally, pet hair often comes with dander and oils from the skin, which can act like a mild adhesive, further anchoring strands to seat fibers.
Car seats, particularly fabric ones, have textured weaves that trap hair deep within. Cracks between seat cushions, headrests, and along seams become reservoirs for loose fur. Without targeted cleaning, these areas accumulate layers over time, making future cleanups more difficult.
“Pet hair buildup isn't just cosmetic—it can degrade fabric integrity and harbor allergens. Regular maintenance is essential for both hygiene and material longevity.” — Dr. Lena Peterson, Veterinary Dermatologist & Pet Environment Specialist
Step-by-Step Guide: Removing Pet Hair Based on Seat Material
The best method depends heavily on your car seat’s material. Using the wrong tool or technique can damage upholstery or push hair deeper into the fabric. Below is a detailed, step-by-step process tailored to each common type.
Fabric Seats
Fabric seats are the most prone to hair accumulation due to their porous, fibrous structure. However, they respond well to mechanical removal and moisture-assisted cleaning.
- Vacuum first: Use a handheld vacuum with a brush attachment to loosen surface hair. Focus on seams, folds, and between cushions. A strong suction model removes up to 60% of loose hair before deeper cleaning.
- Dampen a microfiber cloth: Lightly moisten a high-quality microfiber cloth with water. Wring it until it’s barely damp—not wet. Rub the cloth over the seat in one direction. The slight moisture neutralizes static and helps hair clump together for easier pickup.
- Use rubber gloves: Wear clean kitchen or dishwashing gloves. Run your hands firmly over the seat surface. The rubber creates friction that lifts hair into manageable balls. Collect clumps and discard.
- Lint roller pass: For remaining fine hairs, use a reusable lint roller or tape-based roller. Apply firm, overlapping strokes.
- Deep clean monthly: Treat with a fabric-safe upholstery cleaner and a soft-bristle brush to dislodge embedded hair and residue.
Leather or Vinyl Seats
Leather and vinyl are smoother and less absorbent, but pet hair sticks due to static and surface oils. These materials require gentler care to avoid scratches or drying.
- Dry wipe with microfiber: Start with a dry microfiber cloth. Use quick, sweeping motions—this generates enough friction to lift hair without scratching.
- Apply a leather-safe anti-static spray: Commercial sprays or a diluted mix of water and a drop of fabric softener (10:1) reduces static cling. Spray lightly and wipe with a cloth.
- Use a slightly damp sponge: For persistent spots, gently dab with a damp sponge. Rinse frequently to avoid redepositing hair.
- Condition after cleaning: Always follow with a leather conditioner to prevent cracking and maintain resistance to dust and hair adhesion.
Top 5 Tools That Actually Work
Not all pet hair removers are created equal. Some products promise results but end up spreading hair around or damaging surfaces. The following tools have been tested across multiple vehicle types and consistently deliver efficiency.
| Tool | Best For | Effectiveness (1–5) | Notes |
|---|---|---|---|
| Rubber Squeegee | Fabric & carpeted areas | ★★★★☆ | Scraping motion gathers hair into strips. Inexpensive and reusable. |
| Reusable Lint Roller | All seat types | ★★★★★ | Washable rollers save money and reduce waste over time. |
| Handheld Vacuum (with HEPA filter) | Fabric, floor mats, crevices | ★★★★★ | Essential for full cleanups. HEPA traps allergens effectively. |
| Damp Rubber Gloves | Fabric, mesh, and textured surfaces | ★★★★☆ | Zero cost, highly effective. Just add water. |
| Microfiber Cleaning Cloths | Leather, vinyl, dashboard | ★★★☆☆ | Must be lint-free and non-abrasive to avoid swirl marks. |
Avoid using duct tape, regular sponges, or stiff brushes—they may lift some hair but often leave residue, scratch surfaces, or break fibers, worsening the problem over time.
Real Example: How Sarah Cleared Her SUV in Under 15 Minutes
Sarah, a dog trainer from Colorado, drives her two golden retrievers to outdoor classes five days a week. After just three months, her SUV’s back seats were nearly invisible under layers of shed fur. She tried wiping with towels and standard vacuums, but hair reappeared within hours.
She discovered a simple yet powerful routine: after every trip, she used a damp rubber glove to gather the bulk of the hair into clumps. Once a week, she followed up with a handheld vacuum equipped with a crevice tool. For deeper cleaning, she applied a fabric refresher spray that reduced static. Within two weeks, her seats looked factory-fresh—and stayed that way with minimal effort.
“It’s not about doing more,” she said. “It’s about doing the right steps in the right order. Now I spend less than ten minutes a week maintaining what used to take me an entire Saturday.”
Prevention Checklist: Stop Hair Buildup Before It Starts
Removing pet hair is important, but preventing excessive accumulation is even better. Follow this checklist to minimize future messes:
- ✅ Use waterproof, anti-slip pet seat covers made from tightly woven, non-static fabric.
- ✅ Brush your pet before every car ride—removing loose undercoat reduces shedding by up to 70%.
- ✅ Keep a dedicated cleaning kit in your trunk (vacuum, gloves, wipes).
- ✅ Wipe down seats weekly, even if they appear clean.
- ✅ Avoid fabric softeners or dryer sheets inside the car—they leave residues that attract more dust and hair.
- ✅ Schedule a deep interior clean every 3–4 months, especially during peak shedding seasons (spring and fall).
FAQ: Common Questions About Pet Hair Removal
Can I use a clothes dryer sheet to remove pet hair from car seats?
Yes, but cautiously. Dryer sheets can reduce static and help loosen hair when wiped over fabric seats. However, many contain fragrances and chemicals that may discolor upholstery or irritate pets. Use sparingly and test on a small area first. A safer alternative is a homemade anti-static spray using water and a drop of natural fabric softener.
Is it safe to use water on car seats?
Light moisture is safe on most surfaces when used correctly. Dampen cloths or sponges—never soak the seats. Excess water can seep into padding, leading to mold, odors, or material warping. Always dry the area with a clean towel afterward. For leather, avoid water altogether unless using a manufacturer-approved cleaner.
How often should I clean my car seats if I have pets?
For pet owners, a light surface clean after every few rides is ideal. A thorough cleaning—including vacuuming, wiping, and treating stains—should be done every 2–4 weeks, depending on usage. During heavy shedding seasons, weekly deep cleans are recommended.
Expert Insight: What Detailers Recommend
Professional auto detailers emphasize consistency and material-specific care. They warn against one-size-fits-all solutions that can do more harm than good.
“The biggest mistake people make is waiting until the car looks bad. By then, hair has bonded with fibers and dander. A two-minute wipe-down after each pet ride saves hours of labor later.” — Marcus Reed, Master Auto Detailer with 18 years of experience
Detailers also recommend investing in quality seat protection. “A $30 waterproof cover pays for itself in saved cleaning time and extended upholstery life,” Reed adds.
Conclusion: A Clean Car Is a Happy Car—for You and Your Pet
Removing pet hair from car seats doesn’t have to be a constant battle. With the right tools, techniques, and habits, you can maintain a clean, hygienic interior without sacrificing time with your pet. The key is acting early, choosing the correct method for your seat type, and incorporating simple preventive steps into your routine.
You don’t need fancy gadgets or expensive services. A rubber glove, a microfiber cloth, and a few minutes of attention can transform your car from hairy mess to spotless space. Your passengers—human and animal—will appreciate the comfort, and your vehicle will retain its value longer.
🚀 Start today: Pick one method from this guide and clean your car seats now. Then share your favorite tip in the comments—help fellow pet owners drive cleaner, healthier rides!