Planners are more than just organizational tools—they’re personal spaces where goals, routines, and creativity intersect. Many people turn to decorative stickers and rubber stamps to make their planners visually appealing, but these can quickly become costly. The good news is that personalization doesn’t require a big budget. With simple materials and thoughtful touches, you can create a planner that reflects your personality, boosts motivation, and stays functional—all without spending on commercial embellishments.
Why Personalization Matters
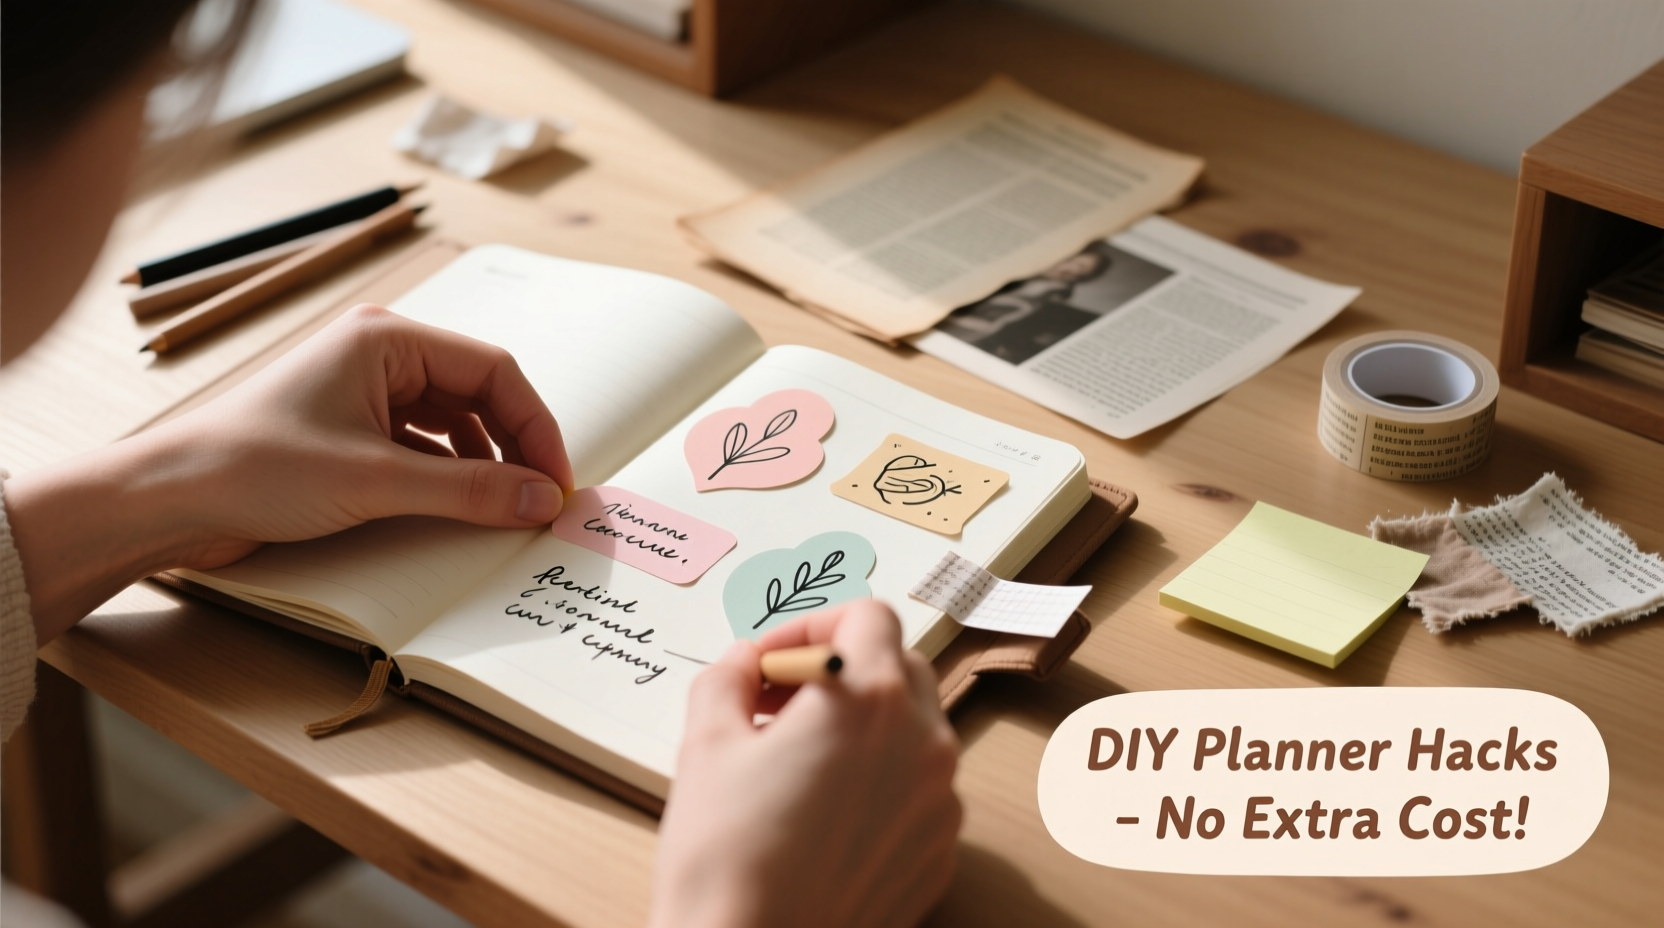
A personalized planner increases engagement. When you enjoy opening your planner each day, you're more likely to use it consistently. Studies in behavioral psychology suggest that visual ownership—feeling that an object is uniquely yours—can improve task adherence and emotional connection to planning systems. You don’t need flashy accessories to achieve this. What matters most is authenticity: colors, symbols, and layouts that resonate with your lifestyle and aesthetic.
Personalization also supports cognitive processing. Using consistent color codes, hand-drawn icons, or meaningful quotes helps the brain organize information more efficiently. Instead of relying on pre-made stickers, you can build a system tailored to your needs—one that evolves as you do.
Tip: Use highlighters in your favorite three colors to create a cohesive theme across pages.Creative Alternatives to Stickers and Stamps
The charm of sticker culture lies in customization and whimsy, but replicating that effect is possible through low-cost, handmade alternatives. These methods not only save money but often result in a more unique and expressive planner.
Hand-Drawn Icons and Doodles
Drawing small symbols for tasks, moods, or priorities adds character without clutter. Start with simple shapes: a sun for sunny days, a coffee cup for morning routines, or a star for high-priority tasks. Over time, develop a personal icon language that speeds up journaling and tracking.
No artistic skill? Begin with basic geometric shapes. A triangle can represent a challenge, a circle for reflection, and a square for completed tasks. Consistency matters more than complexity.
Washi Tape from Repurposed Materials
While store-bought washi tape is popular, you can mimic the look using painter’s tape, masking tape, or even strips of colorful paper. Cut narrow bands and apply them as borders, section dividers, or frames around weekly spreads. Decorate them further with fine liners or colored pencils.
For added texture, try using ribbon scraps or fabric swatches glued lightly at the edges. These create dimension and tactile interest while staying flat enough for planner storage.
Typography and Lettering Techniques
Stylized text is one of the most effective personalization tools. Experiment with different fonts using pens, markers, or even pencil shading. Try:
- Block letters for headers
- Script writing for motivational quotes
- Shadow lettering to add depth
- Bubble letters for fun monthly titles
All you need is a ruler, a pencil, and patience. Practice on scrap paper first, then transfer your design to the planner.
Found Material Embellishments
Look around your home for items that can be repurposed: magazine cutouts, ticket stubs, dried flowers, or fabric labels. These elements add texture and memory-based meaning. For example, a tea bag tag can mark a “self-care” page, or a concert ticket fragment can go in a “memories” section.
Use glue sticks or double-sided tape sparingly to avoid warping pages. For fragile items like petals, consider tracing their outline instead for a minimalist keepsake effect.
“Personalization isn’t about how much you spend—it’s about how much of yourself you put in.” — Lila Monroe, Productivity Coach and Journaling Advocate
Step-by-Step Guide to a Handmade Planner Makeover
Transform your planner over a weekend with this practical sequence. No special supplies needed—just what you likely already have at home.
- Assess Your Current Layout: Flip through your planner. Identify which sections feel dull or repetitive. Is your weekly spread monotonous? Are goal pages underused? Note where visual cues could help.
- Gather Basic Supplies: Collect pens (any color), pencils, rulers, scissors, glue, tape, and any paper scraps or magazines. Optional: watercolor paints or colored pencils for soft backgrounds.
- Create a Color Code System: Assign colors to categories (e.g., blue for work, green for health, pink for personal). Stick to 3–5 colors to avoid confusion. Use them consistently for headings, checkboxes, or margin lines.
- Design a Monthly Theme: Choose a word or concept per month—like “Growth” in spring or “Focus” in January. Illustrate it with doodles, quotes, or abstract patterns in the corner of each week’s layout.
- Add Functional Art: Turn checkboxes into tiny hearts, stars, or leaves. Replace bullet points with small arrows or dots in different colors based on priority. This turns routine tracking into a creative habit.
- Incorporate Handwritten Elements: Write affirmations at the top of each week (“You’ve got this!”) or leave space for daily gratitude. Seeing your own handwriting reinforces ownership.
- Review and Refine: After two weeks, assess what’s working. Did the icons make scheduling easier? Are certain colors confusing? Adjust before moving to the next month.
Planning Tools That Cost Nothing
You don’t need digital apps or specialty products to enhance functionality. Everyday household items can serve as powerful planning aids.
Using Printer Paper for Custom Inserts
If your planner has blank pages, print free templates online (like habit trackers or budget sheets) on regular paper. Trim them to fit and slip them inside. Even better: sketch your own tracker. A grid of 30 squares can become a water-drinking log, exercise check-in, or mood chart.
Repurposing Old Calendars
Last year’s calendar? Cut out beautiful images or interesting date layouts. Paste them as background layers under clear tape or use them as inspiration for seasonal themes. A floral April page from an old planner can inspire a fresh take this year.
Creating Quote Pages from Books
Find meaningful lines from novels, poetry, or self-help books. Transcribe them onto planner pages during reflective moments. Pair them with a simple border or underline in metallic pen for elegance. This turns your planner into a living journal of inspiration.
| Material | Creative Use | Tips |
|---|---|---|
| Newspaper | Background texture for monthly spreads | Use matte Mod Podge to seal and prevent ink transfer |
| Receipt paper | Narrow strips for vertical timelines | Write mini-goals along the length |
| Pencil shavings | Artistic accents (glue in small clusters) | Best for cover pages; avoid inner pages to prevent snagging |
| Tea-stained paper | Vintage-style quote inserts | Brew strong tea, dip paper, dry flat |
Real Example: Maya’s Minimalist Planner Journey
Maya, a freelance writer and mother of two, felt overwhelmed by her planner’s lack of inspiration. She’d bought a premium notebook but avoided using it because she didn’t want to “waste” pages without perfect stickers. After six months, only three pages were filled.
She decided to start fresh with a $2.50 spiral notebook. Using only a black pen, a red highlighter, and colored pencils from her kids’ art bin, she redesigned her weekly layout. She drew a small plant doodle every day she exercised, used asterisks in blue for family events, and wrote a single motivating word at the top of each week (“Breathe,” “Progress,” “Calm”).
Within a month, her usage increased dramatically. The absence of pressure to be “cute” or “Pinterest-worthy” freed her to focus on function. Her children even joined in, drawing tiny animals next to her meal prep notes. Today, her planner is a mix of practicality and heartfelt expression—and she hasn’t spent a dime on decorations.
Frequently Asked Questions
Can I personalize a digital planner the same way?
Yes, though the tools differ. In digital planners (like GoodNotes or Notability), you can import hand-drawn elements scanned from paper. Create your own stamp images using drawings, then upload them as PNGs with transparent backgrounds. Use handwritten fonts or write directly with a stylus to maintain a personal touch.
How do I keep my planner looking neat without perfectionism?
Embrace imperfection. Slight crooked lines or uneven coloring add warmth and humanity. Use a light pencil to sketch layouts first, then go over them in pen. If you make a mistake, incorporate it—turn a smudge into a cloud or a blotch into a flower. Functionality trumps flawless aesthetics.
What if I don’t have time to decorate daily?
Batch your personalization. Spend one hour on a Sunday creating themed headers, doodle clusters, or quote corners for the entire week. Focus on key pages—monthly overview, habit tracker, and goal list. Daily entries can remain simple with just a color-coded dot or quick symbol.
Checklist: Budget-Friendly Planner Personalization
- ☐ Choose 3 signature colors for coding tasks
- ☐ Sketch 5 simple icons for recurring activities
- ☐ Repurpose paper scraps for borders or tabs
- ☐ Add a handwritten quote or affirmation monthly
- ☐ Use found objects (tickets, labels) as memory markers
- ☐ Redesign one spread using only pens and tape
- ☐ Review and adjust your system every 2 weeks
Conclusion: Make It Yours, Not Pricey
Your planner should reflect who you are—not what you can afford. The most effective planning systems aren’t those filled with expensive stickers, but the ones that feel intuitive, inspiring, and authentically yours. By using accessible materials and investing creativity instead of cash, you build a tool that supports your life rather than complicating it.
Start small. Draw one doodle. Write one uplifting line. Trace a border with a marker. These tiny acts accumulate into a system that’s both functional and deeply personal. Forget perfection. Embrace expression. Your planner isn’t a display piece—it’s a companion for your journey. Make it real, make it yours, and let it evolve with you—one handwritten page at a time.
💬 Ready to transform your planner? Pick one idea from this guide and try it today. Share your creation in the comments or with a friend—inspiration grows when shared.