
Keeping a cat means managing one of the less glamorous but essential aspects of pet ownership: the litter box. Many commercially available options fall short in size, accessibility, or odor control. A custom-built litter box allows you to tailor dimensions, materials, and features to your cat’s needs—and your home’s aesthetics. With thoughtful design and basic tools, you can create a solution that’s easier to clean, more private for your pet, and better integrated into your living space.
Why Build Your Own Litter Box?
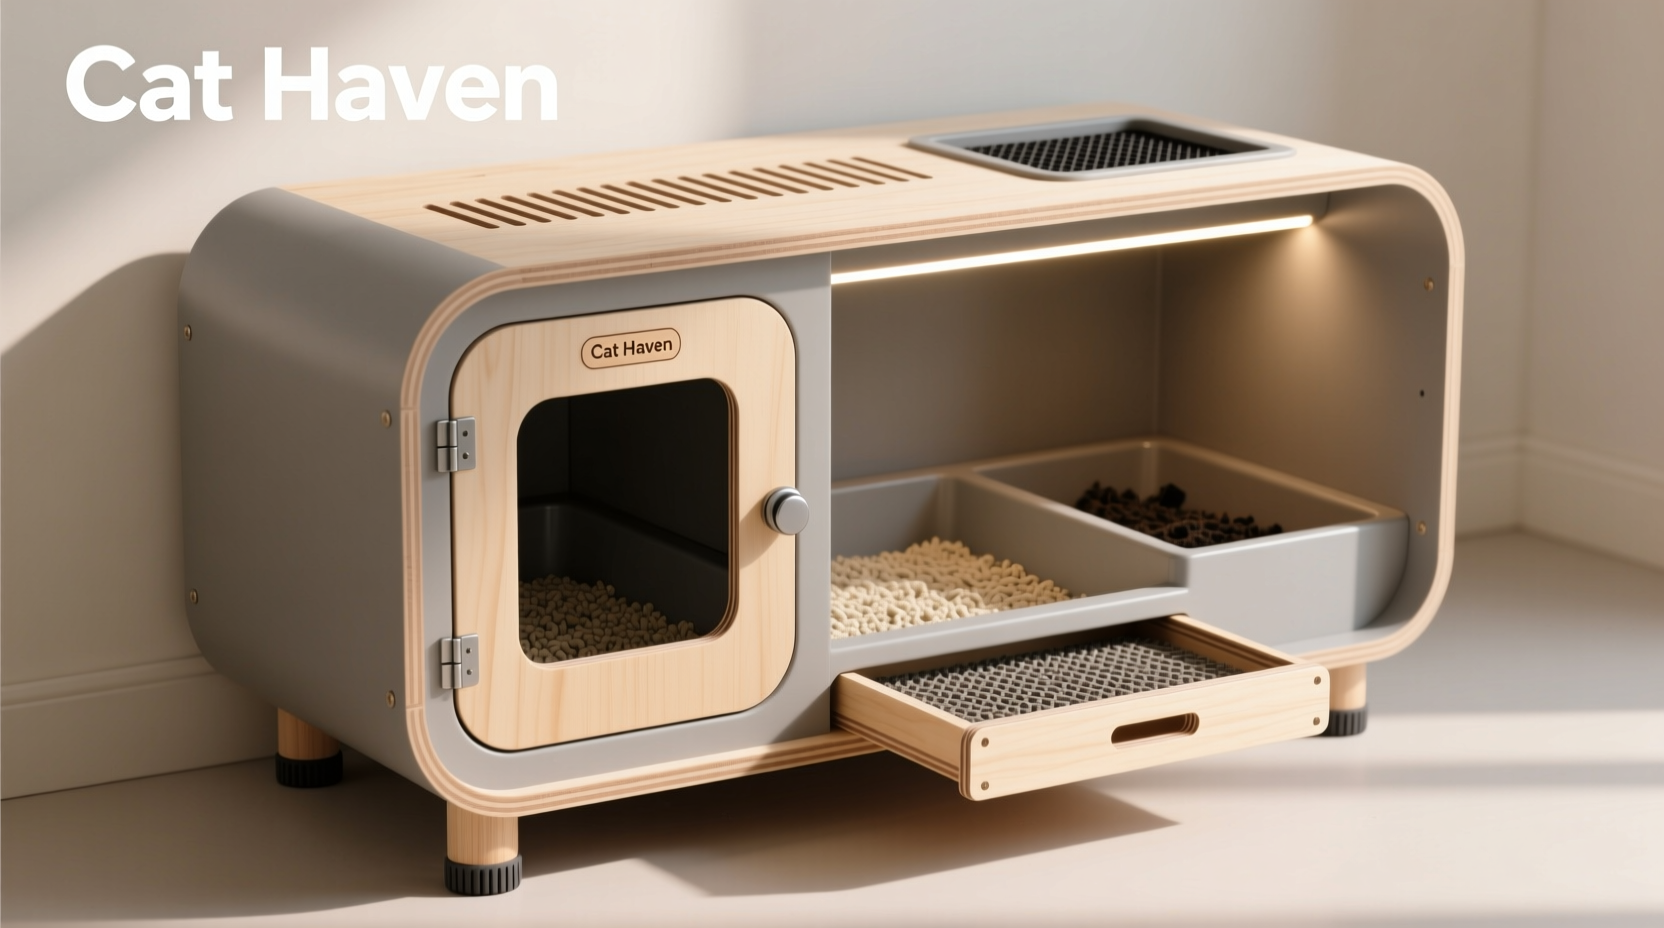
Standard litter boxes often have limitations. They’re typically too small for larger cats, lack proper ventilation, and offer minimal privacy. Over time, odors can permeate plastic, making even daily scooping insufficient. By building your own, you control every aspect—from entry height for older or arthritic cats to airflow design that reduces ammonia buildup.
A custom litter box also eliminates the need for expensive specialty models. With wood, plastic liners, and simple hardware, you can construct a durable, hygienic unit for a fraction of retail cost. Plus, it can be designed to blend into your decor—hidden in a cabinet, tucked under a bench, or styled to match your furniture.
Tip: Measure your cat from nose to tail base and add 1.5 times that length when determining box dimensions for optimal turning space.Materials and Tools You’ll Need
The foundation of a successful DIY litter box is choosing the right materials. Avoid particleboard or untreated wood, which absorb moisture and ammonia fumes. Instead, opt for waterproof, non-porous surfaces.
- Plywood (½ inch): Use exterior-grade for durability and resistance to warping.
- Waterproof sealant: Marine-grade epoxy or polyurethane to coat all wood surfaces.
- Plastic liner: A seamless HDPE or food-grade polyethylene tray (like those used in under-bed storage) prevents leaks and simplifies cleaning.
- Hinges and latch: For top-entry or enclosed models, soft-close hinges and a cat-safe magnetic latch keep the lid secure without trapping your pet.
- Drill, jigsaw, measuring tape, clamps: Basic tools for cutting and assembly.
- Odor-absorbing mesh or carbon filter (optional): Integrate into ventilation holes for added air purification.
“Cats are highly sensitive to scent and texture. A well-ventilated, spacious litter box built with non-reactive materials significantly improves elimination habits.” — Dr. Lena Torres, Feline Behavior Specialist
Step-by-Step Guide to Building a Top-Entry Litter Box
A top-entry design contains litter scatter and offers privacy while allowing natural light and airflow. This version uses a wooden frame with a removable plastic liner for easy maintenance.
- Design the Box: Decide on dimensions. A standard size is 24” x 16” x 18”, tall enough to prevent side spills but with a cutout lid for access.
- Cut the Panels: Using plywood, cut two long sides (18” x 24”), two short ends (18” x 16”), and a bottom piece (16” x 24”).
- Assemble the Frame: Screw panels together using stainless steel screws. Reinforce corners with corner braces for stability.
- Seal All Surfaces: Apply three coats of waterproof sealant, sanding lightly between layers. Let dry fully (24–48 hours).
- Add the Lid: Cut a hinged top from ¼-inch plywood. Install hinges at the back. Drill a circular entry hole (7–8 inches diameter) near the front edge.
- Insert Liner: Place a pre-cut HDPE tray inside the box, ensuring it fits snugly. It should sit below the rim to allow full lid closure.
- Ventilate: Drill ½-inch holes near the top of two opposite sides. Cover interior openings with stainless steel mesh to deter scratching.
- Finish: Paint exterior with pet-safe, low-VOC paint if desired. Label the outside discreetly for household clarity.
Custom Features for Enhanced Functionality
Once the basic structure is complete, consider upgrades that improve usability and hygiene.
| Feature | Benefit | Implementation Tip |
|---|---|---|
| Sliding front panel | Allows full access for cleaning without lifting the entire box | Use U-channel track and acrylic sheet cut to fit |
| Carbon filter vent | Reduces ammonia and urine odor continuously | Attach small activated carbon filter behind mesh-covered hole |
| Modular liner system | Swap liners for deep cleaning without disrupting placement | Build with 1-inch lip to hold interchangeable trays |
| Furniture integration | Hides box in plain sight (e.g., under stairs or as end table) | Match stain/paint to existing pieces; include access panel |
Real Example: The Basement Nook Solution
Sarah, a cat owner in Portland, had two Maine Coons who kicked litter across her finished basement. She built a custom enclosure using sealed birch plywood, incorporating the litter box into a built-in bench. The box has a top-entry lid with a magnetic catch and a rear sliding panel for liner removal. She added a small USB-powered fan connected to a carbon filter, running on a timer. After six months, she reports zero odor migration and no litter tracking. “It looks like part of the furniture,” she says, “and my cats use it without hesitation.”
Common Mistakes to Avoid
Even well-intentioned builds can fail if key details are overlooked. Steer clear of these pitfalls:
- Using unsealed wood: Moisture leads to swelling, mold, and persistent smells.
- Insufficient entry size: Older cats or larger breeds may struggle with narrow or high openings.
- Poor ventilation: Trapped humidity accelerates bacterial growth and odor.
- Ignoring cleanability: Complex corners or fixed liners make thorough washing difficult.
- Forgetting the second box: Experts recommend one litter box per cat, plus one extra.
“The best litter box is one the cat chooses willingly. If it’s too dark, too tight, or smells off, they’ll find another spot.” — James Reed, Certified Cat Behavior Consultant
FAQ
Can I use a regular storage bin instead of building from scratch?
Yes, large storage totes work well for simple DIY boxes. Choose opaque, smooth-sided bins with tight lids. Cut a front or top entry hole, sand edges smooth, and place on a lined tray for leak protection. However, custom builds offer better integration, ventilation, and durability.
How do I keep the box from smelling between cleanings?
Line the bottom with a thin layer of baking soda before adding litter. Use clumping, odor-control litter and scoop daily. Incorporate a carbon filter or small exhaust fan near the top. Clean the liner monthly with enzyme-based pet cleaner.
Will my cat accept a homemade litter box?
Most cats adapt well if the new box mimics the old one’s location and litter type. Introduce it gradually by placing it beside the old box. Allow exploration before removing the original. Monitor usage and adjust entry height or lighting if avoidance occurs.
Final Checklist Before Use
- ✅ All wood surfaces sealed with waterproof coating
- ✅ Entry hole is 7–8 inches and smoothly sanded
- ✅ Plastic liner fits securely and allows lid closure
- ✅ Ventilation holes covered with pet-safe mesh
- ✅ Box placed on a level, stable surface
- ✅ Old box still available during transition period
Conclusion
A thoughtfully built custom litter box transforms a necessary chore into a seamless part of your home environment. It gives your cat a clean, private space while reducing mess and odor for you. With careful planning and attention to materials, you can create a solution that lasts years and supports your pet’s health and comfort.
💬 Have you built a custom litter box? Share your design ideas or lessons learned in the comments—your experience could inspire another cat-loving DIYer!