Cleaning a kitten’s ears may seem like a minor task, but it plays a crucial role in maintaining their overall health. Unlike adult cats, kittens have more delicate ear canals and are still developing immune responses, making proper hygiene essential yet requiring extra care. When done correctly, ear cleaning prevents infections, reduces discomfort, and strengthens the bond between you and your young feline. However, improper techniques or over-cleaning can lead to irritation or injury. This guide provides clear, safe, and veterinarian-backed methods to help you clean your kitten’s ears effectively at home without causing stress or harm.
Understanding Kitten Ear Anatomy and Common Issues
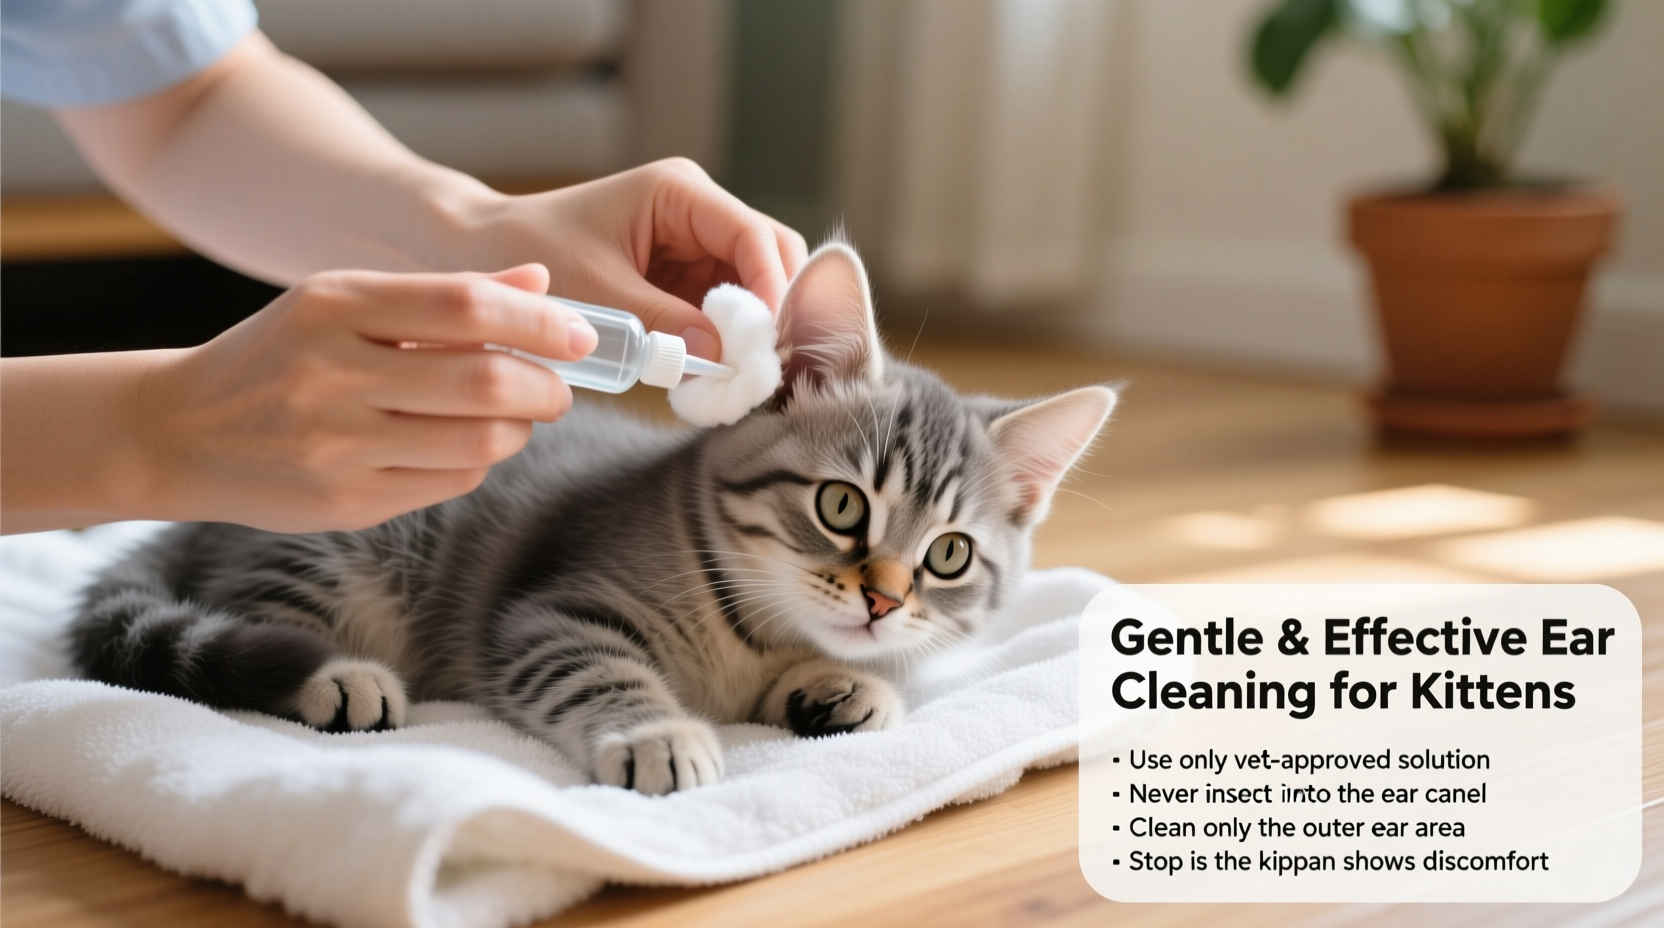
A kitten’s ear is significantly more sensitive than an adult cat’s. The outer ear (pinna) is soft and still forming, while the ear canal is narrow and prone to trapping wax and debris. Healthy kitten ears should appear pale pink, with minimal odor and no visible discharge. Some wax is normal, especially after time outdoors or if the kitten has been exploring dusty areas.
Common ear issues in kittens include:
- Ear mites: Tiny parasites that cause intense itching, dark crumbly discharge resembling coffee grounds, and frequent head shaking.
- Bacterial or yeast infections: Often marked by redness, swelling, foul smell, and yellow or brown discharge.
- Wax buildup: Excessive but non-infected wax that may block the ear canal if not managed gently.
It’s important to distinguish between routine maintenance and signs of medical concern. If your kitten shows persistent scratching, head tilting, bleeding, or pain when touched, consult a veterinarian before attempting any cleaning.
“Kittens are prone to ear mites due to their underdeveloped immune systems. Early detection and gentle care make all the difference.” — Dr. Lena Torres, DVM, Feline Health Specialist
Step-by-Step Guide: How to Clean a Kitten’s Ears Safely
Cleaning your kitten’s ears doesn’t require special tools or expertise—just patience, the right supplies, and a calm approach. Follow this sequence carefully to ensure safety and effectiveness.
- Prepare the environment: Choose a quiet, warm room where your kitten feels secure. Lay down a soft towel to provide traction and comfort.
- Gather supplies: You’ll need a vet-approved ear cleaner (never use alcohol, hydrogen peroxide, or homemade solutions), cotton balls or gauze pads (not cotton swabs), and treats for positive reinforcement.
- Restrain gently: Hold your kitten securely on your lap or against your chest. Speak softly and stroke their body to keep them relaxed. Avoid grabbing or squeezing.
- Inspect the ears: Look inside the outer ear flap. Do not peer deep into the canal. Check for redness, discharge, or strong odors.
- Apply the cleaner: Squeeze a few drops of ear solution directly into the ear canal. Follow product instructions—most recommend 3–5 drops for kittens.
- Massage the base: Gently massage the base of the ear for about 10–15 seconds. You should hear a soft squishing sound, which helps loosen debris.
- Let your kitten shake: Step back slightly. Shaking is natural and helps bring wax and fluid to the surface.
- Wipe the outer ear: Use a cotton ball to wipe away any residue from the visible part of the ear. Never insert anything into the ear canal.
- Reward immediately: Offer a treat and praise to create a positive association with the experience.
- Repeat on the other side: Even if one ear looks cleaner, maintain consistency by treating both sides.
Do’s and Don’ts of Kitten Ear Care
| Do’s | Don’ts |
|---|---|
| Use veterinarian-recommended ear cleaners formulated for kittens. | Never use cotton swabs (Q-tips) inside the ear canal—they can push debris deeper or damage the eardrum. |
| Clean only the outer ear and visible folds. | Avoid alcohol-based or harsh chemical solutions that dry out sensitive skin. |
| Clean once every 2–4 weeks unless otherwise advised. | Don’t over-clean—this disrupts natural oils and can lead to irritation. |
| Monitor for changes in behavior or ear appearance regularly. | Never attempt to treat suspected infections without veterinary diagnosis. |
| Make the process calm and rewarding with treats and affection. | Don’t force the process if your kitten resists—try again later or seek professional help. |
Real Example: Cleaning Lily’s Ears After Adoption
When Sarah adopted her 8-week-old tabby kitten, Lily, she noticed the shelter mentioned mild ear wax buildup. At home, Lily frequently scratched her left ear. Concerned but cautious, Sarah scheduled a vet visit first. The veterinarian confirmed no infection or mites, just excess wax, and recommended biweekly cleaning using a gentle pediatric-safe ear solution.
Sarah followed the step-by-step method: she cleaned Lily’s ears on a soft blanket in the living room, using a dropper for precise application. She massaged the base, allowed Lily to shake, then wiped the outer ear with a dampened cotton ball. After each session, she offered a small treat. Within three weeks, Lily stopped scratching, and her ears remained healthy. More importantly, Lily began to anticipate the routine as a bonding moment rather than a stressful event.
Frequently Asked Questions
How often should I clean my kitten’s ears?
Most kittens only need their ears cleaned every 2 to 4 weeks. Over-cleaning can strip natural oils and cause irritation. If your kitten is prone to wax buildup or lives in a dusty environment, consult your vet for a personalized schedule.
Can I use human baby wipes or olive oil to clean my kitten’s ears?
No. Baby wipes often contain fragrances and preservatives that can irritate sensitive kitten skin. Olive oil may soften wax but can also trap moisture and encourage yeast growth. Always use a vet-approved ear cleaner designed for cats.
What if my kitten won’t sit still during cleaning?
Start with short handling sessions—just touching and lifting the ear flap—without cleaning. Reward calm behavior. Gradually introduce the full process over several days. If your kitten remains anxious, ask your vet for tips or consider professional grooming assistance.
Tip: Practice “touch training” daily—gently handle paws, ears, and mouth—to build tolerance for future care routines.Essential Checklist for Safe Kitten Ear Cleaning
- ✅ Schedule a vet check-up before starting any cleaning routine
- ✅ Purchase a vet-approved kitten-safe ear cleaning solution
- ✅ Gather soft cotton balls or gauze pads
- ✅ Choose a quiet, distraction-free time
- ✅ Inspect ears for redness, odor, or discharge
- ✅ Apply drops as directed and massage the ear base
- ✅ Allow natural shaking and wipe only the outer ear
- ✅ Reward with treats and affection
- ✅ Record the date for next cleaning
- ✅ Monitor for signs of discomfort or infection afterward
Conclusion: Prioritize Safety, Comfort, and Consistency
Cleaning your kitten’s ears at home is a simple yet vital aspect of responsible pet care. By using gentle methods, appropriate products, and a patient approach, you protect your kitten from preventable infections and build trust through consistent, positive interaction. Remember, prevention is always better than treatment—regular observation and timely cleaning go a long way in supporting your kitten’s long-term well-being.
💬 Have questions about your kitten’s ear care routine? Share your experiences or ask for advice in the comments below—we’re here to support you and your furry companion every step of the way.