For many dog owners, the simple act of feeding their pet involves placing bowls on the floor without much thought. However, prolonged eating from ground level can strain a dog’s neck, spine, and joints—especially in larger breeds or older dogs with arthritis. A raised dog bowl stand, properly designed, promotes better posture during meals, aids digestion, and reduces stress on the body. While commercial options exist, they often lack adjustability, durability, or aesthetic appeal. Building a custom dog bowl riser allows you to tailor height, width, and design to your dog’s specific needs—all at a fraction of the retail cost.
Why Elevation Matters: The Health Benefits of a Properly Designed Feeder
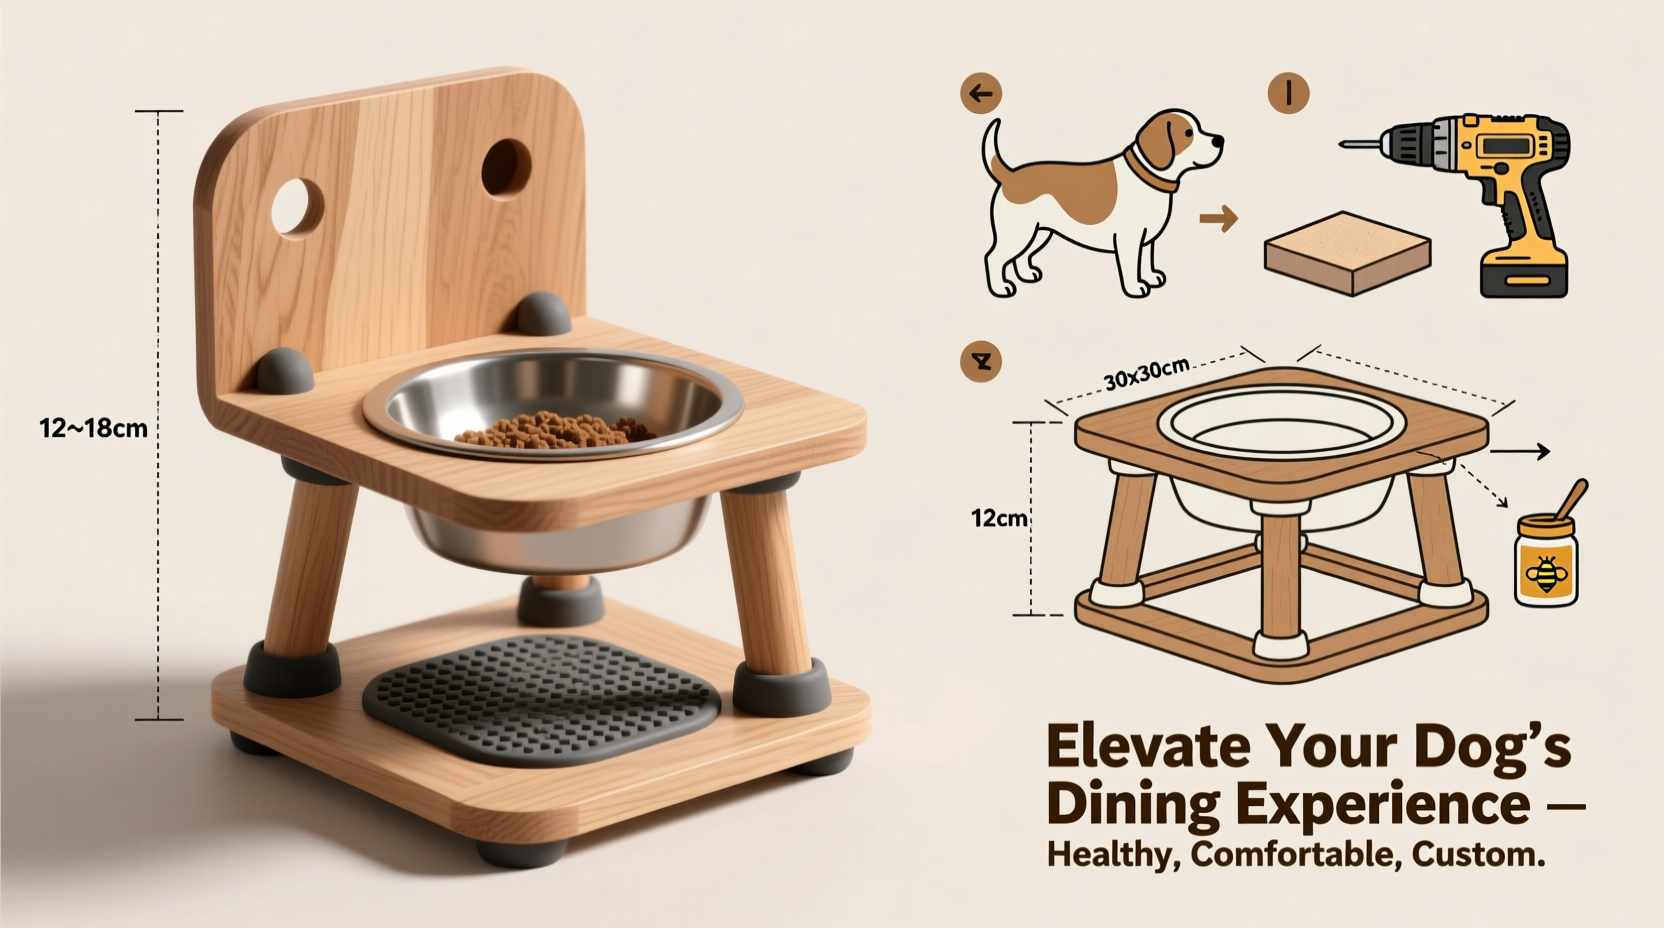
Dogs that eat with their heads lowered for extended periods may develop chronic discomfort. Large and giant breeds—such as Great Danes, German Shepherds, and Labradors—are particularly prone to musculoskeletal strain when feeding from floor-level bowls. Elevating food and water dishes brings them closer to the dog’s natural shoulder height, encouraging a neutral spine alignment.
Veterinarians often recommend elevated feeders for dogs with conditions like hip dysplasia, arthritis, or spinal issues. According to Dr. Laura Bennett, a certified veterinary rehabilitation practitioner:
“Maintaining a neutral head and neck position during meals reduces tension on cervical vertebrae and supports optimal esophageal function. For dogs predisposed to bloat, while elevation isn’t a preventive measure, proper posture can aid slower, more controlled eating.” — Dr. Laura Bennett, DVM, CCRT
Additionally, puppies growing rapidly benefit from correct posture to support healthy skeletal development. Even smaller dogs can experience improved comfort when their bowls are slightly raised, especially if they have short legs or pre-existing joint concerns.
Step-by-Step Guide: Building Your Custom Dog Bowl Riser
This DIY project requires minimal tools and materials, most of which can be sourced from a local hardware store or repurposed from household items. The following instructions create a sturdy, adjustable wooden riser suitable for medium to large dogs, but dimensions can be scaled down as needed.
- Gather Materials and Tools
- Two wooden boards (top platform and base): 14” x 10” x ¾” (pine or birch)
- Four wooden legs: 2” x 2” x desired height (e.g., 12”, 16”, or 20”)
- Screws (1.5-inch wood screws), wood glue, sandpaper (120-grit)
- Drill, screwdriver, measuring tape, pencil, clamps
- Optional: Non-slip rubber feet, wood finish or sealant
- Determine Correct Height
Measure from the floor to your dog’s chest (where the shoulder meets the front leg). Subtract 4–6 inches to allow for natural downward tilt while eating. Example: A Labrador with a 30-inch chest height benefits from a 24-inch feeder.
- Cut and Sand Components
If not pre-cut, shape both top and base boards to size. Sand all edges and surfaces until smooth to prevent splinters. Round the corners slightly for safety and aesthetics.
- Attach Legs to Base Board
Position one leg at each corner of the base board. Use clamps to hold them perpendicular. Drill pilot holes to prevent splitting, then secure each leg with two screws per side. Reinforce with wood glue before tightening.
- Secure Top Platform
Invert the base assembly. Align the top board over the upper ends of the legs. Again, drill pilot holes and fasten with screws from underneath the legs into the platform. Apply wood glue for added stability.
- Finishing Touches
Sand any rough spots. Attach non-slip pads to the bottom of the base and underside of the top platform to prevent sliding. If desired, apply a pet-safe wood sealant to protect against moisture and spills.
Design Variations and Customization Options
A one-size-fits-all approach rarely works for pets. Consider these modifications based on your dog’s breed, age, and living environment:
- Adjustable Height: Use threaded inserts and bolts to allow periodic height changes as your dog grows or health needs evolve.
- Double vs. Single Bowl: Build a wider platform to accommodate separate food and water bowls, or make it narrow for a single slow-feeder bowl.
- Foldable Design: Incorporate hinges and locking pins for portability or storage in small spaces.
- Material Alternatives: Use bamboo for sustainability, metal brackets for industrial style, or recycled plastic lumber for outdoor use.
For multi-dog households, construct a dual-tiered stand so both pets can eat comfortably without competition or awkward bending.
Do’s and Don’ts When Using Elevated Feeders
| Do’s | Don’ts |
|---|---|
| Match bowl size to your dog’s mouth—wide enough for easy access, not so wide that food spreads out | Use unstable or wobbly stands that could tip during use |
| Place the riser on a non-slip surface like rubber matting | Elevate bowls too high; never raise above shoulder level |
| Clean the stand regularly to prevent bacteria buildup in crevices | Assume elevation prevents bloat—it does not; monitor eating speed and avoid exercise around meals |
| Monitor your dog’s posture during and after meals for signs of improvement or discomfort | Ignore signs of slipping, hesitation, or reluctance to use the new feeder |
Real-Life Example: Helping Max the Senior Golden Retriever
When Sarah noticed her 10-year-old Golden Retriever, Max, hesitating before meals and frequently licking his paws afterward, she consulted her vet. An exam revealed early-stage osteoarthritis in his spine and hips. The vet suggested an elevated feeder to reduce strain. Rather than purchasing a $70+ model online, Sarah built a custom 18-inch riser using scrap cedar and rubber foot pads.
Within three days, Max approached his food with renewed enthusiasm. Sarah observed less arching of his back and fewer stiff mornings. After six weeks, she reported to her vet that Max’s overall mobility had improved—not just at mealtimes, but throughout the day. The simple change contributed to a noticeable enhancement in quality of life.
Checklist: Before You Start Using Your New Riser
- ✅ Confirm the height aligns with your dog’s chest measurement minus 4–6 inches
- ✅ Ensure the structure is stable and does not rock or slide
- ✅ Choose bowls that fit securely on the platform without overhang
- ✅ Introduce the riser gradually—allow your dog to investigate it with treats
- ✅ Monitor your dog’s behavior during the first week for signs of discomfort or avoidance
- ✅ Clean the stand weekly with mild soap and water, especially under the bowls
Frequently Asked Questions
Can an elevated feeder cause bloat?
No conclusive evidence proves that elevated feeders cause bloat (gastric dilatation-volvulus). However, some studies suggest large, deep-chested breeds might be at slightly increased risk when using high feeders. Always consult your veterinarian if your dog is predisposed to bloat. Focus on slowing down eating, avoiding vigorous activity around meals, and monitoring portion sizes.
How do I clean a wooden dog bowl riser safely?
Wipe down the surface weekly with a damp cloth and pet-safe cleaner. Avoid soaking the wood. For deeper cleaning, use a mixture of white vinegar and water (1:3 ratio), then dry immediately. Reapply a pet-safe sealant every 3–6 months if used indoors, or more often outdoors.
Can I build a riser for a small dog like a Chihuahua?
Absolutely. For toy breeds, even a 4–6 inch lift can make a difference. Use thinner wood or stackable, sealed wooden blocks painted with non-toxic finish. Ensure the platform is wide enough to stabilize the bowl but low enough for easy access.
Build Better Meals, One Step at a Time
A custom dog bowl riser is more than a home improvement project—it’s an investment in your pet’s long-term well-being. With thoughtful design and attention to ergonomics, you can eliminate unnecessary strain, support healthier digestion, and enhance daily comfort. This simple structure reflects a deeper commitment: meeting your dog’s physical needs with intention and care.
💬 Have you built a pet-friendly home modification? Share your story or post photos of your DIY dog bowl riser in the comments—your idea might inspire another pet parent to make a positive change today!