
For many communities, caring for stray cats means more than just providing food and water—it includes offering shelter from the elements. A well-built outdoor cat house can protect vulnerable animals from rain, wind, snow, and extreme temperatures. Unlike commercial shelters, a DIY version allows customization, cost savings, and the satisfaction of knowing you’ve built something that directly improves an animal’s quality of life. This guide walks through every step of constructing a durable, insulated, and comfortable shelter using accessible materials and tools.
Why Outdoor Cat Shelters Matter
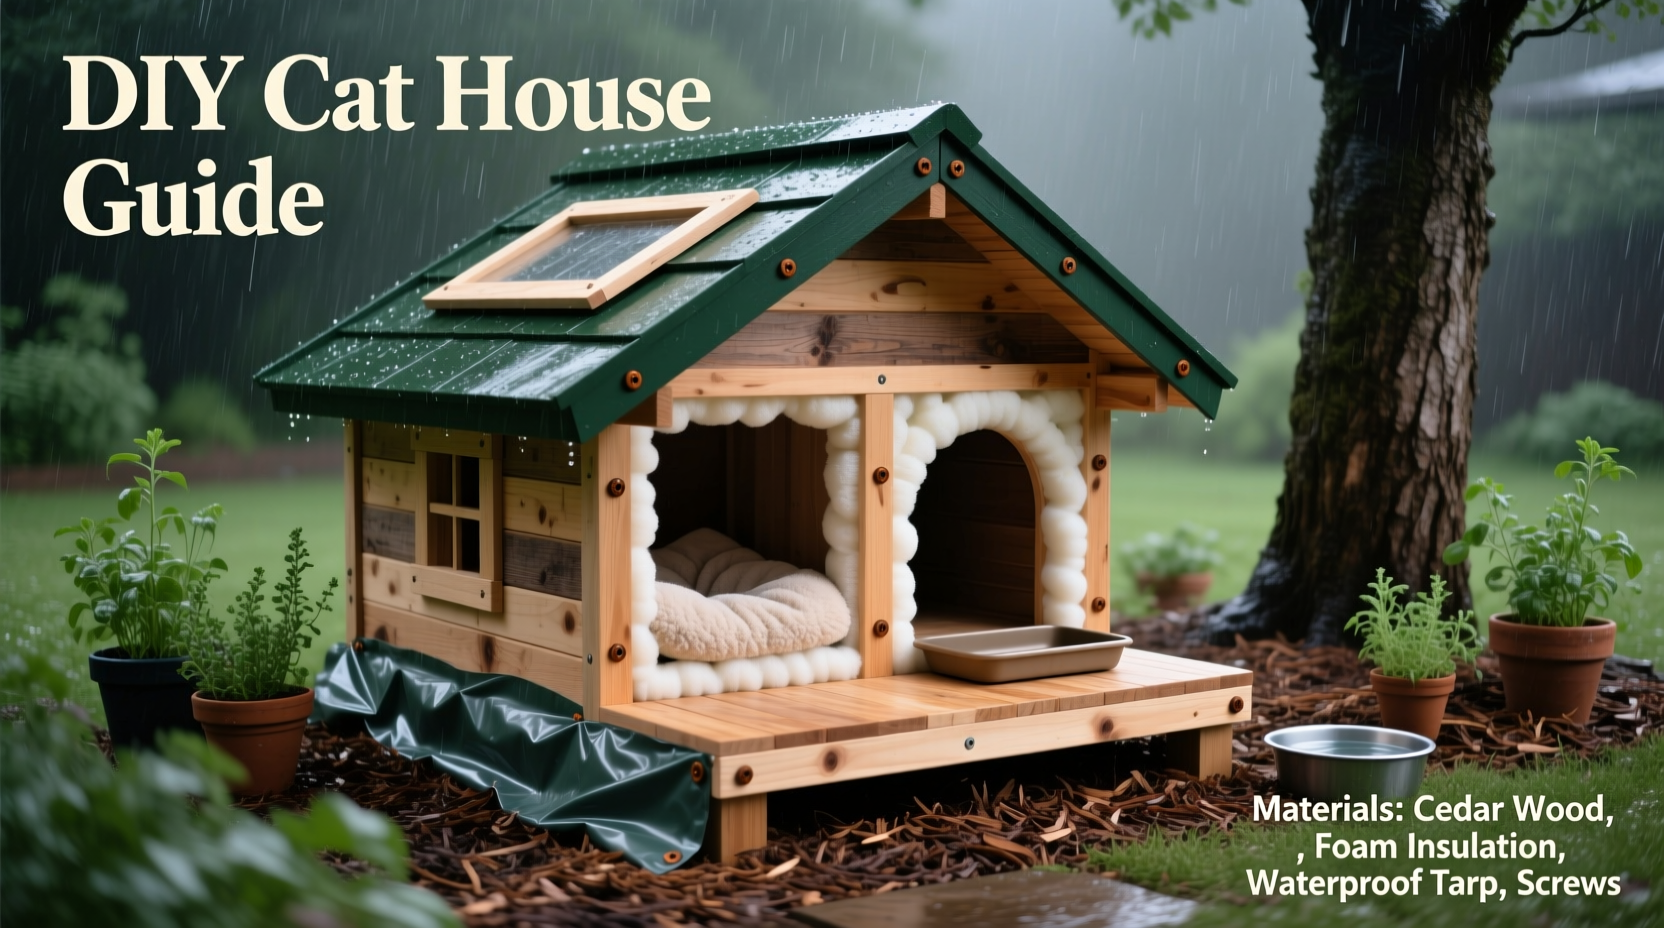
Cats living outdoors face significant risks during colder months. Hypothermia, frostbite, and respiratory infections are common in unsheltered strays. Even mild rain or wind can drastically reduce a cat’s ability to maintain body heat. A properly designed shelter provides insulation, blocks drafts, and elevates the interior off damp ground. The goal isn’t luxury—it’s survival. According to the Humane Society, simple insulated shelters can raise internal temperatures by 20–30°F above outside conditions, making the difference between enduring winter and thriving through it.
“Even a basic shelter, if dry and insulated, dramatically increases a stray cat’s chances of surviving harsh weather.” — Dr. Lena Patel, Urban Animal Welfare Veterinarian
Materials and Tools You’ll Need
Building a weatherproof cat house doesn’t require advanced carpentry skills. Most materials can be sourced from hardware stores or repurposed from household items. Below is a comprehensive list for a single medium-sized shelter (suitable for 1–2 cats).
| Material/Tool | Purpose | Notes |
|---|---|---|
| Insulated plastic tote (18–24 gallon) or plywood (½” exterior grade) | Main structure | Totes are waterproof and pre-insulated; plywood offers more customization |
| Rigid foam insulation board (2” thick) | Thermal lining | XPS or EPS boards work well; avoid fiberglass (irritating to cats) |
| Wood screws or waterproof adhesive | Assembly | Screws for wood builds; adhesive for sealing seams in plastic |
| Waterproof roofing material (e.g., aluminum flashing or shingle sample) | Roof protection | Prevents water seepage and adds durability |
| Elevated platform (wooden pallet or bricks) | Foundation | Keeps shelter off wet ground |
| Straw (not hay or blankets) | Bedding | Straw wicks moisture away and retains warmth |
| Utility knife or saw | Cutting materials | Depends on primary construction method |
| Drill with hole bit (4–6” diameter) | Entryway | One entry per shelter, low to the ground |
Step-by-Step Construction Guide
Follow this sequence to build a sturdy, insulated shelter in under four hours. Two versions are outlined: one using a plastic tote (easiest), and one using plywood (more customizable).
- Choose and prepare the base structure: For the tote method, select a large, lidded container with thick walls. For wood, cut six panels (front, back, two sides, floor, roof) using exterior-grade plywood. Dimensions: 24”L x 18”W x 16”H.
- Insulate all interior surfaces: Cut rigid foam to fit each wall, floor, and ceiling. Press into place and secure with waterproof adhesive. In cold climates, double-layer the floor and north-facing wall.
- Create a small, offset entry: Drill or cut a 6” circular entrance near the bottom of one side. Position it so wind doesn’t blow directly inside. If possible, add a vinyl flap (cut from a heavy-duty shower curtain) to block drafts.
- Seal all gaps: Use silicone caulk around joints, seams, and where the roof meets walls. This prevents moisture intrusion and heat loss.
- Install a sloped, waterproof roof: If using wood, extend the roof overhang by 2–3” on all sides. Attach metal or shingle material to shed rain. Secure with screws and sealant.
- Elevate the shelter: Place on a wooden pallet, cinder blocks, or bricks. This keeps the interior dry and discourages pests.
- Add bedding: Line the floor with 3–4 inches of straw. Avoid towels or blankets—they retain moisture and lose insulating value when wet.
- Position strategically: Face the entry away from prevailing winds (usually west/northwest in North America). Place in a quiet, shaded area protected by bushes or structures.
Weatherproofing Tips and Common Mistakes
Even well-built shelters fail if exposed to poor placement or inadequate maintenance. Here are key do’s and don’ts:
| Do | Don't |
|---|---|
| Use straw instead of hay or fabric bedding | Use cotton blankets or towels (they trap moisture) |
| Check and refresh bedding monthly | Forget seasonal maintenance |
| Anchor the shelter if in a windy area | Leave it on bare soil or grass |
| Add reflective foil behind insulation in very cold zones | Paint the interior (fumes can linger) |
| Build slightly oversized if housing multiple cats | Make multiple large entrances (heat escapes quickly) |
Real-World Example: The Maple Street Colony Shelter Project
In Ann Arbor, Michigan, a neighborhood group noticed increasing distress among a local cat colony during a particularly harsh winter. Using this DIY guide, they constructed five insulated shelters from recycled plastic totes and scrap insulation. Each was elevated on pallets, filled with straw, and placed under a covered porch. Within weeks, volunteers observed consistent use, with cats huddling together inside during sub-zero nights. One volunteer noted, “We found paw prints leading in but none going out for days—that told us they were staying warm and safe.” Over the next six months, no colony members were lost to exposure, compared to three deaths the previous winter.
Frequently Asked Questions
How big should the cat house be?
The ideal size accommodates 1–2 cats snugly. Interior dimensions around 24” x 18” x 16” work well. Too large, and body heat won’t keep it warm; too small, and cats may avoid it. For groups of 3+ cats, build multiple adjacent shelters rather than one large one.
Can I use a cardboard box instead?
Cardboard is not recommended for long-term use. It absorbs moisture quickly and loses insulation when wet. However, in emergencies, line a large plastic bin with a cardboard box and straw—just replace it at the first sign of dampness.
How often should I clean the shelter?
Inspect monthly. Replace wet or soiled straw immediately. Full cleaning—wiping down interior surfaces with a pet-safe disinfectant—should happen twice a year, spring and fall. Avoid strong-smelling cleaners; cats may reject a scented shelter.
Final Checklist Before Deployment
- ✅ Entry is small (6”) and positioned away from wind
- ✅ Shelter is elevated off the ground
- ✅ All seams are sealed against moisture
- ✅ Interior is lined with rigid foam insulation
- ✅ Bedding is straw, not fabric or hay
- ✅ Roof overhangs walls and is waterproof
- ✅ Located in a quiet, low-traffic area
Conclusion: Warmth Is Within Reach
Creating a weatherproof outdoor cat house is a meaningful act of compassion that requires minimal investment but yields lasting impact. With basic tools and thoughtful design, anyone can build a shelter that protects stray cats from the harshest conditions. These animals rely on human kindness—not just for food, but for safety. By following this guide, you’re not just constructing a box; you’re offering dignity, warmth, and a better chance at survival. Build one today, and watch how a simple structure becomes a sanctuary.
💬 Have you built a shelter for community cats? Share your experience, photos, or tips in the comments—your insight could inspire others to take action.