Managing a dog’s incontinence, heat cycle, or house-training accidents doesn’t have to mean expensive disposable products. Many pet owners are turning to DIY dog diapers as a cost-effective, eco-friendly, and customizable solution. When made correctly, homemade dog diapers can be just as effective—and often more comfortable—than store-bought versions. This guide walks you through everything you need to know to create safe, absorbent, and secure diapers that fit your dog perfectly.
Why Make Your Own Dog Diapers?
Commercial dog diapers are convenient but come with drawbacks: they can be costly over time, contain synthetic materials, and may not fit well depending on your dog’s body shape. By making your own, you gain control over the materials, sizing, and design. Whether your senior dog is dealing with bladder weakness, your female pup is in heat, or you’re potty-training a puppy, a well-crafted DIY diaper offers a practical alternative.
Tip: Use old baby onesies or cloth diapers as a base—they're already designed for containment and stretch.Materials You’ll Need
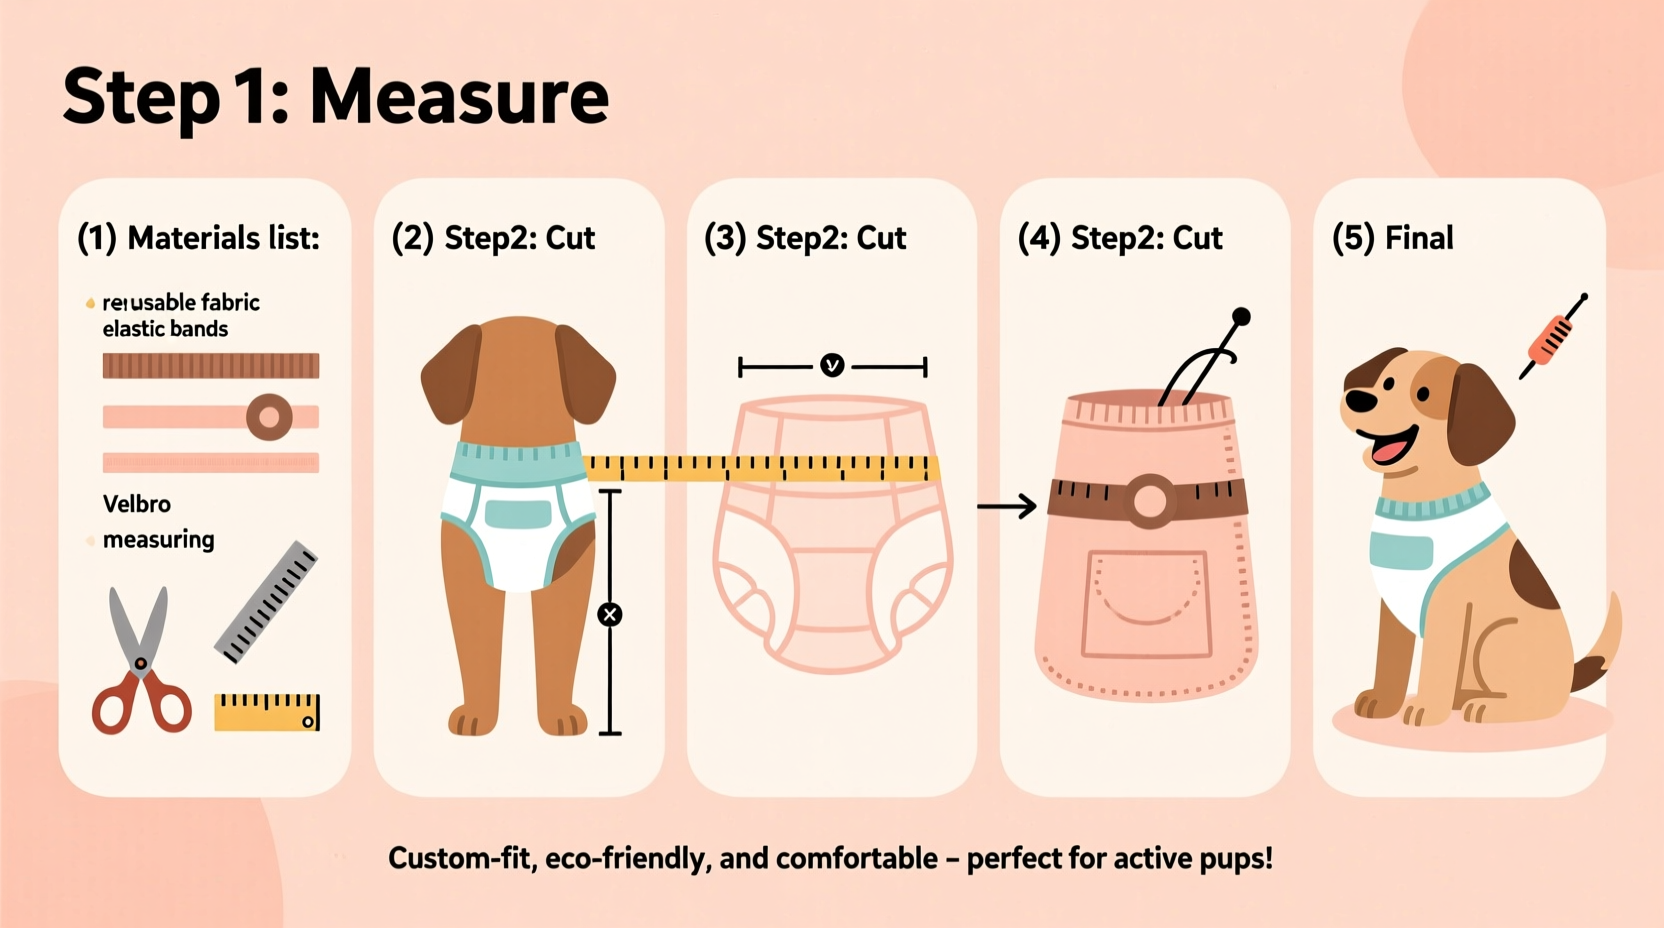
The beauty of DIY dog diapers lies in their simplicity. Most materials can be found at home or purchased inexpensively. Here’s what you’ll typically need:
- Fabric scraps (cotton, flannel, or fleece for comfort)
- A pair of stretchy underwear (boy shorts or briefs in the right size)
- A reusable insert or pad (cloth diaper inserts, sanitary pads, or folded paper towels)
- Elastic bands or Velcro strips (for adjustable fit)
- Needle and thread or sewing machine (optional, for permanent models)
- Scissors and measuring tape
For dogs with heavier output, consider adding a waterproof outer layer using PUL fabric (available online) or repurposing a cut piece from a rain jacket or shower cap.
Step-by-Step Guide to Making a Reusable Dog Diaper
- Measure your dog: Wrap a tape measure around the widest part of your dog’s hips (just in front of the tail). Also measure from the base of the tail to between the hind legs. These dimensions ensure a snug but comfortable fit.
- Select or modify underwear: Choose boy shorts or briefs with enough stretch to go over your dog’s hips. Cut a small slit in the back center for the tail to pass through. The opening should be large enough to avoid pressure but tight enough to prevent leaks.
- Add an absorbent core: Insert a reusable cloth pad or folded thick towel into the crotch area. For temporary use, a high-absorbency sanitary pad works well and can be replaced easily.
- Reinforce the back (optional): Sew or glue a strip of waterproof material across the back half of the underwear to prevent leakage onto furniture or floors.
- Adjust for fit: If the waistband is too loose, add elastic or sew on Velcro tabs on the sides for a secure closure.
- Test and adjust: Let your dog wear the diaper indoors first. Watch for chafing, slipping, or discomfort. Adjust tail hole size or padding as needed.
Do’s and Don’ts of DIY Dog Diapers
| Do’s | Don’ts |
|---|---|
| Use soft, breathable fabrics to prevent skin irritation | Use plastic-heavy materials that trap moisture |
| Change the diaper every 3–4 hours to maintain hygiene | Leave the diaper on overnight without checking |
| Wash reusable parts with pet-safe detergent | Use fabric softeners that can reduce absorbency |
| Trim fur around the genital area to reduce sticking | Allow prolonged exposure to wetness, which can cause rashes |
| Monitor for signs of discomfort or infection | Ignore redness, odor, or scooting behaviors |
Real-Life Example: Managing Incontinence in Senior Dogs
Maggie, a 12-year-old Labrador mix, began leaking urine while sleeping due to age-related incontinence. Her owner, Diane, tried several commercial diapers, but Maggie chewed them off or developed rashes from the plastic lining. After researching alternatives, Diane created a simple DIY diaper using a size-medium cotton boy short, a cut-to-fit sanitary pad, and a Velcro side adjustment. She lined the back with a scrap of laminated cotton for leak protection. Within days, Maggie was comfortable, dry, and no longer anxious about lying on the couch. The total cost? Under $5, including materials reused from old craft supplies.
“Homemade diapers can be gentler on sensitive skin and far more adaptable than one-size-fits-all products.” — Dr. Lena Torres, DVM, Canine Geriatric Specialist
Customizing for Different Needs
Dog diapers aren’t one-size-fits-all because the needs vary. Here’s how to tailor your DIY version:
- For female dogs in heat: Add extra padding in the rear and use dark-colored fabric to minimize visibility of spotting. Change frequently to maintain cleanliness.
- For male dogs: Consider a belly band alternative (a wrap-around tube with absorbent core), but if using a diaper, ensure it covers the prepuce without restricting movement.
- For puppies: Focus on lightweight, easy-on designs. Use bright colors so accidents are easy to spot during training.
- For larger breeds: Reinforce seams and use wide elastic to distribute pressure. Avoid restrictive fits that limit mobility.
Checklist: Building and Using Your DIY Dog Diaper
- ✅ Measure your dog’s hip and tail base accurately
- ✅ Choose soft, washable, and stretchy base clothing
- ✅ Cut a properly sized tail hole to prevent rubbing
- ✅ Insert an absorbent, replaceable pad
- ✅ Test fit and observe for 15 minutes before extended use
- ✅ Wash after each use (if reusable) or dispose safely (if using disposables inside)
- ✅ Inspect skin daily for redness or irritation
- ✅ Keep spare diapers ready for rotation
Frequently Asked Questions
Can I leave a DIY dog diaper on all day?
No. Diapers should be changed every 3–4 hours to prevent bacterial growth, skin irritation, and urinary tract infections. Never leave a dog in a soiled diaper overnight unless under close supervision with regular checks.
How do I stop my dog from removing the diaper?
Dogs often react to new sensations by chewing or pawing at diapers. Try distracting with toys, using a harness over the diaper to secure it, or introducing the diaper gradually with short practice sessions. Positive reinforcement helps build acceptance.
Are cloth diapers better than disposable ones for DIY?
Cloth diapers offer reusability and fewer chemicals, making them ideal for frequent use. However, disposable inserts provide higher absorbency and convenience for travel or emergencies. A hybrid approach—using a cloth shell with disposable inserts—is often the most practical.
Final Thoughts and Next Steps
Creating DIY dog diapers is more than a money-saving hack—it’s a way to provide personalized care that respects your pet’s comfort and your values. With a little effort, you can design a solution that works seamlessly with your lifestyle, whether managing a medical condition, supporting a senior pet, or navigating a heat cycle at home. The key is attention to fit, hygiene, and your dog’s behavior.
Start with one simple prototype. Test it, refine it, and build a small rotation so you always have clean options ready. Share your design with other pet owners—you might inspire someone else to ditch wasteful disposables for something better.
💬 Have a DIY dog diaper tip or success story? Share it in the comments below and help fellow pet parents find smarter, kinder ways to care for their furry family members.