Drawing everyday objects like a dog bowl might seem simple, but it offers a valuable opportunity to practice foundational art skills such as shape accuracy, proportion, light behavior, and texture rendering. For beginners, mastering the depiction of a common item like this builds confidence and sharpens observational abilities. This guide explores creative and effective techniques to draw a dog bowl with realism, style, and precision—without relying on advanced tools or prior experience.
Understanding the Structure of a Dog Bowl
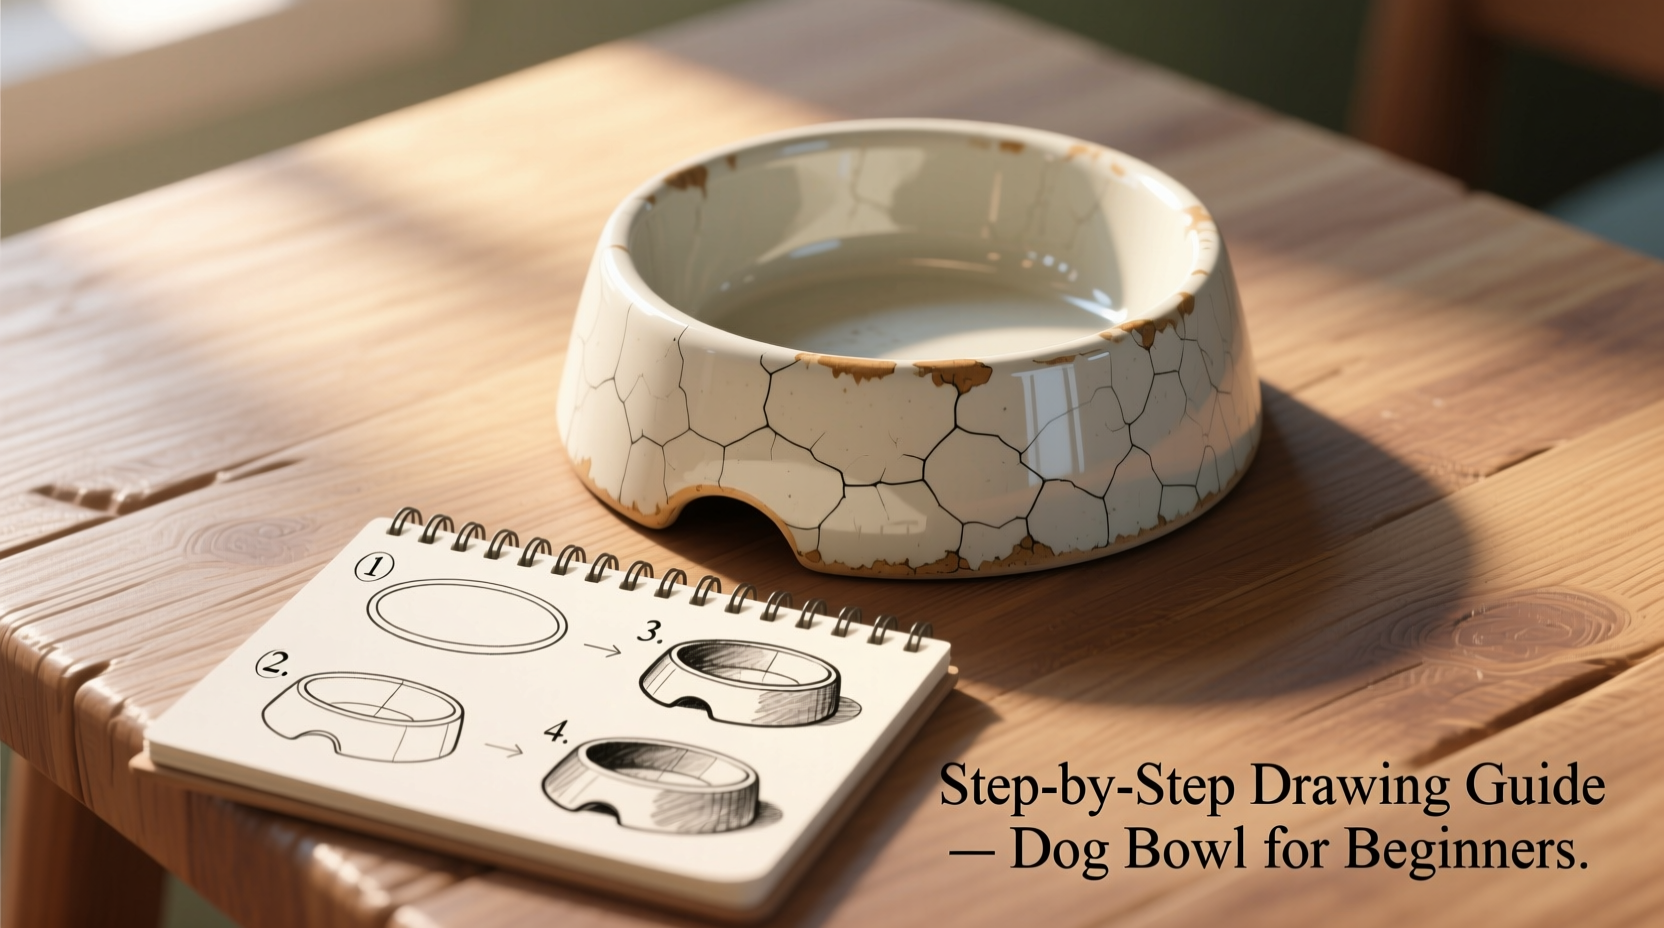
A dog bowl may appear straightforward—a circular dish—but its three-dimensional form presents challenges in perspective and depth. Most bowls are cylindrical or slightly conical, with curved inner and outer edges. When drawing, it’s essential to recognize that what you see depends on the viewing angle: overhead, side, or at an incline.
The key structural components include:
- The rim (top edge of the bowl)
- The outer wall (curving downward from the rim)
- The base (flat or slightly raised bottom)
- The inner cavity (shadowed interior where food or water would sit)
Beginners often misrepresent the ellipse of the rim, making it too narrow or too wide. Remember: the more oblique your view, the more compressed the top ellipse becomes. A bird’s-eye view shows a near-perfect circle, while a side view flattens it into a thin line.
Tip: Use light, loose lines when sketching the initial shape. This allows for easy corrections before committing to darker outlines.Step-by-Step Guide to Drawing a Realistic Dog Bowl
- Choose Your Angle: Decide whether you’re drawing the bowl from above, at eye level, or from the side. Each offers different visual challenges.
- Sketch the Basic Shape: Lightly draw the outer ellipse (rim) using horizontal and vertical guidelines to maintain symmetry.
- Add Depth with Contours: Draw the inner ellipse (representing the bottom inside the bowl) smaller and lower than the rim. Connect the two with gently curving lines to form the walls.
- Define the Base: Extend short vertical lines downward from the outer edge and connect them with a flat or slightly curved line to form the base.
- Refine the Outline: Go over the correct lines with more pressure, erasing construction lines and unnecessary guides.
- Add Shadows and Highlights: Identify your light source. Shade the inner cavity heavily, add a mid-tone on the outer wall opposite the light, and leave a highlight spot on the rim.
- Texture the Surface: If the bowl is metal, use smooth gradients; if ceramic, add subtle speckles or glaze variations.
This method ensures dimensional accuracy and helps train your eye to translate 3D forms onto a 2D surface.
Creative Stylistic Approaches
While realism is a strong starting point, experimenting with artistic styles deepens creativity and personal expression. Consider these alternative techniques:
- Minimalist Line Art: Use a single continuous line to outline the bowl. Focus on fluidity rather than perfection.
- Cartoon or Whimsical Style: Exaggerate proportions—make the bowl oversized with a tiny paw print or bone motif inside.
- Ink Wash or Watercolor: Apply diluted black ink in layers to create soft gradients, mimicking reflections on stainless steel.
- Doodle Embellishment: Surround the bowl with hand-drawn kibble pieces, paw prints, or a leash to tell a story.
These approaches not only make practice enjoyable but also help develop versatility across genres.
“Drawing ordinary objects with attention to detail trains the artist’s eye better than any abstract exercise.” — Julian Parks, Illustration Instructor at Midtown Arts Academy
Common Mistakes and How to Avoid Them
Even simple drawings can go wrong without proper technique. Below is a comparison table highlighting frequent errors and their solutions:
| Mistake | Why It Happens | How to Fix It |
|---|---|---|
| Rim appears lopsided | Poor alignment of ellipse axes | Use crosshairs (vertical and horizontal guides) when drawing the initial oval |
| Bowl looks flat | Lack of tonal variation | Apply a full value scale: highlight, midtone, core shadow, reflected light |
| Walls look straight instead of curved | Incorrect curvature between rim and base | Study real bowls; notice how the curve accelerates near the base |
| Base is too large or floating | Ignoring foreshortening and weight distribution | Keep the base narrower than the rim and anchor it with a cast shadow |
Mini Case Study: From Sketch to Finished Piece
Sophie, a beginner artist with no formal training, wanted to improve her still-life drawing skills. She chose a stainless steel dog bowl filled with water as her subject. Her first attempt lacked depth—the bowl looked like a flat ring with a cylinder attached.
After studying ellipses and practicing basic forms, she redrew the bowl using construction lines and a defined light source from the upper left. She applied graduated shading inside the cavity and added a soft cast shadow beneath the base. The second version showed clear volume and surface reflectivity.
Encouraged by the improvement, Sophie experimented with a watercolor overlay, using cool grays and blues to simulate metallic sheen. Within three weeks, her ability to render reflective surfaces improved significantly, all starting from a humble dog bowl.
Essential Tools and Materials Checklist
You don’t need expensive supplies to begin. Here’s what works best for consistent results:
- HB, 2B, and 4B pencils (for light sketching and dark shading)
- Eraser (kneaded for lifting tone, plastic for clean removal)
- Blending stump or tissue (to smooth gradients)
- Sketchbook with medium-texture paper (90–120 gsm)
- Ruler (optional, for aligning guidelines)
- Reference photo or real bowl (for accurate observation)
Having these basics ensures you can focus on technique without technical distractions.
Frequently Asked Questions
Can I draw a dog bowl without a reference?
Yes, but using a real bowl or photo greatly improves accuracy. Beginners benefit from observing how light interacts with curved surfaces. Over time, you’ll internalize these patterns and draw confidently from memory.
How do I make my drawing look shiny or metallic?
Focus on contrast. Metallic surfaces have sharp highlights and deep shadows. Leave small areas completely white for reflections, and use a kneaded eraser to lift graphite for secondary highlights. Avoid midtones in high-gloss areas.
What if my bowl looks distorted?
Distortion usually comes from incorrect perspective or uneven proportions. Recheck the relationship between the rim and base ellipses. Both should share the same central axis. Redraw the underlying structure lightly before refining.
Final Thoughts and Call to Action
Drawing a dog bowl may not sound exciting at first, but it’s a gateway to mastering form, light, and patience. Every stroke teaches something—about curves, about shadows, about seeing the world more clearly. The techniques covered here lay the foundation for drawing any rounded object, from cups to vases to car headlights.
Art grows through repetition and reflection. Draw the same bowl from three different angles. Try it in ink, then charcoal. Challenge yourself to add a dog’s nose peeking over the edge. Let a simple object inspire complex growth.
🚀 Grab your pencil today and draw your first dog bowl. Share your artwork online with #DrawTheBowl and inspire others to start their artistic journey!