Resin keychains have become a favorite among crafters and small business owners alike—compact, customizable, and endlessly creative. But one of the most common challenges artisans face is achieving consistent, vivid color that doesn’t fade or bleed. The secret lies not just in the resin, but in how you use pigments. Mastering pigment techniques transforms translucent blobs into eye-catching wearable art. This guide breaks down the science, tools, and methods to help you create keychains with rich, stable, and radiant hues every time.
Understanding Resin Pigments: Types and Properties
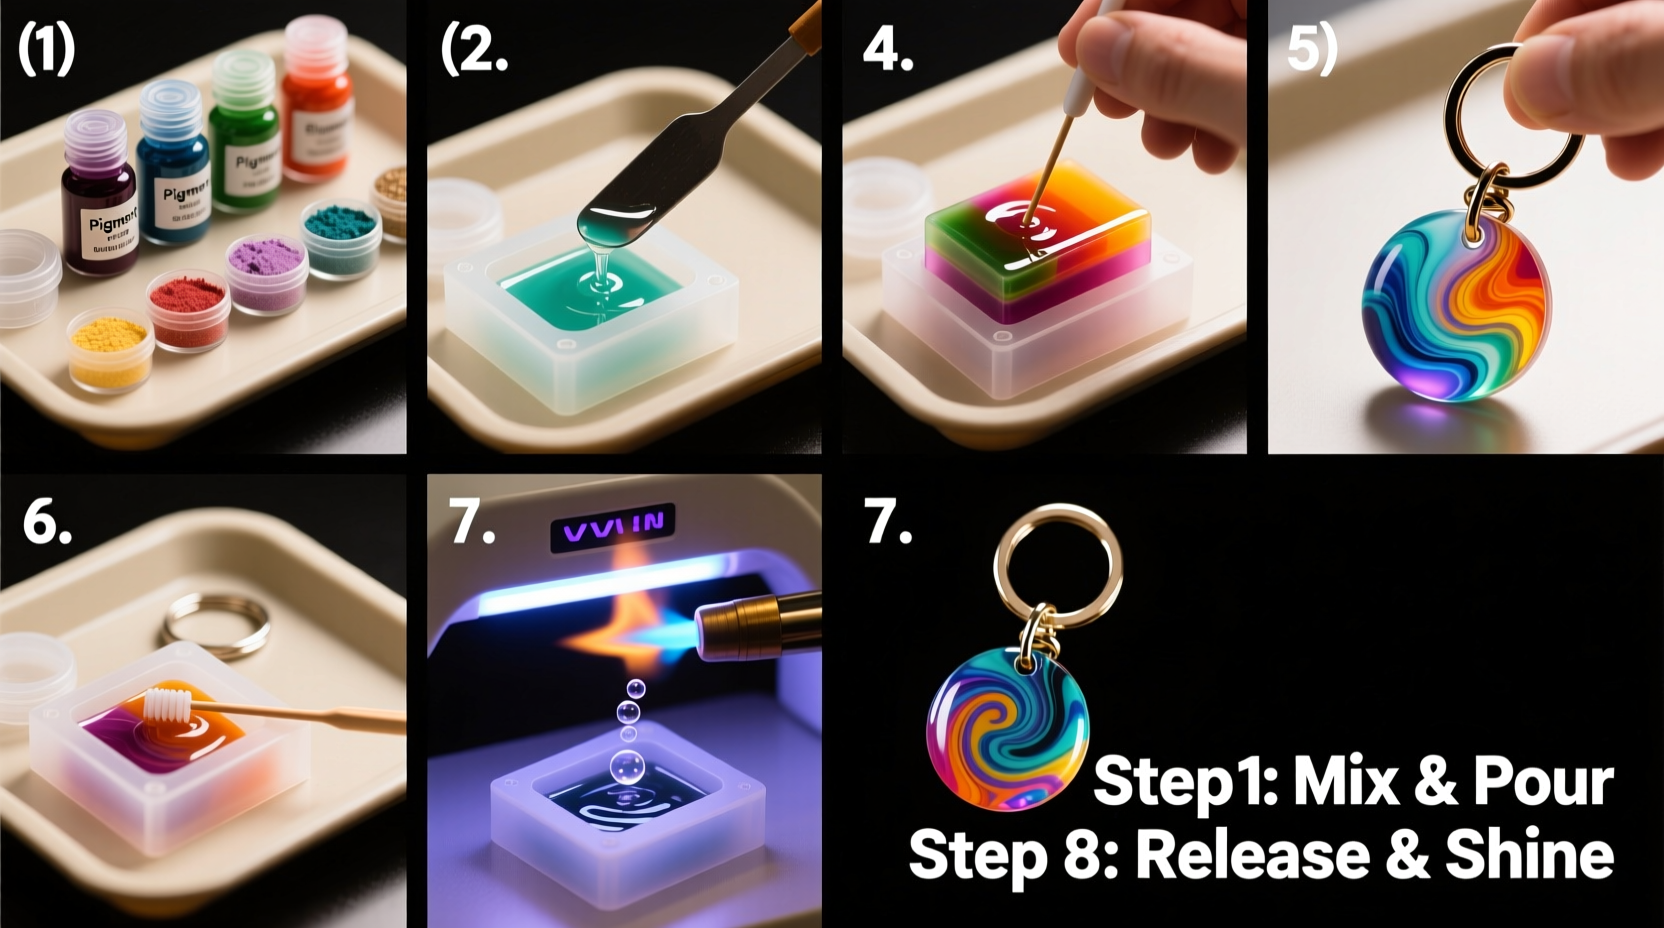
Not all pigments behave the same in epoxy resin. Choosing the right type is the foundation of vibrant results. There are four primary categories of pigments used in resin crafting:
- Liquid dyes: Highly concentrated, easy to mix, and excellent for transparent effects. Ideal for stained-glass-like finishes.
- Alcohol inks: Offer bold, fluid patterns but can shift during curing. Best used sparingly for marbling.
- Mica powders: Provide shimmer and metallic luster. They don’t dissolve but suspend in resin, adding depth.
- Universal colorants (paste or powder): Formulated for multiple mediums, including resin. Offer high opacity and stability.
For keychains—small items where color intensity matters—mica powders and universal pastes deliver the most reliable vibrancy. Liquid dyes work well when layered under clear resin for a glossy pop.
Step-by-Step Guide to Coloring Resin for Keychains
Follow this sequence to achieve professional-grade results without streaks, bubbles, or fading.
- Prepare your workspace: Cover surfaces, gather molds, mixing cups, stir sticks, and torch or heat gun. Work in a dust-free, temperature-controlled area (70–75°F is ideal).
- Measure and mix resin: Use a 1:1 ratio (or as per manufacturer) of resin and hardener. Mix slowly for 3 minutes to avoid introducing air bubbles.
- Add pigment gradually: Start with a toothpick-sized amount of mica or a drop of liquid dye. Stir thoroughly for at least 1 minute to ensure even dispersion.
- Test the color: Drip a small sample onto parchment paper. Wait 10 minutes to assess true hue, as resin darkens slightly during cure.
- Pour into mold: Transfer colored resin into silicone keychain molds. Tap gently to release trapped air.
- Remove bubbles: Pass a heat gun or lighter flame briefly over the surface. Do not linger—overheating causes discoloration.
- Cure undisturbed: Allow 12–24 hours depending on resin thickness and ambient conditions. Avoid moving or covering until fully set.
- Demold and finish: Gently flex the mold to release the piece. Sand edges if needed and apply a final resin coat for gloss.
Do’s and Don’ts of Pigment Use in Small Resin Projects
Small molds like keychains amplify mistakes. A little too much pigment can cloud the resin; too little leaves it lifeless. Use this table as a quick reference.
| Do | Don't |
|---|---|
| Use a dedicated dropper or micro-spatula for precise pigment control. | Free-pour pigment directly from the container—this leads to overuse and contamination. |
| Mix pigment into hardener first before adding resin (for powders). | Add pigment after full resin mix if using large quantities—it won’t disperse evenly. |
| Label each batch with pigment type and ratio for consistency. | Assume all batches will look identical without documentation. |
| Layer colors with partial cures (tacky stage) for clean separation. | Pour wet layers on top of uncured resin—this causes bleeding and swirls. |
| Store pigments in airtight containers away from light and moisture. | Leave mica powders exposed—they clump and oxidize quickly. |
Expert Insight: Why Color Consistency Matters in Handmade Goods
For artists selling their work, repeatable results build brand trust. Customers expect matching earrings or sets to be identical. Inconsistent coloring undermines perceived quality—even if the craftsmanship is excellent.
“Color accuracy is as important as structural integrity in resin art. A single off-shade piece can lead to returns or negative reviews.” — Lila Nguyen, Resin Art Educator & Supply Developer
Nguyen emphasizes batch testing: “Always mix enough pigment-resin combo for your entire order at once. If you run out mid-project, recreate the mix exactly using measured ratios—not guesswork.”
Real Example: From Faded to Fabulous – A Crafter’s Turnaround
Sophie, a hobbyist from Portland, struggled with her blue keychains turning greenish after curing. She used a craft-store liquid dye labeled “suitable for plastics,” but didn’t realize it wasn’t UV-stable. After three failed batches, she switched to a UV-resistant resin dye and pre-mixed her color in a separate cup before adding to resin. She also began curing pieces under a UV lamp for 10 minutes post-pour. Result? Bright, true-blue keychains with no shift. Her Etsy shop sales doubled within a month due to improved product photos and customer satisfaction.
Tip: If your resin changes color after curing, check for UV instability or chemical incompatibility. Switch to artist-grade, resin-specific pigments.Checklist: Preparing for a Successful Pigmented Keychain Batch
- ✅ Verify pigment is resin-safe and UV-stable
- ✅ Calibrate digital scale for accurate resin measurement
- ✅ Prepare molds with a light spray of mold release (optional)
- ✅ Have stirring tools, droppers, and heat source ready
- ✅ Mix a test swatch before full pour
- ✅ Label all pigments clearly to avoid cross-contamination
- ✅ Cure in a flat, level space free from dust
- ✅ Demold only when fully hardened (no tackiness)
Frequently Asked Questions
Can I mix different types of pigments in one keychain?
Yes, but with caution. Combining mica powder with alcohol ink, for example, can create stunning effects, but test first. Some combinations cause separation or affect curing. Stick to compatible types—powder with powder, liquid with liquid—for reliability.
Why did my red pigment turn orange?
This often happens when using low-quality or non-opaque pigments. Transparent reds mixed with clear resin can appear lighter than expected. Use opaque universal colorants or add a second layer of pure pigment for depth.
How do I fix cloudy resin after adding pigment?
Cloudiness usually comes from moisture, over-stirring, or incompatible pigments. Ensure your workspace is dry, mix slowly, and use only resin-approved colorants. If already poured, lightly sand and apply a clear resin topcoat.
Conclusion: Elevate Your Craft One Keychain at a Time
Vibrant resin keychains aren’t the result of luck—they’re the product of informed choices and practiced technique. By understanding pigment behavior, following a disciplined process, and learning from real-world outcomes, you can consistently produce pieces that stand out. Whether you're creating for joy or income, mastering color gives your work a professional edge that customers notice and remember.
💬 Ready to refine your resin palette? Try one new pigment technique this week and share your results in the comments. Let’s grow our craft together.